Centos7.5 安装 Kubernetes 1.13.2
1 环境准备
| 节点 | 主机名 | IP | OS | 内核 |
| master | node0 | 192.168.2.20 | centos7.5 | 3.10.0-862.el7.x86_64 |
| node1 | node1 | 192.168.2.21 | centos7.5 | 3.10.0-862.el7.x86_64 |
| node2 | node2 | 192.168.2.22 | centos7.5 | 3.10.0-862.el7.x86_64 |
2 设置主机名并添加hosts解析
node0:hostnamectl --static set-hostname node0
node1:hostnamectl --static set-hostname node1
node2:hostnamectl --static set-hostname node2
所有节点:
cat >>/etc/hosts<
192.168.2.21 node1
192.168.2.22 node2
EOF
3 创建并分发密钥
1)在node0创建ssh密钥
ssh-keygen
[chen@node0 ~]$ ssh-keygen
Generating public/private rsa key pair.
Enter file in which to save the key (/home/chen/.ssh/id_rsa):
Created directory '/home/chen/.ssh'.
Enter passphrase (empty for no passphrase):
Enter same passphrase again:
Your identification has been saved in /home/chen/.ssh/id_rsa.
Your public key has been saved in /home/chen/.ssh/id_rsa.pub.
The key fingerprint is:
SHA256:sVK0bq4jmUMOH/nj8VyylgL3A3Xs2e1c0EpAUGVm+sA chen@node0
The key's randomart image is:
+---[RSA 2048]----+
|        . .+o.=  |
|       . . ..=   |
|        +.  E. . |
|       o.oo  oo .|
|     ...So o o.o |
|  . = o+  o . o .|
|   = B.oo..  o . |
|    B ===+    o  |
|     +o=+.       |
+----[SHA256]-----+
2)分发node0的公钥,用于免密登录其他服务器
for n in `seq -w 0 2`;do ssh-copy-id node$n;done
[chen@node0 ~]$ for n in `seq -w 0 2`;do ssh-copy-id node$n;done
/usr/bin/ssh-copy-id: INFO: Source of key(s) to be installed: "/home/chen/.ssh/id_rsa.pub"
The authenticity of host 'node0 (192.168.2.20)' can't be established.
ECDSA key fingerprint is SHA256:1fZdyqHJlzntJpvZJvdc851qDreCo+h1ixSi58eVLsI.
ECDSA key fingerprint is MD5:22:1c:ae:bb:67:1a:be:e0:23:c0:77:37:23:03:e6:a4.
Are you sure you want to continue connecting (yes/no)? yes
/usr/bin/ssh-copy-id: INFO: attempting to log in with the new key(s), to filter out any that are already installed
/usr/bin/ssh-copy-id: INFO: 1 key(s) remain to be installed -- if you are prompted now it is to install the new keys
chen@node0's password:

Number of key(s) added: 1

Now try logging into the machine, with:   "ssh 'node0'"
and check to make sure that only the key(s) you wanted were added.

/usr/bin/ssh-copy-id: INFO: Source of key(s) to be installed: "/home/chen/.ssh/id_rsa.pub"
The authenticity of host 'node1 (192.168.2.21)' can't be established.
ECDSA key fingerprint is SHA256:XU02mqnJ5XKT0ICsDGUczitkB0y2SCzG8lhSXkOIUuQ.
ECDSA key fingerprint is MD5:96:d9:6d:1e:3a:f3:52:f6:66:55:62:0a:b3:e1:11:15.
Are you sure you want to continue connecting (yes/no)? yes
/usr/bin/ssh-copy-id: INFO: attempting to log in with the new key(s), to filter out any that are already installed
/usr/bin/ssh-copy-id: INFO: 1 key(s) remain to be installed -- if you are prompted now it is to install the new keys
chen@node1's password:

Number of key(s) added: 1

Now try logging into the machine, with:   "ssh 'node1'"
and check to make sure that only the key(s) you wanted were added.

/usr/bin/ssh-copy-id: INFO: Source of key(s) to be installed: "/home/chen/.ssh/id_rsa.pub"
The authenticity of host 'node2 (192.168.2.22)' can't be established.
ECDSA key fingerprint is SHA256:zsczlvlM7c7ySHkENpVK64Y8B/FC9wC4gzykxRIkFJI.
ECDSA key fingerprint is MD5:12:33:37:2a:68:22:4f:cb:68:46:fa:63:7a:2f:1e:a3.
Are you sure you want to continue connecting (yes/no)? yes
/usr/bin/ssh-copy-id: INFO: attempting to log in with the new key(s), to filter out any that are already installed
/usr/bin/ssh-copy-id: INFO: 1 key(s) remain to be installed -- if you are prompted now it is to install the new keys
chen@node2's password:

Number of key(s) added: 1

Now try logging into the machine, with:   "ssh 'node2'"
and check to make sure that only the key(s) you wanted were added.
注:下面6-11步骤在所有节点执行
4 关闭防火墙
sudo systemctl stop firewalld
sudo systemctl disable firewalld
5 关闭selinux
setenforce 0
sed -i 's/^SELINUX=enforcing$/SELINUX=permissive/' /etc/selinux/config
6 关闭swap
临时关闭
sudo swapoff -a
修改/etc/fstab文件,屏蔽SWAP的自动挂载
[root@node0 ~]# vim /etc/fstab


#
# /etc/fstab
# Created by anaconda on Tue Apr 30 19:06:42 2019
#
# Accessible filesystems, by reference, are maintained under '/dev/disk'
# See man pages fstab(5), findfs(8), mount(8) and/or blkid(8) for more info
#
UUID=51e78615-927b-46af-b9fe-e9e8a54efaf0 /                       ext4    defaults        1 1
UUID=8c2e4586-a6a1-4f65-9569-dea1f34f73e0 /boot                   ext4    defaults        1 2
#UUID=c718f97d-724d-4879-b5ed-8beb7b3f96b0 swap                    swap    defaults        0 0
7 配置内核参数
cat <  /etc/sysctl.d/k8s.conf
net.bridge.bridge-nf-call-ip6tables = 1
net.bridge.bridge-nf-call-iptables = 1
net.ipv4.ip_nonlocal_bind = 1
net.ipv4.ip_forward = 1
vm.swappiness=0
EOF

sysctl --system
8 加载ipvs模块
cat > /etc/sysconfig/modules/ipvs.modules <9 添加yum源
配置为国内阿里的yum源
cat << EOF > /etc/yum.repos.d/kubernetes.repo
[kubernetes]
name=Kubernetes
baseurl=https://mirrors.aliyun.com/kubernetes/yum/repos/kubernetes-el7-x86_64/
enabled=1
gpgcheck=1
repo_gpgcheck=1
gpgkey=https://mirrors.aliyun.com/kubernetes/yum/doc/yum-key.gpg https://mirrors.aliyun.com/kubernetes/yum/doc/rpm-package-key.gpg
EOF

wget http://mirrors.aliyun.com/repo/Centos-7.repo -O /etc/yum.repos.d/CentOS-Base.repo
wget http://mirrors.aliyun.com/repo/epel-7.repo -O /etc/yum.repos.d/epel.repo
wget https://mirrors.aliyun.com/docker-ce/linux/centos/docker-ce.repo -O /etc/yum.repos.d/docker-ce.repo
10 安装docker
sudo yum install -y docker-ce-18.06.1.ce
#启动docker并设置kubelet开机自启动
sudo systemctl start docker && sudo systemctl enable docker
sudo docker version
[chen@node0 root]$ sudo systemctl start docker
[sudo] password for chen:
[chen@node0 root]$ sudo systemctl enable docker
Created symlink from /etc/systemd/system/multi-user.target.wants/docker.service to /usr/lib/systemd/system/docker.service.
[chen@node0 root]$ sudo docker version
Client:
 Version:           18.06.1-ce
 API version:       1.38
 Go version:        go1.10.3
 Git commit:        e68fc7a
 Built:             Tue Aug 21 17:23:03 2018
 OS/Arch:           linux/amd64
 Experimental:      false

Server:
 Engine:
  Version:          18.06.1-ce
  API version:      1.38 (minimum version 1.12)
  Go version:       go1.10.3
  Git commit:       e68fc7a
  Built:            Tue Aug 21 17:25:29 2018
  OS/Arch:          linux/amd64
  Experimental:     false
11 安装kubenates相关软件
sudo yum install -y kubelet-1.13.2 kubeadm-1.13.2 kubectl-1.13.2 ipvsadm ipset
#设置kubelet开机自启动
sudo systemctl enable kubelet
[chen@node0 root]$ sudo systemctl enable kubelet
Created symlink from /etc/systemd/system/multi-user.target.wants/kubelet.service to /etc/systemd/system/kubelet.service.
12 配置初始化文件(node0)
使用kubeadm config print init-defaults > kubeadm-init.yaml 打印出默认配置,然后在根据自己的环境修改配置
[chen@node0 ~]$ cat kubeadm-init.yaml
apiVersion: kubeadm.k8s.io/v1beta1
bootstrapTokens:
- groups:
  - system:bootstrappers:kubeadm:default-node-token
  token: abcdef.0123456789abcdef
  ttl: 24h0m0s
  usages:
  - signing
  - authentication
kind: InitConfiguration
localAPIEndpoint:
  advertiseAddress: 192.168.2.20
  bindPort: 6443
nodeRegistration:
  criSocket: /var/run/dockershim.sock
  name: node0
  taints:
  - effect: NoSchedule
    key: node-role.kubernetes.io/master
---
apiServer:
  timeoutForControlPlane: 4m0s
apiVersion: kubeadm.k8s.io/v1beta1
certificatesDir: /etc/kubernetes/pki
clusterName: kubernetes
controlPlaneEndpoint: ""
controllerManager: {}
dns:
  type: CoreDNS
etcd:
  local:
    dataDir: /var/lib/etcd
imageRepository: registry.cn-hangzhou.aliyuncs.com/google_containers
kind: ClusterConfiguration
kubernetesVersion: v1.13.2
networking:
  dnsDomain: cluster.local
  podSubnet: "10.244.0.0/16"
scheduler: {}
13 预下载镜像(node0)
1)master节点node0通过 sudo kubeadm config images pull --config kubeadm-init.yaml 可以把需要的镜像提前下载下来
[chen@node0 ~]$ sudo kubeadm config images pull --config kubeadm-init.yaml
[sudo] password for chen:
[config/images] Pulled registry.cn-hangzhou.aliyuncs.com/google_containers/kube-apiserver:v1.13.2
[config/images] Pulled registry.cn-hangzhou.aliyuncs.com/google_containers/kube-controller-manager:v1.13.2
[config/images] Pulled registry.cn-hangzhou.aliyuncs.com/google_containers/kube-scheduler:v1.13.2
[config/images] Pulled registry.cn-hangzhou.aliyuncs.com/google_containers/kube-proxy:v1.13.2
[config/images] Pulled registry.cn-hangzhou.aliyuncs.com/google_containers/pause:3.1
[config/images] Pulled registry.cn-hangzhou.aliyuncs.com/google_containers/etcd:3.2.24
[config/images] Pulled registry.cn-hangzhou.aliyuncs.com/google_containers/coredns:1.2.6
2)node1、node2节点需要下载kube-proxy、pause、coredns镜像
sudo docker pull registry.cn-hangzhou.aliyuncs.com/google_containers/kube-proxy:v1.13.2
sudo docker pull registry.cn-hangzhou.aliyuncs.com/google_containers/pause:3.1
sudo docker pull registry.cn-hangzhou.aliyuncs.com/google_containers/coredns:1.2.6
sudo docker pullregistry.cn-hangzhou.aliyuncs.com/google_containers/kubernetes-dashboard-amd64:v1.10.1
14 初始化master(node0)
1)sudo kubeadm init --config kubeadm-init.yaml
[chen@node0 ~]$ sudo kubeadm init --config kubeadm-init.yaml
[init] Using Kubernetes version: v1.13.2
[preflight] Running pre-flight checks
[preflight] Pulling images required for setting up a Kubernetes cluster
[preflight] This might take a minute or two, depending on the speed of your internet connection
[preflight] You can also perform this action in beforehand using 'kubeadm config images pull'
[kubelet-start] Writing kubelet environment file with flags to file "/var/lib/kubelet/kubeadm-flags.env"
[kubelet-start] Writing kubelet configuration to file "/var/lib/kubelet/config.yaml"
[kubelet-start] Activating the kubelet service
[certs] Using certificateDir folder "/etc/kubernetes/pki"
[certs] Generating "front-proxy-ca" certificate and key
[certs] Generating "front-proxy-client" certificate and key
[certs] Generating "etcd/ca" certificate and key
[certs] Generating "etcd/peer" certificate and key
[certs] etcd/peer serving cert is signed for DNS names [node0 localhost] and IPs [192.168.2.20 127.0.0.1 ::1]
[certs] Generating "etcd/healthcheck-client" certificate and key
[certs] Generating "apiserver-etcd-client" certificate and key
[certs] Generating "etcd/server" certificate and key
[certs] etcd/server serving cert is signed for DNS names [node0 localhost] and IPs [192.168.2.20 127.0.0.1 ::1]
[certs] Generating "ca" certificate and key
[certs] Generating "apiserver" certificate and key
[certs] apiserver serving cert is signed for DNS names [node0 kubernetes kubernetes.default kubernetes.default.svc kubernetes.default.svc.cluster.local] and IPs [10.96.0.1 192.168.2.20]
[certs] Generating "apiserver-kubelet-client" certificate and key
[certs] Generating "sa" key and public key
[kubeconfig] Using kubeconfig folder "/etc/kubernetes"
[kubeconfig] Writing "admin.conf" kubeconfig file
[kubeconfig] Writing "kubelet.conf" kubeconfig file
[kubeconfig] Writing "controller-manager.conf" kubeconfig file
[kubeconfig] Writing "scheduler.conf" kubeconfig file
[control-plane] Using manifest folder "/etc/kubernetes/manifests"
[control-plane] Creating static Pod manifest for "kube-apiserver"
[control-plane] Creating static Pod manifest for "kube-controller-manager"
[control-plane] Creating static Pod manifest for "kube-scheduler"
[etcd] Creating static Pod manifest for local etcd in "/etc/kubernetes/manifests"
[wait-control-plane] Waiting for the kubelet to boot up the control plane as static Pods from directory "/etc/kubernetes/manifests". This can take up to 4m0s
[apiclient] All control plane components are healthy after 23.002615 seconds
[uploadconfig] storing the configuration used in ConfigMap "kubeadm-config" in the "kube-system" Namespace
[kubelet] Creating a ConfigMap "kubelet-config-1.13" in namespace kube-system with the configuration for the kubelets in the cluster
[patchnode] Uploading the CRI Socket information "/var/run/dockershim.sock" to the Node API object "node0" as an annotation
[mark-control-plane] Marking the node node0 as control-plane by adding the label "node-role.kubernetes.io/master=''"
[mark-control-plane] Marking the node node0 as control-plane by adding the taints [node-role.kubernetes.io/master:NoSchedule]
[bootstrap-token] Using token: abcdef.0123456789abcdef
[bootstrap-token] Configuring bootstrap tokens, cluster-info ConfigMap, RBAC Roles
[bootstraptoken] configured RBAC rules to allow Node Bootstrap tokens to post CSRs in order for nodes to get long term certificate credentials
[bootstraptoken] configured RBAC rules to allow the csrapprover controller automatically approve CSRs from a Node Bootstrap Token
[bootstraptoken] configured RBAC rules to allow certificate rotation for all node client certificates in the cluster
[bootstraptoken] creating the "cluster-info" ConfigMap in the "kube-public" namespace
[addons] Applied essential addon: CoreDNS
[addons] Applied essential addon: kube-proxy

Your Kubernetes master has initialized successfully!

To start using your cluster, you need to run the following as a regular user:

  mkdir -p $HOME/.kube
  sudo cp -i /etc/kubernetes/admin.conf $HOME/.kube/config
  sudo chown $(id -u):$(id -g) $HOME/.kube/config

You should now deploy a pod network to the cluster.
Run "kubectl apply -f [podnetwork].yaml" with one of the options listed at:
  https://kubernetes.io/docs/concepts/cluster-administration/addons/

You can now join any number of machines by running the following on each node
as root:

  kubeadm join 192.168.2.20:6443 --token abcdef.0123456789abcdef --discovery-token-ca-cert-hash sha256:793d40d2b9ae2c3aff581f57dd1639dae2df4480c962444dfc0a8efb6f02a425
kubeadm join 192.168.2.20:6443 --token abcdef.0123456789abcdef --discovery-token-ca-cert-hash sha256:793d40d2b9ae2c3aff581f57dd1639dae2df4480c962444dfc0a8efb6f02a425 这句话要记录下来,节点加入集群时要用到,若忘记了或者过期了可以通过kubeadm token create从新生成
2)kubectl默认会在执行的用户家目录下面的.kube目录下寻找config文件。这里是将在初始化时[kubeconfig]步骤生成的 admin.conf拷贝到.kube/config
mkdir -p $HOME/.kube
sudo cp -i /etc/kubernetes/admin.conf $HOME/.kube/config
sudo chown $(id -u):$(id -g) $HOME/.kube/config
3)查看组件状态
kubectl get cs
kubectl get node
[chen@node0 ~]$  kubectl get cs
NAME                 STATUS    MESSAGE              ERROR
scheduler            Healthy   ok
controller-manager   Healthy   ok
etcd-0               Healthy   {"health": "true"}
[chen@node0 ~]$ kubectl get node
NAME    STATUS     ROLES    AGE    VERSION
node0   NotReady   master   109s   v1.13.2
目前只有一个节点,角色是Master,状态是NotReady是因为网络还没有装
15 安装flannel网络(node0)
kubectl apply -f https://raw.githubusercontent.com/coreos/flannel/master/Documentation/kube-flannel.yml
[chen@node0 ~]$ kubectl apply -f https://raw.githubusercontent.com/coreos/flannel/master/Documentation/kube-flannel.yml
podsecuritypolicy.extensions/psp.flannel.unprivileged created
clusterrole.rbac.authorization.k8s.io/flannel created
clusterrolebinding.rbac.authorization.k8s.io/flannel created
serviceaccount/flannel created
configmap/kube-flannel-cfg created
daemonset.extensions/kube-flannel-ds-amd64 created
daemonset.extensions/kube-flannel-ds-arm64 created
daemonset.extensions/kube-flannel-ds-arm created
daemonset.extensions/kube-flannel-ds-ppc64le created
daemonset.extensions/kube-flannel-ds-s390x created
kubectl get node 重新查看节点状态
[chen@node0 ~]$ kubectl get node
NAME    STATUS   ROLES    AGE     VERSION
node0   Ready    master   7m15s   v1.13.2
16 node部署
node1,node2上执行上面生成的这句:
kubeadm join 192.168.2.20:6443 --token abcdef.0123456789abcdef --discovery-token-ca-cert-hash sha256:793d40d2b9ae2c3aff581f57dd1639dae2df4480c962444dfc0a8efb6f02a425
[chen@node1 ~]$ sudo kubeadm join 192.168.2.20:6443 --token abcdef.0123456789abcdef --discovery-token-ca-cert-hash sha256:793d40d2b9ae2c3aff581f57dd1639dae2df4480c962444dfc0a8efb6f02a425
[preflight] Running pre-flight checks
[discovery] Trying to connect to API Server "192.168.2.20:6443"
[discovery] Created cluster-info discovery client, requesting info from "https://192.168.2.20:6443"
[discovery] Requesting info from "https://192.168.2.20:6443" again to validate TLS against the pinned public key
[discovery] Cluster info signature and contents are valid and TLS certificate validates against pinned roots, will use API Server "192.168.2.20:6443"
[discovery] Successfully established connection with API Server "192.168.2.20:6443"
[join] Reading configuration from the cluster...
[join] FYI: You can look at this config file with 'kubectl -n kube-system get cm kubeadm-config -oyaml'
[kubelet] Downloading configuration for the kubelet from the "kubelet-config-1.13" ConfigMap in the kube-system namespace
[kubelet-start] Writing kubelet configuration to file "/var/lib/kubelet/config.yaml"
[kubelet-start] Writing kubelet environment file with flags to file "/var/lib/kubelet/kubeadm-flags.env"
[kubelet-start] Activating the kubelet service
[tlsbootstrap] Waiting for the kubelet to perform the TLS Bootstrap...
[patchnode] Uploading the CRI Socket information "/var/run/dockershim.sock" to the Node API object "node1" as an annotation

This node has joined the cluster:
* Certificate signing request was sent to apiserver and a response was received.
* The Kubelet was informed of the new secure connection details.

Run 'kubectl get nodes' on the master to see this node join the cluster.
注意,master节点默认是不作为node的,也不推荐做node节点。 如果需要把master当node:
kubectl taint nodes --all node-role.kubernetes.io/master-
[root@node0 ceph]# kubectl taint nodes --all node-role.kubernetes.io/master-
node/node0 untainted
error: taint "node-role.kubernetes.io/master:" not found
[root@node0 ceph]# kubectl taint nodes --all node-role.kubernetes.io/master-
taint "node-role.kubernetes.io/master:" not found
taint "node-role.kubernetes.io/master:" not found
17 查看集群节点及运行的pod信息(node0)
kubectl get node
kubectl get pods --all-namespaces -o wide
[chen@node0 ~]$ kubectl get node
NAME    STATUS   ROLES    AGE   VERSION
node0   Ready    master   10d   v1.13.2
node1   Ready       10d   v1.13.2
node2   Ready       9d    v1.13.2
[chen@node0 ~]$ kubectl get pods --all-namespaces -o wide
NAMESPACE          NAME                                   READY   STATUS      RESTARTS   AGE     IP             NODE    NOMINATED NODE   READINESS GATES
kube-system        coredns-89cc84847-6lnhb                1/1     Running     4          10d     10.244.0.11    node0
kube-system        coredns-89cc84847-trtdb                1/1     Running     4          10d     10.244.0.10    node0
kube-system        etcd-node0                             1/1     Running     4          10d     192.168.2.20   node0
kube-system        kube-apiserver-node0                   1/1     Running     5          10d     192.168.2.20   node0
kube-system        kube-controller-manager-node0          1/1     Running     5          10d     192.168.2.20   node0
kube-system        kube-flannel-ds-amd64-4nxmw            1/1     Running     0          2m32s   192.168.2.21   node1
kube-system        kube-flannel-ds-amd64-bv79d            1/1     Running     0          2m32s   192.168.2.20   node0
kube-system        kube-flannel-ds-amd64-jmtsc            1/1     Running     0          2m32s   192.168.2.22   node2
kube-system        kube-proxy-ftdxp                       1/1     Running     2          9d      192.168.2.22   node2
kube-system        kube-proxy-hf2n5                       1/1     Running     8          10d     192.168.2.21   node1
kube-system        kube-proxy-s7lkw                       1/1     Running     4          10d     192.168.2.20   node0
kube-system        kube-scheduler-node0                   1/1     Running     6          10d     192.168.2.20   node0
18 安装dashboard
1)下载kubernetes-dashboard.yaml
wget https://raw.githubusercontent.com/kubernetes/dashboard/master/aio/deploy/recommended/kubernetes-dashboard.yaml
2)在所有节点中给dashboard镜像打标签
sudo docker tag registry.cn-hangzhou.aliyuncs.com/google_containers/kubernetes-dashboard-amd64:v1.10.1 k8s.gcr.io/kubernetes-dashboard-amd64:v1.10.1
3)为了可以从集群外部访问,编辑kubernetes-dashboard.yaml将服务修改成 NodePort 类型
# ------------------- Dashboard Service ------------------- #

kind: Service
apiVersion: v1
metadata:
  labels:
    k8s-app: kubernetes-dashboard
  name: kubernetes-dashboard
  namespace: kube-system
spec:
  type: NodePort
  ports:
    - port: 443
      targetPort: 8443
  selector:
    k8s-app: kubernetes-dashboard
4)创建dashboard
[chen@node0 ~]$ sudo kubectl create -f kubernetes-dashboard.yaml
secret/kubernetes-dashboard-certs created
secret/kubernetes-dashboard-csrf created
serviceaccount/kubernetes-dashboard created
role.rbac.authorization.k8s.io/kubernetes-dashboard-minimal created
rolebinding.rbac.authorization.k8s.io/kubernetes-dashboard-minimal created
deployment.apps/kubernetes-dashboard created
service/kubernetes-dashboard created
5)查询创建的dashboard服务
[chen@node0 ~]$ kubectl get service --all-namespaces | grep kubernetes-dashboard
kube-system   kubernetes-dashboard                     NodePort       10.108.46.221            443:30847/TCP    18d
6) 授予dashboard账户集群管理权限
新建admin-user-admin.rbac.yaml文件
[chen@node0 ~]$ vim admin-user-admin.rbac.yaml

apiVersion: v1
kind: ServiceAccount
metadata:
  name: admin-user
  namespace: kube-system
---
apiVersion: rbac.authorization.k8s.io/v1
kind: ClusterRoleBinding
metadata:
  name: admin-user
roleRef:
  apiGroup: rbac.authorization.k8s.io
  kind: ClusterRole
  name: cluster-admin
subjects:
- kind: ServiceAccount
  name: admin-user
  namespace: kube-system
授予权限
[chen@node0 ~]$ kubectl create -f admin-user-admin.rbac.yaml
serviceaccount/admin-user created
clusterrolebinding.rbac.authorization.k8s.io/admin-user created
获取token并记下,登录的时候会使用,这个token默认是永久的
[chen@node0 ~]$ kubectl -n kube-system describe secret $(kubectl -n kube-system get secret | grep admin-user | awk '{print $1}')
Name:         admin-user-token-k5cst
Namespace:    kube-system
Labels:
Annotations:  kubernetes.io/service-account.name: admin-user
              kubernetes.io/service-account.uid: 03c627ad-61c8-11e9-b911-ac1f6b78fe52

Type:  kubernetes.io/service-account-token

Data
====
ca.crt:     1025 bytes
namespace:  11 bytes
token:      eyJhbGciOiJSUzI1NiIsImtpZCI6IiJ9.eyJpc3MiOiJrdWJlcm5ldGVzL3NlcnZpY2VhY2NvdW50Iiwia3ViZXJuZXRlcy5pby9zZXJ2aWNlYWNjb3VudC9uYW1lc3BhY2UiOiJrdWJlLXN5c3RlbSIsImt1YmVybmV0ZXMuaW8vc2VydmljZWFjY291bnQvc2VjcmV0Lm5hbWUiOiJhZG1pbi11c2VyLXRva2VuLWs1Y3N0Iiwia3ViZXJuZXRlcy5pby9zZXJ2aWNlYWNjb3VudC9zZXJ2aWNlLWFjY291bnQubmFtZSI6ImFkbWluLXVzZXIiLCJrdWJlcm5ldGVzLmlvL3NlcnZpY2VhY2NvdW50L3NlcnZpY2UtYWNjb3VudC51aWQiOiIwM2M2MjdhZC02MWM4LTExZTktYjkxMS1hYzFmNmI3OGZlNTIiLCJzdWIiOiJzeXN0ZW06c2VydmljZWFjY291bnQ6a3ViZS1zeXN0ZW06YWRtaW4tdXNlciJ9.ZFFYs-N9aQVJiE_9hx4W3rUaqJF7YLOgSW9ZRbgTfBIO8QBqzZXTfzk9CG9QqV8Vz1Pu7McfObc2id-uYL0aDtB0ZzVRHpeNEEcygToArF2DPsPtgo-Je1zX8OOyRBHrm-yy9D38yW7dZqtocZ7vNhCuah3JJZcrVS2S9SNHML0PK0oXUMylCyK5ExXS45u1T3O2BXbGdVZRJ4LhNJlduWJe1TuyoizdOS9KNnsPKuo0XaFSrbVAaYdHEDr8joUgxyJninlozdIZq01J6n5yxrVShZGULnbBBg0dn-PiFmuuDllauomYK-2PmfVm3OubTvs0Nw8vmF-n2sW82NuHNw
7)访问dashboard
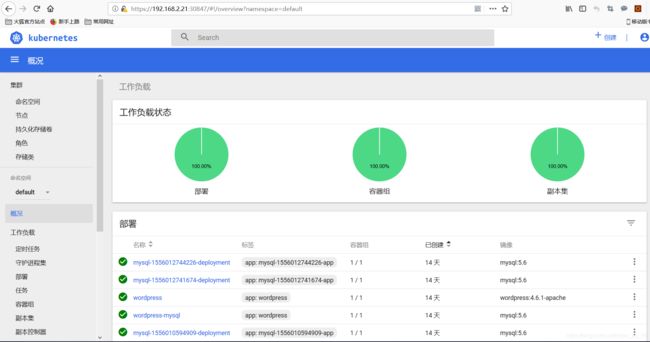
浏览器地址栏输入https://192.168.2.21:30847 ,出现登陆界面后输入上面token登陆