cocos2dx lua + protobuf
vs 2015 cocos2dx 3.10 lua protobuf
1. 下载 protobuf 源码
https://github.com/bnnswyp/protobuf/tree/master/protobuf-2.5.0
解压后的文件列表如下所示
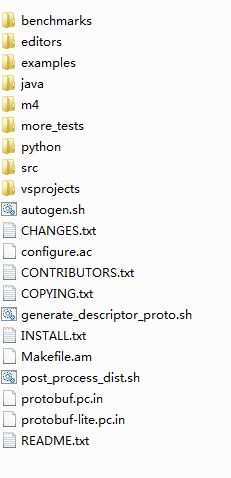
其中 vsprojects 文件夹为 protobuf 的vs 工程
2. 打开 protobuf.sln 编译 工程视图如下

编译报错 is deprecated and will be REMOVED ...
解决:项目->属性->配置属性->C/C++->预处理器->编辑 添加
_SILENCE_STDEXT_HASH_DEPRECATION_WARNINGS
编译报错: 错误 3 error C3861: “max”: 找不到标识符 f:\google\protobuf\protobuf-
解决:在头文件处 添加 #include
3. 编译成功后生成 protoc.exe 文件
4. 将 protobuf C++ 代码集成到 libcocos2d 项目中
1 修改 libcocos2d 项目
在 libcocos2d 项目 external 文件夹中增加新的 pcb 文件夹, 将 pbc.h 文件和 src 文件夹中的文件 拷贝到里面去,并添加到项目中 如下图

2 修改 pbc.h 文件
因为 libcocos2d 项目是一个 dll 项目, 所以需要导出必要的函数让 libluacocos2d 项目进行调用,导出的函数前需要增加CC_DLL 前缀。首先 增加 #include "platform/CCPlatformMacros.h", 然后将所有函数增加前缀 CC_DLL 如下图

3 编译 libcocos2d 项目
5. 将 C++ 绑定到 lua 部分集成到 libluacocos2d项目中
1 修改 libluacocos2d
在libluacocos2d 项目中manual 文件夹中增加新的 pbc 文件夹, 并将 pbc-lua.c 文件(从binding/lua)拷贝进去,并新增 三个用于绑定的文件 pbc-lua.h, lua_cocos2dx_pbc_manual.h, lua_cocos2dx_pbc_manual.cpp 三个文件,如下图

2 修改 pbc-lua.c 文件 如下图

3 pbc-lua.h 内容 如下
#pragma once
#ifdef __cplusplus
extern "C" {
#endif
#include "lua.h"
#include "lualib.h"
#include "lauxlib.h"

#ifdef __cplusplus
}
#endif

#ifdef __cplusplus
extern "C" {
#endif
    int luaopen_protobuf_c(lua_State *L);
#ifdef __cplusplus
}
#endif
4 lua_cocos2dx_pbc_manual.h 内容如下
#pragma once

#ifdef __cplusplus
extern "C" {
#endif
#include "tolua++.h"
#ifdef __cplusplus
}
#endif

TOLUA_API int  register_pbc_module(lua_State* L);
5 lua_cocos2dx_pbc_manual.cpp 内容如下
#include "scripting/lua-bindings/manual/pbc/lua_cocos2dx_pbc_manual.h"
#include "platform/CCPlatformConfig.h"
#include "base/ccConfig.h"
#include "scripting/lua-bindings/manual/tolua_fix.h"
#include "scripting/lua-bindings/manual/LuaBasicConversions.h"
#include "scripting/lua-bindings/manual/CCLuaEngine.h"
#include "scripting/lua-bindings/manual/pbc/pbc-lua.h"
#include "cocos/platform/CCFileUtils.h"
int read_protobuf_file(lua_State *L){
const char *buff = luaL_checkstring(L, -1);
Data data = cocos2d::FileUtils::getInstance()->getDataFromFile(buff);
lua_pushlstring(L, (const char*)data.getBytes(), data.getSize());
return 1;
}
TOLUA_API int register_pbc_module(lua_State* L)
{
lua_getglobal(L, "_G");
if (lua_istable(L, -1))//stack:...,_G,
{
lua_register(L, "read_protobuf_file_c", read_protobuf_file);
luaopen_protobuf_c(L);
}
lua_pop(L, 1);
return 1;
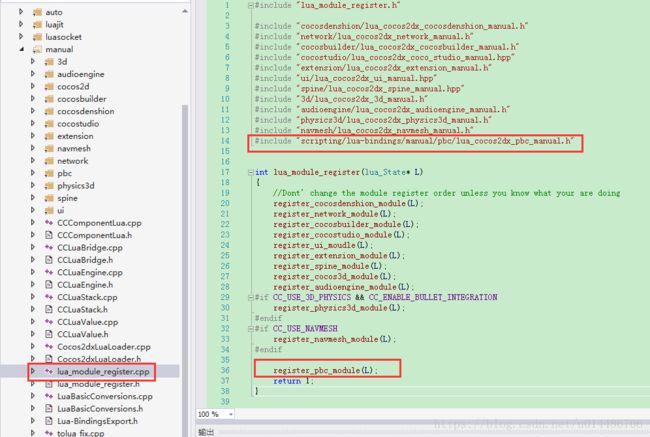
}6 在 cocos2d-x\cocos\scripting\lua-bindings\manual\lua_module_register.cpp 中进行注册
7 编译 libluacocos2d 项目
6. 在 lua 项目中的使用
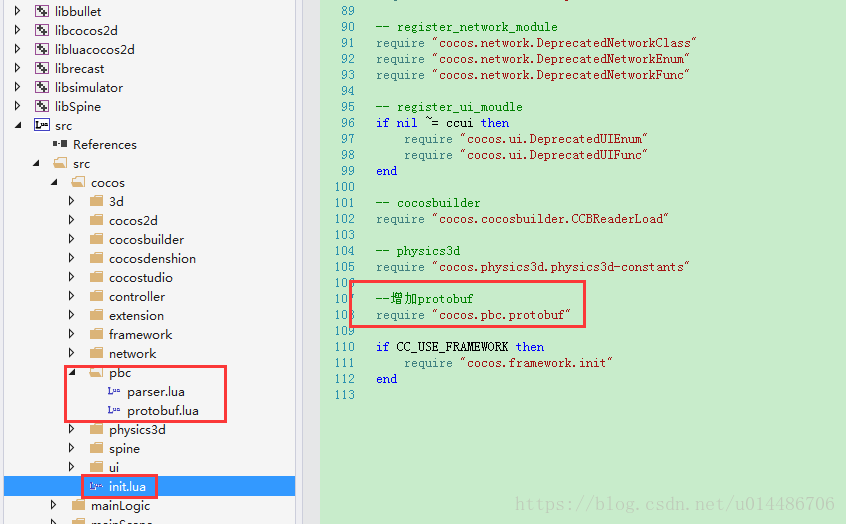
1 在 binding/lua 中拷贝两个文件 parser.lua, protobuf.lua 到项目 src/cocos/pbc 文件夹下, 并在 init.lua 中进行 require
2 定义 Msg.proto 文件
message Person {
  required string name = 1;
  required int32 id = 2;
  optional string email = 3;

  enum PhoneType {
    MOBILE = 0;
    HOME = 1;
    WORK = 2;
  }

  message PhoneNumber {
    required string number = 1;
    optional PhoneType type = 2 [default = HOME];
  }

  repeated PhoneNumber phone = 4;
}

message AddressBook {
  repeated Person person = 1;
}
3 使用第 3 步生成的 protoc.exe 来生成 Msg.pb 文件 dos 命令如下
protoc.exe --descriptor_set_out=./Msg.pb ./Msg.proto
4 将生成的 Msg.pb 放到资源 res 文件夹中
5 代码验证
local pbFilePath = cc.FileUtils:getInstance():fullPathForFilename("Msg.pb")
    release_print("PB file path: "..pbFilePath)

    local buffer = read_protobuf_file_c(pbFilePath)
    protobuf.register(buffer) --注:protobuf 是因为在protobuf.lua里面使用module(protobuf)来修改全局名字

    local stringbuffer = protobuf.encode("Person",
        {
            name = "test007",
            id = 12345,
            phone = {
                {
                    number = "5885685"
                },
            }
        })

    local slen = string.len(stringbuffer)
    release_print("slen = "..slen)

    local temp = ""
    for i=1, slen do
        temp = temp .. string.format("0xX, ", string.byte(stringbuffer, i))
    end
    release_print(temp)
    local result = protobuf.decode("Person", stringbuffer)
    release_print("result name: "..result.name)
    release_print("result name: "..result.id)
此时可以 windows 上正常使用了
下篇更新 Mac 使用 protobuf