cocos creator入门教程(十八)—— creator_Director对象与资源加载策略
cc.Director与 资源加载策略
cc.Director对象
1:游戏里面控制管理整个游戏全局对象,包括了场景切换等,为cc.Director对象;
2:导演对象全局只有一个cc.director,大写的为类, 小写的cc.director为全局的导演对象;
3: cc.director来获取导演对象实例;
4: 游戏中各种管理对象都可以通过cc.director获取,比如物理引擎管理,Action管理, 碰撞检测管理等;
常用接口
1: getWinSize: 适配后的逻辑大小;
2: getWinSizeInPixels: 获取窗口的像素大小;
3: getScene: 获取当前的逻辑场景,场景对象下面是Canvas;
4: setDisplayStats: 是否显示左下角FPS信息;
5: getCollisionManager: 获取碰撞检测管理对象;
6: getPhysicsManager :获取物理引擎管理对象;
7:loadScene(scene_name):加载场景,场景的名字,系统会加载对应的场景
8:preloadScene(scene_name):预加载场景
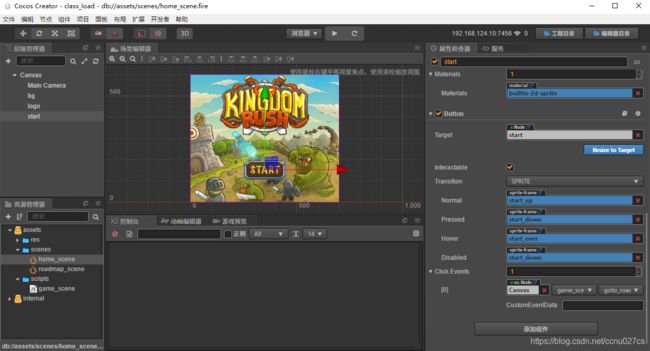
    goto_roadmap : function() {
        cc.director.loadScene("roadmap_scene");
    },
资源加载策略
1: h5资源加载的过程:
(1)从服务器上下载来来资源,并把资源加载到内存中,所以你在做h5游戏,你要把你当前游戏中要用到的资源先加载下来,否者的话,你在运行的时候去加载就来不及了(h5卡住);
2:三种资源加载策略:
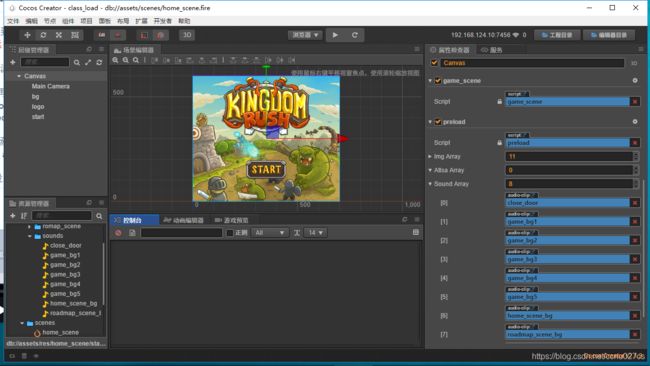
1>: h5的小游戏:采用全部提前绑定好所有的资源。编写预加载脚本preload.js, 将要加载的资源手动关联到第一个启动的场景上面;
// Learn cc.Class:
//  - [Chinese] https://docs.cocos.com/creator/manual/zh/scripting/class.html
//  - [English] http://docs.cocos2d-x.org/creator/manual/en/scripting/class.html
// Learn Attribute:
//  - [Chinese] https://docs.cocos.com/creator/manual/zh/scripting/reference/attributes.html
//  - [English] http://docs.cocos2d-x.org/creator/manual/en/scripting/reference/attributes.html
// Learn life-cycle callbacks:
//  - [Chinese] https://docs.cocos.com/creator/manual/zh/scripting/life-cycle-callbacks.html
//  - [English] https://www.cocos2d-x.org/docs/creator/manual/en/scripting/life-cycle-callbacks.html

cc.Class({
    extends: cc.Component,

    properties: {
        // foo: {
        //     // ATTRIBUTES:
        //     default: null,        // The default value will be used only when the component attaching
        //                           // to a node for the first time
        //     type: cc.SpriteFrame, // optional, default is typeof default
        //     serializable: true,   // optional, default is true
        // },
        // bar: {
        //     get () {
        //         return this._bar;
        //     },
        //     set (value) {
        //         this._bar = value;
        //     }
        // },

        img_array: {
            type: cc.SpriteFrame,
            default: [],
        },

        atlsa_array: {
            type: cc.SpriteAtlas,
            default: [],
        },

        sound_array: {
            url: cc.AudioClip,
            default: [],
        },

        prefab_array: {
            type: cc.Prefab,
            default: [],
        },
    },

    // LIFE-CYCLE CALLBACKS:

    // onLoad () {},

    start () {

    },

    // update (dt) {},
});
图片多,可以使用图集打包方式。
2>: 添加等待界面,预加载下一个场景,然后再进行切换,提前关联好下一个场景要的资源;
cc.loader.onProgress = function ( completedCount, totalCount, item ){
console.log("completedCount:" + completedCount + ",totalCount:" + totalCount ); };


// Learn cc.Class:
//  - [Chinese] https://docs.cocos.com/creator/manual/zh/scripting/class.html
//  - [English] http://docs.cocos2d-x.org/creator/manual/en/scripting/class.html
// Learn Attribute:
//  - [Chinese] https://docs.cocos.com/creator/manual/zh/scripting/reference/attributes.html
//  - [English] http://docs.cocos2d-x.org/creator/manual/en/scripting/reference/attributes.html
// Learn life-cycle callbacks:
//  - [Chinese] https://docs.cocos.com/creator/manual/zh/scripting/life-cycle-callbacks.html
//  - [English] https://www.cocos2d-x.org/docs/creator/manual/en/scripting/life-cycle-callbacks.html

cc.Class({
    extends: cc.Component,

    properties: {
        // foo: {
        //     // ATTRIBUTES:
        //     default: null,        // The default value will be used only when the component attaching
        //                           // to a node for the first time
        //     type: cc.SpriteFrame, // optional, default is typeof default
        //     serializable: true,   // optional, default is true
        // },
        // bar: {
        //     get () {
        //         return this._bar;
        //     },
        //     set (value) {
        //         this._bar = value;
        //     }
        // },

        wait: {
            type: cc.Node,
            default: null,
        },

        process_label: {
            type: cc.Label,
            default: null,
        },
    },

    // LIFE-CYCLE CALLBACKS:

    onLoad () {
        this.wait.active = false;
        this.process_label.string = "0%";
    },

    goto_roadmap : function() {
        /*
          在做场景切换的时候,如果直接切换过去,由于下一个场景一定要先加载完成它所需的资源,那么
          一定会卡一段时间;需要在这里加上等待界面,加入,场景加载的等待场景
        */

       this.wait.active = true;

       //进度函数
       cc.loader.onProgress = function(completedCount, totalCount,  item ){
           console.log("completedCount:" + completedCount + ",totalCount:" + totalCount);
           var per = Math.floor(completedCount * 100 / totalCount);
           this.process_label.string = per+"%";
        }.bind(this);

       //预加载场景
       cc.director.preloadScene("roadmap_scene", function(){
           cc.loader.onProgress = null;
           cc.director.loadScene("roadmap_scene");
       });


    },

    start () {

    },

    // update (dt) {},
});
3> 嫌手动关联麻烦,在场景切换中加入过渡场景,代码来加载场景的资源:
cc.loader.loadResAll("textures", function (err, assets) { });
代码加载资源会导致setting.js文件过大,一般尽量少在代码里面加载资源;
下一篇:loader代码加载和释放资源