Springboot对接InfluxDB
Springboot对接InfluxDB
1、InfluxDB的安装与配置
2、InfluxDB基本操作
3、Springboot对接InfluxDB
4、InfluxDB小总结
5、telagraf+influxdb+grafana搭建监控系统
6、Grafana的基本使用
写在前面
InfluxDB开放了HTTP API,所以使用代码对接InfluxDB也是基于HTTP的API进行访问
引入依赖
<dependency>
  <groupId>org.influxdbgroupId>
  <artifactId>influxdb-javaartifactId>
  <version>2.15version>
dependency>
springboot与集成influxdb比较简单,只需要引入以上的依赖即可
配置InfluxDB
spring:
  influx:
    url: http://localhost:8086 #influxdb服务器的地址
    user: test #用户名
    password: 123456 #密码
    database: mydb #指定的数据库
- InfluxDB默认没有开启权限验证,所以可以直接访问其HTTP API
- 要开启其访问权限验证,需要在其配置文件 /etc/influxdb/influxdb.conf 修改[http]模块下的配置
[http]
  enabled = true #开启HTTP API
  bind-address = ":8086" #绑定的端口号
  auth-enabled = true #开启授权
  log-enabled = true #开启日志
开启后进行influxdb重启
systemctl restart influxdb
此时再使用CLI或者HTTP API都需要权限验证了

当然开启权限之前要先有一个用户,关于用户的创建以及权限的修改见另一篇博客,此处不再赘述
InfluxDB基本操作
代码实现
当上面的环境搭建好了之后,就可以进入开发阶段了,这里我使用的是springboot2.x版本,新建一个Controller进行开发
@Resource
private InfluxDB influxDB;  //注入influxDB
开始使用
- 写入数据
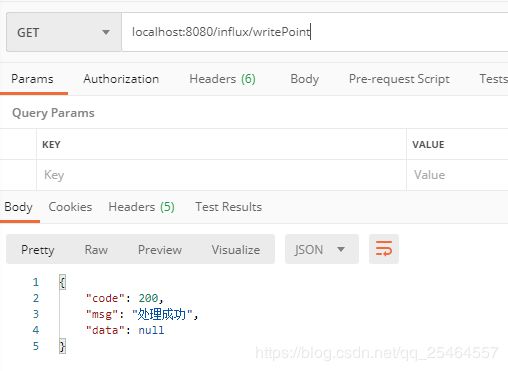
@RequestMapping("writePoint")
public Result insertPoint(){
	try{
	    influxDB.setDatabase("mydb");
	    //新建一个Point,指定表名,和tag以及field
	    //由于是链式调用可以增加多个Tag和Field
	    Point point = Point.measurement(MEASURMENT_NAME)
	            .tag("host","server03")
	            .tag("region","zh-east")
	            .addField("value",1.0)
	            .time(System.currentTimeMillis(),TimeUnit.MILLISECONDS)
	            .build();
	    influxDB.write(point);
     }catch (Exception e){
        e.printStackTrace();
         return Result.error();
     }
     return  Result.ok();
}
@RequestMapping("writePoint2")
public Result insertPoint2(){
    try{
        influxDB.setDatabase("mydb");
        PointBean pointBean = new PointBean(
                System.currentTimeMillis(),
                "out","server04",
                "zh-east",0.6f
        );
        Point point = Point.measurementByPOJO(PointBean.class).addFieldsFromPOJO(pointBean).build();
        influxDB.write(point);
    }catch (Exception e){
        e.printStackTrace();
        return Result.error();
    }

    return  Result.ok();
}
实体类的结构
@Measurement(name="cpu_load_short")
public class PointBean {
    /**Column中的name为measurement中的列名*/
    @Column(name = "time")
    private Long time;
    /**注解中添加tag = true,表示当前字段内容为tag内容*/
    @Column(name = "direction", tag = true)
    private String direction;
    @Column(name = "host", tag = true)
    private String host;
    @Column(name = "region", tag = true)
    private String region;
    @Column(name = "value")
    private Float value;

    public PointBean(Long time, String direction, String host, String region, Float value) {
        this.time = time;
        this.direction = direction;
        this.host = host;
        this.region = region;
        this.value = value;
    }
}
要用@Measurement注解指定表名
Point point = Point.measurementByPOJO(PointBean.class).addFieldsFromPOJO(pointBean).build();

可以看到measurementByPOJO接收的bean必须要有@Measurement注解修饰
- 读取数据
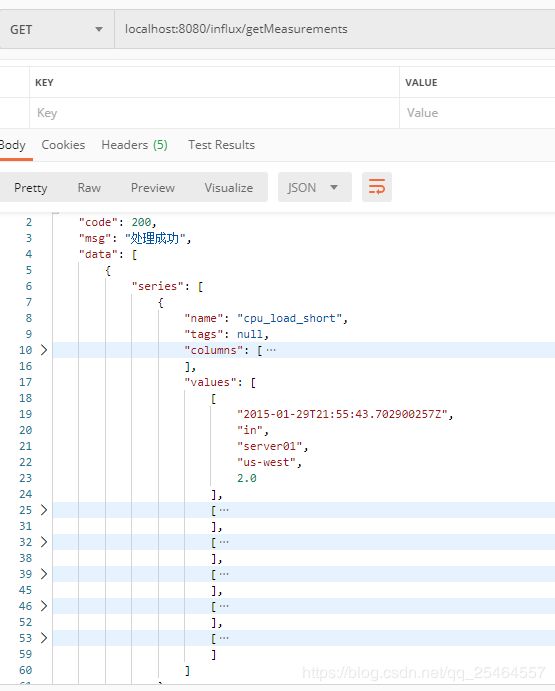
@RequestMapping("getMeasurements")
public Result getMeasurements(){
	//构建查询语句,返回QueryResult
    QueryResult rs = influxDB.query(new Query("select * from cpu_load_short", "mydb"));
    logger.info("query result => {}", rs);
    if (!rs.hasError() && !rs.getResults().isEmpty()) {
        rs.getResults().forEach(System.out::println);
    }
    return  Result.ok(rs.getResults());
}
总结
InfluxDB的java API实际上是通过访问InfluxDB的HTTP API,只要掌握其中的几个关键类就可以灵活运用,可以进入InfluxDB的接口看其接口的定义,主要是write()和query()方法的运用,可以有多种表现形式,在实际应用中选择适合自己业务的即可

