vue项目部署方式:tomcat部署和nginx部署
关于vue部署
1.nginx转发
一般项目前后端分离得话,都会用nginx作为反向代理转发的。
因为项目要兼容ie9,使用axios发ajax请求的时候,不能通过CORS解决跨域的问题,所以尝试部署nginx作反向代理.
参考:vue+webpack+vue-router(history) 部署到nginx服务器下,非根目录,前后端怎样配置文件?
Nginx配置proxy_pass
Nginx反向代理解决前后端联调跨域问题
1.1vue打包
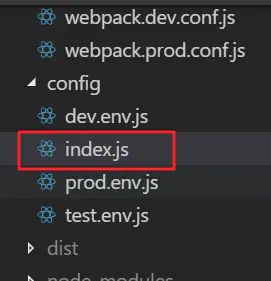
其中vue+webpack+vue-router(history) 部署到nginx服务器下,非根目录,前后端怎样配置文件这篇文章详细说明了怎么打包vue项目,记得修改config下的index.js文件.
修改为:(只显示修改的部分)
 build: {
    // Template for index.html
    index: path.resolve(__dirname, "../dist/index.html"),

    // Paths
    assetsRoot: path.resolve(__dirname, "../dist/myweb"),
    assetsSubDirectory: "static",
    assetsPublicPath: "/myweb/", //和router对应的base配置一致

1.2nginx反向配置
关于nginx的配置,一定需要注意第二篇文章说到的问题;
1、location /test/ {
                proxy_pass http://t6:8300;
     }

2、location /test/ {
                proxy_pass http://t6:8300/;
     }
proxy_pass转发的路径后是否带 “/” 的意义都是不一样的,假设有请求http://true_server/test/index.html,如果配置是第一种情况,不带"/“的话,那么访问的实际是
http://t6:8300/index.html,直接访问根路径,如果带”/",那么访问的实际是"http://t6:8300/test/index.html",以"/test"作为根路径.
具体配置如下:
#user  nobody;
worker_processes  1;
error_log  logs/error.log  notice;

events {
    worker_connections  1024;
}


http {
    include       mime.types;
    #include blocksip.conf;
    default_type  application/octet-stream;

    sendfile        on;
    keepalive_timeout  65;

   server {
        listen       8999;
        server_name  localhost;
        error_page 500 502 503 504 /50x.html;
        location = /50x.html {
        root html;
        }
         location / {
            root E:/_ex_workplace/pweb/dist;
           try_files $uri $uri/ /index.html;
            index index.html index.htm;
        }

         location /api/ {
            rewrite ^/api/(.*)$ /$1 break;  #所有对后端的请求加一个api前缀方便区分,真正访问的时候移除这个前缀
            # API Server
            proxy_pass http://132.122.14.6:9800/;  #将真正的请求代理到serverB,即真实的服务器地址,ajax的url为/api/user/1的请求将会访问http://www.serverB.com/user/1
        }

        location @router {
            rewrite ^.*$ /index.html last;
        }
    }
}
2.部署到tomcat下
2.1vue项目的路由配置
因为项目上线,一般需要添加项目名,并且消去vue-router产生的#号,需要在router的配置下,在本项目是router->index.js下配置:
import Vue from "vue";
import Router from "vue-router";
Vue.use(Router);

export default new Router({
  base: "/webSite/", //项目名称 访问路由页面都需要加上这个,访问的根路径为http://ip:port/webSite
  mode: "history", //消去#
  routes: [
    {
      path: "/test",
      name: "test",
      component: resolve => require(["@/pages/test"], resolve)
    }]
})
2.2vue项目的静态资源配置
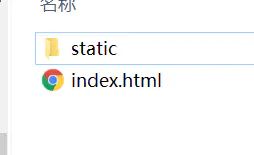
在打包后,会生成dist文件,文件下由以下部分组成:

如果打开static里面的css会发现由如下文件:

这些css都是webpack打包生成的,并且上面提到的index.html文件会引用这些文件。
如果不修改config下的index文件,打包生成的index.html对这些文件引用被打包为:
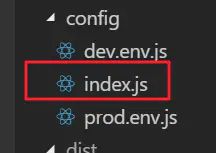
显然这是不合理的,因为我们已经配置了根路径为http://ip:port/webSite,所以我们需要修改config下的index.js文件的内容:
找到index.js文件,找到build对象:
修改为assetsPublicPath的值为与上面的base的取值一致。
build: {
    // Template for index.html
    index: path.resolve(__dirname, "../dist/index.html"),

    // Paths
    assetsRoot: path.resolve(__dirname, "../dist"),
    assetsSubDirectory: "static",
    assetsPublicPath: "/webSite/",

    productionSourceMap: true,
    devtool: "#source-map",

    productionGzip: false,
    productionGzipExtensions: ["js", "css"],
    bundleAnalyzerReport: process.env.npm_config_report
  }

2.3vue项目配置完毕
至此,整个vue项目算是配置完毕,但是部署到tomcat下会出现访问图片没有带根路径的问题,如果你引用图片的方式和我一致,如下:
<img :src="'../../static/images/'+code+'.png'" alt="icon">
那么可以尝试的解决方法是,重新配置tomcat的;
2.4tomcat的配置
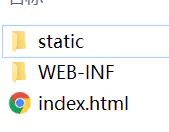
首先在tomcat的webapps新建文件夹,文件夹名称和上面配置的根路径一致,即为webSite,然后将打包生成的dist文件夹里面的文件复制到webSite下,并且新建文件 WEB-INF/web.xml:
项目结构为:

2.5配置静态资源服务
2.5.5.1修改server.xml文件
找到tomcat的conf文件下的server.xml,配置静态服务,找到HOST标签:
这里的配置为:
 <Host name="localhost"  appBase="webapps"
        unpackWARs="true" autoDeploy="true">

    <!-- SingleSignOn valve, share authentication between web applications
         Documentation at: /docs/config/valve.html -->
    <!--
    <Valve className="org.apache.catalina.authenticator.SingleSignOn" />
    -->

    <!-- Access log processes all example.
         Documentation at: /docs/config/valve.html
         Note: The pattern used is equivalent to using pattern="common" -->
    <Valve className="org.apache.catalina.valves.AccessLogValve" directory="logs"
           prefix="localhost_access_log" suffix=".txt"
           pattern="%h %l %u %t "%r" %s %b" />
           <Context path="" docBase="webSite" reloadable="false" />
  </Host>
参考:tomcat配置外部静态资源映射路径
2.5.5.2修改新增的web.xml文件
增加这个文件是因为,解除#号,参考官网:
去除vue项目的#号
这里就直接丢配置了:
<?xml version="1.0" encoding="ISO-8859-1"?>
<web-app xmlns="http://java.sun.com/xml/ns/javaee"
  xmlns:xsi="http://www.w3.org/2001/XMLSchema-instance"
  xsi:schemaLocation="http://java.sun.com/xml/ns/javaee
                      http://java.sun.com/xml/ns/javaee/web-app_3_0.xsd"
  version="3.0"
  metadata-complete="true">

  <display-name>webapp</display-name>
  <description>
     webapp
  </description>
  <error-page>
   <error-code>404</error-code>
   <location>/index.html</location>
</error-page>
</web-app>