Android新控件MotionLayout介绍(三)
文章目录
- 实例
- MotionLayout 与 CoordinatorLayout
- MotionLayout 与 DrawerLayout
- MotionLayout 与 ViewPager
- MotionLayout 与 Lottie
- 结论
上两章内容:
Android新控件MotionLayout介绍(一)
Android新控件MotionLayout介绍(二)
原文地址为:https://medium.com/google-developers/introduction-to-motionlayout-part-iii-47cd64d51a5
这一节主要讲述将MotionLayout与已经存在的Layout,比如CoordinatorLayout、DrawerLayout 或者ViewPager将如何一起使用。
实例
以下是Motionlayout与CoordinatorLayout 、 DrawerLayout 、 ViewPager 、 Lottie之间的相互集成:
| CoordinatorLayout | DrawerLayout | ViewPager | Lottie |
|---|---|---|---|
 |
MotionLayout 与 CoordinatorLayout
【MotionLayout可以实现CoordinatorLayout类似的效果,在接下来的文章中将会有例子】
我们很容易利用MotionLayout来指定屏幕中组件怎么实现动画。同样,你可以在已经存在的布局中添加更多有趣的操作,这样的操作并不会对你的程序造成损害。
举个例子,如果你想搞一个这样的动作:
我们可以将在AppBarLayout中的Toolbar替换成为MotionLayout,从而我们可以让CoordinatorLayout 来实现这种动画。
我们可以通过setProgress()来控制MotionLayout的动画的完成度,通过监听AppBarLayout的滚动改变来实现这个目的:
这个类名叫CollapsibleToolbar ,继承自MotionLayout:
package com.google.androidstudio.motionlayoutexample.utils

import android.content.Context
import android.support.constraint.motion.MotionLayout
import android.support.design.widget.AppBarLayout
import android.util.AttributeSet

class CollapsibleToolbar @JvmOverloads constructor(
        context: Context, attrs: AttributeSet? = null, defStyleAttr: Int = 0
) : MotionLayout(context, attrs, defStyleAttr), AppBarLayout.OnOffsetChangedListener {

    override fun onOffsetChanged(appBarLayout: AppBarLayout?, verticalOffset: Int) {
        progress = -verticalOffset / appBarLayout?.totalScrollRange?.toFloat()!!
    }

    override fun onAttachedToWindow() {
        super.onAttachedToWindow()
        (parent as? AppBarLayout)?.addOnOffsetChangedListener(this)
    }
}
替换掉CoordinatorLayout 中的Toolbar,换上我们自定义的CollapsibleToolbar :
<android.support.design.widget.CoordinatorLayout xmlns:android="http://schemas.android.com/apk/res/android"
    xmlns:app="http://schemas.android.com/apk/res-auto"
    xmlns:tools="http://schemas.android.com/tools"
    android:id="@+id/content"
    android:layout_width="match_parent"
    android:layout_height="match_parent"
    android:fitsSystemWindows="false"
    android:background="@color/contentBackground">

    <android.support.design.widget.AppBarLayout
        android:id="@+id/app_bar"
        android:layout_width="match_parent"
        android:layout_height="@dimen/app_bar_height"
        android:theme="@style/AppTheme.AppBarOverlay">

        <include layout="@layout/motion_09_coordinatorlayout_header"/>

    android.support.design.widget.AppBarLayout>

    <include layout="@layout/content_scrolling" />

android.support.design.widget.CoordinatorLayout>
其中motion_09_coordinatorlayout_header布局如下,我们唯一要做的就是创建Motionlayout文件,包含需要动画的组件。
<com.google.androidstudio.motionlayoutexample.utils.CollapsibleToolbar
    xmlns:android="http://schemas.android.com/apk/res/android"
    xmlns:tools="http://schemas.android.com/tools"
    xmlns:app="http://schemas.android.com/apk/res-auto"
    android:id="@+id/motionLayout"
    app:layoutDescription="@xml/scene_09"
    android:layout_width="match_parent"
    android:layout_height="match_parent"
    android:minHeight="50dp"
    android:fitsSystemWindows="false"
    app:layout_scrollFlags="scroll|enterAlways|snap|exitUntilCollapsed">

    <ImageView
        android:id="@+id/background"
        android:layout_width="match_parent"
        android:layout_height="200dp"
        android:background="@color/colorAccent"
        android:scaleType="centerCrop"
        android:src="@drawable/monterey"/>

    <TextView
        android:id="@+id/label"
        android:layout_width="wrap_content"
        android:layout_height="wrap_content"
        android:transformPivotX="0dp"
        android:transformPivotY="0dp"
        android:text="Monterey"
        android:textColor="#FFF"
        android:textSize="32dp" />

com.google.androidstudio.motionlayoutexample.utils.CollapsibleToolbar>
同样,我们定义一下动画描述文件scene_09:
<MotionScene
    xmlns:android="http://schemas.android.com/apk/res/android"
    xmlns:motion="http://schemas.android.com/apk/res-auto">

    <Transition
        motion:constraintSetStart="@+id/start"
        motion:constraintSetEnd="@+id/end" />

    <ConstraintSet android:id="@+id/start">
        <Constraint
            android:id="@+id/background"
            android:layout_width="match_parent"
            android:layout_height="match_parent"
            android:alpha="1.0"
            motion:layout_constraintBottom_toBottomOf="parent"/>


        <Constraint
            android:id="@+id/label"
            android:layout_width="wrap_content"
            android:layout_height="wrap_content"
            android:rotation="-90.0"
            motion:layout_constraintBottom_toBottomOf="@+id/background"
            motion:layout_constraintStart_toStartOf="parent"/>
    ConstraintSet>

    <ConstraintSet android:id="@+id/end">
        <Constraint
            android:id="@+id/background"
            android:layout_width="match_parent"
            android:layout_height="match_parent"
            android:alpha="0.2"
            motion:layout_constraintBottom_toBottomOf="parent"/>
        <Constraint
            android:id="@+id/label"
            android:layout_width="wrap_content"
            android:layout_height="wrap_content"
            android:layout_marginStart="8dp"
            android:layout_marginBottom="8dp"
            android:rotation="0.0"
            motion:layout_constraintBottom_toBottomOf="@+id/background"
            motion:layout_constraintStart_toStartOf="parent" />
    ConstraintSet>
MotionScene>
MotionLayout 与 DrawerLayout
DrawerLayout是Android5.0出来的控件,说新也不新,感觉也用的蛮多的。我们称之为抽屉式布局,结合Motionlayout可以做一下比较炫酷的情景:
就像上面的CoordinatorLayout/AppBarLayout例子一样,我们需要定义一个子类来设置Motionlayout的动画完成度progress.我们称之为DrawerContent:
package com.google.androidstudio.motionlayoutexample.utils

import android.content.Context
import android.support.constraint.motion.MotionLayout
import android.support.v4.widget.DrawerLayout
import android.util.AttributeSet
import android.view.View

class DrawerContent @JvmOverloads constructor(
        context: Context, attrs: AttributeSet? = null, defStyleAttr: Int = 0
) : MotionLayout(context, attrs, defStyleAttr), DrawerLayout.DrawerListener {
    override fun onDrawerStateChanged(newState: Int) {
    }

    override fun onDrawerSlide(drawerView: View, slideOffset: Float) {
        progress = slideOffset
    }

    override fun onDrawerClosed(drawerView: View) {
    }

    override fun onDrawerOpened(drawerView: View) {
    }

    override fun onAttachedToWindow() {
        super.onAttachedToWindow()
        (parent as? DrawerLayout)?.addDrawerListener(this)
    }
}
这个子类会自动的通过OnDrawerSlide()的回调slideOffset设置进度Progress。
通过这个子类,在DrawaerLayout中使用MotionLayout:
<android.support.v4.widget.DrawerLayout
    xmlns:android="http://schemas.android.com/apk/res/android"
    android:layout_width="match_parent"
    android:layout_height="match_parent"
    xmlns:app="http://schemas.android.com/apk/res-auto"
    android:id="@+id/motionLayout"
    android:background="@color/colorPrimaryDark">

    <include layout="@layout/motion_12_drawerlayout_content"/>

    <include layout="@layout/motion_13_drawerlayout_menu"/>

android.support.v4.widget.DrawerLayout>
motion_12_drawerlayout_content.xml是刚才上面例子的布局文件,我们简单拿过来用一下。
我们的菜单文件使用MotionLayout(或者我们刚刚自定义的DrawerContent):
[很简单,就是5个简单的TextView]
<com.google.androidstudio.motionlayoutexample.utils.DrawerContent
    xmlns:android="http://schemas.android.com/apk/res/android"
    xmlns:app="http://schemas.android.com/apk/res-auto"
    xmlns:tools="http://schemas.android.com/tools"
    android:id="@+id/menu"
    android:layout_width="180dp"
    android:layout_height="match_parent"
    android:layout_gravity="start"
    app:layoutDescription="@xml/scene_13_menu"
    android:background="@color/colorPrimaryDark">

    <TextView
        android:id="@+id/textView"
        android:layout_width="wrap_content"
        android:layout_height="wrap_content"
        android:layout_marginTop="32dp"
        android:text="Monterey"
        android:textSize="20sp"
        android:textStyle="italic"
        android:typeface="serif"
        android:textColor="#FFF"
        app:layout_constraintBottom_toTopOf="@+id/textView3"
        app:layout_constraintEnd_toEndOf="parent"
        app:layout_constraintHorizontal_bias="0.5"
        app:layout_constraintStart_toStartOf="parent"
        app:layout_constraintTop_toTopOf="parent"
        app:layout_constraintVertical_bias="0.0"
        app:layout_constraintVertical_chainStyle="packed" />

    <TextView
        android:id="@+id/textView2"
        android:layout_width="wrap_content"
        android:layout_height="wrap_content"
        android:layout_marginTop="16dp"
        android:text="Information"
        app:fontFamily="sans-serif-smallcaps"
        android:textColor="#FFF"
        app:layout_constraintBottom_toTopOf="@+id/textView4"
        app:layout_constraintEnd_toEndOf="parent"
        app:layout_constraintHorizontal_bias="0.5"
        app:layout_constraintStart_toStartOf="parent"
        app:layout_constraintTop_toBottomOf="@+id/view" />

    <TextView
        android:id="@+id/textView4"
        android:layout_width="wrap_content"
        android:layout_height="wrap_content"
        android:layout_marginTop="16dp"
        android:text="Directions"
        app:fontFamily="sans-serif-smallcaps"
        android:textColor="#FFF"
        app:layout_constraintBottom_toTopOf="@+id/textView5"
        app:layout_constraintEnd_toEndOf="parent"
        app:layout_constraintHorizontal_bias="0.5"
        app:layout_constraintStart_toStartOf="parent"
        app:layout_constraintTop_toBottomOf="@+id/textView2" />

    <TextView
        android:id="@+id/textView5"
        android:layout_width="wrap_content"
        android:layout_height="wrap_content"
        android:layout_marginTop="16dp"
        android:text="Sight-Seeing"
        app:fontFamily="sans-serif-smallcaps"
        android:textColor="#FFF"
        app:layout_constraintBottom_toBottomOf="parent"
        app:layout_constraintEnd_toEndOf="parent"
        app:layout_constraintHorizontal_bias="0.5"
        app:layout_constraintStart_toStartOf="parent"
        app:layout_constraintTop_toBottomOf="@+id/textView4" />

    <View
        android:id="@+id/view"
        android:background="#c2c1c1"
        android:layout_width="100dp"
        android:layout_height="1dp"
        android:layout_marginTop="16dp"
        app:layout_constraintBottom_toTopOf="@+id/textView2"
        app:layout_constraintEnd_toEndOf="parent"
        app:layout_constraintHorizontal_bias="0.5"
        app:layout_constraintStart_toStartOf="parent"
        app:layout_constraintTop_toBottomOf="@+id/textView3" />

    <TextView
        android:id="@+id/textView3"
        android:layout_width="wrap_content"
        android:layout_height="wrap_content"
        android:text="California"
        android:textColor="#FFF"
        app:fontFamily="cursive"
        app:layout_constraintBottom_toTopOf="@+id/view"
        app:layout_constraintEnd_toEndOf="parent"
        app:layout_constraintHorizontal_bias="0.5"
        app:layout_constraintStart_toStartOf="parent"
        app:layout_constraintTop_toBottomOf="@+id/textView" />
com.google.androidstudio.motionlayoutexample.utils.DrawerContent>
然后我们编写layoutDescription文件,来定义每个TextView的动画结构:
<MotionScene xmlns:android="http://schemas.android.com/apk/res/android"
    xmlns:motion="http://schemas.android.com/apk/res-auto">

    <Transition
        motion:constraintSetEnd="@+id/end"
        motion:constraintSetStart="@+id/start"
        motion:duration="250" />

    <ConstraintSet android:id="@+id/start">
        <Constraint
            android:id="@+id/textView"
            android:layout_width="wrap_content"
            android:layout_height="wrap_content"
            android:layout_marginTop="32dp"
            android:rotation="90"
            android:translationX="100dp"
            motion:layout_constraintBottom_toTopOf="@+id/textView3"
            motion:layout_constraintEnd_toEndOf="parent"
            motion:layout_constraintStart_toStartOf="parent"
            motion:layout_constraintTop_toTopOf="parent"
            motion:layout_constraintVertical_chainStyle="spread" />

        <Constraint
            android:id="@+id/textView2"
            android:layout_width="wrap_content"
            android:layout_height="wrap_content"
            android:layout_marginTop="16dp"
            android:rotation="90"
            android:translationX="100dp"
            motion:layout_constraintBottom_toTopOf="@+id/textView4"
            motion:layout_constraintEnd_toEndOf="parent"
            motion:layout_constraintStart_toStartOf="parent"
            motion:layout_constraintTop_toBottomOf="@+id/view" />

        <Constraint
            android:id="@+id/textView4"
            android:layout_width="wrap_content"
            android:layout_height="wrap_content"
            android:layout_marginTop="16dp"
            android:rotation="90"
            android:translationX="100dp"
            motion:layout_constraintBottom_toTopOf="@+id/textView5"
            motion:layout_constraintEnd_toEndOf="parent"
            motion:layout_constraintStart_toStartOf="parent"
            motion:layout_constraintTop_toBottomOf="@+id/textView2" />

        <Constraint
            android:id="@+id/textView5"
            android:layout_width="wrap_content"
            android:layout_height="wrap_content"
            android:layout_marginTop="16dp"
            android:rotation="90"
            android:translationX="100dp"
            motion:layout_constraintBottom_toBottomOf="parent"
            motion:layout_constraintEnd_toEndOf="parent"
            motion:layout_constraintStart_toStartOf="parent"
            motion:layout_constraintTop_toBottomOf="@+id/textView4" />

        <Constraint
            android:id="@+id/view"
            android:layout_width="100dp"
            android:layout_height="1dp"
            android:layout_marginTop="16dp"
            android:rotation="90"
            android:translationX="100dp"
            motion:layout_constraintBottom_toTopOf="@+id/textView2"
            motion:layout_constraintEnd_toEndOf="parent"
            motion:layout_constraintStart_toStartOf="parent"
            motion:layout_constraintTop_toBottomOf="@+id/textView3" />

        <Constraint
            android:id="@+id/textView3"
            android:layout_width="wrap_content"
            android:layout_height="wrap_content"
            android:rotation="90"
            android:translationX="100dp"
            motion:layout_constraintBottom_toTopOf="@+id/view"
            motion:layout_constraintEnd_toEndOf="parent"
            motion:layout_constraintStart_toStartOf="parent"
            motion:layout_constraintTop_toBottomOf="@+id/textView" />
    ConstraintSet>

    <ConstraintSet android:id="@+id/end">
        <Constraint
            android:id="@+id/textView"
            android:layout_width="wrap_content"
            android:layout_height="wrap_content"
            android:layout_marginTop="32dp"
            motion:layout_constraintBottom_toTopOf="@+id/textView3"
            motion:layout_constraintEnd_toEndOf="parent"
            motion:layout_constraintHorizontal_bias="0.5"
            motion:layout_constraintStart_toStartOf="parent"
            motion:layout_constraintTop_toTopOf="parent"
            motion:layout_constraintVertical_bias="0.0"
            motion:layout_constraintVertical_chainStyle="packed" />

        <Constraint
            android:id="@+id/textView2"
            android:layout_width="wrap_content"
            android:layout_height="wrap_content"
            android:layout_marginTop="16dp"
            motion:layout_constraintBottom_toTopOf="@+id/textView4"
            motion:layout_constraintEnd_toEndOf="parent"
            motion:layout_constraintHorizontal_bias="0.5"
            motion:layout_constraintStart_toStartOf="parent"
            motion:layout_constraintTop_toBottomOf="@+id/view" />

        <Constraint
            android:id="@+id/textView4"
            android:layout_width="wrap_content"
            android:layout_height="wrap_content"
            android:layout_marginTop="16dp"
            motion:layout_constraintBottom_toTopOf="@+id/textView5"
            motion:layout_constraintEnd_toEndOf="parent"
            motion:layout_constraintHorizontal_bias="0.5"
            motion:layout_constraintStart_toStartOf="parent"
            motion:layout_constraintTop_toBottomOf="@+id/textView2" />

        <Constraint
            android:id="@+id/textView5"
            android:layout_width="wrap_content"
            android:layout_height="wrap_content"
            android:layout_marginTop="16dp"
            motion:layout_constraintBottom_toBottomOf="parent"
            motion:layout_constraintEnd_toEndOf="parent"
            motion:layout_constraintHorizontal_bias="0.5"
            motion:layout_constraintStart_toStartOf="parent"
            motion:layout_constraintTop_toBottomOf="@+id/textView4" />

        <Constraint
            android:id="@+id/view"
            android:layout_width="100dp"
            android:layout_height="1dp"
            android:layout_marginTop="16dp"
            motion:layout_constraintBottom_toTopOf="@+id/textView2"
            motion:layout_constraintEnd_toEndOf="parent"
            motion:layout_constraintHorizontal_bias="0.5"
            motion:layout_constraintStart_toStartOf="parent"
            motion:layout_constraintTop_toBottomOf="@+id/textView3" />

        <Constraint
            android:id="@+id/textView3"
            android:layout_width="wrap_content"
            android:layout_height="wrap_content"
            motion:layout_constraintBottom_toTopOf="@+id/view"
            motion:layout_constraintEnd_toEndOf="parent"
            motion:layout_constraintHorizontal_bias="0.5"
            motion:layout_constraintStart_toStartOf="parent"
            motion:layout_constraintTop_toBottomOf="@+id/textView" />
    ConstraintSet>

MotionScene>
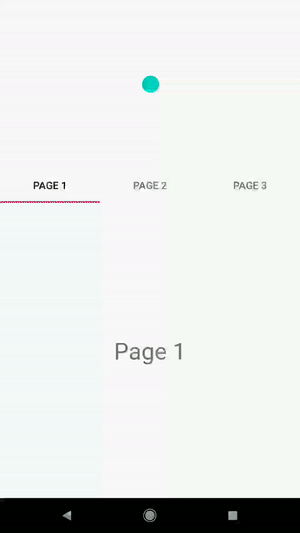
MotionLayout 与 ViewPager
类似的,我们可以实现一个非常有趣的ViewHeader头布局信息:
我们可以使用子类记录当前位置的窍门实现ViewPager的架构:
package com.google.androidstudio.motionlayoutexample.utils

import android.content.Context
import android.support.constraint.motion.MotionLayout
import android.support.v4.view.ViewPager
import android.util.AttributeSet

class ViewpagerHeader @JvmOverloads constructor(
        context: Context, attrs: AttributeSet? = null, defStyleAttr: Int = 0
) : MotionLayout(context, attrs, defStyleAttr), ViewPager.OnPageChangeListener {

    override fun onPageScrollStateChanged(state: Int) {
    }

    override fun onPageScrolled(position: Int, positionOffset: Float, positionOffsetPixels: Int) {
        var numPages = 3
        progress = (position + positionOffset) / (numPages - 1)
    }

    override fun onPageSelected(position: Int) {
    }
}
这个数学非常的直接,在onPageScrolled方法中给我们一个位置position,然后加上一个positionOffset,运动的偏移量,就可以实现我们的动画了。那么动画完成度progress 可以描述为:
progress = (position + positionOffset) / (numPages-1)
MotionLayout 与 Lottie
Lottie动画框架是Airbnb出品的动画框架(旨在解决复杂的动画问题),官网为:https://github.com/airbnb/lottie-android
通过设置动画的完成度可以直接打到效果:
直接在ViewPagerHeader中定义这个LottieAnimationView,就可以直接打到效果了。
<com.google.androidstudio.motionlayoutexample.utils.ViewpagerHeader xmlns:android="http://schemas.android.com/apk/res/android"
    xmlns:tools="http://schemas.android.com/tools"
    xmlns:app="http://schemas.android.com/apk/res-auto"
    android:id="@+id/motionLayout"
    app:layoutDescription="@xml/scene_23"
    android:layout_width="match_parent"
    app:progress="0"
    android:layout_height="230dp">

    <com.airbnb.lottie.LottieAnimationView
        android:id="@+id/animation_view"
        android:layout_width="match_parent"
        android:layout_height="match_parent"
        app:lottie_rawRes="@raw/walkthrough"/>

com.google.androidstudio.motionlayoutexample.utils.ViewpagerHeader>
通过使用motion:progress的属性来控制LottieAnimationView的动画播放:
<Constraint
    android:id="@+id/animation_view"
    android:layout_width="match_parent"
    android:layout_height="match_parent"
    motion:progress="0"/>
LottieAnimationView有一个setProgress()的功能,可以直接被MotionLayout作用,从而播放出动画的。
scene_23.xml 动画的结构如下:
<MotionScene
    xmlns:android="http://schemas.android.com/apk/res/android"
    xmlns:motion="http://schemas.android.com/apk/res-auto">

    <Transition
        motion:constraintSetStart="@+id/start"
        motion:constraintSetEnd="@+id/end">
    Transition>

    <ConstraintSet android:id="@+id/start">
        <Constraint
            android:id="@+id/animation_view"
            android:layout_width="match_parent"
            android:layout_height="match_parent"
            motion:progress="0"/>
    ConstraintSet>

    <ConstraintSet android:id="@+id/end">
        <Constraint
            android:id="@+id/animation_view"
            android:layout_width="match_parent"
            android:layout_height="match_parent"
            motion:progress="1"/>
    ConstraintSet>

MotionScene>
结论
通过上面的例子,我们可以很容易的将Motionlayout集成到你已有的项目中了。
例子的中所有代码都可以在https://github.com/googlesamples/android-ConstraintLayoutExamples中找到,
初次翻译文章,有不好的地方请多见谅。