符号执行之angr学习-控制流图
一 序
分析控制流图是分析程序必不可少地过程,通过分析控制流图能够快速地帮助我们了解程序结构,同时利用控制流图实现漏洞挖掘,Bug分析等也是非常有用地。Angr提供了多种分析工具,其中就有控制流图分析。(转载请注明出处)
对控制流图(CFG)的分析分为两个方面,静态控制流图分析和动态控制流图分析。
https://docs.angr.io/built-in-analyses/cfg 提供了对CFG的相关说明,本次实际操作看看CFG的生成过程。
二 案例
本文依然采用前面的二进制文件,代码来源:https://github.com/angr/angr-doc/tree/master/examples/sym-write,将代码编译为二进制文件。
2.1 通过阅读https://docs.angr.io/built-in-analyses/cfg,自己编写了一个简单的程序来试着获取程序的CFG。注意:在angr中,可以生成两种类型的CFG:静态CFG (CFGFast)和动态CFG (cfgem)。
# -*- coding: utf-8 -*-
import angr
import claripy
from angrutils import *

def main():
    proj = angr.Project('./test',load_options={"auto_load_libs":False})
    print("-----static------")
    cfgs = proj.analyses.CFGFast()
    print("This is the graph:", cfgs.graph)
    print("It has %d nodes and %d edges" % (len(cfgs.graph.nodes()), len(cfgs.graph.edges())))
    print("-----dynamic------")
    cfgd = proj.analyses.CFGEmulated(keep_state=True)
    #cfgd = proj.analyses.CFGAccurate(keep_state=True)
    print("This is the graph:", cfgd.graph)
    print("It has %d nodes and %d edges" % (len(cfgd.graph.nodes()), len(cfgd.graph.edges())))
if __name__ == "__main__":
    print repr(main())
基本上就是把一些代码粘贴过来组合了一下,看看结果:
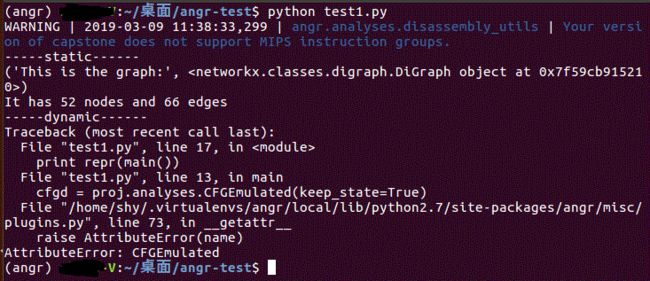
竟然报错了,然后我去这个地址查看原因
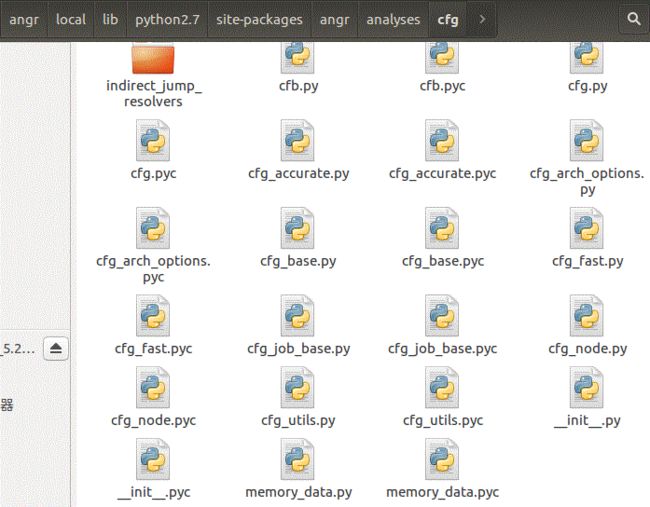
结果发现,找到了cfg_fast,但是没有CFGEmulated,看来是文件名称换了,最后我找到了cfg_accurate这个,并在代码中将CFGEmulated换为CFGAccurate后,运行结果如下:
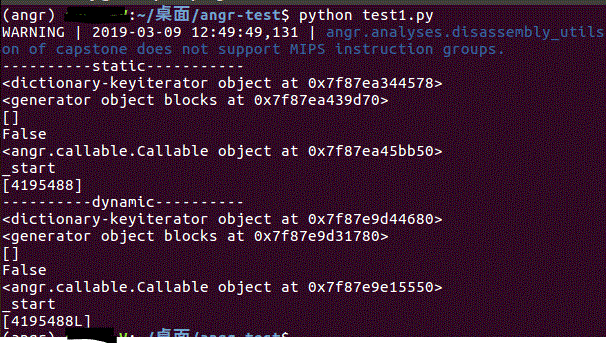
成功将静态CFG和动态CFG均打印出来了
2.2 进阶,获取节点信息
# -*- coding: utf-8 -*-
import angr
import claripy
from angrutils import *

def main():
    proj = angr.Project('./test',load_options={"auto_load_libs":False})
    print("----------static-----------")
    cfgs = proj.analyses.CFGFast()
    print("This is the graph:", cfgs.graph)
    print("It has %d nodes and %d edges" % (len(cfgs.graph.nodes()), len(cfgs.graph.edges())))
    print("###-entry node-###")
    entry_node = cfgs.get_any_node(proj.entry)
    print("There were %d contexts for the entry block" % len(cfgs.get_all_nodes(proj.entry)))
    print("###-father node-###")
    print("Predecessors of the entry point:", entry_node.predecessors)
    print("###-son node-###")
    print("Successors of the entry point:", entry_node.successors)
    print("Successors (and type of jump) of the entry point:", [ jumpkind + " to " + str(node.addr) for node,jumpkind in cfgs.get_successors_and_jumpkind(entry_node) ])


    print("----------dynamic----------")
    cfgd = proj.analyses.CFGAccurate(keep_state=True)
    print("This is the graph:", cfgd.graph)
    print("It has %d nodes and %d edges" % (len(cfgd.graph.nodes()), len(cfgd.graph.edges())))
    print("###-entry node-###")
    entry_node = cfgd.get_any_node(proj.entry)
    print("There were %d contexts for the entry block" % len(cfgd.get_all_nodes(proj.entry)))
    print("###-father node-###")
    print("Predecessors of the entry point:", entry_node.predecessors)
    print("###-son node-###")
    print("Successors of the entry point:", entry_node.successors)
    print("Successors (and type of jump) of the entry point:", [ jumpkind + " to " + str(node.addr) for node,jumpkind in cfgd.get_successors_and_jumpkind(entry_node) ])
if __name__ == "__main__":
    main()
运行结果如下:
因此,我们可以通过 cfgs.get_any_node()来获取任意节点,通过.predecessors,.successors属性来访问该节点的父节点和子节点,.get_successors_and_jumpkind()这个函数还没找到资料
2.3 CFG可视化
在https://docs.angr.io/built-in-analyses/cfg中,提出了angr-utils 能够实现CFG(以及其他流图)的可视化。安装过程如下:
workon angr
git clone https://github.com/axt/bingraphvis
pip install -e ./bingraphvis
git clone https://github.com/axt/angr-utils
pip install -e ./angr-utils
之后编写代码尝试实现CFG的可视化:
# -*- coding: utf-8 -*-
import angr
import claripy
from angrutils import *

def main():
    proj = angr.Project('./test',load_options={"auto_load_libs":False})
    print("----------static-----------")
    main = proj.loader.main_object.get_symbol("main")
    start_state = proj.factory.blank_state(addr=main.rebased_addr)
    cfgs = proj.analyses.CFGFast()
    plot_cfg(cfgs, "static", asminst=True, remove_imports=True, remove_path_terminator=True)


    print("----------dynamic----------")
    main = proj.loader.main_object.get_symbol("main")
    start_state = proj.factory.blank_state(addr=main.rebased_addr)
    cfgs = proj.analyses.CFGAccurate()
    plot_cfg(cfgs, "dynamic", asminst=True, remove_imports=True, remove_path_terminator=True)
if __name__ == "__main__":
    main()
在文件的目录下,我找到了关于CFG的静态流图和动态流图:
2.4 函数管理器
CFG结果生成一个名为Function Manager的对象,可以通过cfg.kb.functions来访问函数的一些属性:
# -*- coding: utf-8 -*-
import angr
import claripy
from angrutils import *

def main():
    proj = angr.Project('./test',load_options={"auto_load_libs":False})
    print("----------static-----------")
    cfgs = proj.analyses.CFGFast()
    entry_func1 = cfgs.kb.functions[proj.entry]
    print(entry_func1.block_addrs)#是属于函数的基本块的起始地址集吗
    print(entry_func1.blocks)#是该函数的一组基本块,可用capstone对其进行探索和拆卸。
    print(entry_func1.string_references())#返回函数中任意点引用的所有常量字符串的列表
    print(entry_func1.returning)#是一个布尔值,指示函数是否可以返回。
    print(entry_func1.callable)#是一个引用此函数的angr可调用对象。
    print(entry_func1.name)#函数的名称
    print(entry_func1.get_call_sites())#返回以调用其他函数结束的所有基本块的地址列表。
    #print(entry_func1.transition_graph)#是描述函数内部控制流的NetworkX有向图。它类似于IDA在每个函数级别上显示的控制流图。
    #print(entry_func.has_unresolved_calls)#与CFG中检测不精确有关。
    #print(entry.has_unresolved_jumps)#与CFG中检测不精确有关。
    #print(entry_func.get_call_target(callsite_addr))#将从调用站点地址列表中给定callsite_addr,返回该callsite将调用到的位置。
entry_func.get_call_return(callsite_addr))#将从调用站点地址列表中给定callsite_addr,返回该callsite应该返回到的位置。
    print("----------dynamic----------")
    cfgd = proj.analyses.CFGAccurate(keep_state=True)
    entry_func2 = cfgd.kb.functions[proj.entry]
    print(entry_func2.block_addrs)
    print(entry_func2.blocks)
    print(entry_func2.string_references())
    print(entry_func2.returning)
    print(entry_func2.callable)
    print(entry_func2.name)
    print(entry_func2.get_call_sites())

if __name__ == "__main__":
    main()
运行结果
2.5 关于CFGFast集以CFGAccurate的一些可选属性
CFGFast :
force_complete_scan#(默认值:True)将整个二进制代码作为函数检测的代码。如果您有一个blob(例如,混合代码和数据),您想要关闭它。
function_starts#地址列表,用作分析的入口点。
normalize#对结果函数进行规范化(例如,每个基本块最多属于一个函数)
collect_data_references#查找生成CFG期间对数据的所有引用。结果可以让您找到对数据的交叉引用。
resolve_indirect_jumps#执行附加分析,试图为CFG创建过程中发现的每个间接跳转找到目标。
CFGAccurate:
context_sensitivity_level#这将设置分析的上下文敏感性级别。有关更多信息,请参见下面的上下文敏感性级别一节。默认情况下这是1。(一般有0,1,2,3共四个级别,分别指定调用该函数的前几个函数)
starts#地址列表,用作分析的入口点。
avoid_runs#要在分析中忽略的地址列表。
call_depth#将分析的深度限制为若干个调用。这对于检查特定函数可以直接跳转到哪个函数非常有用(通过将call_depth设置为1)。
initial_state#可以向CFG提供初始状态,它将在整个分析过程中使用该初始状态。
keep_state#为了节省内存,默认情况下将丢弃每个基本块的状态。如果keep_state为真,则状态保存在CFGNode中。
enable_symbolic_back_traversal#是否启用解决间接跳转的密集技术
enable_advanced_backward_slicing#是否启用另一种密集技术来解决直接跳转
三 总结
本次通过对CFG的学习,能够学会简单的CFG操作,这样在以后对程序进行分析时会方便很多!


