xcode6.1开发环境下开发视图间切换程序
xcode6.1开发环境下开发视图间切换程序
1、 新建一个空项目
因为xcode6.1没有空项目,所以先从Single View Application 模板新建ios项目。
Product Name输入Switch,完成。下面开始删除一些文件,并改变一些配置。
2、 删除视图和界面文件
删除Main.storyboard和LaunchScreen.xib ,完成后在info.plist文件中也需要删除对应的配置,通过点击减号即可。
删除默认的视图控制器文件ViewController.h ViewController.m;
3、 创建视图控制器
下一步输入控制器类名称;
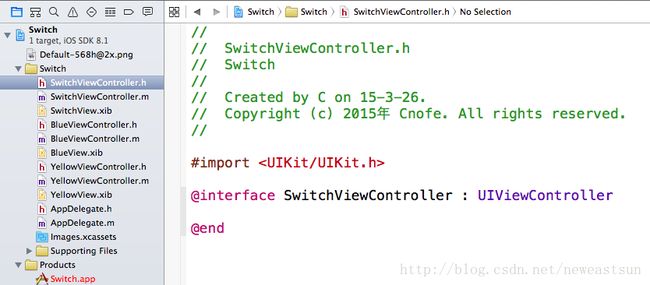
完成后生成两个文件:SwitchViewController.h和SwitchViewController.m;
按照同样的步骤,新建BlueViewController.m和YellowViewController.m及对应的.h文件。
4、 创建视图文件
通过新建文件,选择User Interface类别的View;分别命名为SwitchView、BlueView、YellowView;
5、 添加视图控制器
把视图默认的类NSObject修改成对应的控制器类;
6、 关联视图与控制器
同样方式给其他两个视图添加控制器;
7、 修改应用程序委托
#import
@classSwitchViewController;
@interfaceAppDelegate : UIResponder <UIApplicationDelegate>
@property (strong, nonatomic) UIWindow *window;
@property (strong, nonatomic) SwitchViewController *switchViewController;
@end
AppDelegate.m文件的didFinishLaunchingWithOptions方法修改如下:
#import "AppDelegate.h"
#import "SwitchViewController.h"
@implementationAppDelegate
- (BOOL)application:(UIApplication*)application didFinishLaunchingWithOptions:(NSDictionary*)launchOptions {
self.window = [[UIWindowalloc] initWithFrame:[[UIScreenmainScreen] bounds]];
self.switchViewController = [[SwitchViewControlleralloc] initWithNibName:@"SwitchView"bundle:nil];
UIView *switchView = self.switchViewController.view;
CGRect switchViewFrame = switchView.frame;
switchViewFrame.origin.y += [UIApplicationsharedApplication].statusBarFrame.size.height;
switchView.frame = switchViewFrame;
self.window.rootViewController = self.switchViewController;
self.window.backgroundColor = [UIColorgreenColor];
[self.windowmakeKeyAndVisible];
returnYES;
}
8、 运行测试,查看结果
绿色界面是switchView的背景颜色,并添加了Toolbar到底部。
9、 主控制器中申明其他控制器
#import
@classBlueViewController;
@classYellowViewController;
@interfaceSwitchViewController : UIViewController
@property (strong,nonatomic) BlueViewController*blueViewController;
@property (strong,nonatomic) YellowViewController *yellowViewController;
@end
生成- (IBAction)switchView:(UIBarButtonItem *)sender{}方法;
10、 根视图加载时插入蓝色视图
- (void)viewDidLoad {
[superviewDidLoad];
self.blueViewController = [[BlueViewControlleralloc] initWithNibName:@"BlueView"bundle:nil];
[self.viewinsertSubview:self.blueViewController.viewatIndex:0];
}
11、 响应按钮事件,实现切换
- (void)didReceiveMemoryWarning {
[superdidReceiveMemoryWarning];
if (self.blueViewController.view.superview == nil) {
self.blueViewController = nil;
}else{
self.yellowViewController = nil;
}
}
- (IBAction)switchView:(UIBarButtonItem *)sender{
if (self.yellowViewController.view.superview == nil) {
if (self.yellowViewController.view == nil) {
self.yellowViewController = [[YellowViewControlleralloc] initWithNibName:@"YellowView"bundle:nil];
}
[self.blueViewController.viewremoveFromSuperview];
[self.viewinsertSubview:self.yellowViewController.viewatIndex:0];
}else{
if (self.blueViewController.view == nil) {
self.blueViewController = [[BlueViewControlleralloc] initWithNibName:@"BlueView"bundle:nil];
}
[self.yellowViewController.viewremoveFromSuperview];
[self.viewinsertSubview:self.blueViewController.viewatIndex:0];
}
}
12、 实现动画切换
- (IBAction)switchView:(UIBarButtonItem *)sender{
[UIViewbeginAnimations:@"View Flip"context:nil];
[UIViewsetAnimationDuration:1.25];
[UIViewsetAnimationCurve:UIViewAnimationCurveEaseInOut];
if (self.yellowViewController.view.superview == nil) {
if (self.yellowViewController.view == nil) {
self.yellowViewController = [[YellowViewControlleralloc] initWithNibName:@"YellowView"bundle:nil];
}
[UIViewsetAnimationTransition:UIViewAnimationTransitionFlipFromRightforView:self.viewcache:YES];
[self.blueViewController.viewremoveFromSuperview];
[self.viewinsertSubview:self.yellowViewController.viewatIndex:0];
}else{
if (self.blueViewController.view == nil) {
self.blueViewController = [[BlueViewControlleralloc] initWithNibName:@"BlueView"bundle:nil];
}
[UIViewsetAnimationTransition:UIViewAnimationTransitionFlipFromRightforView:self.viewcache:YES];
[self.yellowViewController.viewremoveFromSuperview];
[self.viewinsertSubview:self.blueViewController.viewatIndex:0];
}
[UIViewcommitAnimations];
}
13、 常见问题
问题1:
The file “Info.plist” couldn’t be openedbecause there is no such file
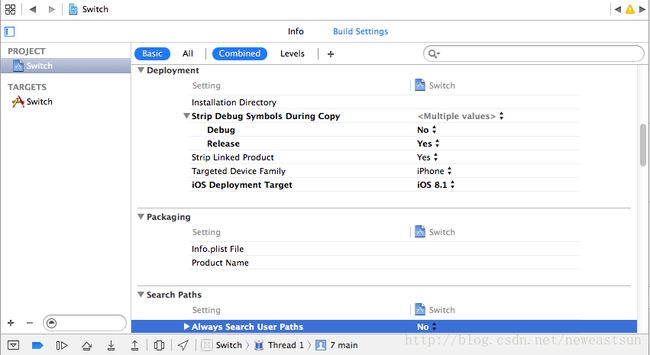
删除test文件没有删除干净;通过工程配置界面可以看到并删除。
问题2:
'Could not load NIB in bundle:'NSBundle (loaded)' with name 'SwitchViews''
self.switchViewController = [[SwitchViewControlleralloc] initWithNibName:@"SwitchView"bundle:nil];
初始化视图控制器是名称没有指定明确,区别大小写;


