CIFAR-10 数据集可视化详细讲解(附代码)
The CIFAR-10 dataset 介绍
The CIFAR-10 dataset consists of 60000 32x32 colour images in 10 classes, with 6000 images per class. There are 50000 training images and 10000 test images.(cifar-10数据集一共10类图片,每一类有6000张图片,加起来就是60000张图片,每张图片的尺寸是32x32,图片是彩色图)
The dataset is divided into five training batches and one test batch, each with 10000 images. The test batch contains exactly 1000 randomly-selected images from each class. The training batches contain the remaining images in random order, but some training batches may contain more images from one class than another. Between them, the training batches contain exactly 5000 images from each class.(整个数据集被分为5个训练批次和1个测试批次,每一批10000张图片。测试批次包含10000张图片,是由每一类图片随机抽取出1000张组成的集合。剩下的50000张图片每一类的图片数量都是5000张,训练批次是由剩下的50000张图片打乱顺序,然后随机分成5份,所以可能某个训练批次中10个种类的图片数量不是对等的,会出现一个类的图片数量比另一类多的情况)
这里的test_batch就是测试批次,data_batch_1(2、3、4、5)这5个就是训练批次
以下是数据集包含的10个种类,每个种类随机选出的10张图
CIFAR-10 数据集的3个官方版本
官网下载链接
本文采用的是第一个版本:CIFAR-10 python version
CIFAR-10数据集导入的两个方法
这里给出了python2和python3版本的方法,MATLAB跟python方法一样
本文章用的是python3
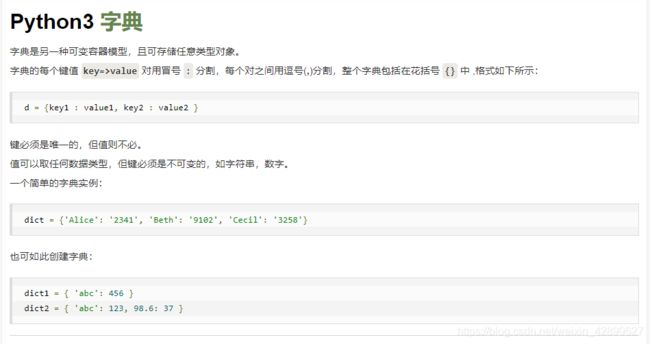
这里数据导出的存储格式是dict,注意一个这个存储格式下的数值调用
python3 字典的学习链接
def unpickle(file):
    import pickle
    with open(file, 'rb') as fo:
        dict = pickle.load(fo, encoding='bytes')
    return dict
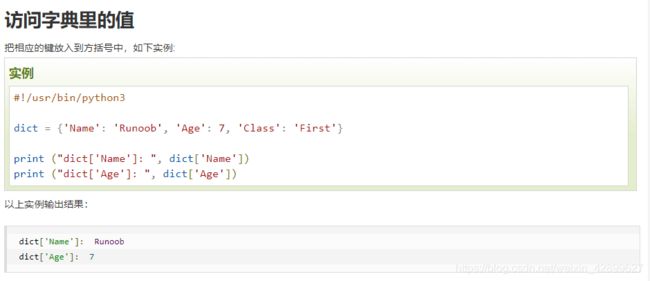
这里Name、Age、Class叫做字典键
CIFAR-10 数据格式(重点)
每个data_batch中的数据包含4个字典键,这里只列出了data和labels两个,还有batch_label和filenames,如果需要查看,直接print(dict)就可以了,这里的dict就是unpickle(file)函数的返回值
这里注意,在访问字典的值得时候需要添加一个b
访问字典的值代码示例
data_batch=unpickle("data_batch_2")#打开cifar-10文件的data_batch_1
cifar_data=data_batch[b'data']#这里每个字典键的前面都要加上b
cifar_label=data_batch[b'labels']
这里的data字典键保存的就是图片的像素值,这是一个10000x3072的数组,对于这个数组的理解是10000张图片,每一张图片有32x32x3个像素值,这里为什么要乘3,因为每一张图片都是RGB格式的彩色图片(这里每一张彩色图都是通过拆分成红色分量矩阵R、绿色分量矩阵G、蓝色分量矩阵B来保存),把3个颜色分量矩阵分别拉伸成1行,然后再拼在一起,就是3072个数值(可视化的过程就是这个的逆过程)
这里的labels字典键保存的就是这些图片的标签,一共10个种类,用 0-9 来表示
'airplane'=0
'automobile'=1
'brid'=2
'cat'=3
'deer'=4
'dog'=5
'frog'=6
'horse'=7
'ship'=8
'truck'=9
cifar-10可视化代码
import numpy as np
import cv2

def unpickle(file):#打开cifar-10文件的其中一个batch(一共5个batch)
    import pickle
    with open("C:/Users/Chengguo/Desktop/py_study/Alexnet/cifar-10-batches-py/"+file, 'rb') as fo:
        dict = pickle.load(fo, encoding='bytes')
    return dict

data_batch=unpickle("data_batch_2")#打开cifar-10文件的data_batch_1
cifar_data=data_batch[b'data']#这里每个字典键的前面都要加上b
cifar_label=data_batch[b'labels']
cifar_data=np.array(cifar_data)#把字典的值转成array格式,方便操作
print(cifar_data.shape)#(10000,3072)
cifar_label=np.array(cifar_label)
print(cifar_label.shape)#(10000,)

label_name=['airplane','automobile','brid','cat','deer','dog','frog','horse','ship','truck']

def imwrite_images(k):#k的值可以选择1-10000范围内的值
    for i in range(k):
        image=cifar_data[i]
        image=image.reshape(-1,1024)
        r=image[0,:].reshape(32,32)#红色分量
        g=image[1,:].reshape(32,32)#绿色分量
        b=image[2,:].reshape(32,32)#蓝色分量
        img=np.zeros((32,32,3))
        #RGB还原成彩色图像
        img[:,:,0]=r
        img[:,:,1]=g
        img[:,:,2]=b
        cv2.imwrite("C:/Users/Chengguo/Desktop/py_study/Alexnet/cifar_pictures/"+ "NO."+str(i)+"class"+str(cifar_label[i])+str(label_name[cifar_label[i]])+".jpg",img)
    print("%d张图片保存完毕"%k)

imwrite_images(100)
运行结果
图片保存格式
这里展示一下第1张图和第2张图(32x32的小图片)
NO.0class1automobile.jpg(第1张图,第1类,汽车)
![]()
NO.1class6frog.jpg(第2张图,第6类,青蛙)
![]()


