之前都是直接使用Kali里面安装好的Wireshark和Win下的,Ubuntu的来个小计
PS:解决方法不重要,我觉得更重要的是这个摸索的过程
解决方法
# 安装wireshark
sudo apt install wireshark
# 新增wireshark用户组
$ sudo groupadd wireshark
# 将dumpcap更改为wireshark用户组
$ sudo chgrp wireshark /usr/bin/dumpcap
# 让wireshark用户组有root权限使用dumpcap
$ sudo chmod 4755 /usr/bin/dumpcap
# 将当前用户加入wireshark用户组
$ sudo gpasswd -a dnt wireshark
探索过程
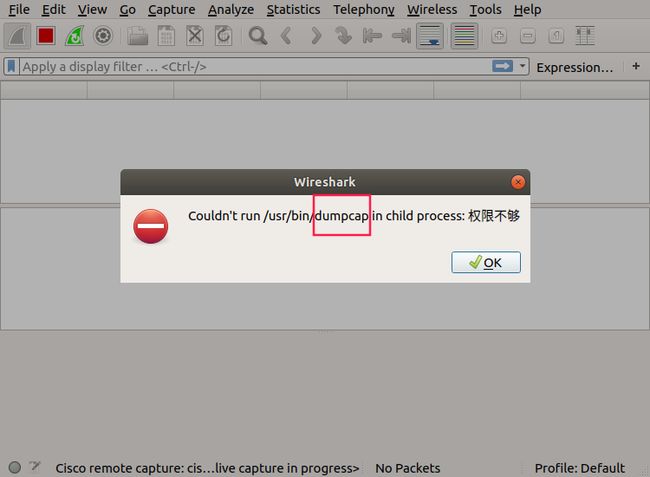
Wireshark:couldn't run dumpcap in child process
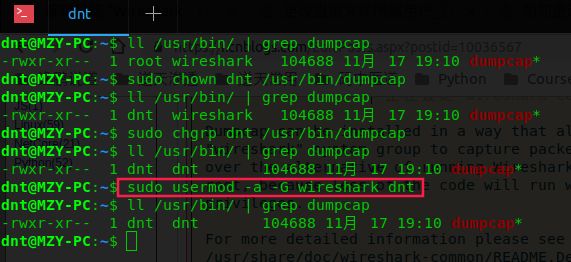
看到这个第一反应都是:先把用户换成有权限的用户组,或者专门设置一个专用的
更换所属用户:sudo chown dnt /usr/bin/dumpcap
更换所属的组:sudo chgrp dnt /usr/bin/dumpcap
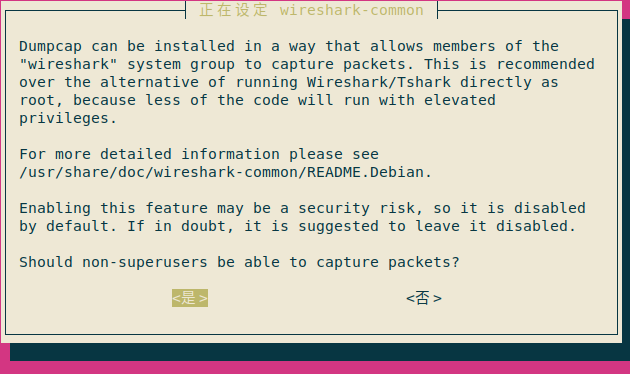
再次使用,爆出新的错误:
按照给的解决方案试试:
sudo dpkg-reconfigure wireshark-common(确保你之前安装是选的是yes)
运行:ll /usr/bin/ | grep dumpcap 发现错误并没有解决
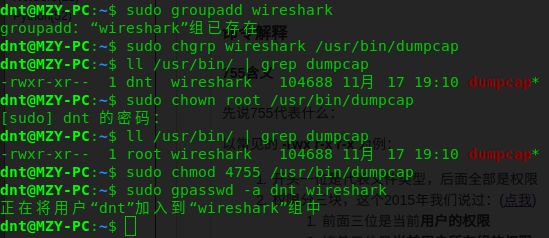
那么这个方向行不通,换个思路:新建一个专门的组,然后给权限(安装的时候默认已经建立了wireshark)
先恢复下,然后设置文件是4755权限(下面会解释)sudo chmod 4755 /usr/bin/dumpcap
再把当前用户添加到wireshark组里面:sudo gpasswd -a dnt wireshark
之前有朋友说Linux命令不太熟悉,我说以后用到就稍微解释下,这边简单说明下:
命令解释
755含义
先说755代表什么:
以常见的 -rwx r-x r-x 为例:
- 开头一位是代表文件类型,后面全部是权限
- 权限分三块,这个2015年我们说过:(点我)
- 前面三位是当前用户的权限
- 接着三位是当前用户所在组的权限
- 最后三位是其他用户的权限
- rwx => 2^2 2^1 2^0 => 4 2 1 => 4+2+1 => 7
- r代表可读,w代表可写,x代表可执行
- rwx r-x r-x => 4+2+1 4+1 4+1 => 755
4755含义
再说一下4755含义:
chmod 4755 与 chmod 755 的区别在于开头多了一位,这个4表示其他用户执行文件时,具有与所有者相当的权限
然后这边就可以正常使用了


