CSS3与页面布局学习总结(六)——CSS3新特性(阴影、动画、渐变、变形、伪元素等)...
CSS3在CSS2.1的基础上新增加了许多属性,这里选择了较常用的一些功能与大家分享,帮助文档中有很详细的描述,可以在本文的示例中获得帮助文档。
一、阴影
1.1、文字阴影
text-shadow
示例代码:
DOCTYPE html>
<html>
    <head>
        <meta charset="UTF-8">
        <title>title>
        <style>
            .text{
                font: bold 100px/1.5 georgia, sans-serif;
                color: dodgerblue;
                text-shadow: 10px 10px 50px #000;
                /*text-shadow: 20px 30px 50px #000,-20px -30px 50px #f00;*/
            }
        style>
    head>
    <body>
        <div class="text">
            Shadow Text
        div>
    body>
html>
运行效果:
示例代码:
DOCTYPE html>
<html>
    <head>
        <meta charset="UTF-8">
        <title>title>
    head>
    <body>
        <style>
            body {
                background: #000;
                color: #fff;
            }
            .neon{
                font: bold 100px/1.5 georgia, sans-serif;
                text-shadow: 0 0 10px #fff, 0 0 20px #fff, 0 0 30px #fff, 0 0 40px #ff00de, 0 0 70px #ff00de, 0 0 80px #ff00de, 0 0 100px #ff00de, 0 0 150px #ff00de;
            }
        style>
        <div class="neon">
            Hello NEON Text
        div>
    body>
html>
运行结果:
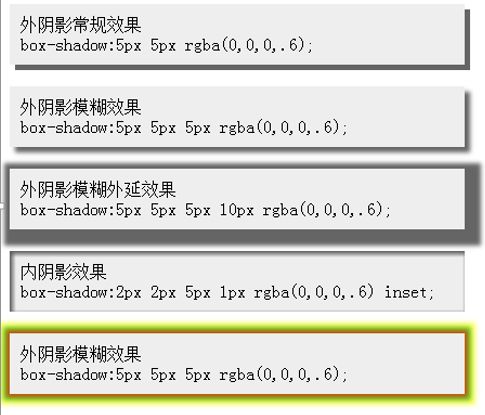
1.2、盒子阴影
box-shadow
inset: 设置对象的阴影类型为内阴影。该值为空时,则对象的阴影类型为外阴影
示例代码:
DOCTYPE html>
<html>
    <head>
        <meta charset="UTF-8">
        <title>title>
        <style>
            .shadow1{
                margin: 30px;
                border: 10px solid #fff;
                box-shadow: 10px 10px 30px 0 #1E90FF,-10px -10px 30px 0 #1E90FF;
            }
            .shadow2{
                margin: 30px;
                border: 10px solid #fff;
                box-shadow: 0 0 30px 0 #1E90FF;
            }
        style>
    head>
    <body>
        <p>
        <img src="img/7.jpg" class="shadow2"/>
        p>
    body>
html>
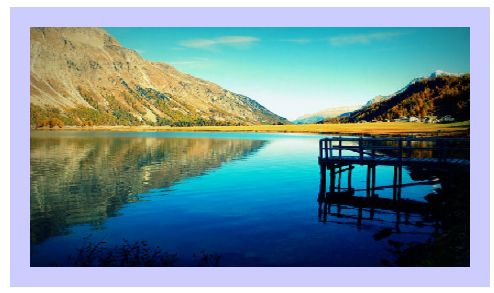
运行效果:
练习:
二、背景
2.1、背景图像尺寸
background-size:指定对象的背景图像的尺寸大小
background-size:
auto: 背景图像的真实大小。
cover: 将背景图像等比缩放到完全覆盖容器,背景图像有可能超出容器。
contain: 将背景图像等比缩放到宽度或高度与容器的宽度或高度相等,背景图像始终被包含在容器内。
示例代码:
DOCTYPE html>
<html>
    <head>
        <meta charset="UTF-8">
        <title>title>
        <style>
            #div1{
                width: 500px;
                height: 300px;
                border: 10px solid rgba(0,0,255,.3);
                margin: 100px;

                background: url(img/7.jpg) no-repeat;
                background-size:100% 100%;
                /*background-size:100px 50px;*/
                /*background-size:contain;*/
            }
        style>
    head>
    <body>
        <div id="div1">

        div>
    body>
html>
运行结果:
2.2、背景图像显示的原点
background-origin:指定对象的背景图像显示的原点。
background-origin:
padding-box: 从padding区域(含padding)开始显示背景图像。
border-box: 从border区域(含border)开始显示背景图像。
content-box: 从content区域开始显示背景图像。
示例代码:
DOCTYPE html>
<html>
    <head>
        <meta charset="UTF-8">
        <title>title>
        <style>
            #div1{
                width: 400px;
                height: 200px;
                border: 20px solid rgba(0,0,255,.2);
                margin: 100px;
                padding: 20px;

                background: url(img/7.jpg) no-repeat;
                background-size:100% 100%;
                background-origin:padding-box;
            }
        style>
    head>
    <body>
        <div id="div1">

        div>
    body>
html>
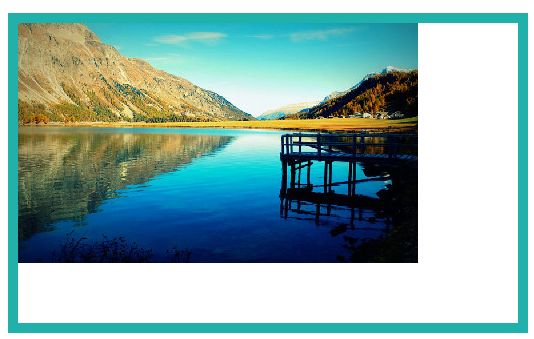
border-box效果:
content-box效果:
padding-box效果:(默认)
三、伪元素
伪元素不是真的元素是通过CSS虚拟出的一个元素,CSS3的语法为了区分伪元素与伪类,使用“::”表示,但是前期为了兼容“:”仍然可以使用。
3.1、before
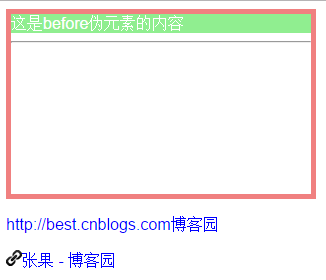
在应用样式的元素内的前部虚拟一个元素可以指定元素的内容与样式。
示例:
DOCTYPE html>
<html>

    <head>
        <meta charset="UTF-8">
        <title>title>
        <style type="text/css">
            #div1 {
                margin: 100px;
                width: 300px;
                height: 180px;
                border: 5px solid lightcoral;
            }
            a{
                color:blue;
                text-decoration: none;
            }

            #div1:before {
                content: '这是before伪元素的内容';
                display: block;
                color: white;
                background: lightgreen;
            }

            #link1:before {
                content: attr(href);
            }

            #link2:before {
                content: url(img/link.png);
            }
        style>
    head>

    <body>
        <div id="div1">
            <hr />
        div>

        <p>
            <a href="http://best.cnblogs.com" id="link1">博客园a>
        p>

        <p>
            <a href="http://best.cnblogs.com" id="link2">张果 - 博客园a>
        p>
    body>

html>
效果:
在上面的示例中伪元素可以当成一个正常的元素写所有样式,attr可以取出元素的属性,img可以指定图片。
3.2、after
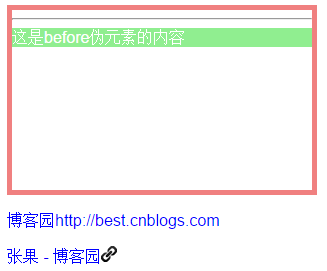
after也是一个与before类似的伪元素,不同的是他的位置是在内部的尾部,示例如下:
DOCTYPE html>
<html>

    <head>
        <meta charset="UTF-8">
        <title>title>
        <style type="text/css">
            #div1 {
                width: 300px;
                height: 180px;
                border: 5px solid lightcoral;
            }
            a{
                color:blue;
                text-decoration: none;
            }

            #div1:after {
                content: '这是before伪元素的内容';
                display: block;
                color: white;
                background: lightgreen;
            }

            #link1:after {
                content: attr(href);
            }

            #link2:after {
                content: url(img/link.png);
            }
        style>
    head>

    <body>
        <div id="div1">
            <hr />
        div>

        <p>
            <a href="http://best.cnblogs.com" id="link1">博客园a>
        p>

        <p>
            <a href="http://best.cnblogs.com" id="link2">张果 - 博客园a>
        p>
    body>

html>
运行效果:
注意:
a)、本质上并不支持伪元素的双冒号(::)写法,而是忽略掉了其中的一个冒号,仍以单冒号来解析,所以等同变相支持了E::after。
b)、不支持设置属性position, float, list-style-*和一些display值,Firefox3.5开始取消这些限制。
c)、IE10在使用伪元素动画有一个问题:
.test:hover {}
.test:hover::after { /* 这时animation和transition才生效 */ }需要使用一个空的:hover来激活
3.3、清除浮动
方法一:
.clearfix:before, .clearfix:after {
    content:"";
    display:table;
}
.clearfix:after{
    clear:both;
    overflow:hidden;
}
.clearfix{
    *zoom:1;
}
方法二:
            .clearfix {
                *zoom: 1;
                /*在旧版本的IE浏览器缩放大小,触发haslayout(类似BFC)*/
            }

            .clearfix:after {
                /*伪元素,在应用该元素后添加一个伪元素*/
                content: "";
                /*内容为空*/
                display: table;
                /*BFC,清除内部浮动*/
                clear: both;
                /*清除外部浮动*/
            }
四、圆角与边框
圆角可能是我们最迫切需要的CSS3样式了,在CSS2.1中想尽各种办法都不算理想,实现方法如下:
4.1、border-radius 圆角
border-radius:[
这里有两部分,第一个角度是水平角度,第二个角度是垂直角度。
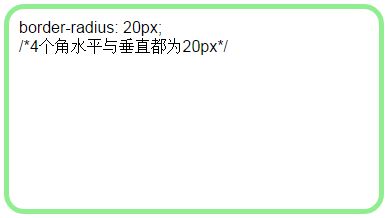
a)、提供2个参数,2个参数以“/”分隔,每个参数允许设置1~4个参数值,第1个参数表示水平半径,第2个参数表示垂直半径,如第2个参数省略,则默认等于第1个参数
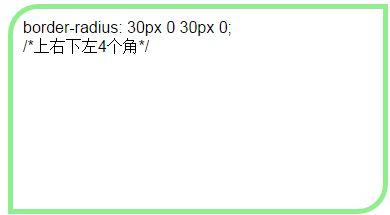
b)、水平半径:如果提供全部四个参数值,将按上左(top-left)、上右(top-right)、下右(bottom-right)、下左(bottom-left)的顺序作用于四个角。
c)、如果只提供一个参数,将用于全部的于四个角。
d)、如果提供两个,第一个用于上左(top-left)、下右(bottom-right),第二个用于上右(top-right)、下左(bottom-left)。
e)、如果提供三个,第一个用于上左(top-left),第二个用于上右(top-right)、下左(bottom-left),第三个用于下右(bottom-right)。
垂直半径也遵循以上4点。 对应的脚本特性为borderRadius。
示例:
DOCTYPE html>
<html>
    <head>
        <meta charset="UTF-8">
        <title>border-radiustitle>
        <style type="text/css">
            #div1 {
                width: 300px;
                height: 180px;
                margin: 100px;
                padding: 10px;
                border: 5px solid lightgreen;

                /*border-radius: 20px;  4个角水平与垂直都为10px*/

                 /*border-radius: 30px 0 30px 0;  上右下左4个角*/

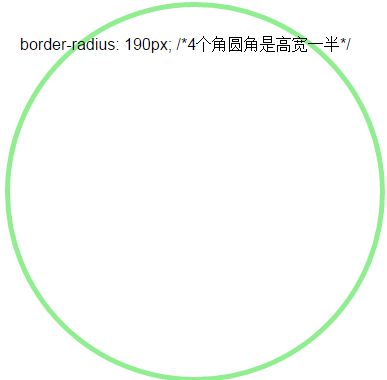
                /*border-radius: 190px; 4个角圆角是高宽一半*/

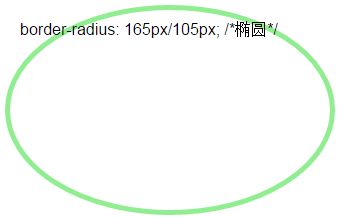
                border-radius: 165px 105px;
            }
        style>
    head>
    <body>
        <div id="div1">
        border-radius: 165px 105px;
        div>
    body>
html>
效果:
示例:
DOCTYPE html>
<html>
    <head>
        <meta charset="UTF-8">
        <title>border-radius 圆角title>
        <style type="text/css">
            #div1{
                width: 300px;
                height:300px;
                margin: 100px;
                background: #0066CC;

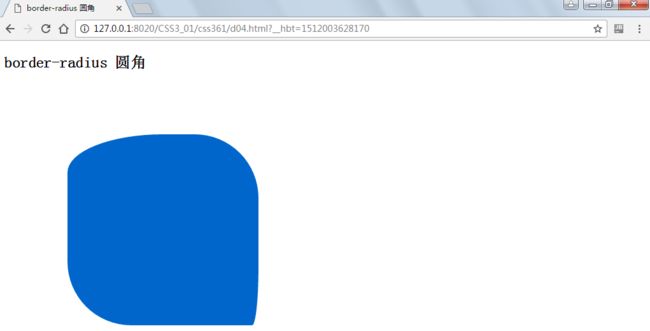
                border-radius: 150px 100px 10px 100px/60px 100px 90px 100px;
            }
        style>
    head>
    <body>
        <h2>border-radius 圆角h2>


        <div id="div1">div>
    body>
html>
结果:
4.2、边框图片border-image
border-image:<' border-image-source '> || <' border-image-slice '> [ / <' border-image-width '> | / <' border-image-width '>? / <' border-image-outset '> ]? || <' border-image-repeat '>
<' border-image-source '>: 设置或检索对象的边框是否用图像定义样式或图像来源路径。
<' border-image-slice '>: 设置或检索对象的边框背景图的分割方式。
<' border-image-width '>: 设置或检索对象的边框厚度。
<' border-image-outset '>: 设置或检索对象的边框背景图的扩展。
<' border-image-repeat '>: 设置或检索对象的边框图像的平铺方式。
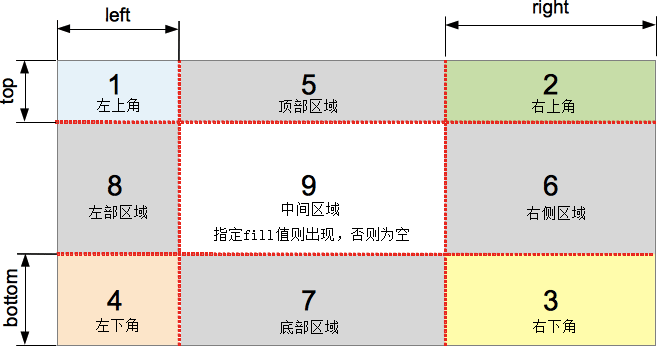
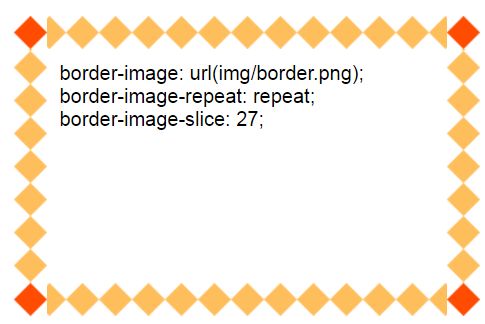
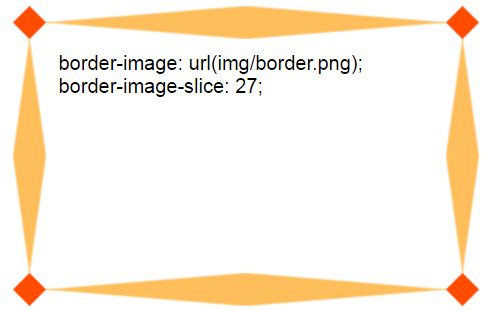
图片剪裁位置(border-image-slice)
1、没有单位,专指像素。这类似于flash的as脚本,舞台高宽,影片剪辑大小,位移直接就是一个数值,没有单位,因为默认单位就是像素(px)了。例如:border-image:url(border.png) 27 repeat;这里的27专指27像素。
2、支持百分比值,百分比值大小事相对于边框图片而言,假设边框图片大小为400px*300px,则20%的实际效果就是剪裁了图片的60px 80px 60px 80px的四边大小。
重复性(border-image-repeat)
这里的重复性有别于background的背景重复,差别较大。background图片就是重复,不重复,水平重复,垂直重复,总之就是围绕repeat(重复)这个词打转,一家独大。而对于border-image,可谓是三足鼎立,repeat(重复)只是其中之一,其余两个是round(平铺)和stretch(拉伸)。其中,stretch是默认值。
参数0~2个,0则使用默认值 – stretch,例如:border-image:url(border.png) 30% 40%;就等同于border-image:url(border.png) 30% 40% stretch stretch;;1则表示水平方向及垂直方向均使用此参数;2个参数的话则第一个参数表水平方向,第二个参数表示垂直方向。例如:border-image:url(border.png) 30% 40%;就等同于border-image:url(border.png) 30% 40% round repeat;表示水平方向round(平铺),垂直方向repeat(重复),至于何为平铺何为重复下面会深入讲解。
详解:http://www.zhangxinxu.com/wordpress/2010/01/css3-border-image/
示例:
DOCTYPE html>
<html>
    <head>
        <meta charset="UTF-8">
        <title>border-imagetitle>
        <style type="text/css">
            #div1 {
                width: 300px;
                height: 167px;
                margin: 100px;
                padding: 10px;
                border: 27px solid lightgreen;

                border-image: url(img/border.png);
                border-image-slice: 27;
            }
        style>
    head>
    <body>
        <div id="div1">
                border-image: url(img/border.png);<br/>
                border-image-slice: 27;<br />
        div>

    body>
html>
效果:
五、变形 transform
CSS3中使用transform对元素进行变形,可以是2D的也可以是3D(效果)的,transform的参数有许多,多数是函数的形式,具体如下:
transform:none |
2D Transform Functions:
matrix(): 以一个含六值的(a,b,c,d,e,f)变换矩阵的形式指定一个2D变换,相当于直接应用一个[a,b,c,d,e,f]变换矩阵
translate(): 指定对象的2D translation(2D平移)。第一个参数对应X轴,第二个参数对应Y轴。如果第二个参数未提供,则默认值为0
translatex(): 指定对象X轴(水平方向)的平移
translatey(): 指定对象Y轴(垂直方向)的平移
rotate(): 指定对象的2D rotation(2D旋转),需先有 <' transform-origin '> 属性的定义
scale(): 指定对象的2D scale(2D缩放)。第一个参数对应X轴,第二个参数对应Y轴。如果第二个参数未提供,则默认取第一个参数的值
scalex(): 指定对象X轴的(水平方向)缩放
scaley(): 指定对象Y轴的(垂直方向)缩放
skew(): 指定对象skew transformation(斜切扭曲)。第一个参数对应X轴,第二个参数对应Y轴。如果第二个参数未提供,则默认值为0
skewx(): 指定对象X轴的(水平方向)扭曲
skewy(): 指定对象Y轴的(垂直方向)扭曲 3D Transform Functions:
matrix3d(): 以一个4x4矩阵的形式指定一个3D变换
translate3d(): 指定对象的3D位移。第1个参数对应X轴,第2个参数对应Y轴,第3个参数对应Z轴,参数不允许省略
translatez(): 指定对象Z轴的平移
rotate3d(): 指定对象的3D旋转角度,其中前3个参数分别表示旋转的方向x,y,z,第4个参数表示旋转的角度,参数不允许省略
rotatex(): 指定对象在x轴上的旋转角度
rotatey(): 指定对象在y轴上的旋转角度
rotatez(): 指定对象在z轴上的旋转角度
scale3d(): 指定对象的3D缩放。第1个参数对应X轴,第2个参数对应Y轴,第3个参数对应Z轴,参数不允许省略
scalez(): 指定对象的z轴缩放
perspective(): 指定透视距离
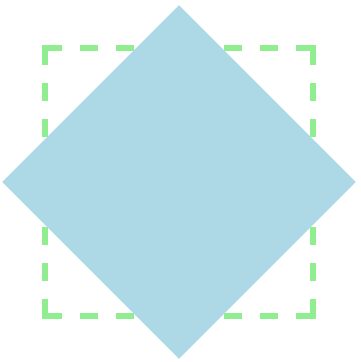
5.1、rotate()2D旋转
transform:rotate(
angle是角度的意思,单位可以是:
deg 度(Degrees)
grad 梯度(Gradians)
rad 弧度(Radians)
turn 转、圈(Turns)
示例:
DOCTYPE html>
<html>

    <head>
        <meta charset="utf-8">
        <title>title>
        <style>
            .box-wrapper {
                width: 200px;
                height: 200px;
                border: 5px dashed lightgreen;
                padding: 5px;
                margin: 50px;
            }

            .box {
                width: 200px;
                height: 200px;
                background: lightblue;
                transform: rotate(45deg);
            }
        style>
    head>

    <body>
        <div class="box-wrapper">
            <div class="box">
            div>
        div>
        transform: rotate(45deg);
    body>

html>
效果:
5.2、设置原点 transform-origin
transform-origin用于设置变形时的原点,从5.1可以看出转动时默认的原点在中心,这里使用该属性修改原点位置。
transform-origin:[
默认值:50% 50%,效果等同于center center
transform-origin:水平(left | center | right) 垂直(top | center | bottom)
示例:
DOCTYPE html>
<html>

    <head>
        <meta charset="utf-8">
        <title>title>
        <style>
            .box-wrapper {
                width: 200px;
                height: 200px;
                border: 5px dashed lightgreen;
                padding: 5px;
                margin: 50px 0 0 150px;
            }

            .box {
                width: 200px;
                height: 200px;
                background: lightblue;
                transform: rotate(30deg);
                transform-origin: left top;
                /*旋转的原点为左上角*/
            }
        style>
    head>

    <body>
        <div class="box-wrapper">
            <div class="box">
            div>
        div>
    body>

html>
效果:
一般情况下我们会在9个关键点转动,也可以使用具体的数字指定一个特殊的位置。
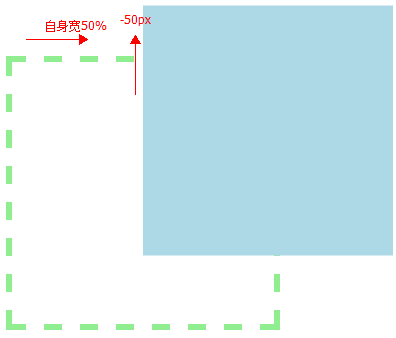
5.3、平移 translate()
transform:translate(x,y) = translate(
示例:
DOCTYPE html>
<html>

    <head>
        <meta charset="utf-8">
        <title>title>
        <style>
            .box-wrapper {
                width: 200px;
                height: 200px;
                border: 5px dashed lightgreen;
                padding: 5px;
                margin: 50px 0 0 150px;
            }

            .box {
                width: 200px;
                height: 200px;
                background: lightblue;
                transform: translate(50%,-50px);
            }
        style>
    head>

    <body>
        <div class="box-wrapper">
            <div class="box">
            div>
        div>
    body>

html>
效果:
可以使用该方法实现垂直居中,需要使用定位。
5.4、缩放 scale
transform:scale(x,y)
scale(): 指定对象的2D scale(2D缩放)。第一个参数对应X轴,第二个参数对应Y轴。如果第二个参数未提供,则默认取第一个参数的值
示例:
DOCTYPE html>
<html>

    <head>
        <meta charset="utf-8">
        <title>title>
        <style>
            .box-wrapper {
                width: 200px;
                height: 200px;
                border: 5px dashed lightgreen;
                padding: 5px;
                margin: 50px 0 0 150px;
            }

            .box {
                width: 200px;
                height: 200px;
                background: lightblue;
                transform: scale(0.5,1.5);  /*宽度缩小到1半,高度放大到1.5倍*/
            }
        style>
    head>

    <body>
        <div class="box-wrapper">
            <div class="box">
            div>
        div>
    body>

html>
效果:
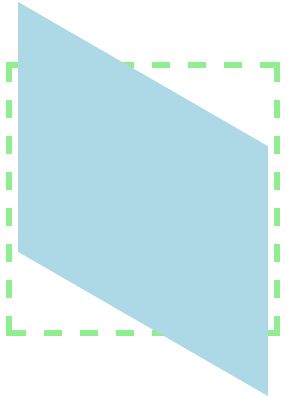
5.5、斜切扭曲skew
transform:skew(x,y): 指定对象skew transformation(斜切扭曲)。第一个参数对应X轴 角度,第二个参数对应Y轴角度。如果第二个参数未提供,则默认值为0
示例:
x30度角时效果:
y30度角时效果:
x30度角,y30度角时的效果:
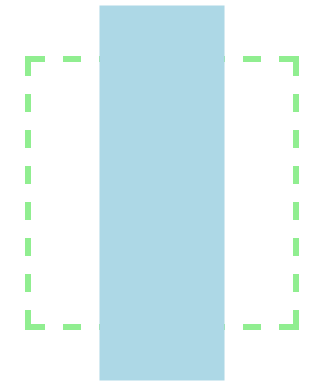
练习1:
只允许一个div,可以使用CSS3
练习2:
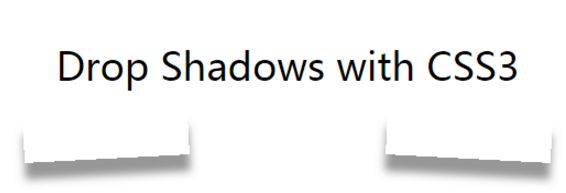
请实现如下效果,可以使用CSS3
DOCTYPE html>
<html>

    <head>
        <meta charset="utf-8">
        <title>title>
        <style>
            .box {
                width: 500px;
                height: 200px;
                background: lightblue;
                font: 43px/200px "microsoft yahei";
                color: darkblue;
                text-align: center;
                margin: 0 auto;
                text-shadow: 0 1px 1px #fff;
                position: relative;
            }

            .box:before,
            .box:after {
                content: ' ';
                position: absolute;
                bottom: 10px;
                left: 5px;
                width: 50%;
                height: 20%;
                box-shadow: 0 10px 20px #ccc;
                transform: rotate(-3deg);
                z-index: -1;
            }

            .box:after {
                left: auto;
                right: 5px;
                transform: rotate(3deg);
            }
        style>
    head>

    <body>
        <div class="box">
            Hello World By CSS3
        div>
    body>

html>
六、渐变
在早期IE浏览中的滤镜中就有渐变,Photoshop中也有渐变,可简单的认为渐变就是颜色的平滑过度,CSS3的渐变语法如下:
to left: 设置渐变为从右到左。相当于: 270deg
to right: 设置渐变从左到右。相当于: 90deg
to top: 设置渐变从下到上。相当于: 0deg
to bottom: 设置渐变从上到下。相当于: 180deg。这是默认值,等同于留空不写。
渐变一般应用于需要指定颜色的地方。
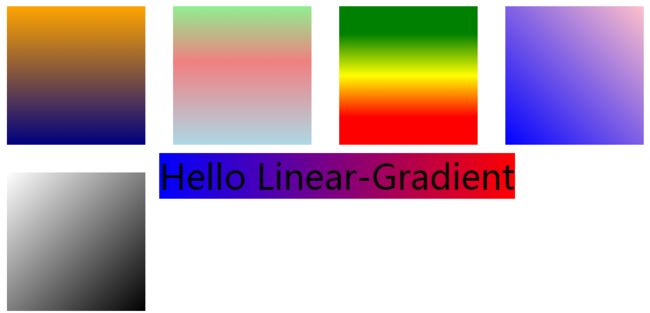
示例:
DOCTYPE html>
<html>
    <head>
        <meta charset="utf-8">
        <title>linear-gradienttitle>
        <style>
            .box {
                height: 200px;
                width: 200px;
                float: left;
                margin: 20px;
            }
            #div1{
                background: linear-gradient(orange,navy);
                /*从上到下橙色到蓝色渐变*/
            }
            #div2{
                background: linear-gradient(lightgreen,lightcoral 40%,lightblue);
                /*绿红蓝从上到下渐变,中间的40%表示红出现的位置,如果不指定则均匀分配*/
            }

            #div3{
                background: linear-gradient(0deg,red 20%,yellow 50%,green 80%);
                /*0度角方向(从下向上)*/
            }

            #div4{
                background: linear-gradient(45deg,blue,pink);
                /*目标方向45度角方向*/
            }

            #div5{
                background: linear-gradient(to top left,#000,#fff);
                /*从右下到左上的渐变*/
            }
            span{
                font: 50px/50px "microsoft yahei";
                color: linear-gradient(to left,red,blue);
                /*前景色无效,背景有效*/
            }
        style>
    head>

    <body>
        <div class="box" id="div1">
        div>
        <div class="box" id="div2">
        div>
        <div class="box" id="div3">
        div>
        <div class="box" id="div4">
        div>
        <div class="box" id="div5">
        div>
        <span>
            Hello Linear-Gradient
        span>
    body>
html>
效果:
如果要考虑兼容IE浏览器,可以使用IE中特有的滤镜。
filter: progid:DXImageTransform.Microsoft.gradient(startColorstr='#ff0000', endColorstr='#0000ff', grandientType=1);
/** IE7 **/
-ms-filter: progid:DXImageTransform.Microsoft.gradient(startColorstr='#ff0000', endColorstr='#0000ff', grandientType=1);
/** IE8 **/
filter: progid:DXImageTransform.Microsoft.Gradient(GradientType=0, StartColorStr="orange", EndColorStr="navy");
/*老IE中的渐变*/
IE中常用的滤镜:
透明效果:filter:alpha(opacity=50);

黑白照片:filter: gray;

X光照片:filter: Xray;

风动模糊:filter: blur(add=true,direction=45,strength=30);

正弦波纹:filter: Wave(Add=0, Freq=60, LightStrength=1, Phase=0, Strength=3);

半透明效果:filter: Alpha(Opacity=50);

线型透明:filter: Alpha(Opacity=0, FinishOpacity=100, Style=1, StartX=0, StartY=0, FinishX=100, FinishY=140);

放射透明:filter: Alpha(Opacity=10, FinishOpacity=100, Style=2, StartX=30, StartY=30, FinishX=200, FinishY=200);

白色透明:filter: Chroma(Color=#FFFFFF);

降低色彩:filter: grays;

底片效果:filter: invert;

左右翻转:filter: fliph;

垂直翻转:filter: flipv;

投影效果:filter:progid:dXImageTransform.Microsoft.DropShadow(color=#cccccc,offX=5,offY=5,positives=true);

马赛克:filter:progid:dXImageTransform.Microsoft.Pixelate(maxsquare=3);

发光效果:filter:progid:dXImageTransform.Microsoft.Glow(color=#cccccc,Strength=5);

柔边效果:filter:alpha(opacity=100, finishOpacity=0,style=2;

许多 Filter 中的特效均已进入了 CSS3 草案,并在新版的非 IE 浏览器中得到了很好的支持。
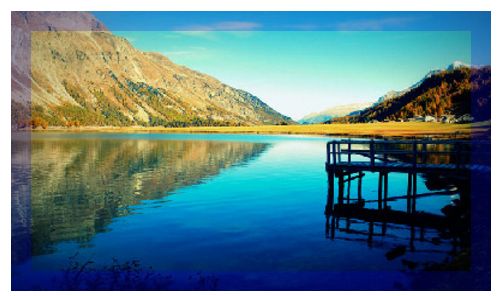
七、透明
7.1、opacity
设置对象的不透明度。
opacity:
示例:
            .box {
                height: 180px;
                width: 300px;
                float: left;
                margin: 20px;
                background: url(img/7.jpg);
            }
            #div1{
                opacity: 0.5;  /*设置半透明*/
                filter:alpha(opacity=50); /*兼容IE,使用滤镜,0-100 */
                background: blue;
                height: 100px;
            }
效果:
7.2、transparent与图片透明
用来指定全透明色彩
transparent是全透明黑色(black)的速记法,即一个类似rgba(0,0,0,0)这样的值。
在CSS1中,transparent被用来作为background-color的一个参数值,用于表示背景透明。
在CSS2中,border-color也开始接受transparent作为参数值,《Open eBook(tm) Publication Structure 1.0.1》[OEB101]延伸到color也接受transparent作为参数值。
在CSS3中,transparent被延伸到任何一个有color值的属性上。
    color: transparent;
    border: 1px solid transparent;
    background: transparent;
常见互联网图片格式,压缩格式:
gif:只255种颜色,透明,动画效果
jpg:色彩丰富(65536),不透明,不支持动画
png:色彩更加丰富,支持透明,不支持动画
7.3、RGBA
RGBA是CSS3中新增用于设置颜色的方法,语法:
RGBA(R,G,B,A)
取值:
R: 红色值。正整数 | 百分数
G: 绿色值。正整数 | 百分数
B: 蓝色值。正整数 | 百分数
A: Alpha透明度。取值0 - 1之间。
此色彩模式与RGB相同,只是在RGB模式上新增了Alpha透明度。
IE6.0-8.0不支持使用 rgba 模式实现透明度,可使用 IE 滤镜处理,如:
filter: progid:DXImageTransform.Microsoft.Gradient(startColorStr=#80000000,endColorStr=#80000000);
background: rgba(0, 0, 0, 0.5);
示例:
            #div3 {
                /*兼容IE,使用滤镜,0-100 */
                filter: alpha(opacity=50);
                background: blue;
                background: rgba(0,0,255,.5);
                height: 100px;
            }
效果:
代码:
linear-gradient
结果:
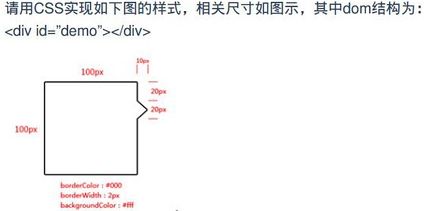
作业:
请完成如下效果,要求兼容IE8:
八、动画
前端可以使用javascript实现一些简单的动画,但是有很大局限;jQuery解决了部分问题,对于一些小的动画jQuery表示不错,但复杂的过渡效果也无能为力;CSS3中引入了2种动画效果表现不错,分别是过渡动画与帧动画。
8.1、过渡动画
过渡动画可简单理解为是从一个状态过渡到另一个状态间自动生成的动画效果,相对简单。
transition语法:
transition:
<' transition-property '>: 检索或设置对象中的参与过渡的属性
<' transition-duration '>: 检索或设置对象过渡的持续时间
<' transition-timing-function '>: 检索或设置对象中过渡的动画类型
<' transition-delay '>: 检索或设置对象延迟过渡的时间
示例:
DOCTYPE html>
<html>

    <head>
        <meta charset="utf-8">
        <title>动画title>
        <style>
            body {
                padding: 100px;
            }

            #img1 {
                /*所有过渡动画的时间都为1秒*/
                transition: all 1s;
            }

            #img1:hover {
                transform: rotate(360deg);
            }

            #img2 {
                /*当动画针对width时时间为0.5秒,高度为2秒*/
                transition: width 0.5s, height 2s ease-in;
            }

            #img2:hover {
                width: 100px;
                height: 50px;
            }
        style>
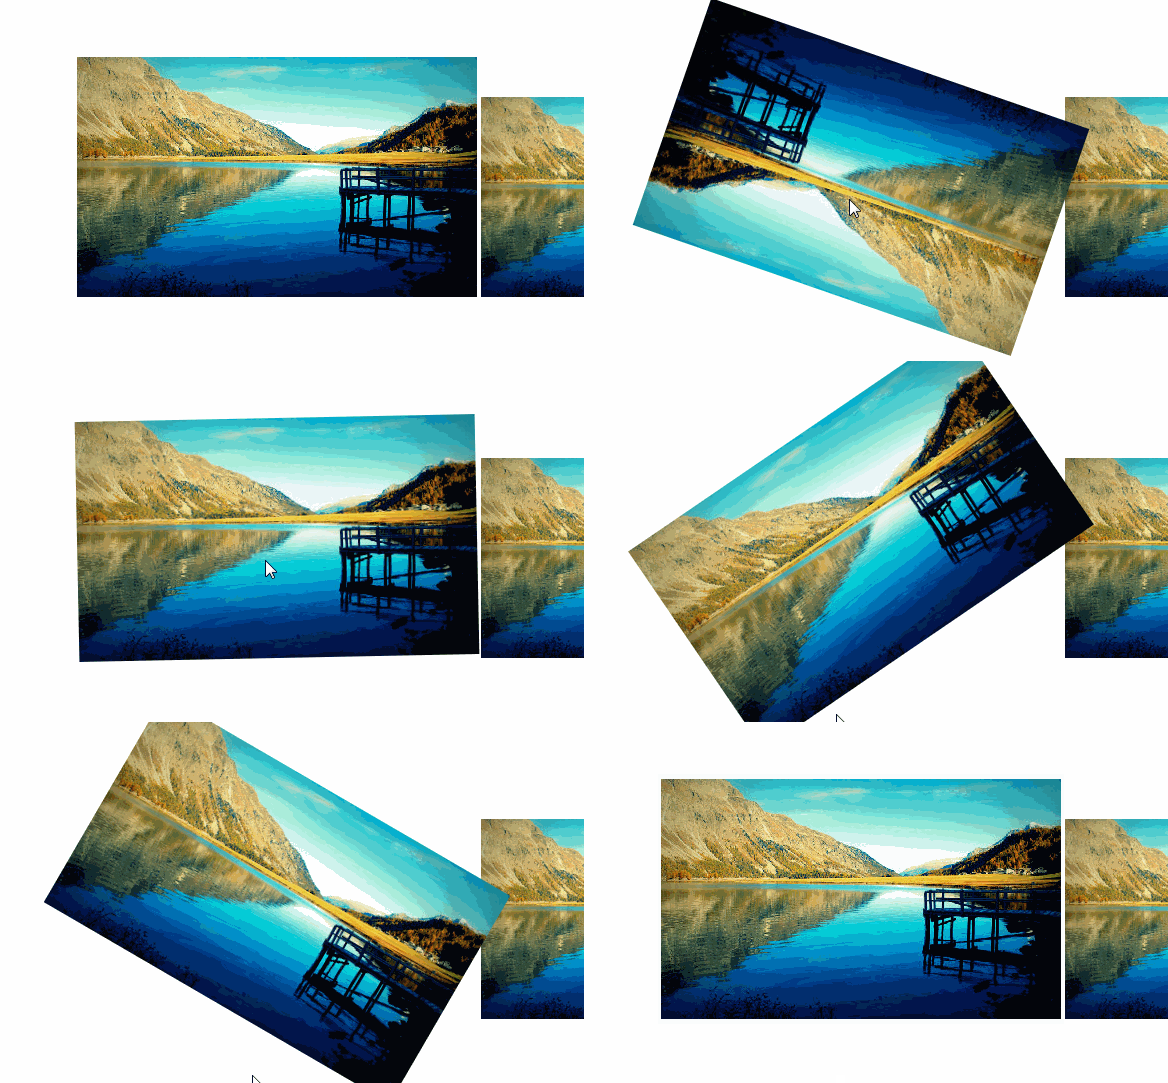
    head>

    <body>
        <img src="img/7.jpg" id="img1" />
        <img src="img/7.jpg" id="img2" width="300" height="200" />
    body>

html>
效果:
过度动画基本可以针对元素的种属性为尺寸、透明度、颜色等。
8.2、帧动画
也称为补间动画,过度动画中的效果是根据原始状态与目标状态生成的,如果需要控制中间过程则可以使用帧动画。
帧动画需要先定义再使用,使用@keyframes定义,animation调用定义好的动画。
@keyframes语法:
@keyframes
@keyframes testanimations {
    from { opacity: 1; }
    to { opacity: 0; }
}
animation语法:
animation:
animation-name : 检索或设置对象所应用的动画名称
animation-duration: 检索或设置对象动画的持续时间
animation-timing-function: 检索或设置对象动画的过渡类型
animation-delay: 检索或设置对象动画延迟的时间
animation-iteration-count '>: 检索或设置对象动画的循环次数
animation-direction: 检索或设置对象动画在循环中是否反向运动
animation-fill-mode: 检索或设置对象动画时间之外的状态
animation-play-state: 检索或设置对象动画的状态。w3c正考虑是否将该属性移除,因为动画的状态可以通过其它的方式实现,比如重设样式
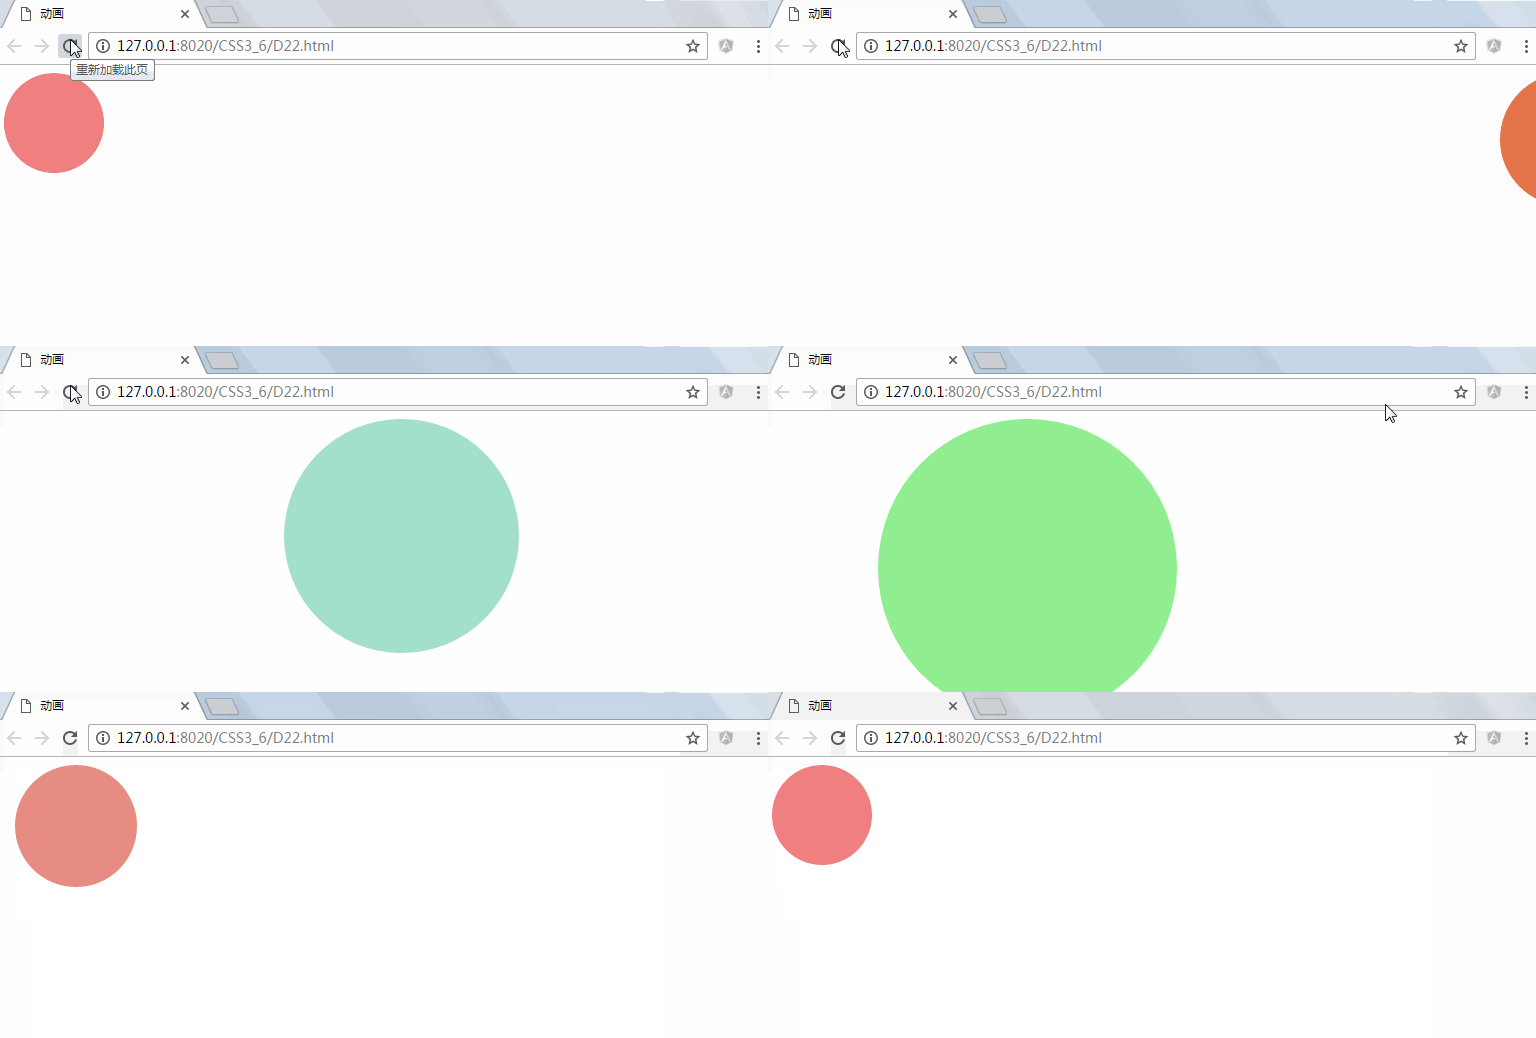
示例:
DOCTYPE html>
<html>

    <head>
        <meta charset="utf-8">
        <title>动画title>
        <style>
            /*定义动画 名称为animate1*/
            @keyframes animate1 {
                /*第一帧样式*/
                from {
                    margin-left: 100%;
                    background: orangered;
                }
                /*动画执行到30%时样式*/
                30% {
                    background: lightblue;
                    width: 200px;
                    height: 200px;
                    border-radius: 100px;
                }
                /*动画执行到60%时样式*/
                60% {
                    background: lightgreen;
                    width: 300px;
                    height: 300px;
                    border-radius: 150px;
                }
                /*结束时样式*/
                to {
                    margin-left: 0;
                }
            }
            #div1 {
                width: 100px;
                height: 100px;
                border-radius: 50px;
                background: lightcoral;
                /*调用定义的动画,infinite无限制执行,linear动画函数线性动画*/
                animation: animate1 2s infinite linear;
            }
        style>
    head>
    <body>
        <div id="div1">
        div>
    body>
html>
效果:
infinite表示动画一直执行,如果只想执行一次,可以删除该关键字。虽然多数动画使用CSS3可以完成,但是动画非常耗资源,特别是在移动端,不建议多用。更加复杂的动画可以使用Canvas。
练习与测试:
"UTF-8">
练习
"div1">
Hello World!
 "img/3.jpg" id="img1" width="300" height="300" />
"div2">
"div3">
九、示例下载
https://git.coding.net/zhangguo5/CSS301.git
https://github.com/zhangguo5/CSS3_6.git
十、视频
https://www.bilibili.com/video/av16530230/
十一、作业
11.1、请使用CSS3实现如下效果,注意左下与右下角有翘起,文字有发光
11.2、请完成一个弹出框与遮罩效果,要求兼容IE8
11.3、请使用CSS3完成如下动画效果


