Kubernetes pod部署httpd
*部署Master
启动顺序:
# systemctl start etcd
# systemctl start docker
# systemctl start kube-apiserver
# systemctl start kube-controller-manager
# systemctl start kube-scheduler
# systemctl start kubelet
# systemctl start kube-proxy
安装Docker
参考:https://blog.51cto.com/lizhenliang/2296100
https://blog.51cto.com/liuleis/2067977
1、如果以前安装过,先卸载旧版本:
#yum remove docker docker-common docker-selinux docker-engine

2、镜像仓库安装:
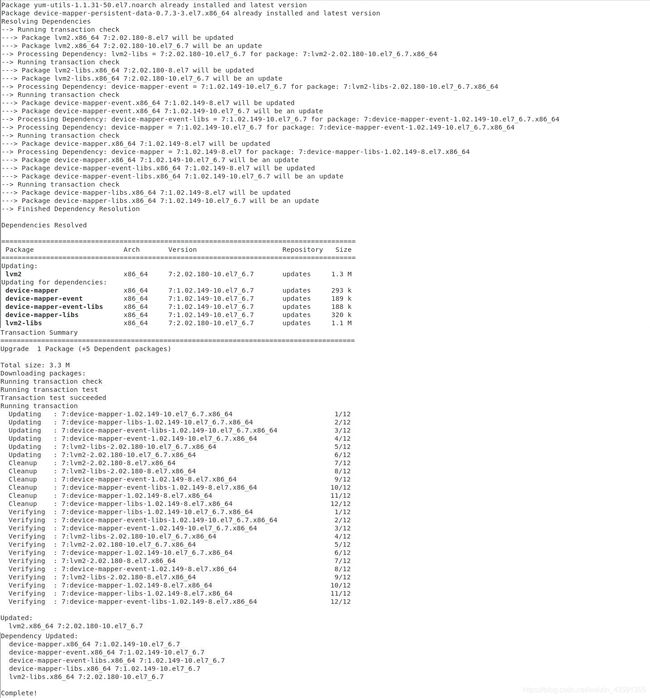
#yum install -y yum-utils device-mapper-persistent-data lvm2
//配置镜像源,这里用的阿里
#yum-config-manager --add-repo https://download.docker.com/linux/centos/docker-ce.repo
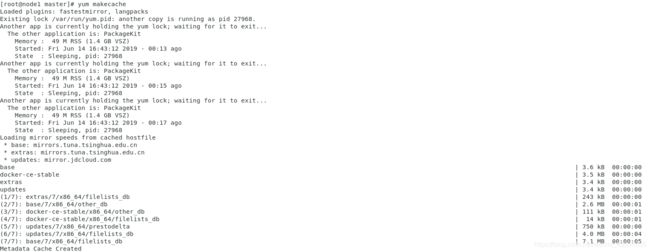
#yum makecache
![]()
3、指定版本安装:
查看版本:yum list docker-ce --showduplicates | sort -r
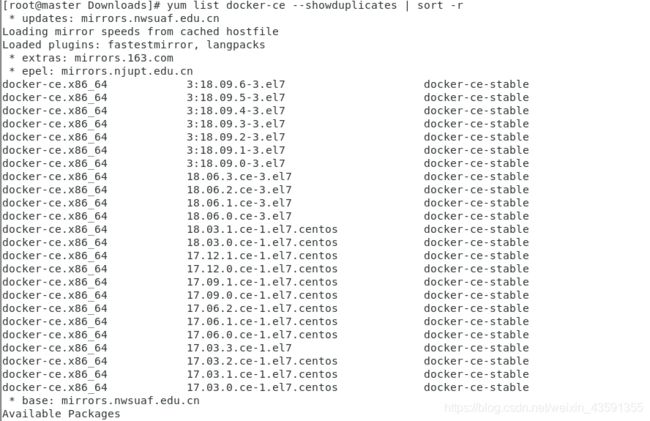
查看github里Kubernetes-1.14支持Docker-ce-18.06,所以决定安装18.06。

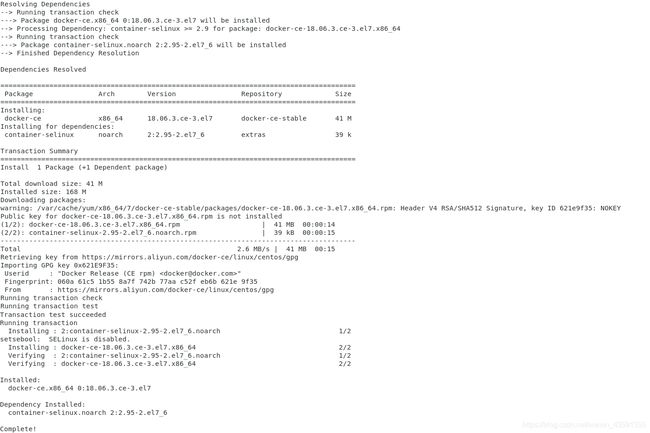
安装:#yum install -y docker-ce-18.06.3.ce
启动与验证:systemctl enable docker && systemctl start docker
![]()
查看运行状态:
#systemctl status docker

尝试一下:
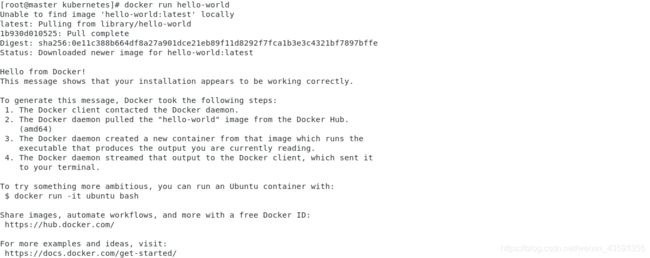
安装Kubernetes
1、安装Kubernetes-v1.14.3:
#yum install -y kubeadm-1.14.3 kubectl-1.14.3 kubelet-1.14.3


2、确保docker和kubelet的cgroup drive一样:
#docker info | grep -i cgroup //查看docker的cgroup drive
//查看kubelet的cgroup drive
#cat /etc/systemd/system/kubelet.service.d/10-kubeadm.conf
docker上如图:
![]()
但是居然没找到kubelet的文件,后来通过查看kubelet status发现文件在其它路径

重新查看文件:

参考:https://www.linuxidc.com/Linux/2018-01/150442.htm?hmsr=toutiao.io
修改配置文件,具体见下步。
3、启动kubelet:
#systemctl enable kubelet
直接start会失败:

【PENDING】修改配置文件:
Environment="KUBELET_KUBECONFIG_ARGS=--kubeconfig=/etc/kubernetes/kubelet.conf --require-kubeconfig=true"
Environment="KUBELET_SYSTEM_PODS_ARGS=--pod-manifest-path=/etc/kubernetes/manifests --allow-privileged=true"
Environment="KUBELET_NETWORK_ARGS=--network-plugin=cni --cni-conf-dir=/etc/cni/net.d --cni-bin-dir=/opt/cni/bin"
Environment="KUBELET_DNS_ARGS=--cluster-dns=10.96.0.10 --cluster-domain=cluster.local"
Environment="KUBELET_AUTHZ_ARGS=--authorization-mode=Webhook --client-ca-file=/etc/kubernetes/pki/ca.crt"
Environment="KUBELET_CGROUP_ARGS=--cgroup-driver=cgroupfs"
ExecStart=/usr/bin/kubelet $KUBELET_KUBECONFIG_ARGS $KUBELET_SYSTEM_PODS_ARGS $KUBELET_NETWORK_ARGS $KUBELET_DNS_ARGS $KUBELET_AUTHZ_ARGS $KUBELET_CGROUP_ARGS  $KUBELET_EXTRA_ARGS
拉Docker镜像
1、尝试是否可以直接google拉镜像:
#kubeadm config images pull//测试与 gcr.io的连接
查看需要的镜像:

2、拉取镜像
参考:https://blog.csdn.net/networken/article/details/84571373
https://my.oschina.net/Kanonpy/blog/3006129
由于不想自己搭+主机代理实现失败,所以通过阿里云/docker hub拉。考虑过主机下载winscp传到虚拟机上,但不知道需不需要证书配置+不会+怕弄错于是放弃。
截止文章时mirrorgooglecontainers上v1.15-beta2已经可以用了:
https://hub.docker.com/r/mirrorgooglecontainers/kube-apiserver/tags
写脚本统一安装:
#!/bin/bash
KUBE_VERSION=v1.14.3
KUBE_PAUSE_VERSION=3.1
ETCD_VERSION=3.3.10
KUBE_DASHBOARD_VERSION=v1.10.1
username=mirrorgooglecontainers
images=(
        kube-proxy-amd64:${KUBE_VERSION}
        kube-scheduler-amd64:${KUBE_VERSION}
        kube-controller-manager-amd64:${KUBE_VERSION}
        kube-apiserver-amd64:${KUBE_VERSION}
        pause:${KUBE_PAUSE_VERSION}
        etcd-amd64:${ETCD_VERSION}
        )

docker pull quay.io/coreos/flannel:v0.10.0-amd64
docker pull coredns/coredns:1.3.1
docker tag coredns/coredns:1.3.1 k8s.gcr.io/coredns:1.3.1
docker rmi coredns/coredns:1.3.1

for image in ${images[@]}
do
	NEW_IMAGE=`echo ${image}|awk '{gsub(/-amd64/,"",$0);print}'`
	echo ${NEW_IMAGE}
	docker pull ${username}/${image}
 	docker tag ${username}/${image} k8s.gcr.io/${NEW_IMAGE}
	docker rmi ${username}/${image} //删除
done

查看已安装镜像:
#docker images

附:①删除镜像指令:
docker rmi REPOSITORY:TAG
②kubernetes自身的组件版本要带上v。来自博主后来单独pull Dashboard的感悟。

Kubernetes初始化
1、根据Flannel的github,由于要配置网络插件Flannel,所以初始化时加入--pod-network-cidr=10.244.0.0/16。
2、初始化:
官方文档:https://kubernetes.io/docs/reference/setup-tools/kubeadm/kubeadm-init/
kubeadm init --kubernetes-version=1.14.3 --pod-network-cidr=10.244.0.0/16 --apiserver-advertise-address=192.168.148.xxx
成功报错:

解决方案:

reset后:

重新init:
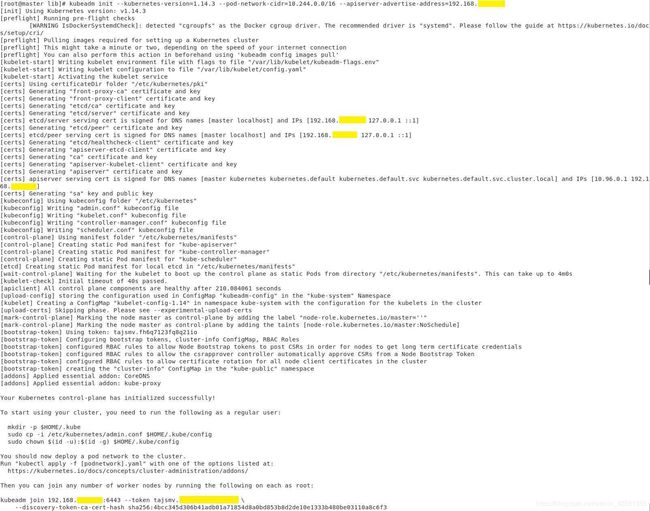
[root@master lib]# kubeadm init --kubernetes-version=1.14.3 --pod-network-cidr=10.244.0.0/16 --apiserver-advertise-address=192.168.xxx.xxx --token-ttl 0
[init] Using Kubernetes version: v1.14.3
[preflight] Running pre-flight checks
	[WARNING IsDockerSystemdCheck]: detected "cgroupfs" as the Docker cgroup driver. The recommended driver is "systemd". Please follow the guide at https://kubernetes.io/docs/setup/cri/
[preflight] Pulling images required for setting up a Kubernetes cluster
[preflight] This might take a minute or two, depending on the speed of your internet connection
[preflight] You can also perform this action in beforehand using 'kubeadm config images pull'
[kubelet-start] Writing kubelet environment file with flags to file "/var/lib/kubelet/kubeadm-flags.env"
[kubelet-start] Writing kubelet configuration to file "/var/lib/kubelet/config.yaml"
[kubelet-start] Activating the kubelet service
[certs] Using certificateDir folder "/etc/kubernetes/pki"
[certs] Generating "front-proxy-ca" certificate and key
[certs] Generating "front-proxy-client" certificate and key
[certs] Generating "etcd/ca" certificate and key
[certs] Generating "etcd/server" certificate and key
[certs] etcd/server serving cert is signed for DNS names [master localhost] and IPs [192.168.xxx.xxx 127.0.0.1 ::1]
[certs] Generating "etcd/peer" certificate and key
[certs] etcd/peer serving cert is signed for DNS names [master localhost] and IPs [192.168.xxx.xxx 127.0.0.1 ::1]
[certs] Generating "etcd/healthcheck-client" certificate and key
[certs] Generating "apiserver-etcd-client" certificate and key
[certs] Generating "ca" certificate and key
[certs] Generating "apiserver-kubelet-client" certificate and key
[certs] Generating "apiserver" certificate and key
[certs] apiserver serving cert is signed for DNS names [master kubernetes kubernetes.default kubernetes.default.svc kubernetes.default.svc.cluster.local] and IPs [10.96.0.1 192.168.xxx.xxx]
[certs] Generating "sa" key and public key
[kubeconfig] Using kubeconfig folder "/etc/kubernetes"
[kubeconfig] Writing "admin.conf" kubeconfig file
[kubeconfig] Writing "kubelet.conf" kubeconfig file
[kubeconfig] Writing "controller-manager.conf" kubeconfig file
[kubeconfig] Writing "scheduler.conf" kubeconfig file
[control-plane] Using manifest folder "/etc/kubernetes/manifests"
[control-plane] Creating static Pod manifest for "kube-apiserver"
[control-plane] Creating static Pod manifest for "kube-controller-manager"
[control-plane] Creating static Pod manifest for "kube-scheduler"
[etcd] Creating static Pod manifest for local etcd in "/etc/kubernetes/manifests"
[wait-control-plane] Waiting for the kubelet to boot up the control plane as static Pods from directory "/etc/kubernetes/manifests". This can take up to 4m0s
[kubelet-check] Initial timeout of 40s passed.
[apiclient] All control plane components are healthy after 210.084061 seconds
[upload-config] storing the configuration used in ConfigMap "kubeadm-config" in the "kube-system" Namespace
[kubelet] Creating a ConfigMap "kubelet-config-1.14" in namespace kube-system with the configuration for the kubelets in the cluster
[upload-certs] Skipping phase. Please see --experimental-upload-certs
[mark-control-plane] Marking the node master as control-plane by adding the label "node-role.kubernetes.io/master=''"
[mark-control-plane] Marking the node master as control-plane by adding the taints [node-role.kubernetes.io/master:NoSchedule]
[bootstrap-token] Using token: tajsmv.fh6q7123fq8q21io
[bootstrap-token] Configuring bootstrap tokens, cluster-info ConfigMap, RBAC Roles
[bootstrap-token] configured RBAC rules to allow Node Bootstrap tokens to post CSRs in order for nodes to get long term certificate credentials
[bootstrap-token] configured RBAC rules to allow the csrapprover controller automatically approve CSRs from a Node Bootstrap Token
[bootstrap-token] configured RBAC rules to allow certificate rotation for all node client certificates in the cluster
[bootstrap-token] creating the "cluster-info" ConfigMap in the "kube-public" namespace
[addons] Applied essential addon: CoreDNS
[addons] Applied essential addon: kube-proxy

Your Kubernetes control-plane has initialized successfully!

To start using your cluster, you need to run the following as a regular user:

  mkdir -p $HOME/.kube
  sudo cp -i /etc/kubernetes/admin.conf $HOME/.kube/config
  sudo chown $(id -u):$(id -g) $HOME/.kube/config

You should now deploy a pod network to the cluster.
Run "kubectl apply -f [podnetwork].yaml" with one of the options listed at:
  https://kubernetes.io/docs/concepts/cluster-administration/addons/

Then you can join any number of worker nodes by running the following on each as root:

kubeadm join 192.168.xxx.xxx:6443 --token tajsmv.xxxxxxxxxxxxxx \
    --discovery-token-ca-cert-hash sha256:4bcc345d306b41adb01a71854d8a0bd853b8d2de10e1333b480be03110a8c6f3
终于成功。
3、部署kubectl工作台,配置kubectl认证信息:
//对于非root用户
$mkdir -p $HOME/.kube
$sudo cp -i /etc/kubernetes/admin.conf $HOME/.kube/config
$sudo chown $(id -u):$(id -g) $HOME/.kube/config

//对于root用户
#export KUBECONFIG=/etc/kubernetes/admin.conf
//也可以直接放到~/.bash_profile
//echo "export KUBECONFIG=/etc/kubernetes/admin.conf" >> ~/.bash_profile
查看当前节点:#kubectl get nodes
![]()
节点NotReady。

DNS未启动。
原因:未安装flannel。
4、安装flannel
联动:https://blog.csdn.net/weixin_43591355/article/details/91945577
根据github:https://github.com/coreos/flannel
#kubectl apply -f https://raw.githubusercontent.com/coreos/flannel/v0.10.0/Documentation/kube-flannel.yml //注意一定要跟自己之前下的版本相符!!
![]()
安装完后查看:
![]()

#kubectl get pods -n kube-system

#kubectl get pods --all-namespaces

4、node加入master工作节点。
[root@node1 ~]#kubeadm join .....
联动:https://blog.csdn.net/weixin_43591355/article/details/91984610
5、
#kubectl describe node master //描述master信息
#kubectl cluster-info//查看集群信息,包括IP地址、coredns
#kubectl version 版本信息 client版本 server版本
6、配置主节点是否参与调度:
//master运行pod
#kubectl taint nodes master.k8s node-role.kubernetes.io/master-

//master不运行pod
#kubectl taint nodes master.k8s node-role.kubernetes.io/master=:NoSchedule
7、安装Dashboard
移步:https://blog.csdn.net/weixin_43591355/article/details/92003769
【END】
【后续涨知识】http://www.pianshen.com/article/9578189986/


