Ionic4+Angular8实现App主题样式切换
Ionic4+Angular8实现App主题样式切换
- 背景
- 前置条件
- 正文部分
- 实现效果
- 实现过程
- 1、创建主题样式文件
- 2、修改src/theme/variables.scss,导入刚刚创建的3个样式文件
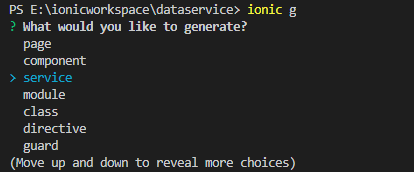
- 3、通过ionic g脚手架命令创建一个service
- 4、通过观察者模式完善SettingsService
- 5、修改src/app/app.component.ts代码,在应用启动的时候订阅SettingsService的观察者对象
- 6、修改src/app/app.component.html,使用动态样式
- 7、通过ionic g脚手架命令增加一个page实现样式切换的页面
- 8、完善新建的主题切面页面的功能实现主题样式切换
- 9、结束说明
背景
一款App除了本身功能的需求要完成以外,为了增强客户体验度满足更加广泛的客户对界面的体验需求,往往需要实现根据客户的喜好定制应用的界面外观,而主题样式切换可以满足80%的基本需求,因此主题样式切换功能成了App的一个基础功能。本文就讲述以最新的Ionic4+Angular8的环境下实现主题样式切换的实现思路。
前置条件
在学习本文之前假设您已经在您的电脑上搭建好了Ionic4和Angular8的开发环境,并且已经创建了一个应用,比如应用的名称为dataservice。这部分不再重复,不太熟悉的可以参考我之前的博文
ionic5+angular8混合移动开发(一)——环境搭建
正文部分
实现效果
本文主要是讲实现,具体样式的美观可以后期自己完善。先看实现的效果图如下三个主题的切换效果。

途中效果实现点击相应主题的按钮实现把应用中所有按钮的背景色进行修改。
实现过程
1、创建主题样式文件
找到src/theme目录新建3个样式文件,分别为theme.primary.scss、theme.tertiary.scss、theme.success.scss,如下图:

样式代码如下
theme.primary.scss
.primary-theme {
    ion-button {
        --background: #3880ff;
    }
}
theme.tertiary.scss
.tertiary-theme {
    ion-button {
        --background: #7044ff;
    }
}
theme.success.scss
.success-theme {
    ion-button {
        --background: #10dc60;
    }
}
2、修改src/theme/variables.scss,导入刚刚创建的3个样式文件
找到src/theme/variables.scss,在代码末尾导入,导入的代码如下
@import "theme.primary";
@import "theme.success";
@import "theme.tertiary";
导入后的src/theme/variables.scss的代码如下:
// Ionic Variables and Theming. For more info, please see:
// http://ionicframework.com/docs/theming/

/** Ionic CSS Variables **/
:root {
  /** primary **/
  --ion-color-primary: #3880ff;
  --ion-color-primary-rgb: 56, 128, 255;
  --ion-color-primary-contrast: #ffffff;
  --ion-color-primary-contrast-rgb: 255, 255, 255;
  --ion-color-primary-shade: #3171e0;
  --ion-color-primary-tint: #4c8dff;

  /** secondary **/
  --ion-color-secondary: #0cd1e8;
  --ion-color-secondary-rgb: 12, 209, 232;
  --ion-color-secondary-contrast: #ffffff;
  --ion-color-secondary-contrast-rgb: 255, 255, 255;
  --ion-color-secondary-shade: #0bb8cc;
  --ion-color-secondary-tint: #24d6ea;

  /** tertiary **/
  --ion-color-tertiary: #7044ff;
  --ion-color-tertiary-rgb: 112, 68, 255;
  --ion-color-tertiary-contrast: #ffffff;
  --ion-color-tertiary-contrast-rgb: 255, 255, 255;
  --ion-color-tertiary-shade: #633ce0;
  --ion-color-tertiary-tint: #7e57ff;

  /** success **/
  --ion-color-success: #10dc60;
  --ion-color-success-rgb: 16, 220, 96;
  --ion-color-success-contrast: #ffffff;
  --ion-color-success-contrast-rgb: 255, 255, 255;
  --ion-color-success-shade: #0ec254;
  --ion-color-success-tint: #28e070;

  /** warning **/
  --ion-color-warning: #ffce00;
  --ion-color-warning-rgb: 255, 206, 0;
  --ion-color-warning-contrast: #ffffff;
  --ion-color-warning-contrast-rgb: 255, 255, 255;
  --ion-color-warning-shade: #e0b500;
  --ion-color-warning-tint: #ffd31a;

  /** danger **/
  --ion-color-danger: #f04141;
  --ion-color-danger-rgb: 245, 61, 61;
  --ion-color-danger-contrast: #ffffff;
  --ion-color-danger-contrast-rgb: 255, 255, 255;
  --ion-color-danger-shade: #d33939;
  --ion-color-danger-tint: #f25454;

  /** dark **/
  --ion-color-dark: #222428;
  --ion-color-dark-rgb: 34, 34, 34;
  --ion-color-dark-contrast: #ffffff;
  --ion-color-dark-contrast-rgb: 255, 255, 255;
  --ion-color-dark-shade: #1e2023;
  --ion-color-dark-tint: #383a3e;

  /** medium **/
  --ion-color-medium: #989aa2;
  --ion-color-medium-rgb: 152, 154, 162;
  --ion-color-medium-contrast: #ffffff;
  --ion-color-medium-contrast-rgb: 255, 255, 255;
  --ion-color-medium-shade: #86888f;
  --ion-color-medium-tint: #a2a4ab;

  /** light **/
  --ion-color-light: #f4f5f8;
  --ion-color-light-rgb: 244, 244, 244;
  --ion-color-light-contrast: #000000;
  --ion-color-light-contrast-rgb: 0, 0, 0;
  --ion-color-light-shade: #d7d8da;
  --ion-color-light-tint: #f5f6f9;
}

@import "theme.primary";
@import "theme.success";
@import "theme.tertiary";
3、通过ionic g脚手架命令创建一个service
在vscode中新建一个控制台终端,输入ionic g,如下图:

在what would you like to generate?后面选择service,回车如下图:

在Name/path of service:后面输入wongoing/settings,其中wongoing是路径名称,settings是service名称,生成后的完整路径是src/app/wongoing,回车后会在src/app/wongoing目录下生成2个文件settings.service.ts和settings.service.spec.ts,其中settings.service.spec.ts文件是单元测试文件,可以把它删除掉。刚刚成圣的settings.service.ts文件内容如下:
import { Injectable } from '@angular/core';

@Injectable({
  providedIn: 'root'
})
export class SettingsService {

  constructor() { }
}
4、通过观察者模式完善SettingsService
下面我们通过观察者模式完善一下src/app/wongoing/settings.service.ts的代码,方便后面的调用,完善后的代码如下:
import { Injectable } from '@angular/core';
import { BehaviorSubject } from 'rxjs';

@Injectable({
  providedIn: 'root'
})
export class SettingsService {
  private theme: BehaviorSubject<string>;

  /**
   * 构造方法,设置默认主题
   */
  constructor() {
    this.theme = new BehaviorSubject('primary-theme');
  }

  /**
   * 设置主题的方法
   * @param val 要设置的新主题
   */
  public setActiveTheme(val) {
    this.theme.next(val);
  }

  /**
   * 获取当前主题的观察者对象
   */
  public getActiveTheme() {
    return this.theme.asObservable();
  }
}
5、修改src/app/app.component.ts代码,在应用启动的时候订阅SettingsService的观察者对象
找到scr/app/app.component.ts,完善代码实现在app启动的时候订阅SettingsService的观察者对象,当主题更改时,把最新的主题值保存到成员变量selectedTheme中,代码如下:
import { Component } from '@angular/core';

import { Platform } from '@ionic/angular';
import { SplashScreen } from '@ionic-native/splash-screen/ngx';
import { StatusBar } from '@ionic-native/status-bar/ngx';
import { SettingsService } from './wongoing/settings.service';

@Component({
  selector: 'app-root',
  templateUrl: 'app.component.html',
  styleUrls: ['app.component.scss']
})
export class AppComponent {
  private selectedTheme: string;  // 保存当前主题样式名称
  constructor(
    private platform: Platform,
    private splashScreen: SplashScreen,
    private statusBar: StatusBar,
    private settings: SettingsService
  ) {
    this.initializeApp();
  }

  /**
   * 初始化应用方法
   */
  initializeApp() {
    this.platform.ready().then(() => {
      this.statusBar.styleDefault();
      this.splashScreen.hide();
      // 订阅可观察者对象
      this.settings.getActiveTheme().subscribe(val => {
        console.log('theme = ' + val);
        const plats: any = this.platform.platforms();
        if (plats.length > 0) {
          console.log('platform = ' + plats[0]);
          // 判断当前平台是android平台核实ios平台
          if (plats[0] === 'android') {
            this.selectedTheme = val + ' md ion-page hydrated';
          } else {
            this.selectedTheme = val + ' ios ion-page hydrated';
          }
        } else {
          this.selectedTheme = val;
        }
        console.log('theme = ' + this.selectedTheme);
      });
    });
  }
}
6、修改src/app/app.component.html,使用动态样式
找到src/app/app.component.html,在ion-app元素后面添加[class]="selectedTheme"代码,完整代码如下:
<ion-app [class]="selectedTheme">
  <ion-router-outlet>ion-router-outlet>
ion-app>
这样ion-app的class就关联上了app.component.ts中成员变量selectedTheme的值了。
7、通过ionic g脚手架命令增加一个page实现样式切换的页面
在vscode的控制台终端中,输入ionic g:
在what would you like to generate?后面选择page,回车后输入路径和页面名称,这里我们生成的页面路径是src/app/me/commonset/themeset,在这个目录下生成了5个文件themeset.moudle.ts、themeset.page.html
、themeset.page.scss、themeset.page.ts、themeset.page.spec.ts,其中themeset.page.spec.ts是单元测试文件,可以删除。
8、完善新建的主题切面页面的功能实现主题样式切换
修改themeset.page.ts,注入SettingsService,并定义一个主题切换的方法以便在themeset.page.html页面中调用。修改后的themeset.page.ts代码如下:
import { Component, OnInit } from '@angular/core';
import { SettingsService } from '../../.././wongoing/settings.service';
import { Router } from '@angular/router';

@Component({
  selector: 'app-themeset',
  templateUrl: './themeset.page.html',
  styleUrls: ['./themeset.page.scss'],
})
export class ThemesetPage implements OnInit {
  constructor(private router: Router, private settings: SettingsService) {

  }

  ngOnInit() {

  }

  /**
   * 主题样式切换方法
   * @param theme 要切换的目标主题
   */
  public changeTheme(theme: any) {
    this.settings.setActiveTheme(theme);
  }
}
修改themeset.page.html内容,增加3个按钮并调用上面在themeset.page.ts中定义的changeTheme方法,修改后的themeset.page.html代码如下:
<ion-header>
  <ion-toolbar>
    <ion-buttons slot="start">
      <ion-back-button text="{{ 'generic_goback' | translate }}">ion-back-button>
    ion-buttons>
    <ion-title>{{ 'meComSet_theme' | translate }}ion-title>
  ion-toolbar>
ion-header>

<ion-content>
  <section class="full-width">
    {{ 'meThemeSet_default_theme' | translate }}ion-button>
  section>
  <section class="full-width">
      {{ 'meThemeSet_tertiary_theme' | translate }}ion-button>
  section>
  <section class="full-width">
    {{ 'meThemeSet_success_theme' | translate }}ion-button>
section>
ion-content>
代码中带transalte的是国际化的部分,如果有不明白的可以参考我的另一篇博客。
Ionic4国际化实战
9、结束说明
至此我们就把Ionic4中主题样式切换的实现过程讲完了,这是就可以通过ionic serve命令运行看看效果了。
其中应用启动的代码中app.component.ts订阅观察者对象的代码中根据样式变化更改成员变量的部分有一块判断当前运行平台的代码:
// 判断当前平台是android平台核实ios平台
if (plats[0] === 'android') {
  this.selectedTheme = val + ' md ion-page hydrated';
} else {
  this.selectedTheme = val + ' ios ion-page hydrated';
}
在设置的主题样式(primary-theme|tertiary-theme|success-theme)后增加[ md ion-page hydrated]或者[ ios ion-page hydrated],这块使用浏览器F12进行调试查看的时候需要的不然看不到相应的效果,会变为空白页,因此这块要注意。好了本文就讲到这里了,希望对大家有所帮助~