spring专题---第三部分MVC---上传下载机制

本篇内容总结如下:
前言
单文件上传
多文件上传
下载
总结
分享与交流
前言
上传文件在我们的项目开发中经常用到,spring MVC为我们提供了一套很好的上传下载机制,有效的简化了开发步骤。
单文件上传
(1)在pom.xml中引入fileupload组件依赖。它是Apache fileupload组件,spring MVC对其进行了封装,从而使我们应用的得心应手。
>
>commons-fileupload >
>commons-fileupload >
>1.2.1 >
>
>
>commons-io >
>commons-io >
>1.3.2 >
>
(2)在pom.xml中引入JSTL相关依赖,因为下边JSP要用JSTL表达式作判断。
>
>jstl >
>jstl >
>1.2 >
>
>
>taglibs >
>standard >
>1.1.2 >
>
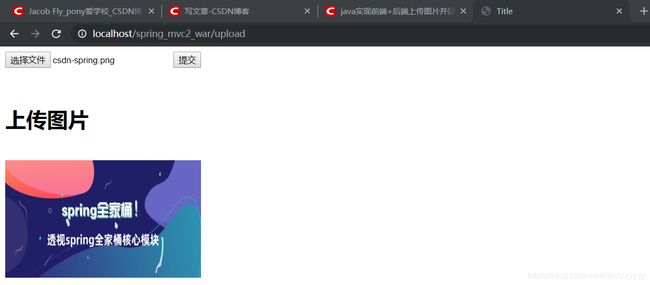
(3)创建JSP页面,负责前端用户交互。
<body>
<form action="upload" method="post" enctype="multipart/form-data">
    <input type="file" name="img">
    <input type="submit" value="提交">
</form><br/>
<c:if test="${filePath!=null}">
    <h1>上传图片</h1><br/>
    <img  src="${filePath}">
</c:if>
</body>
•input的type设置为file
•form表单的method设置为post,不能用get请求,因为get请求只会将文件名传至后台。
•form表单的enctype设置为multipart/form-data,表示以二进制的形式传输数据。
•${filePath},EL表达式,filePath是指后台返回的值,该值表示文件在后台的位置,前台以此位置显示该文件内容。
(4)完成业务方法,接收前台发过来的文件,并完成上传操作。我们使用MultipartFile对象作为参数。
@Controller
public class upload {

    @RequestMapping(value = "/upload",method = RequestMethod.POST)//method一定要设置为POST
    public String upload(@RequestParam(value = "img")MultipartFile img, HttpServletRequest request)throws Exception{
        if(img.getSize()>0){//判断是否有文件传过来
//            String path=request.getSession().getServletContext().getRealPath("file");

            String path="E:\\idea\\day_project\\spring_mvc2\\src\\main\\webapp\\file";//设置文件上传后保存的位置
            String fileName=img.getOriginalFilename();//获得上传的文件名
            File file=new File(path,fileName);
            img.transferTo(file);
            request.setAttribute("filePath","file/"+fileName);//file+文件名保存在域中,前台通过它找到文件位置
            return "fileupload";
        }
        return "error";
    }
}
(5)测试

多文件上传
多文件上传在我们的项目开发中也经常用的到,有的时候需要用户上传多个文件,我们可以参考单文件上传案例,并结合集合的思想写一个多文件上传的案例。
(1)pom.xml中所需的依赖就不再说明了,可以参考上面案例。
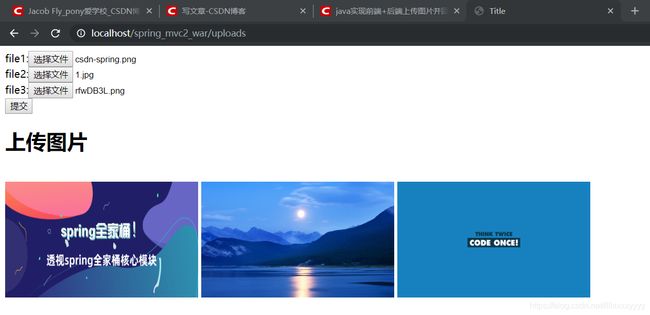
(2)创建JSP页面,实现与用户交互。
<body>
<form action="uploads" method="post" enctype="multipart/form-data">
    file1:<input type="file" name="imgs"><br/>
    file2:<input type="file" name="imgs"><br/>
    file3:<input type="file" name="imgs"><br/>
    <input type="submit" value="提交">
</form>
<c:if test="${filePaths!=null}">
<h1>上传图片</h1><br/>
<c:forEach items="${filePaths}" var="filePath" >
<img  width="300px" height="180px" src="${filePath}">
    </c:forEach>
</c:if>
</body>
(3)完成业务方法,实现文件上传。
@Controller
public class upload {

    @RequestMapping(value = "/uploads",method = RequestMethod.POST)//method一定要设置为POST
    public String uploads(@RequestParam(value = "imgs")MultipartFile[] imgs, HttpServletRequest request)throws Exception{
        List<String> filePaths=new ArrayList<String>();
        for(MultipartFile img:imgs){
            if(img.getSize()>0){//判断是否有文件传过来

                String path="E:\\idea\\day_project\\spring_mvc2\\src\\main\\webapp\\file";//设置文件上传后保存的位置
                String fileName=img.getOriginalFilename();//获得上传的文件名
                File file=new File(path,fileName);
                filePaths.add("file/"+fileName);
                img.transferTo(file);
            }
        }
        request.setAttribute("filePaths",filePaths);//前台通过它找到文件位置
        return "fileupload";
    }
}
(4)测试
下载
项目中,文件上传和文件下载通常是共存的,我们在开发中不仅要完成上传功能,还要实现下载功能,实现后台文件资源传至前台。
(1)在JSP页面中实现使用超链接,下载上边案例上传的图片。
<a href="download?fileName=1.jpg">下载图片</a>
(2)完成业务方法,实现文件下载。
@Controller
public class upload {

    @RequestMapping("/download")
    public void downloadFile(String fileName, HttpServletRequest request, HttpServletResponse response){
        if (fileName!=null){
            String realPath=request.getServletContext().getRealPath("file/");
            File file=new File(realPath,fileName);
            OutputStream out=null;
            if(file.exists()){
                response.setHeader("Content-Disposition","attachment;filename="+fileName);
                try{
                    out=response.getOutputStream();
                    out.write(FileUtils.readFileToByteArray(file));
                    out.flush();
                }catch(IOException e){
                    e.printStackTrace();
                }finally {
                    if(out!=null){
                        try{
                            out.close();
                        }catch (IOException e){
                            e.printStackTrace();
                        }
                    }
                }

            }
        }
    }
}
(3)测试

总结
spring MVC对于文件的上传和下载提供了很好的支持,文件上传和下载底层都是通过IO流完成的,上传就是将客户端的资源通过IO流写入服务端,下载则是将服务端资源通过IO流写入客户端。
分享与交流
以上是我个人学习记录总结,如果总结的不到位,还请大佬们不吝赐教。
如果你在写项目的时候,遇到一些不寻常的问题,也可以关注我的博客园,上边会发布一些我在写项目中遇到的各种问题以及解决方式。