Fastdfs 踩坑学习!!
由于业务需求,研究学习,学习一下fastdfs,欢迎各位大佬指正!!
fastDFS介绍:
fastDFS 是以C语言开发的一项开源轻量级分布式文件系统,他主要对文件进行管理,能解决大容量存储和负载均衡的问题,适合以文件 为载体的在线服务,例如图片,视频网站等。
主要的功能:
文件存储
文件同步
文件访问(文件上传/下载)
fastdfs 有两个角色:
跟踪器(tracker):调度工作和负载均衡的作用。
存储节点(storage):只要负责完成文件管理的所有功能,存储、同步以及提供存取接口。还对文件的属性进行管理(matedata),用键值对方式表示。
同时跟踪器和存储节点可以有一台或多台服务器构成,也就是集群,跟踪器和存储节点都可以随时增加或者下线,不会影响线上业务,跟踪器中的所有服务器都是对等的,没有主从之分,可以根据服务器压力情况随时进行调整。
fastdfs 架构图(自己画的 不是很好看)
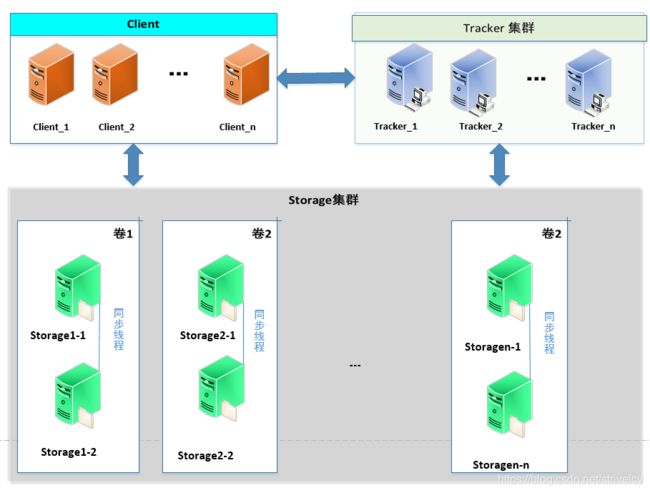
概述:
FastDFS 架构主要包括 tracker 和 storage。
tracker(跟踪器或者调度):负载均衡和调度工作,client上传数据时根据策略查找storage。可以实现集群,每个节点的地位都是等同的
storage(存储服务器): client上传的数据最终全部保存在storage上,而storage利用操作系统的文件系统管理文件。storage可以分为多个组,每个组保存的文件不是相同的,而每个组可以有多个成员,组内成员保存的信息是一致的。组成员的地位一样,无主从之分。
上传和下载流程
上传
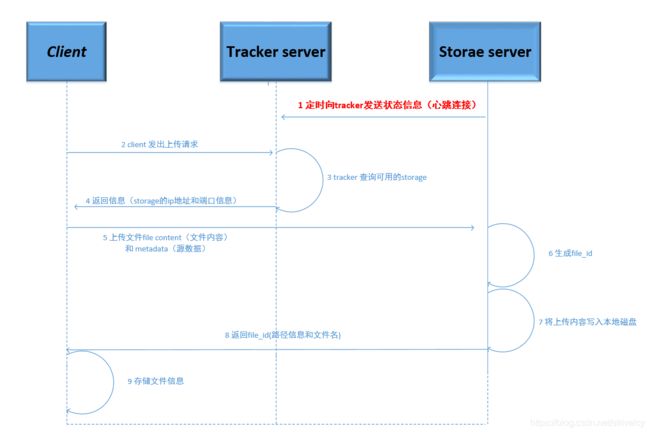
上传流程:
1、 storage 会定时想tracker 发送状态信息
2、当client 发出上传请求,tracker会查询可用的storage,并且返回给client storage的ip 和端口信息
3、client接收到信息后,直接通过IP和端口上传数据到storage server上。
4、storage接收到数据后,先生成file_id ,然后写入到本地磁盘中。
5、storage完成后会返回给client file_id信息
6、client 接受返回信息后保存file_id信息

下载流程:
1、storage 会定时想tracker 发送状态信息
2、当client 发出下载请求,tracker会查询可用的storage,并且返回给client storage的ip 和端口信息
3、client接收到信息后,发送file_id信息给storage
4、storage 通过client提供的file_id 查找文件
5、storage查找到文件后,返回给client
安装部署
系统: centos7
软件要求:nginx libfastcommon_v1.01.tar.gz FastDFS_v5.01.tar.gz
下载连接:
libfastcommon: https://sourceforge.net/projects/libfastcommon/files/latest/download
fastdfs:https://sourceforge.net/projects/fastdfs/files/FastDFS%20Server%20Source%20Code/FastDFS%20Server%20with%20PHP%20Extension%20Source%20Code%20V5.08/FastDFS_v5.08.tar.gz/download
安装依赖:
yum -y install gcc-c++ libevent zlib zlib-devel pcre pcre-devel gcc gcc-c++ openssl openssl-devel libevent libevent-devel perl unzip net-tools wget
安装:libfastcommon
tar -zxvf libfastcommon_v1.01.tar.gz
解压后的文件
![]()
编译:
./make.sh

安装:
./make.sh install
这里注意一下,有的文章上要把 /usr/lib64/libfastcommon.so 链接或者拷贝到/usr/lib/目录下 ,这里并没与拷贝和链接,因为安装完成后/usr/lib 已经存在
libfastcommon.so 文件。详见下图
![]()
安装 FastDFS
解压:
tar -zxvf FastDFS_v5.01.tar.gz```  ```./make.sh
./make.sh install
编译报错:

解决方法一: 由于fastdfs 版本太高了(用的5.08) 降低版本(5.01)。
解决方法二:百度还有一种说法是 ,需要下载:libfastcommon-master.zip包,libfastcommon_v1.04.tar.gz 和libfastcommon_v1.01.tar.gz 之后,在编译安装完后,再去FastDFS目录中编译安装会报错,报缺少文件。(这种方法没有试验过,如果需要自行实验。)
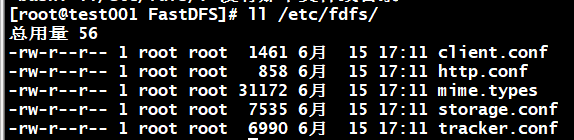
有以下几个文件说明安装成功
**fasdfs整合nginx **
需要fastdfs-nginx-module 模块,所以我们要在nginx添加此模块
安装nginx (我已经安装了nginx 就不介绍编译安装,直接动态添加fastdfs-nginx-module 模块)
先备份 nginx 程序文件
cp /data/nginx/sbin ./nginx.bak
查看nginx 所安装的模块:
./nginx -V

进入最原始nginx解压目录:
cd /opt/packages/nginx_install/nginx-1.14.1
下面内容要注意:百度所查nginx 动态编译 是 ./configure --add-module=/home/yuqing/fastdfs-nginx-module/src 只添加了这一个模块 ,但是编译完成后并没有添加成功。这里一定要把以前安装的模块再次全部编译一下。这是个坑。
./configure --prefix=/data/nginx --sbin-path=/data/nginx/sbin/nginx --modules-path=/data/nginx/modules --conf-path=/data/nginx/conf/nginx.conf --error-log-path=/data/nginx/logs/error.log --pid-path=/data/nginx/run/nginx.pid --lock-path=/data/nginx/lock/nginx.lock --user=nginx --group=nginx --with-select_module --with-poll_module --with-threads --with-file-aio --with-http_ssl_module --with-http_v2_module --with-http_realip_module --with-http_addition_module --with-http_xslt_module --with-http_xslt_module=dynamic --with-http_image_filter_module --with-http_image_filter_module=dynamic --with-http_sub_module --with-http_dav_module --with-http_flv_module --with-http_mp4_module --with-http_gunzip_module --with-http_gzip_static_module --with-http_auth_request_module --with-http_random_index_module --with-http_secure_link_module --with-http_degradation_module --with-http_slice_module --with-http_stub_status_module --http-log-path=/data/nginx/logs/access.log --http-client-body-temp-path=/data/nginx/client-body --http-proxy-temp-path=/data/nginx/proxy --http-fastcgi-temp-path=/data/nginx/cgi/fastcgi --http-uwsgi-temp-path=/data/nginx/cgi/uwsgi --http-scgi-temp-path=/data/nginx/cgi/scgi --with-mail --with-mail=dynamic --with-mail_ssl_module --without-mail_pop3_module --without-mail_imap_module --without-mail_smtp_module --with-stream --with-stream=dynamic --with-stream_ssl_module --with-stream_realip_module --with-stream_ssl_preread_module --with-cpp_test_module --with-compat --with-debug --add-module=/opt/packages/fastdfs-nginx-module/src
make
无报错后。继续。 注意只执行make,如果执行了make install nginx就重新安装了
停止nginx
/etc/init.d/nginx stop
将新编译的nginx程序文件拷贝至安装目录:
cp /opt/packages/nginx_install/nginx-1.14.1/objs /data/nginx/sbin/nginx
启动nginx并查看安装的模块是否成功

已经存在 说明安装成功!!!
我们创建一个 fastdfs目录 用于存放数据和日志
修改配置文件;
把扩展模块的配置文件拷贝到/etc/fdfs 目录下
cp mod_fastdfs.conf /etc/fdfs/
vim tracker.conf
base_path=/opt/fastdfs/tracker
vim storage.conf store_path0=/opt/fastdfs/storage tracker_server=192.168.100.201:22122 这里是tracker服务所在的服务器ip、 base_path=/opt/fastdfs/storage
vim mod_fastdfs.conf base_path=/opt/fastdfs/storage store_path0=/opt/fastdfs/storage tracker_server=192.168.100.201:22122 url_have_group_name = true
vim client.conf base_path=/opt/fastdfs/storage tracker_server=192.168.100.201:22122
配置nginx 添加一下规则
vim nginx.conf location /group1/M00 { root /opt/fastdfs/storage/data; ngx_fastdfs_module; }
配置完成!!
启动 tracker 和 storage
fdfs_trackerd /etc/fdfs/tracker.conf start fdfs_storaged /etc/fdfs/storage.conf start
重启nginx
测试:
以下边图片为例

上传
fdfs_test /etc/fdfs/client.conf upload /opt/packages/bfcd4ae866391daaa8dbc053bde28a294c0565e9.jpg 后面的路径是你的图片路径

返回以上结果,访问图片中的url
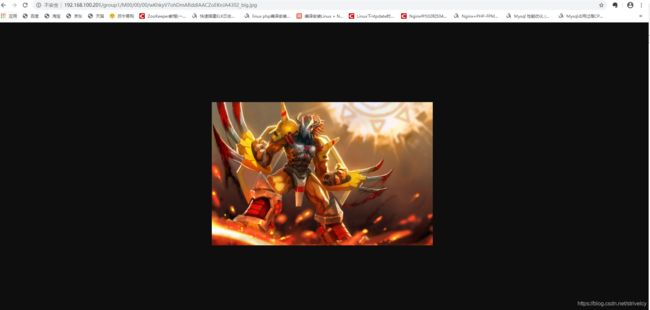
访问成功!!!
错误排查:

**原因:mod_fastdfs.conf 没有修改
vim mod_fastdfs.conf
base_path=/opt/fastdfs/storage 这两个路径一定要和storage.conf 中的路径一致 否则就会报上面的错误
store_path0=/opt/fastdfs/storage
**