CESIUM例子学习(十)——PostProcessStage(fog)
cesium里的PostProcessStage功能是在1.46之后才加上去的。PostProcessStage算是cesium的高级应用了。很多动态绚丽效果都可以用它来完成,但是对开发者的要求也高一些,如果深入研究,需要GLSLS。关于PostProcessStage的执行的基本流程,http://www.bubuko.com/infodetail-2675940.html这篇博文讲得很仔细,可以收藏起来。
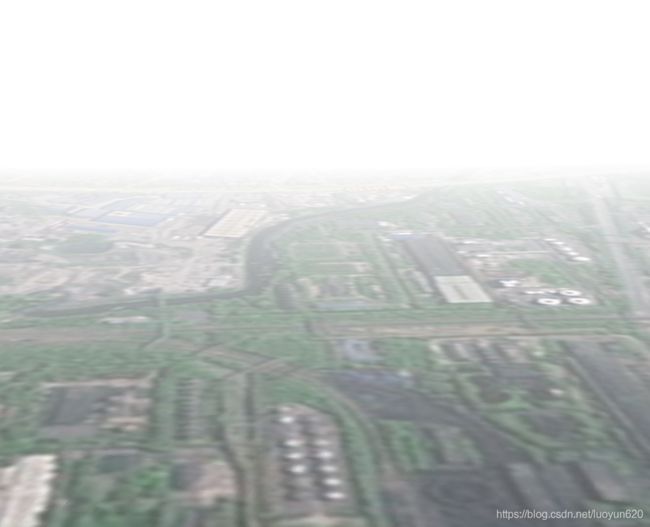
绘制雾的基本思路:在一定可见距离内(startDistance到endDistance),根据目标点离观察点的距离,设置某个颜色及其颜色透明度附加到原来场景颜色。当目标距离小于等于startDistance时,雾颜色和透明度完全不起作用,也就是没有雾的效果;当目标距离与观察点距离大于等于endDistance距离时,透明度设置为0,也就是只看到雾和。代码如下:
var fragmentShaderSource =
    计算每个渲染顶点和视点(相机)的距离
    "float getDistance(sampler2D depthTexture, vec2 texCoords) \n" +
    "{ \n" +
    "    float depth = czm_unpackDepth(texture2D(depthTexture, texCoords)); \n" +
    "    if (depth == 0.0) { \n" +
    "        return czm_infinity; \n" +
    "    } \n" +
    "    vec4 eyeCoordinate = czm_windowToEyeCoordinates(gl_FragCoord.xy, depth); \n" +
    "    return -eyeCoordinate.z / eyeCoordinate.w; \n" +
    "} \n" +
    "//计算雾化距离(当它远离眼睛位置时,系数变小)\n" +
    "float interpolateByDistance(vec4 nearFarScalar, float distance) \n" +
    "{ \n" +
    "    float startDistance = nearFarScalar.x;//雾化的起点距离 \n" +
    "    float startValue = nearFarScalar.y; \n" +
    "    float endDistance = nearFarScalar.z; \n" +
    "    float endValue = nearFarScalar.w; \n" +
    "    float t = clamp((distance - startDistance) / (endDistance - startDistance), 0.0, 1.0); \n" +
    "    return mix(startValue,endValue,t ); \n" +
    "} \n" +
    "vec4 alphaBlend(vec4 sourceColor, vec4 destinationColor) \n" +
    "{ \n" +
    "    return sourceColor * vec4(sourceColor.aaa, 1.0) + destinationColor * (1.0 - sourceColor.a); \n" +
    "} \n" +
    "uniform sampler2D colorTexture; \n" +
    "uniform sampler2D depthTexture; \n" +
    "uniform vec4 fogByDistance; \n" +
    "uniform vec4 fogColor; //雾的颜色\n" +
    "varying vec2 v_textureCoordinates; \n" +
    "void main(void) \n" +
    "{ \n" +
    "    float distance = getDistance(depthTexture, v_textureCoordinates); \n" +
    "    vec4 sceneColor = texture2D(colorTexture, v_textureCoordinates); \n" +
    "    float blendAmount = interpolateByDistance(fogByDistance, distance); \n" +
    "    vec4 finalFogColor = vec4(fogColor.rgb, fogColor.a * blendAmount); \n" +
    "    gl_FragColor = alphaBlend(finalFogColor, sceneColor); \n" +
    "} \n";
function addFog () {
    var postProcessStage = viewer.scene.postProcessStages.add(
        new Cesium.PostProcessStage({
            fragmentShader: fragmentShaderSource,
            uniforms: {
                fogByDistance: new Cesium.Cartesian4(10.0, 0.0, 1500, 1.0),
                fogColor: new Cesium.Color(1.0, 1.0, 1.0, 1.0),
            },
        })
    );
}
代码利用 new Cesium.PostProcessStage创建了一个PostProcessStage对象,参数中包括:
fragmentShader:片源着色器代码字符串,它是GLSL代码语言。
uniforms:它是片源着色器代码字符串中需要在前端传入的变量。比如字符串中的uniform vec4 fogByDistance定义的vec4 类型的fogByDistance变量,就是通过uniforms中的 fogByDistance: new Cesium.Cartesian4(10.0, 0.0, 1500, 1.0)赋值传递过去的,(10.0, 0.0, 1500, 1.0)理解为:在离视点10米距离时开始雾化,10米时雾的透明度是0.0,也就是完全看不到雾的效果;在离视点距离大于等于1500米时,雾的透明度是1.0,此时,也就是看不到雾后面的景物。
在fragmentShaderSource字符串中,也就是片源着色器代码字符串,它定义了getDistance、interpolateByDistance、alphaBlend和main函数。
其中getDistance是计算目标点、也就是绘制点离观察点的距离;
interpolateByDistance:计算雾化距离。并统一到最大距离是1.0,最小是0.0。clamp()是GLSL的内置函数,clamp(a,min, max)的意思是,min alphaBlend:用场景原色和雾化后颜色,重新计算片源公位置的颜色,用gl_FragColor片源颜色内置变量接收。 除了函数,代码字符串中还有一些变量,其中fogByDistance、fogColor为自定义变量,而colorTexture、depthTexture和v_textureCoordinates是系统保留变量,不用外面赋值。 雾的绘制结果如下图:
