SpringCloud构建微服务之SpringCloudConfig配置中心高可用
前言
在上篇文章我们讲解了使用客户端直接调用配置中心服务端来获取配置文件信息,但是这样客户端和服务耦合性就太高了,不利于维护和扩展。那么该怎么样处理呢?我们只需将配置中心服务端注册到eureka中,客户端直接从eureka集群中获取配置中心服务即可。
下面我们来动手实现。
server端改造
修改spring-cloud-config-serverpom文件,引入eureka依赖:
        spring-cloud-config
        com.chaytech
        1.0-SNAPSHOT

    4.0.0

    spring-cloud-config-server
    jar


            org.springframework.cloud
            spring-cloud-config-server


            org.springframework.cloud
            spring-cloud-starter-eureka
修改application.yml,增加eureka配置:
server:
  port: 9002
spring:
  application:
    name: spring-cloud-config-server
  cloud:
    config:
      server:
        git:
          uri: https://github.com/chencytech/spring-cloud-examples.git # 配置git仓库的地址
          search-paths: config  # git仓库地址下的相对地址(如何直接使用仓库根目录的话,就不用配置此路径),可以配置多个,用,分割。
          # username:   # git仓库的账号
          # password:   # git仓库的密码

eureka:
  client: #客户端注册进eureka服务列表内
    service-url:
      #defaultZone: http://localhost:7001/eureka (单机)
      defaultZone: http://eureka7001:7001/eureka/,http://eureka7002:7002/eureka/,http://eureka7003:7003/eureka/ #(集群)
  instance:
    instance-id: spring-cloud-config-server9001 # 自定义服务名称信息
    prefer-ip-address: true # 访问路径可以现实IP
修改启动类,增加@EnableEurekaClient注解:
@SpringBootApplication
@EnableEurekaClient
public class SpringCloudConfigClient_Applicaiton {
    public static void main(String[] args) {
        SpringApplication.run(SpringCloudConfigClient_Applicaiton.class, args);
    }
}
服务端改造好了,下面我们来改造客户端
client端改造
修改spring-cloud-config-clientpom文件,引入eureka依赖:
        spring-cloud-config
        com.chaytech
        1.0-SNAPSHOT

    4.0.0

    spring-cloud-config-client
    jar


            org.springframework.boot
            spring-boot-starter-web


            org.springframework.boot
            spring-boot-starter-test
            test


            org.springframework.cloud
            spring-cloud-starter-config


            org.springframework.cloud
            spring-cloud-starter-eureka
修改bootstrap.yml:
- 去掉直接指向配置中心服务端地址的配置
- 增加开启Config服务发现支持的配置
- 增加
eureka客户端配置
spring:
  cloud:
    config:
      name: application # 对应{application}部分
      profile: dev # 对应{profile}部分
      label: master # 对应git的分支
      # uri: http://localhost:9002 # 配置中心服务端地址
      discovery:
        enabled: true # 开启Config服务发现支持
        serviceId: spring-cloud-config-server # 指定server端的name,也就是server端spring.application.name的值

eureka:
  client: #客户端注册进eureka服务列表内
    service-url:
      #defaultZone: http://localhost:7001/eureka (单机)
      defaultZone: http://eureka7001:7001/eureka/,http://eureka7002:7002/eureka/,http://eureka7003:7003/eureka/ #(集群)
  instance:
    instance-id: spring-cloud-config-client9002 # 自定义服务名称信息
    prefer-ip-address: true # 访问路径可以现实IP
修改启动类,增加@EnableEurekaClient注解:
@SpringBootApplication
@EnableEurekaClient
public class SpringCloudConfigClient_Applicaiton {
    public static void main(String[] args) {
        SpringApplication.run(SpringCloudConfigClient_Applicaiton.class, args);
    }
}
客户端也改造好了,下面我们来测试一下。
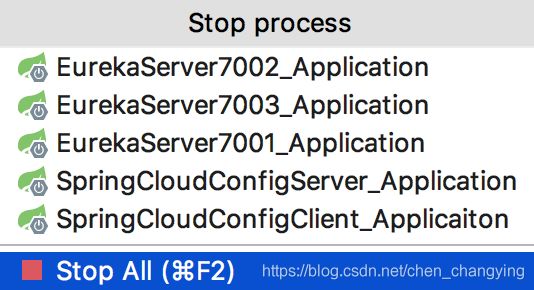
分别启动eureka集群、config server端、config client端:

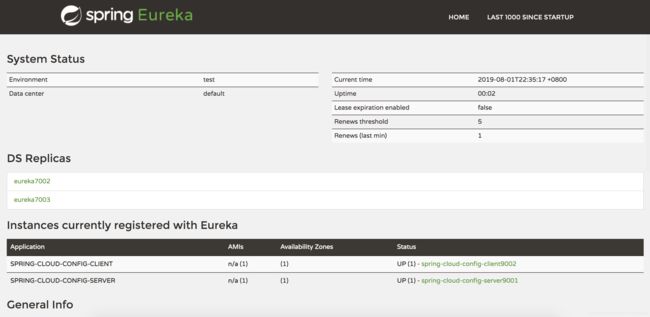
访问eureka管理页面:http://127.0.0.1:7001/

可以看到config server端、config client端都注册到了eureka注册中心了。
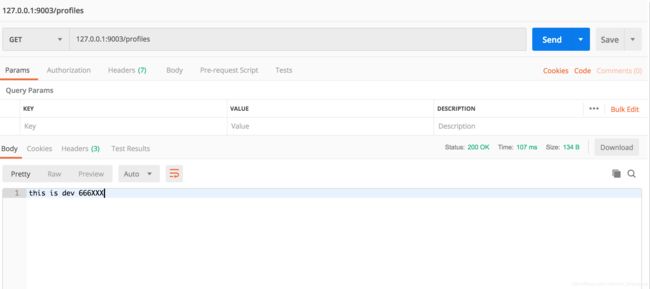
请求接口:http://127.0.0.1:9003/profiles

可以看到拿到了配置文件内容
接着请求:http://127.0.0.1:9002/application/dev

可以看到获取到了配置文件信息。
此处我只启动了一个config server端,可以自己下去再启动一个config server端,达到主备效果,就算其中一台出了问题,也不会影响配置中心的服务。
源码地址:https://github.com/chencytech/spring-cloud-examples