Linux 安装SQL
安装环境:系统是 centos6.5
1、下载
下载地址:http://dev.mysql.com/downloads/mysql/5.6.html#downloads
下载版本:我这里选择的5.6.33,通用版,linux下64位
也可以直接复制64位的下载地址,通过命令下载:wget http://dev.mysql.com/get/Downloads/MySQL-5.6/mysql-5.6.33-linux-glibc2.5-x86_64.tar.gz
2、解压
| 1 2 3 4 |
|
3、添加用户组和用户
| 1 2 3 4 |
|
4、在 etc 下新建配置文件my.cnf,并在该文件中添加一下代码:
basedir = /usr/local/mysql
datadir = /usr/local/mysql/data
port = 3306
#server_id = .....
socket = /usr/local/mysql/mysqlotherfile/mysql.sock
max_connections=200
# 服务端使用的字符集默认为8比特编码的latin1字符集
character-set-server=utf8
# 创建新表时将使用的默认存储引擎
default-storage-engine=INNODB
lower_case_table_name=1
max_allowed_packet=16M
# Remove leading # to set options mainly useful for reporting servers.
# The server defaults are faster for transactions and fast SELECTs.
# Adjust sizes as needed, experiment to find the optimal values.
join_buffer_size = 128M
sort_buffer_size = 2M
read_rnd_buffer_size = 2M
sql_mode=NO_ENGINE_SUBSTITUTION,STRICT_TRANS_TABLES
[client]
default-character-set= utf8
socket= /usr/local/mysql/mysqlotherfile/mysql.sock
[mysql]
default-character-set= utf8
socket= /usr/local/mysql/mysqlotherfile/mysql.sock
5、进入安装mysql软件目录
[root@localhost ~]# cd /usr/local/mysql
[root@localhost mysql]# chown -R mysql:mysql ./       修改当前目录拥有着为mysql用户
[root@localhost mysql]# ./scripts/mysql_install_db --user=mysql --basedir=/usr/local/mysql/ --datadir=/usr/local/mysql/data/ 安装数据库
注意:文件中的路径/usr/local/mysql/mysqlotherfile/mysql.sock 的 mysqlotherfile 该文件夹需要修改权限
chmod 777 /usr/local/mysql/mysqlotherfile (名字可以自己取 得修改权限)
不然会报一下错误
Can 't connect to local MySQL server through socket '/tmp/mysql.sock '(2)
或者
Warning: World-writable config file ‘/etc/my.cnf’ is ignored
重新回到上述第三个命令继续操作:
[root@localhost mysql]# chown -R mysql:mysql data 修改当前data目录的拥有者为mysql用户
到此数据库安装完毕!
二、配置MySQL
1、授予my.cnf最大权限
[root@localhost ~]# chmod 777 /etc/my.cnf
设置开机自启动服务控制脚本:
2、复制启动脚本到资源目录
[root@localhost mysql]# cp ./support-files/mysql.server /etc/rc.d/init.d/mysqld
3、增加mysqld服务控制脚本执行权限
[root@localhost mysql]# chmod +x /etc/rc.d/init.d/mysqld
4、将mysqld服务加入到系统服务
[root@localhost mysql]# chkconfig --add mysqld
5、检查mysqld服务是否已经生效
[root@localhost mysql]# chkconfig --list mysqld
命令输出类似下面的结果:
mysqld 0:off 1:off 2:on 3:on 4:on 5:on 6:off
表明mysqld服务已经生效,在2、3、4、5运行级别随系统启动而自动启动,以后可以使用service命令控制mysql的启动和停止
命令为:service mysqld start和service mysqld stop
6、启动mysqld
[root@localhost mysql]# service mysqld start
7、将mysql的bin目录加入PATH环境变量,编辑 ~/.bash_profile文件
[root@localhost mysql]# vim ~/.bash_profile
在文件最后添加如下信息:
export PATH=$PATH:/usr/local/mysql/bin
然后按ESC键
继续 shift键加冒号打出来=> :
接下来输入wq回车即可
执行下面的命令是修改的内容立即生效:
[root@localhost mysql]# source ~/.bash_profile
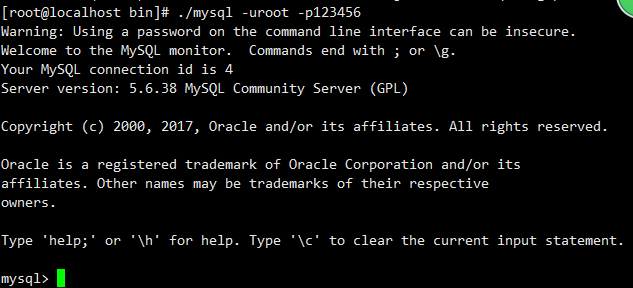
8、以root账户登录mysql,默认是没有密码的
[root@localhost mysql]# mysql -uroot -p
要输入密码的时候直接回车即可。
9、设置root账户密码为root(也可以修改成你要的密码)
mysql>use mysql;
mysql>update user set password=password('root') where user='root' and host='localhost';
mysql>flush privileges;
10、设置远程主机登录,注意下面的your username 和 your password改成你需要设置的用户和密码
mysql>GRANT ALL PRIVILEGES ON *.* TO 'your username'@'%' IDENTIFIED BY 'your password' WITH
GRANT OPTION;
| [root@localhost bin]# ./mysql
|
linux mysql access denied for user ‘root’@’localhost'(using password:YES)
linux安装完mysql后,使用程序连接报以上错误
解决方法,重新设置密码,步骤如下
1.先停掉原来的服务
service mysqld stop
2.使用安全模式登陆,跳过密码验证
mysqld_safe --user=mysql --skip-grant-tables --skip-networking&
3.登陆
mysql -uroot mysql
4.修改密码
mysql  > update user set authentication_string = password('123456')
       where user = 'root' and Host = 'localhost'
5.刷新权限
mysql > flush privileges;
6.重新使用正常模式登陆
#mysql -uroot -p
#enter password : 123456
可以正常登陆。
7.执行其他命令:show databases; 提示如下错误
You must reset your password using ALTER USER statement
                before   executing this statement.
8.重新将密码设置一遍即可
mysql > set password = password ('123456');
9.配置完成。
问题1:
2018-11-14 19:53:10 19980 [ERROR] /usr/local/mysql/bin/mysqld: unknown option '--skip-locking'
2018-11-14 19:53:10 19980 [ERROR] Aborting
在日志当中会有这样的错误 解决办法:看etc/my.cnf 文件去掉 '--skip-locking'这个参数
[root@master mysql]# service mysql start
Starting MySQL...The server quit without updating PID file (/usr/local/mysql/data/mysql.pid).
开启服务会提示这种 还是看配置文件的源头 也就是etc/my.cnf
记得修改完之后 初始化数据 即进入script文件里
./mysql_install_db --user=mysql --basedir=/usr/local/mysql --datadir=/usr/local/mysql/data --pid-file=/usr/local/mysql/data/mysql.pid --tmpdir=/tmp
其中五个属性和属性值都是my.cnf文件对应的值
问题二:
修改连接msql 的路径:
The reference to entity "characterEncoding" must end with the ';' delimiter.
解决办法:
优化命令:
service mysql start 启动服务
ps -ef | grep mysql 查看端口是否被占用redis在Linux安装报错
https://archive.apache.org/dist/flink/flink-1.3.1/
数据可视化工具以及插件下载:https://help.aliyun.com/document_detail/50891.html
mysql的开启以及简单的操作:
linu下启动mysql
1./etc/rc.d/init.d/mysql start
2.进入到mysql的bin目录中 直接mysql即可
3.其他
mysql的一些见到操作:
show databases;
use mysql;
show tables;
3、显示数据表的结构:
describe 表名;
4、显示表中的记录:
select * from 表名;
例如:显示mysql库中user表中的纪录。所有能对MySQL用户操作的用户都在此表中。
Select * from user;
5、建库:
create database 库名;
例如:创建一个名字位aaa的库
mysql> create databases aaa;
6、建表:
use 库名;
create table 表名 (字段设定列表);
例如:在刚创建的aaa库中建立表name,表中有id(序号,自动增长),xm(姓名),xb(性别),csny(出身年月)四个字段
use aaa;
mysql> create table name (id int(3) auto_increment not null primary key, xm char(8),xb char(2),csny date);
可以用describe命令察看刚建立的表结构。
mysql> describe name;
+-------+---------+------+-----+---------+----------------+
| Field | Type | Null | Key | Default | Extra |
+-------+---------+------+-----+---------+----------------+
| id | int(3) | | PRI | NULL | auto_increment |
| xm | char(8) | YES | | NULL | |
| xb | char(2) | YES | | NULL | |
| csny | date | YES | | NULL | |
+-------+---------+------+-----+---------+------------ ----+
7、增加记录 例如:增加几条相关纪录。
mysql> insert into name values('','张三','男','1971-10-01');
mysql> insert into name values('','白云','女','1972-05-20');
可用select命令来验证结果。 mysql> select * from name;
+----+------+------+------------+
| id | xm | xb | csny
| +----+------+------+------------+
| 1 | 张三 | 男 | 1971-10-01 |
| 2 | 白云 | 女 | 1972-05-20 |
+----+------+------+------------+
8、修改纪录 例如:将张三的出生年月改为1971-01-10
mysql> update name set csny='1971-01-10' where xm='张三';
9、删除纪录
例如:删除张三的纪录。
mysql> delete from name where xm='张三';
10、删库和删表
drop database 库名;
drop table 表名;
九、增加MySQL用户
格式:grant select on 数据库.* to 用户名@登录主机 identified by "密码"
例1、增加一个用户user_1密码为123,让他可以在任何主机上登录,并对所有数据库有查询、插入、修改、删除的权限。
首先用以root用户连入MySQL,然后键入以下命令:
mysql> grant select,insert,update,delete on *.* to user_1@"%" Identified by "123";
例1增加的用户是十分危险的,如果知道了user_1的密码,那么他就可以在网上的任何一台电脑上登录你的MySQL数据库并对你的数据为所欲为了,解决办法见例2。
例 2、增加一个用户user_2密码为123,让此用户只可以在localhost上登录,并可以对数据库aaa进行查询、插入、修改、删除的操作 (localhost指本地主机,即MySQL数据库所在的那台主机),这样用户即使用知道user_2的密码,他也无法从网上直接访问数据库,只能通过 MYSQL主机来操作aaa库。
mysql>grant select,insert,update,delete on aaa.* to user_2@localhost identified by "123";
用新增的用户如果登录不了MySQL,在登录时用如下命令:
mysql -u user_1 -p -h 192.168.113.50 (-h后跟的是要登录主机的ip地址)
十、备份与恢复
1、备份
例如:将上例创建的aaa库备份到文件 back_aaa中
[root@test1 root]# cd /home/data/mysql (进入到库目录,本例库已由val/lib/mysql转到/home/data/mysql,见上述第七部分内容)
[root@test1 mysql]# mysqldump -u root -p --opt aaa > back_aaa
2、恢复
[root@test mysql]# mysql -u root -p ccc < back_aaa
