第一部分
叶绿体基因组类的文章通常会做重复序列分析,然后通过柱形图来展示不同长度重复序列的数量,通过饼图来展示重复序列位于内含子、外显子和基因间隔区的比例,以下简单记录自己利用ggplot2制作饼图和柱形图的过程
饼图
- 第一步:通过bing搜索关键词 ggplot2 pie chart 关键词
点开第一条搜索结果ggplot2 pie chart: Quick start guide - R software and data visualization,大体浏览,发现代码简单,自带数据,很容易重复,遂决定重复此例。 - 第二步:重复教程
生成数据
df<-data.frame(group=c("Male","Female","Child"),value=c(25,35,45))
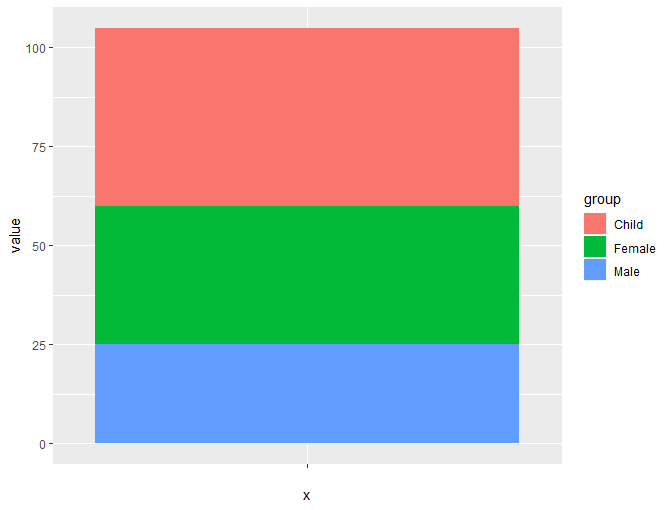
先来一个简单的堆积柱形图
library(ggplot2)
bp <- ggplot(df,aes(x="",y=value,fill=group))+
        geom_bar(stat="identity",width=1)
bp
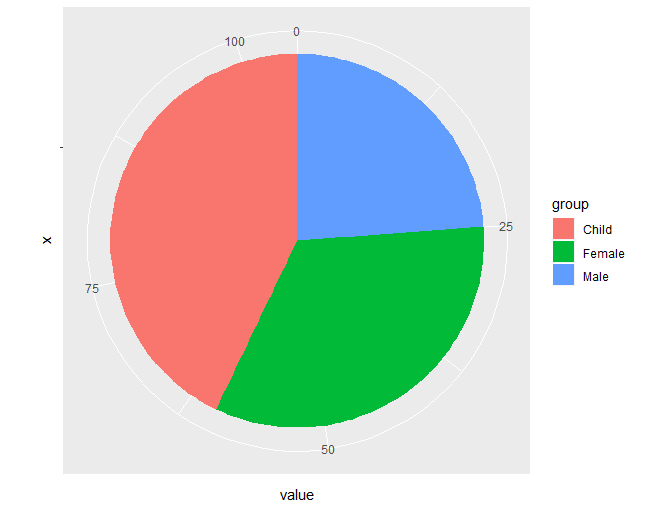
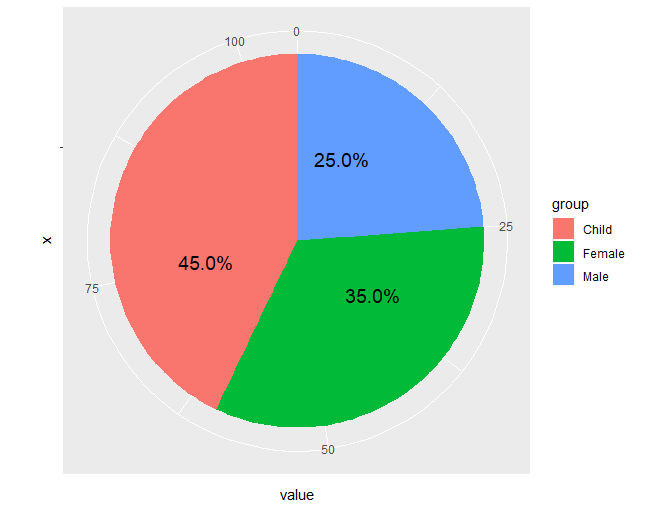
变成饼图
bp + coord_polar("y",start=0)+xlabs(x="")
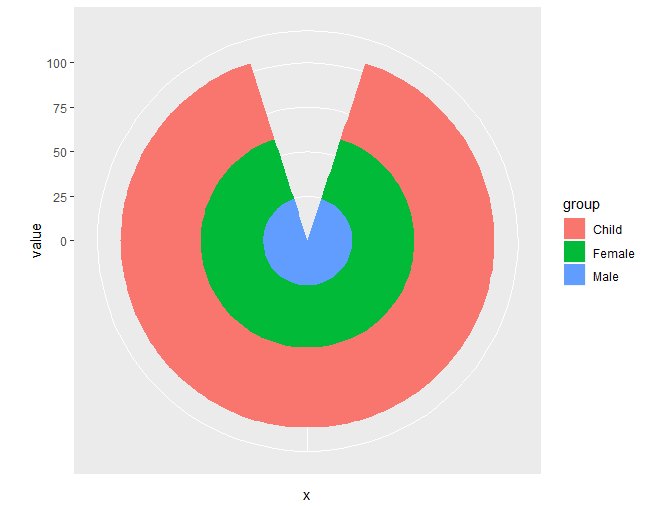
(之前知道coord_polar()函数可以把线型的图变成环状,但是不太清楚饼图也是用这个函数加参数调节来做的)比如柱形图加上coord_polar()函数就变成这个样子
bp + coord_polar()
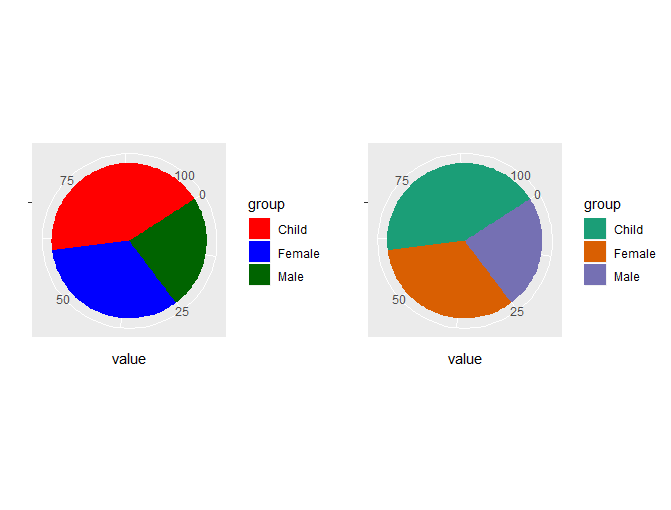
调节配色
p1<- bp + coord_polar("y",start=1) + labs(x="") + scale_fill_manual(values= c("red","blue","darkgreen"))
或者
p2<-bp+coord_polar("y",start=1)+labs(x="")+scale_fill_brewer(palette="Dark2")
ggtree::multiplot(p1,p2,ncol=2)
为各部分添加标签展示百分比
pie <- bb + coord_polar("y",start=1)+labs(x="")
pie+geom_text(aes(y=value/3+
                  c(0,cumsum(value)[-length(value)]),
                  label=scales::percent(value/100)),size=5)
(添加标签的代码自己是彻底看不明白了,知道他的目的是为了控制标签的位置,但是看不懂原理,尤其是线性的图转化为极坐标状态后的位置坐标自己有点搞不清楚)
- 第一次接触cumsum()函数,一个简单的小例子大家就可以明白这个函数的作用,(自己也看明白了但是不知道如何表达),比如运行
cumsum(c(1,2,3))
输出的结果是1,3,6
- 第一次接触scales包,第一次接触percent()函数,作用是将数字转化为字符类型的百分数,比如运行
scales::percent(5)
输出的是“500%”
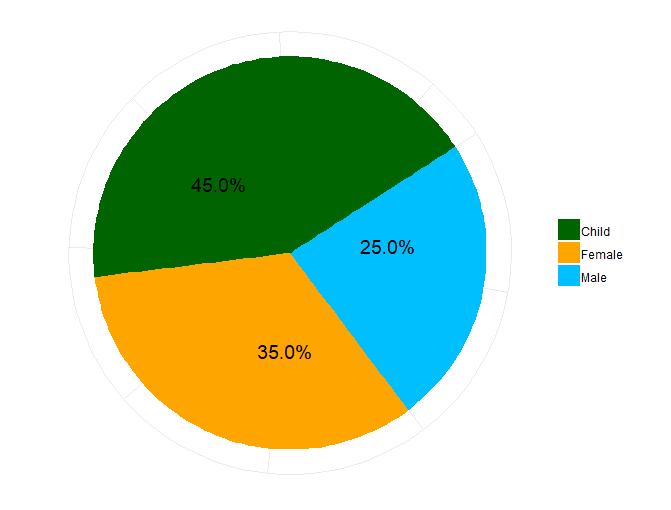
接下来就是美化,更改一些细节比如去掉灰色背景,去掉x,y轴的刻度和坐标等
df<-data.frame(group=c("Male","Female","Child"),
               value=c(25,35,45))
library(ggplot2)
library(scales)
ggplot(df,aes(x="",y=value,fill=group))+
  geom_bar(stat="identity")+
  coord_polar("y",start=1) +
  geom_text(aes(y=value/3+
                  c(0,cumsum(value)[-length(value)]),
                label=percent(value/100)),size=5)+
  theme_minimal()+
  theme(axis.title=element_blank(),
        axis.ticks=element_blank(),
        axis.text = element_blank(),
        legend.title = element_blank())+
  scale_fill_manual(values=c("darkgreen","orange","deepskyblue"))
(柱形图抽时间补上)
ggplot2将多个图放到一起的代码有时间好好研究一下
multiplot1 <- function(..., plotlist=NULL, file, cols=1, layout=NULL) {
  library(grid)

  # Make a list from the ... arguments and plotlist
  plots <- c(list(...), plotlist)

  numPlots = length(plots)

  # If layout is NULL, then use 'cols' to determine layout
  if (is.null(layout)) {
    # Make the panel
    # ncol: Number of columns of plots
    # nrow: Number of rows needed, calculated from # of cols
    layout <- matrix(seq(1, cols * ceiling(numPlots/cols)),
                     ncol = cols, nrow = ceiling(numPlots/cols))
  }

  if (numPlots==1) {
    print(plots[[1]])

  } else {
    # Set up the page
    grid.newpage()
    pushViewport(viewport(layout = grid.layout(nrow(layout), ncol(layout))))

    # Make each plot, in the correct location
    for (i in 1:numPlots) {
      # Get the i,j matrix positions of the regions that contain this subplot
      matchidx <- as.data.frame(which(layout == i, arr.ind = TRUE))

      print(plots[[i]], vp = viewport(layout.pos.row = matchidx$row,
                                      layout.pos.col = matchidx$col))
    }
  }
}
layout <- matrix(c(1, 1, 1, 2, 2, rep(3, 5)), nrow = 2, byrow = TRUE)
以上代码出自参考文献3
ggtree里multiplot也可以实现,印象里ggplot2好像是有函数可以实现这个功能,但是暂时找不到是哪一个了
柱形图
p4<-ggplot(df,aes(x=species,y=number,fill=category))+
  geom_bar(stat="identity",width=0.5,position = position_dodge(0.5))+
  geom_text(aes(label=number),size=5,
            position = position_dodge(0.5),vjust=-0.5)+
  labs(y="SSR numbers")+theme_minimal()+ylim(0,80)+
  theme(axis.title.x = element_blank(),
        axis.text.x = element_text(face="italic",size=15),
        axis.ticks = element_blank(),
        legend.title = element_blank(),
        legend.position = "bottom")+
  scale_fill_manual(values=c("darkred","darkgreen","darkblue"))
df1<-data.frame(group=c("intergentic region","intron","exon"),
                value=c(64,5,10))
- 小知识点:ggplot2柱形图如何调整柱形图之间的间距
在 生物软件交流 群里看到了有人给出的答案
geom_bar(stat="identity",width=0.5,position=position_dodge(width=1))
- width in geom_bar() determines the width of the bar
- width in position_dodge determines the position of each bar
第二部分
叶绿体基因组类的文章通常会有序列分歧度分析(sequence divergence analysis),然后通过折线图来展示数据,分析过程由DNAsp软件完成,结果中也会输出折线图,但不够美观,所以可以导出数据后自己来画
- 小知识点一:
离散型数据画折线图需要加一个参数group=1
例如
df<-data.frame(A=c("a","b","c","d"),B=c(1,2,3,4))
ggplot(df,aes(x=A,y=B))+geom_line()
会遇到报错geom_path: Each group consists of only one observation.
Do you need to adjust the group aesthetic?;具体是什么原因自己不是很明白
改成
ggplot(df,aes(x=A,y=B,group=1))+geom_line()
就可以了(之前有段时间一直在纠结离散型数据如何画折线图,今天找到了一种解决方式)
- 小知识点二:
离散型数据更改坐标轴刻度标签使用的是scale_x_discrete()函数;连续型函数使用的是scale_x_continous()函数,主要的参数是 breaks 和 labels
比如
df<-data.frame(A=c("a","b","c","d"),B=c(1,2,3,4))
p1<-ggplot(df,aes(x=A,y=B))+geom_point()
p2<-ggplot(df,aes(x=A,y=B))+geom_point()+scale_x_discrete("A",labels=c("P","O","M","E"))
可以比较一下p1和p2的差别
参考文献
- 1、ggplot2 pie chart: Quick start guide - R software and data visualization
- 2 、R语言ggplot2之图例设置
- 3、Multiple graphs on one page (ggplot2)
