Android Animation
Android Animation
Android framework提供了两种动画系统: property animation (introduced in Android 3.0)和view animation。
除了这两种系统外,也可以利用Drawable animation,也就是播放序列帧图像。
所以,Android中的Animation分三种:
1. Property Animation
2. View Animation
3. Drawable Animation
下面主要说Property Animation。
Property Animation
Property Animation是Android 3.0引进的,也即API Level 11,这套系统让你可以对任意对象(即便不在屏幕上的对象)的任何属性进行动画变换。
为了让某件东西动起来,你指定对象要变换的属性,动画持续的时间,以及你在动画之中想要达到的值即可。
通过property animation系统你可以定义一个动画的下列特性:
Duration: 动画持续的时间,默认值是300ms。
Time interpolation: 时间插值,你可以定义随着时间的变换,属性值是如何变换的。
Repeat count and behavior: 你可以指定一个动画是否重复进行,以及重复几次,也可以指定是否让动画倒着回放,这样可以动画可以来回进行,直到达到了所要求的重复次数。
Animator sets: 你可以把动画行为组织成一个逻辑集合,它们一起播放或者顺序播放,或者也可以在指定的延迟后播放。
Frame refresh delay: 你可以指定多久刷新一次你的动画的帧。默认值被设置为每10ms,但是你的应用刷新帧的频率是和系统当前的实际情况相关的。
原理介绍 How Property Animation Works
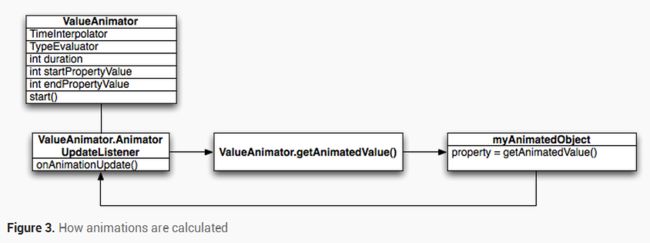
ValueAnimator 对象持有动画时间,比如动画已经进行了多长时间,和变换的属性的当前值。
ValueAnimator中封装了TimeInterpolator和TypeEvaluator。
TimeInterpolator定义了动画的时间插值,比如可以线性或者加速减速;
TypeEvaluator定义了如何计算被动画改变的属性值。
为了开启一个动画,首先构造一个ValueAnimator对象,把你想要改变的属性值的起始值、终止值以及动画时间告诉它,当你调用 start()方法时,动画开始。
在整个动画的过程中,所涉及的计算分为下面三步:
1.这个ValueAnimator对象会根据动画的总时间和已经流逝的时间计算出一个0到1之间的elapsed fraction值。这个elapsed fraction值就代表了时间完成的程度。
2.计算出elapsed fraction之后,ValueAnimator对象会调用TimeInterpolator 来计算一个interpolated fraction,即,根据所设置的时间插值方法将elapsed fraction映射到interpolated fraction。
如果是线性插值的话elapsed fraction和interpolated fraction会是一直相等的,但是非线性变换就不是了。
3. interpolated fraction计算出来后,ValueAnimator 会调用TypeEvaluator,来进行你要动画的属性值的计算。
这时候用的输入参数就是interpolated fraction的值,以及属性值的起始值和终止值。
整个过程如下图所示:
Property Animation API
Property Animation系统的大多数API都在这个包中:android.animation
但是由于View Animation系统定义了一些插值器(interpolator),所以你可以直接使用这个包android.view.animation中的一些插值器。
链接:http://developer.android.com/guide/topics/graphics/prop-animation.html中的API Overview部分列表介绍了Property Animation的API,可前往查看。
API主要分为Table 1. Animators,Table 2. Evaluators,Table 3. Interpolators三大部分。
Animatiors中:
ValueAnimator只计算出属性值,并不将属性值设置在对象上,所以你必须监听属性值的更新,自己修改对象的属性,实现动画逻辑。
用法见:Animating with ValueAnimator
ObjectAnimator是ValueAnimator的子类,在构造函数中传入了目标对象和对应属性值的名字(要求对象类有相应的get/set方法),会自动进行属性值得设置。
用法见:Animating with ObjectAnimator
AnimatorSet提供了Animation的组合,
用法见: Choreographing multiple animations with Animator Sets
另外,Animation Listeners也很重要:Animation Listeners
Property Animation和View Animation的关系
View Animation是比较旧的一套系统,仅仅适用于View对象。
并且View Animation系统限制了可以动画的方面,比如缩放和旋转是可以的,但是背景颜色的动画是做不了的。
View Animation系统的另一个缺陷就是它仅仅改变了View绘制的位置,并没有改变View本身实际的位置。
比如,如果你让一个按钮通过动画移动到屏幕上的另一个位置,虽然它绘制在目标位置,但是你要点击它还是要在原来的位置,所以你需要自己写逻辑去处理这种问题。
Property animation系统就不存在上面的问题,它是确实地改变了View对象的真实属性。
从Android 3.0起,View类加了很多属性和方法用来进行Property animation。
这些属性有:
translationX and translationY

rotation, rotationX, and rotationY

scaleX and scaleY

pivotX and pivotY

x and y

alpha
当这些属性值被改变的时候,View会自动调用 invalidate()方法来进行刷新。
Declaring Animations in XML
Property animation系统允许你用xml来声明动画,这样做一是可以达到动画的复用,通用性更强,另一个好处是编辑多个动画的序列更加容易,可读性更好。
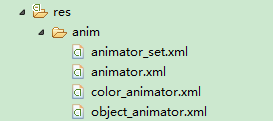
为了区分Property animation和View animation的资源文件,从Android 3.1开始,Property animation的xml文件存在res/animator/目录下(View animation的存在res/anim/目录下), animator这个名是可选的。但是如果你想要使用Eclipse ADT plugin (ADT 11.0.0+)的布局编辑器,你就必须使用res/animator/目录,因为ADT只在该目录下寻找property animation的资源文件。
对应的标签如下:
ValueAnimator-ObjectAnimator-AnimatorSet-
定义Property Animation的语义,详见: Animation Resources
参考资料
官方API Guides:
http://developer.android.com/guide/topics/graphics/overview.html
Property Animation:
http://developer.android.com/guide/topics/graphics/prop-animation.html
Property Animation package:
http://developer.android.com/reference/android/animation/package-summary.html
Animator类提供了创建动画的基本结构,但是一般使用的是它的子类:
ValueAnimator、ObjectAnimator、AnimatorSet
ApiDemos中Animation部分是单独的一个包。
下面代码来自ApiDemos中的AnimationCloning类,加了一个使用ValueAnimator的动画,还有一些注释。
完整的项目见:URL:https://github.com/mengdd/AnimationApiDemos.git
package com.example.helloanimation.demo1; import java.util.ArrayList; import com.example.helloanimation.R; import com.example.helloanimation.demo.ShapeHolder; import android.animation.AnimatorSet; import android.animation.ObjectAnimator; import android.animation.ValueAnimator; import android.animation.ValueAnimator.AnimatorUpdateListener; import android.app.Activity; import android.content.Context; import android.graphics.Canvas; import android.graphics.Paint; import android.graphics.RadialGradient; import android.graphics.Shader; import android.graphics.drawable.ShapeDrawable; import android.graphics.drawable.shapes.OvalShape; import android.os.Bundle; import android.view.View; import android.view.animation.AccelerateInterpolator; import android.view.animation.DecelerateInterpolator; import android.widget.Button; import android.widget.LinearLayout; public class BasicAnimationActivity extends Activity { @Override protected void onCreate(Bundle savedInstanceState) { super.onCreate(savedInstanceState); // 设置布局,布局xml中只包含了一个线性布局和一个Button setContentView(R.layout.animation_basic); LinearLayout container = (LinearLayout) findViewById(R.id.container); // 将自定义的View加入到线性布局中 final MyAnimationView animView = new MyAnimationView(this); container.addView(animView); // Button的点击事件即动画开始 Button starter = (Button) findViewById(R.id.startButton); starter.setOnClickListener(new View.OnClickListener() { public void onClick(View v) { animView.startAnimation(); } }); } /** * 自定义的View类 * 其中包含了一系列的球形对象 * */ public class MyAnimationView extends View implements ValueAnimator.AnimatorUpdateListener { // 圆形球 public final ArrayListballs = new ArrayList (); // 总的动画集合 AnimatorSet animation = null; // 屏幕密度 private float mDensity; public MyAnimationView(Context context) { super(context); // 得到密度值 mDensity = getContext().getResources().getDisplayMetrics().density; addBall(50f, 25f); addBall(150f, 25f); addBall(250f, 25f); addBall(350f, 25f); addBall(450f, 25f); } private void createAnimation() { if (animation == null) { // =============================================== // 第1个球球的动画效果:用ObjectAnimator // 用工厂方法构造对象:用ofFloat()因为属性值是float类型 // 第1个参数为目标对象:balls.get(0) // 第2个参数为属性名:y 这里要求目标对象要有“set属性名()”的方法。 // 后面是可变参数,表明属性目标值,一个参数表明是终止值(对象要有get属性方法) // 可变参数的个数为2时,表明第一个是起始值,第二个是终止值;更多个参数时,动画属性值会逐个经过这些值 ObjectAnimator anim1 = ObjectAnimator.ofFloat(balls.get(0), "y", 0f, getHeight() - balls.get(0).getHeight()) .setDuration(500); // =============================================== // 第二个球球的动画效果:clone动画效果1,但是重新设置目标物体 ObjectAnimator anim2 = anim1.clone(); anim2.setTarget(balls.get(1)); anim1.addUpdateListener(this); // 因为前两个动画完全相同,所以设置刷新监听的时候就只设置了一个(它们刷新的是同一个View) // =============================================== // 第三个球球的动画效果:先加速下落,再减速上升 ShapeHolder ball2 = balls.get(2); // 动画效果:落下效果 ObjectAnimator animDown = ObjectAnimator.ofFloat(ball2, "y", 0f, getHeight() - ball2.getHeight()).setDuration(500); // 落下效果改变了Interpolator,设置为加速 animDown.setInterpolator(new AccelerateInterpolator()); // 动画效果:上升效果 ObjectAnimator animUp = ObjectAnimator.ofFloat(ball2, "y", getHeight() - ball2.getHeight(), 0f).setDuration(500); // 上升效果设置为减速上升 animUp.setInterpolator(new DecelerateInterpolator()); // 用一个AnimatorSet对象将下落效果和上升效果顺序播放 AnimatorSet s1 = new AnimatorSet(); s1.playSequentially(animDown, animUp);// 顺序播放效果,参数个数可变 // 下落动画刷新View animDown.addUpdateListener(this); // 上升动画刷新View animUp.addUpdateListener(this); // =============================================== // 第四个球球的动画效果 // 另一个AnimatorSet克隆了上一个set,更换了对象 AnimatorSet s2 = (AnimatorSet) s1.clone(); s2.setTarget(balls.get(3)); // =============================================== // 第五个球球的动画效果:使用ValueAnimator final ShapeHolder ball5 = balls.get(4); ValueAnimator valueAnimator5 = ValueAnimator.ofFloat(0f, getHeight() - ball5.getHeight()); valueAnimator5.setDuration(500); valueAnimator5.addUpdateListener(new AnimatorUpdateListener() { // ValueAnimator需要自己在监听处理中设置对象参数 @Override public void onAnimationUpdate(ValueAnimator animation) { // 用animation.getAnimatedValue()得到当前的属性值,设置进动画对象中 ball5.setY((Float) animation.getAnimatedValue()); // 记得要刷新View否则不会调用重新绘制 invalidate(); } }); // ============================================================= // 用一个总的AnimatorSet对象管理以上所有动画 animation = new AnimatorSet(); animation.playTogether(anim1, anim2, s1);// 并行 animation.playSequentially(s1, s2, valueAnimator5);// 串行 } } // 在指定位置加上球形 private ShapeHolder addBall(float x, float y) { OvalShape circle = new OvalShape(); circle.resize(50f * mDensity, 50f * mDensity); ShapeDrawable drawable = new ShapeDrawable(circle); ShapeHolder shapeHolder = new ShapeHolder(drawable); shapeHolder.setX(x - 25f); shapeHolder.setY(y - 25f); int red = (int) (100 + Math.random() * 155); int green = (int) (100 + Math.random() * 155); int blue = (int) (100 + Math.random() * 155); int color = 0xff000000 | red << 16 | green << 8 | blue; Paint paint = drawable.getPaint(); // new // Paint(Paint.ANTI_ALIAS_FLAG); int darkColor = 0xff000000 | red / 4 << 16 | green / 4 << 8 | blue / 4; RadialGradient gradient = new RadialGradient(37.5f, 12.5f, 50f, color, darkColor, Shader.TileMode.CLAMP); paint.setShader(gradient); shapeHolder.setPaint(paint); balls.add(shapeHolder); return shapeHolder; } @Override protected void onDraw(Canvas canvas) { // 遍历并绘制每一个球形对象 for (int i = 0; i < balls.size(); ++i) { ShapeHolder shapeHolder = balls.get(i); canvas.save(); canvas.translate(shapeHolder.getX(), shapeHolder.getY()); shapeHolder.getShape().draw(canvas); canvas.restore(); } } public void startAnimation() { createAnimation(); animation.start();// 这里开始播放动画 } @Override public void onAnimationUpdate(ValueAnimator animation) { // 在参数更新的时候invalidate,刷新整个View的绘制 // 否则onDraw不会被调用,即看不到View外观的改变 invalidate(); } } }
其中ShapeHolder:
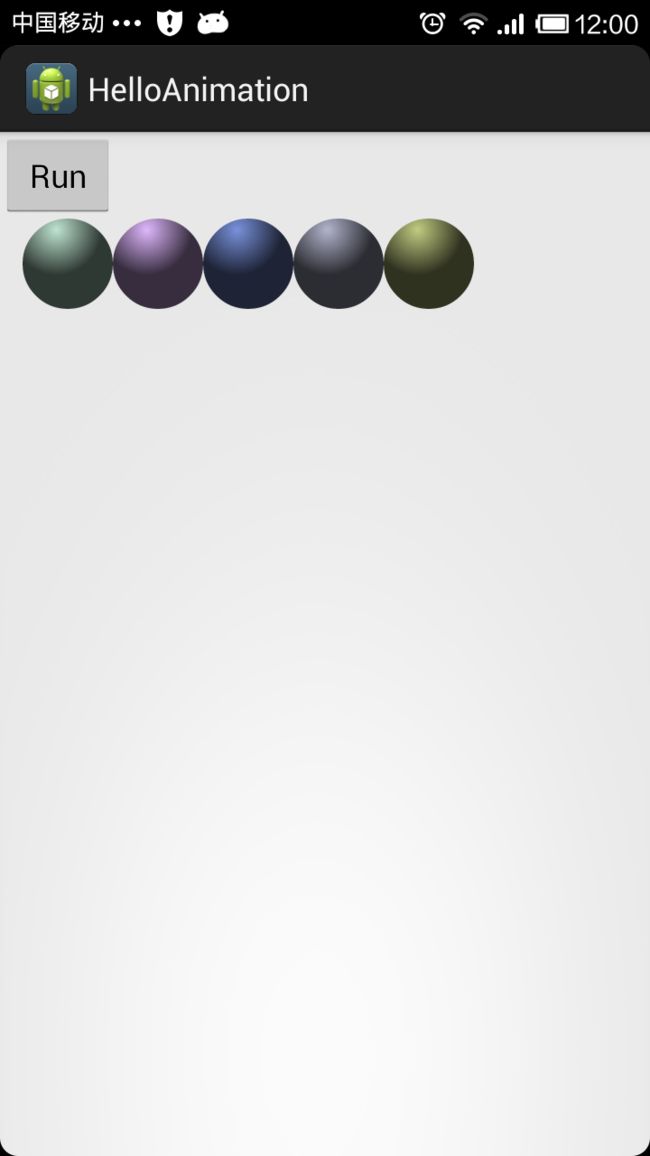
效果如图:
ValueAnimator
ValueAnimator使用时可以需要自己设置监听,将变动的值设置给目标对象:
ValueAnimator构造使用工厂方法。
上面例子中相应的代码片段:
                // ===============================================
                // 第五个球球的动画效果:使用ValueAnimator
                final ShapeHolder ball5 = balls.get(4);
                ValueAnimator valueAnimator5 = ValueAnimator.ofFloat(0f,
                        getHeight() - ball5.getHeight());
                valueAnimator5.setDuration(500);
                valueAnimator5.addUpdateListener(new AnimatorUpdateListener() {

                    // ValueAnimator需要自己在监听处理中设置对象参数
                    @Override
                    public void onAnimationUpdate(ValueAnimator animation) {
                        // 用animation.getAnimatedValue()得到当前的属性值,设置进动画对象中
                        ball5.setY((Float) animation.getAnimatedValue());

                        // 记得要刷新View否则不会调用重新绘制
                        invalidate();
                    }
                });
ObjectAnimator
ObjectAnimator是ValueAnimator的子类,构造时也用工厂方法。
ObjectAnimator不用自己设置监听来设置对象的值,要动画的对象和要改变的属性都在构造的时候设置好了。
比如前两个球球的动画:
                // ===============================================
                // 第1个球球的动画效果:用ObjectAnimator
                // 用工厂方法构造对象:用ofFloat()因为属性值是float类型
                // 第1个参数为目标对象:balls.get(0)
                // 第2个参数为属性名:y 这里要求目标对象要有“set属性名()”的方法。
                // 后面是可变参数,表明属性目标值,一个参数表明是终止值(对象要有get属性方法)
                // 可变参数的个数为2时,表明第一个是起始值,第二个是终止值;更多个参数时,动画属性值会逐个经过这些值

                ObjectAnimator anim1 = ObjectAnimator.ofFloat(balls.get(0),
                        "y", 0f, getHeight() - balls.get(0).getHeight())
                        .setDuration(500);

                // ===============================================
                // 第二个球球的动画效果:clone动画效果1,但是重新设置目标物体
                ObjectAnimator anim2 = anim1.clone();
                anim2.setTarget(balls.get(1));
                anim1.addUpdateListener(this);
                // 因为前两个动画完全相同,所以设置刷新监听的时候就只设置了一个(它们刷新的是同一个View)
AnimatorSet
AnimatorSet用来组织动画,动画可以同时播放,顺序播放,也可以设定一定的延迟之后播放。
playTogether()表示动画同时播放。
playSequentially() 表示动画顺序播放。
比如第三个球球先加速下降再减速上升的动画:
                // ===============================================
                // 第三个球球的动画效果:先加速下落,再减速上升
                ShapeHolder ball2 = balls.get(2);
                // 动画效果:落下效果
                ObjectAnimator animDown = ObjectAnimator.ofFloat(ball2, "y",
                        0f, getHeight() - ball2.getHeight()).setDuration(500);
                // 落下效果改变了Interpolator,设置为加速
                animDown.setInterpolator(new AccelerateInterpolator());
                // 动画效果:上升效果
                ObjectAnimator animUp = ObjectAnimator.ofFloat(ball2, "y",
                        getHeight() - ball2.getHeight(), 0f).setDuration(500);
                // 上升效果设置为减速上升
                animUp.setInterpolator(new DecelerateInterpolator());

                // 用一个AnimatorSet对象将下落效果和上升效果顺序播放
                AnimatorSet s1 = new AnimatorSet();
                s1.playSequentially(animDown, animUp);// 顺序播放效果,参数个数可变

                // 下落动画刷新View
                animDown.addUpdateListener(this);
                // 上升动画刷新View
                animUp.addUpdateListener(this);
因为参数是Animator类型的对象集合或者可变参数,所以表示AnimationSet是可嵌套使用的,因为AnimationSet是Animator的子类。
                // =============================================================
                // 用一个总的AnimatorSet对象管理以上所有动画
                animation = new AnimatorSet();
                animation.playTogether(anim1, anim2, s1);// 并行
                animation.playSequentially(s1, s2, valueAnimator5);// 串行
Demo中就是将所有的动画都放在一个AnimationSet对象中,最后调用start()方法播放。
参考资料
API Guides:Property Animation
http://developer.android.com/guide/topics/graphics/prop-animation.html#value-animator
博文:
http://www.cnblogs.com/angeldevil/archive/2011/12/02/2271096.html
项目地址:
https://github.com/mengdd/AnimationApiDemos.git
XML动画文件的使用
可以用XML文件来定义Animation。
文件必须有一个唯一的根节点:
对应的Java类是:
- ValueAnimator -
- ObjectAnimator -
- AnimatorSet -
比如:
<set android:ordering="sequentially" >

    <set>
        <objectAnimator
            android:duration="500"
            android:propertyName="x"
            android:valueTo="400"
            android:valueType="intType" />
        <objectAnimator
            android:duration="500"
            android:propertyName="y"
            android:valueTo="300"
            android:valueType="intType" />
    set>

    <objectAnimator
        android:duration="500"
        android:propertyName="alpha"
        android:valueTo="1f" />

set>
使用时:
        AnimatorSet set = (AnimatorSet) AnimatorInflater.loadAnimator(
                myContext, R.anim.property_animator);
        set.setTarget(myObject);
        set.start();
为了区分Property animation和View animation的资源文件,从Android 3.1开始,Property animation的xml文件存在res/animator/目录下(View animation的存在res/anim/目录下), animator这个名是可选的。但是如果你想要使用Eclipse ADT plugin (ADT 11.0.0+)的布局编辑器,你就必须使用res/animator/目录,因为ADT只在该目录下寻找property animation的资源文件。
Api Demo相关代码:
代码结构和上一篇文章中的基本类似,也是各种小球的动画,只不过这次的动画效果都是从XML文件中读取的。
完整的项目见项目地址:https://github.com/mengdd/AnimationApiDemos.git
public class AnimationFromXmlActivity extends Activity { @Override protected void onCreate(Bundle savedInstanceState) { super.onCreate(savedInstanceState); // 设置布局,布局xml中只包含了一个线性布局和一个Button setContentView(R.layout.animation_basic); LinearLayout container = (LinearLayout) findViewById(R.id.container); // 将自定义的View加入到线性布局中 final MyAnimationView animView = new MyAnimationView(this); container.addView(animView); // Button的点击事件即动画开始 Button starter = (Button) findViewById(R.id.startButton); starter.setOnClickListener(new View.OnClickListener() { public void onClick(View v) { animView.startAnimation(); } }); } public class MyAnimationView extends View implements ValueAnimator.AnimatorUpdateListener { private static final float BALL_SIZE = 100f; public final ArrayListballs = new ArrayList (); Animator animation = null; public MyAnimationView(Context context) { super(context); addBall(50, 50); addBall(200, 50); addBall(350, 50); addBall(500, 50, Color.GREEN); } private void createAnimation() { Context appContext = AnimationFromXmlActivity.this; if (animation == null) { // ======================================================== // 载入根节点为 的xml资源文件,解析放进ObjectAnimator类对象 ObjectAnimator anim = (ObjectAnimator) AnimatorInflater .loadAnimator(appContext, R.anim.object_animator); anim.addUpdateListener(this); anim.setTarget(balls.get(0)); // ======================================================== // 载入根节点为的xml资源文件,解析放进ValueAnimator类对象 ValueAnimator fader = (ValueAnimator) AnimatorInflater .loadAnimator(appContext, R.anim.animator); fader.addUpdateListener(new ValueAnimator.AnimatorUpdateListener() { public void onAnimationUpdate(ValueAnimator animation) { invalidate(); // ValueAnimator动画需要在监听器中自己设置对象的属性值 // 这里改变的是alpha值 balls.get(1).setAlpha( (Float) animation.getAnimatedValue()); } }); // ======================================================== // 载入根节点为的xml资源文件,解析放进AnimatorSet类对象 AnimatorSet seq = (AnimatorSet) AnimatorInflater.loadAnimator( appContext, R.anim.animator_set);// x和y属性同时改变的动画集合 seq.setTarget(balls.get(2)); // 这里要注意:因为AnimatorSet没有设置AnimatorUpdateListener的方法, // 所以如果其他动画没有设置AnimatorUpdateListener来进行View的invalidate()刷新, // 这个AnimatorSet seq是不刷新的 // ======================================================== // 载入根节点为的xml资源文件,解析放进ObjectAnimator类对象 ObjectAnimator colorizer = (ObjectAnimator) AnimatorInflater .loadAnimator(appContext, R.anim.color_animator); colorizer.setTarget(balls.get(3)); colorizer.addUpdateListener(this); // ======================================================== // 总的AnimationSet,所有的动画同时播放 animation = new AnimatorSet(); ((AnimatorSet) animation).playTogether(anim, fader, seq, colorizer); } } public void startAnimation() { createAnimation(); animation.start(); } private ShapeHolder createBall(float x, float y) { OvalShape circle = new OvalShape(); circle.resize(BALL_SIZE, BALL_SIZE); ShapeDrawable drawable = new ShapeDrawable(circle); ShapeHolder shapeHolder = new ShapeHolder(drawable); shapeHolder.setX(x); shapeHolder.setY(y); return shapeHolder; } private void addBall(float x, float y, int color) { ShapeHolder shapeHolder = createBall(x, y); shapeHolder.setColor(color); balls.add(shapeHolder); } private void addBall(float x, float y) { ShapeHolder shapeHolder = createBall(x, y); int red = (int) (100 + Math.random() * 155); int green = (int) (100 + Math.random() * 155); int blue = (int) (100 + Math.random() * 155); int color = 0xff000000 | red << 16 | green << 8 | blue; Paint paint = shapeHolder.getShape().getPaint(); int darkColor = 0xff000000 | red / 4 << 16 | green / 4 << 8 | blue / 4; RadialGradient gradient = new RadialGradient(37.5f, 12.5f, 50f, color, darkColor, Shader.TileMode.CLAMP); paint.setShader(gradient); balls.add(shapeHolder); } @Override protected void onDraw(Canvas canvas) { // 遍历并绘制每一个球形对象 for (ShapeHolder ball : balls) { // 这里是canvas.translate到一个地方,进行绘制,之后再translate回来 // 跟先save后restore的作用相同 canvas.translate(ball.getX(), ball.getY()); ball.getShape().draw(canvas); canvas.translate(-ball.getX(), -ball.getY()); } } public void onAnimationUpdate(ValueAnimator animation) { // 刷新View invalidate(); // 因为第一个小球用的是ObjectAnimator,所以这里不必要自己设置属性值 // 如果是ValueAnimator就需要加上下面两行 // ShapeHolder ball = balls.get(0); // ball.setY((Float) animation.getAnimatedValue()); } } }
相关动画:
资源文件:
第一个小球:下落,并且返回:
<objectAnimator xmlns:android="http://schemas.android.com/apk/res/android"
    android:duration="1000"
    android:valueTo="200"
    android:valueType="floatType"
    android:propertyName="y"
    android:repeatCount="1"
    android:repeatMode="reverse"/>
第二个小球:消失(变为透明),然后再出现:
<animator xmlns:android="http://schemas.android.com/apk/res/android"
    android:duration="1000"
    android:valueFrom="1"
    android:valueTo="0"
    android:valueType="floatType"
    android:repeatCount="1"
    android:repeatMode="reverse"/>
第三个小球:X轴与Y轴同时运动,并且返回:
<set>
    <objectAnimator xmlns:android="http://schemas.android.com/apk/res/android"
        android:duration="1000"
        android:valueTo="200"
        android:valueType="floatType"
        android:propertyName="x"
        android:repeatCount="1"
        android:repeatMode="reverse"/>
    <objectAnimator xmlns:android="http://schemas.android.com/apk/res/android"
        android:duration="1000"
        android:valueTo="400"
        android:valueType="floatType"
        android:propertyName="y"
        android:repeatCount="1"
        android:repeatMode="reverse"/>
set>
第四个小球:颜色变化:
<objectAnimator xmlns:android="http://schemas.android.com/apk/res/android"
    android:duration="1000"
    android:valueFrom="#0f0"
    android:valueTo="#00ffff"
    android:propertyName="color"
    android:repeatCount="1"
    android:repeatMode="reverse"/>
参考资料
API Guides:Declaring Animations in XML
Animation Resources
项目地址:https://github.com/mengdd/AnimationApiDemos.git
多属性动画
如果想同时改变多个属性,根据前面所学的,比较显而易见的一种思路是构造多个对象Animator ,
( Animator可以是ValueAnimator、ObjectAnimator和AnimatorSet)
然后最后把它们放在一个AnimatorSet中。
另一种思路就是,把多个属性的改变放在同一个 ValueAnimator 中(ObjectAnimator也是 ValueAnimator)。
而这就要借助PropertyValuesHolder。本文主要讲这种方法。
PropertyValuesHolder
PropertyValuesHolder是API Level 11加进来的。根据名字就可以判断出它是某种属性的持有者。
使用工厂方法构造PropertyValuesHolder对象,指定属性名和一系列属性值。
代码例子:MultiPropertyAnimation中:
                // ============================================================
                // 第二个小球:加速下落并且alpha变化
                ball = balls.get(1);

                // 利用ofFloat工厂方法构造PropertyValuesHolder类型对象,控制y属性
                PropertyValuesHolder pvhY = PropertyValuesHolder.ofFloat("y",
                        ball.getY(), getHeight() - BALL_SIZE);
                // 利用ofFloat工厂方法构造另一个PropertyValuesHolder类型对象,控制alpha属性
                PropertyValuesHolder pvhAlpha = PropertyValuesHolder.ofFloat(
                        "alpha", 1.0f, 0f);
                // 利用ofPropertyValuesHolder方法来构造ObjectAnimator对象
                // 把多个属性变化结合到一个动画中去
                ObjectAnimator yAlphaBouncer = ObjectAnimator
                        .ofPropertyValuesHolder(ball, pvhY, pvhAlpha)
                        .setDuration(DURATION / 2);
                yAlphaBouncer.setInterpolator(new AccelerateInterpolator());
                yAlphaBouncer.setRepeatCount(1);
                yAlphaBouncer.setRepeatMode(ValueAnimator.REVERSE);
关键帧Keyframe
PropertyValuesHolder的工厂方法里面,除了整形ofInt()、浮点型ofFloat()、Object类型ofObject()之外,还有一种:ofKeyframe()。
Keyframe类型对象由一个time/value对组成,定义了指定时间点的指定值。
每一个keyframe还可以拥有自己的interpolator,控制了前一个关键帧到这一个关键帧之间的时间动画行为。
Keyframe 对象的构造也用是工厂方法:ofInt(), ofFloat(), or ofObject()。
Keyframe对象构造完之后就可以用 ofKeyframe()工厂方法来构造PropertyValuesHolder对象。
代码例子:MultiPropertyAnimation中:
                // ============================================================
                // 第四个小球:利用关键帧实现曲线运动
                ball = balls.get(3);
                // 属性1:Y坐标运动:下落
                pvhY = PropertyValuesHolder.ofFloat("y", ball.getY(),
                        getHeight() - BALL_SIZE);
                float ballX = ball.getX();
                // 三个关键帧
                Keyframe kf0 = Keyframe.ofFloat(0f, ballX);
                Keyframe kf1 = Keyframe.ofFloat(.5f, ballX + 100f);
                Keyframe kf2 = Keyframe.ofFloat(1f, ballX + 50f);
                // 属性2:X坐标运动:曲折
                // 用三个关键帧构造PropertyValuesHolder对象
                PropertyValuesHolder pvhX = PropertyValuesHolder.ofKeyframe(
                        "x", kf0, kf1, kf2);

                // 再用两个PropertyValuesHolder对象构造一个ObjectAnimator对象
                ObjectAnimator yxBouncer = ObjectAnimator
                        .ofPropertyValuesHolder(ball, pvhY, pvhX).setDuration(
                                DURATION / 2);
                yxBouncer.setRepeatCount(1);
                yxBouncer.setRepeatMode(ValueAnimator.REVERSE);
View的多属性动画:使用ViewPropertyAnimator
ViewPropertyAnimator是API Level 12引进的。
它是用来做针对View对象的多个属性动画功能。
(前面的PropertyValuesHolder对象是针对所有对象的,范围更广)。
如果要同时变换一个View的多个属性的话,ViewPropertyAnimator提供了一种更方便和更适合的方法。
而且由于多个属性的invalidate方法调用统一管理,而不是之前的分别调用,所以还会有一些性能优化。
注意 ViewPropertyAnimator 这个类的对象不是由调用者构造的,而是通过View类的animate()方法返回的。
比如下面的代码对比:给同一个View实现同一个动画效果:
用多个ObjectAnimator对象:
ObjectAnimator animX = ObjectAnimator.ofFloat(myView, "x", 50f);
ObjectAnimator animY = ObjectAnimator.ofFloat(myView, "y", 100f);
AnimatorSet animSetXY = new AnimatorSet();
animSetXY.playTogether(animX, animY);
animSetXY.start();
用一个ObjectAnimator对象加多个PropertyValuesHolder:
PropertyValuesHolder pvhX = PropertyValuesHolder.ofFloat("x", 50f);
PropertyValuesHolder pvhY = PropertyValuesHolder.ofFloat("y", 100f);
ObjectAnimator.ofPropertyValuesHolder(myView, pvhX, pvyY).start();
用ViewPropertyAnimator:
myView.animate().x(50f).y(100f);
API Demos完整代码:
public class MultiPropertyAnimation extends Activity { private static final int DURATION = 1500; @Override public void onCreate(Bundle savedInstanceState) { super.onCreate(savedInstanceState); setContentView(R.layout.animation_multi_property); LinearLayout container = (LinearLayout) findViewById(R.id.container); final MyAnimationView animView = new MyAnimationView(this); container.addView(animView); Button starter = (Button) findViewById(R.id.startButton); starter.setOnClickListener(new View.OnClickListener() { public void onClick(View v) { animView.startAnimation(); } }); } public class MyAnimationView extends View implements ValueAnimator.AnimatorUpdateListener { private static final float BALL_SIZE = 100f; public final ArrayListballs = new ArrayList (); AnimatorSet animation = null; Animator bounceAnim = null; ShapeHolder ball = null; public MyAnimationView(Context context) { super(context); addBall(50, 0); addBall(150, 0); addBall(250, 0); addBall(350, 0); } private void createAnimation() { if (bounceAnim == null) { ShapeHolder ball; // ============================================================ // 第一个小球:弹跳效果 ball = balls.get(0); ObjectAnimator yBouncer = ObjectAnimator.ofFloat(ball, "y", ball.getY(), getHeight() - BALL_SIZE).setDuration( DURATION); yBouncer.setInterpolator(new BounceInterpolator()); yBouncer.addUpdateListener(this); // ============================================================ // 第二个小球:加速下落并且alpha变化 ball = balls.get(1); // 利用ofFloat工厂方法构造PropertyValuesHolder类型对象,控制y属性 PropertyValuesHolder pvhY = PropertyValuesHolder.ofFloat("y", ball.getY(), getHeight() - BALL_SIZE); // 利用ofFloat工厂方法构造另一个PropertyValuesHolder类型对象,控制alpha属性 PropertyValuesHolder pvhAlpha = PropertyValuesHolder.ofFloat( "alpha", 1.0f, 0f); // 利用ofPropertyValuesHolder方法来构造ObjectAnimator对象 // 把多个属性变化结合到一个动画中去 ObjectAnimator yAlphaBouncer = ObjectAnimator .ofPropertyValuesHolder(ball, pvhY, pvhAlpha) .setDuration(DURATION / 2); yAlphaBouncer.setInterpolator(new AccelerateInterpolator()); yAlphaBouncer.setRepeatCount(1); yAlphaBouncer.setRepeatMode(ValueAnimator.REVERSE); // ============================================================ // 第三个小球:宽度,高度,x,y同时变化 ball = balls.get(2); PropertyValuesHolder pvhW = PropertyValuesHolder.ofFloat( "width", ball.getWidth(), ball.getWidth() * 2); PropertyValuesHolder pvhH = PropertyValuesHolder.ofFloat( "height", ball.getHeight(), ball.getHeight() * 2); PropertyValuesHolder pvTX = PropertyValuesHolder.ofFloat("x", ball.getX(), ball.getX() - BALL_SIZE / 2f); PropertyValuesHolder pvTY = PropertyValuesHolder.ofFloat("y", ball.getY(), ball.getY() - BALL_SIZE / 2f); // 利用ofPropertyValuesHolder方法来构造ObjectAnimator对象 // 因为是可变参数,所以PropertyValuesHolder对象的个数不限 ObjectAnimator whxyBouncer = ObjectAnimator .ofPropertyValuesHolder(ball, pvhW, pvhH, pvTX, pvTY) .setDuration(DURATION / 2); whxyBouncer.setRepeatCount(1); whxyBouncer.setRepeatMode(ValueAnimator.REVERSE); // ============================================================ // 第四个小球:利用关键帧实现曲线运动 ball = balls.get(3); // 属性1:Y坐标运动:下落 pvhY = PropertyValuesHolder.ofFloat("y", ball.getY(), getHeight() - BALL_SIZE); float ballX = ball.getX(); // 三个关键帧 Keyframe kf0 = Keyframe.ofFloat(0f, ballX); Keyframe kf1 = Keyframe.ofFloat(.5f, ballX + 100f); Keyframe kf2 = Keyframe.ofFloat(1f, ballX + 50f); // 属性2:X坐标运动:曲折 // 用三个关键帧构造PropertyValuesHolder对象 PropertyValuesHolder pvhX = PropertyValuesHolder.ofKeyframe( "x", kf0, kf1, kf2); // 再用两个PropertyValuesHolder对象构造一个ObjectAnimator对象 ObjectAnimator yxBouncer = ObjectAnimator .ofPropertyValuesHolder(ball, pvhY, pvhX).setDuration( DURATION / 2); yxBouncer.setRepeatCount(1); yxBouncer.setRepeatMode(ValueAnimator.REVERSE); // =========================================================== // 所有小球动画的集合 bounceAnim = new AnimatorSet(); ((AnimatorSet) bounceAnim).playTogether(yBouncer, yAlphaBouncer, whxyBouncer, yxBouncer); } } public void startAnimation() { createAnimation(); bounceAnim.start(); } private ShapeHolder addBall(float x, float y) { OvalShape circle = new OvalShape(); circle.resize(BALL_SIZE, BALL_SIZE); ShapeDrawable drawable = new ShapeDrawable(circle); ShapeHolder shapeHolder = new ShapeHolder(drawable); shapeHolder.setX(x); shapeHolder.setY(y); int red = (int) (100 + Math.random() * 155); int green = (int) (100 + Math.random() * 155); int blue = (int) (100 + Math.random() * 155); int color = 0xff000000 | red << 16 | green << 8 | blue; Paint paint = drawable.getPaint(); int darkColor = 0xff000000 | red / 4 << 16 | green / 4 << 8 | blue / 4; RadialGradient gradient = new RadialGradient(37.5f, 12.5f, 50f, color, darkColor, Shader.TileMode.CLAMP); paint.setShader(gradient); shapeHolder.setPaint(paint); balls.add(shapeHolder); return shapeHolder; } @Override protected void onDraw(Canvas canvas) { for (ShapeHolder ball : balls) { canvas.translate(ball.getX(), ball.getY()); ball.getShape().draw(canvas); canvas.translate(-ball.getX(), -ball.getY()); } } public void onAnimationUpdate(ValueAnimator animation) { invalidate(); } } }
参考资料:
API Guides:Property Animation
http://developer.android.com/guide/topics/graphics/prop-animation.html
项目地址:https://github.com/mengdd/AnimationApiDemos.git
容器布局动画 LayoutTransition
Property animation系统还提供了对ViewGroup中的View改变加入动画的功能。
你可以使用 LayoutTransition 对ViewGroup中的View改变进行动画显示。
注意,本文所说的动画效果都是设置给容器(ViewGroup),然而效果是通过容器存放的View来体现的。
四种容器转换动画类型
当你添加或者移除ViewGroup中的View时,或者你调用View的setVisibility()方法来控制其显示或消失时,就处于一个转换状态。这种事件就有可能会激发动画。
当前被增加或者移除的View可以经历一个出现的动画或者一个消失的动画。
而且不止是当前要控制的View,ViewGroup中的其他View也可以随之进行变动,比如经历一个动画移动到新的位置。
所以一共有四种相关的动画类型:
1.View本身的出现动画;
2.消失动画;
3.由于新增了其他View而需要改变位置的动画;
4.由于移除了其他View而需要改变位置的动画。
(如果增加或移除了其他View之后,当前View的位置不需要改变,则无动画)。
你可以自定义这些动画,通过setAnimator() 方法把它们设置进一个 LayoutTransition 对象中去。
设置的时候需要一个 Animator 对象和一个常数:
APPEARING - A flag indicating the animation that runs on items that are appearing in the container.
CHANGE_APPEARING - A flag indicating the animation that runs on items that are changing due to a new item appearing in the container.
DISAPPEARING - A flag indicating the animation that runs on items that are disappearing from the container.
CHANGE_DISAPPEARING - A flag indicating the animation that runs on items that are changing due to an item disappearing from the container.
你可以自己定义这四种事件类型的动画,也可以使用默认的动画。
最后通过setLayoutTransition(LayoutTransition)方法把这些动画以一个 LayoutTransition 对象的形式设置给一个ViewGroup即可。
比如下面这个方法就生成了一个全新的LayoutTransition对象并set给容器(ViewGroup类型),这样四个动画就全是默认动画。
    // 重新生成LayoutTransition对象并设置给container
    private void resetTransition() {
        mTransitioner = new LayoutTransition();
        container.setLayoutTransition(mTransitioner);
    }
为这个mTransitioner对象生成四个自定义动画:
    // 生成自定义动画
    private void setupCustomAnimations() {
        // 动画:CHANGE_APPEARING
        // Changing while Adding
        PropertyValuesHolder pvhLeft = PropertyValuesHolder.ofInt("left", 0, 1);
        PropertyValuesHolder pvhTop = PropertyValuesHolder.ofInt("top", 0, 1);
        PropertyValuesHolder pvhRight = PropertyValuesHolder.ofInt("right", 0,
                1);
        PropertyValuesHolder pvhBottom = PropertyValuesHolder.ofInt("bottom",
                0, 1);
        PropertyValuesHolder pvhScaleX = PropertyValuesHolder.ofFloat("scaleX",
                1f, 0f, 1f);
        PropertyValuesHolder pvhScaleY = PropertyValuesHolder.ofFloat("scaleY",
                1f, 0f, 1f);

        final ObjectAnimator changeIn = ObjectAnimator.ofPropertyValuesHolder(
                this, pvhLeft, pvhTop, pvhRight, pvhBottom, pvhScaleX,
                pvhScaleY).setDuration(
                mTransitioner.getDuration(LayoutTransition.CHANGE_APPEARING));
        mTransitioner.setAnimator(LayoutTransition.CHANGE_APPEARING, changeIn);
        changeIn.addListener(new AnimatorListenerAdapter() {
            public void onAnimationEnd(Animator anim) {
                View view = (View) ((ObjectAnimator) anim).getTarget();
                view.setScaleX(1f);
                view.setScaleY(1f);
            }
        });

        // 动画:CHANGE_DISAPPEARING
        // Changing while Removing
        Keyframe kf0 = Keyframe.ofFloat(0f, 0f);
        Keyframe kf1 = Keyframe.ofFloat(.9999f, 360f);
        Keyframe kf2 = Keyframe.ofFloat(1f, 0f);
        PropertyValuesHolder pvhRotation = PropertyValuesHolder.ofKeyframe(
                "rotation", kf0, kf1, kf2);
        final ObjectAnimator changeOut = ObjectAnimator
                .ofPropertyValuesHolder(this, pvhLeft, pvhTop, pvhRight,
                        pvhBottom, pvhRotation)
                .setDuration(
                        mTransitioner
                                .getDuration(LayoutTransition.CHANGE_DISAPPEARING));
        mTransitioner.setAnimator(LayoutTransition.CHANGE_DISAPPEARING,
                changeOut);
        changeOut.addListener(new AnimatorListenerAdapter() {
            public void onAnimationEnd(Animator anim) {
                View view = (View) ((ObjectAnimator) anim).getTarget();
                view.setRotation(0f);
            }
        });

        // 动画:APPEARING
        // Adding
        ObjectAnimator animIn = ObjectAnimator.ofFloat(null, "rotationY", 90f,
                0f).setDuration(
                mTransitioner.getDuration(LayoutTransition.APPEARING));
        mTransitioner.setAnimator(LayoutTransition.APPEARING, animIn);
        animIn.addListener(new AnimatorListenerAdapter() {
            public void onAnimationEnd(Animator anim) {
                View view = (View) ((ObjectAnimator) anim).getTarget();
                view.setRotationY(0f);
            }
        });

        // 动画:DISAPPEARING
        // Removing
        ObjectAnimator animOut = ObjectAnimator.ofFloat(null, "rotationX", 0f,
                90f).setDuration(
                mTransitioner.getDuration(LayoutTransition.DISAPPEARING));
        mTransitioner.setAnimator(LayoutTransition.DISAPPEARING, animOut);
        animOut.addListener(new AnimatorListenerAdapter() {
            public void onAnimationEnd(Animator anim) {
                View view = (View) ((ObjectAnimator) anim).getTarget();
                view.setRotationX(0f);
            }
        });

    }
默认的布局转换动画
如果你要使用默认的动画,一个非常简单的方式是在ViewGroup的XML布局文件中把android:animateLayoutchanges 属性设置为true。
这样就自动地按照默认方式来对要移除或添加的View,还有Group中的其他View进行动画。
比如ApiDemos中的LayoutAnimationsByDefault:
xml version="1.0" encoding="utf-8"?>
<LinearLayout xmlns:android="http://schemas.android.com/apk/res/android"
    android:layout_width="match_parent"
    android:layout_height="match_parent"
    android:orientation="vertical" >

    <Button
        android:id="@+id/addNewButton"
        android:layout_width="wrap_content"
        android:layout_height="wrap_content"
        android:text="Add Button" />


    <LinearLayout
        android:id="@+id/gridContainer"
        android:layout_width="wrap_content"
        android:layout_height="wrap_content"
        android:animateLayoutChanges="true"
        android:orientation="vertical">
    LinearLayout>

LinearLayout>
我把布局改成了线性布局,只要是ViewGroup类型都可以。
默认情况下,DISAPPEARING和CHANGE_APPEARING动画是立即开始的,其他动画都有一个默认的开始延迟。
这是因为,比如:当一个新的View出现的时候,其他View要立即执行CHANGE_APPEARING动画腾出位置,而新出现的View在一定延迟之后再执行APPEARING出现;
相反地,一个View消失的时候,它需要先DISAPPEARING动画消失,而其他的View需要先等它消失后再执行CHANGE_DISAPPEARING。
当然这些默认的行为都可以通过 setDuration(int, long) 和setStartDelay(int, long)等方法改变。
API Demos代码
ApiDemos中布局动画相关的类有:LayoutAnimationsByDefault 、LayoutAnimations、LayoutAnimationsHideShow。
完整的项目可以去github下载。https://github.com/mengdd/AnimationApiDemos
参考资料
API Guides: Property Animation
http://developer.android.com/guide/topics/graphics/prop-animation.html
其中的Animating Layout Changes to ViewGroups
LayoutTransition类Reference:
http://developer.android.com/reference/android/animation/LayoutTransition.html
项目地址:
https://github.com/mengdd/AnimationApiDemos
View Animation介绍
View Animation
View animation系统可以用来执行View上的Tween animation和Frame animation。
Tween animation可以在View对象上执行一系列的简单变换,比如位置、尺寸、旋转、透明度等。
animation package 包中包含了tween animation所有的类。
一系列的动画命令定义了一个完整的tween animation,可以用代码定义也可以用XML资源文件定义。
XML资源文件
XML资源文件的使用可以见:Animation Resources。
XML文件放在项目的res/anim/目录下。文件必须有一个唯一的根节点。
这个根节点可以是:
默认情况下,所有的动画都是并行进行的,要想使得它们顺寻发生,你必须指定startOffset属性。
有一些值,可以指定是相对于View本身还是相对于父类容器的。
比如pivotX,要表示相对于自身的50%,要用50%;要表示相对于父类容器的50%,则直接写50。
使用例子
XML文件存储为:res/anim/hyperspace_jump.xml:
<set xmlns:android="http://schemas.android.com/apk/res/android"
    android:shareInterpolator="false">
    <scale
        android:interpolator="@android:anim/accelerate_decelerate_interpolator"
        android:fromXScale="1.0"
        android:toXScale="1.4"
        android:fromYScale="1.0"
        android:toYScale="0.6"
        android:pivotX="50%"
        android:pivotY="50%"
        android:fillAfter="false"
        android:duration="700" />
    <set
        android:interpolator="@android:anim/accelerate_interpolator"
        android:startOffset="700">
        <scale
            android:fromXScale="1.4"
            android:toXScale="0.0"
            android:fromYScale="0.6"
            android:toYScale="0.0"
            android:pivotX="50%"
            android:pivotY="50%"
            android:duration="400" />
        <rotate
            android:fromDegrees="0"
            android:toDegrees="-45"
            android:toYScale="0.0"
            android:pivotX="50%"
            android:pivotY="50%"
            android:duration="400" />
    set>
set>
在代码中把这个动画应用于一个ImageView:
ImageView image = (ImageView) findViewById(R.id.image);
Animation hyperspaceJump = AnimationUtils.loadAnimation(this, R.anim.hyperspace_jump);
image.startAnimation(hyperspaceJump);
除了调用 startAnimation() ,另一种处理方式是通过Animation.setStartTime()方法定义一个开始时间,然后通过View.setAnimation()方法把这个动画赋给控件即可。
View Animation和Property Animation
View Animation是API Level 1就引入的。
View Animation在包android.view.animation中。
动画类叫Animation。
Property Animation是API Level 11引入的,即Android 3.0才开始有Property Animation相关的API。
Property Animation API在包 android.animation中。
动画相关类叫Animator。
参考资料
API Guides:View Animation
http://developer.android.com/guide/topics/graphics/view-animation.html
Tween animation的包:
http://developer.android.com/reference/android/view/animation/package-summary.html
Animation类:
http://developer.android.com/reference/android/view/animation/Animation.html
Animation Resources
http://developer.android.com/guide/topics/resources/animation-resource.html


