Android之Layout总结
之前自己在用Layout的时候用的最多的就是LinearLayout和RelativeLayout了,对其他的其实也只是一知半解。近来也是接触到了更多的Layout在实际中的用途,也算是有了更多的认识。
我现在接触到的比较多的Layout分为几种:LinearLayout,RelativeLayout,FrameLayout,ConstraintLayout。最后再讲一下自己去自定义layout。
LinearLayout
顾名思义,就是一种线性的布局,也是我们最常用到的布局了,一般可以分为水平布局和垂直布局。LinearLayout中有一个我比较喜欢的东西,就是可以通过定义layout_weight来定义布局中每个子view应占的比例大小。这里就不再多做介绍了,做一个简单的布局,效果图及相应代码如下:
RelativeLayout
从名字也可以看出,这是相对布局。它主要针对的,就是view和view之间的布局关系,以及子view和父view之间的布局关系。大致可以分成以下三种类型:
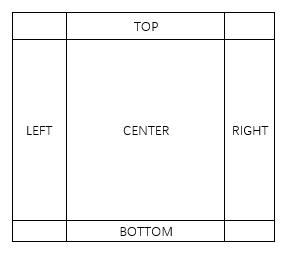
(1)与父view之间的相对关系,这里用一个图来表示位置关系:
android:layout_centerHrizontal:水平居中
android:layout_centerVertical:垂直居中
android:layout_centerInparent:水平+垂直居中
android:layout_alignParentTop:位于父view的上边缘
android:layout_alignParentBottom 位于父view的下边缘
android:layout_alignParentLeft 位于父view的左边缘
android:layout_alignParentRight 位于父view的右边缘
(2)view与view之间的关系:
android:layout_above 位于view的上边
android:layout_below 位于view的下边
android:layout_toLeftOf 位于view的左边
andorid:layout_toRightOf 位于view的右边
(3)与父view或其他view的边缘关系,就是说当前view的某个边缘与父view或其他view的边缘对齐
android:layout_alignTop 和某view上边缘对齐
android:layout_alignBottom 和某view下边缘对齐
android:layout_alignLeft 和某view左边缘对齐
android:layout_alignRight 和某view右边缘对齐
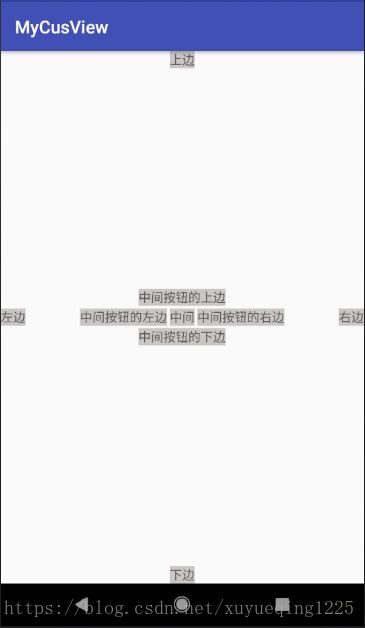
这里也是给出一个RelativeLayout的效果图和相应代码:
FrameLayout
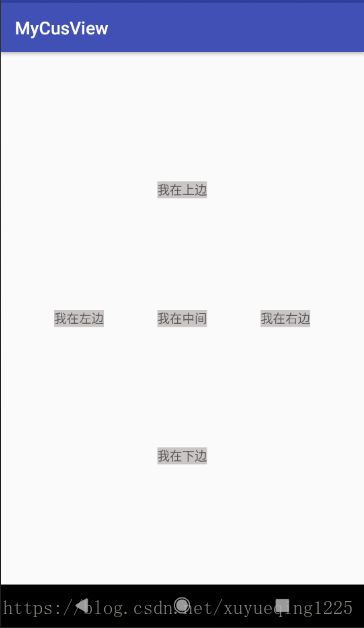
帧布局。这个布局的特性就是所有的view都是从左上方来进行绘制的,如果不做特殊的定义,它们之间就会层层覆盖。这种布局有一个用途,就是当我们在做某个展示界面,可能除了最终数据加载成功之后的展示界面,还需要一个加载中的界面和一个加载失败的界面。这里我们就可以用FrameLayout来解决问题。同时定义这三个view,然后通过加载的状态来决定要对哪个view进行展示即可。推而广之,当我们的某一个view有多种状态展示时,就可以通过FrameLayout来定义所有展示样式,通过代码去控制要展示哪一个样式。同样,这里贴出一个效果图和相应代码:
ConstraintLayout
这个也是Android中的一个比较酷炫的Layout了,因为它可以让我们用可视化的方式来进行Android界面的设计,就像ios那样。它通过去对每个view的位置进行约束来实现的。具体的介绍可以参考郭霖老师的博客:http://blog.csdn.net/guolin_blog/article/details/53122387 。其实这个的话我现在用的也不多,主要是还是习惯了用代码的方式来进行布局设计...不过感觉这个东西值得一学。照例,贴一下效果图和相应代码。不过如果以后用这个东西,是不是以后就不需要看xml代码了:
自定义布局之继承ViewGroup
除了上面说的这些布局之外,我们也可以通过继承ViewGroup来自定义自己的布局。自定义布局的话,我们需要对onMeasure方法和onLayout方法进行重写。假设我们要做这样一个布局:当前view的左上角为上一个view的中心点。效果图如下:
这个用我们通用的View来做的实现的话不太好实现,所以我们通过自定义Layout的方式来实现。在onMeasure中获得我们这个ViewGroup的宽和高,在onLayout方法中对每个子view所需要展示的位置和大小进行设置。代码如下:
public class MyLayout extends ViewGroup {
    public MyLayout(Context context) {
        super(context);
    }

    public MyLayout(Context context, AttributeSet attrs) {
        super(context, attrs);
    }

    @Override
    protected void onMeasure(int widthMeasureSpec, int heightMeasureSpec) {
        super.onMeasure(widthMeasureSpec, heightMeasureSpec);
        measureChildren(widthMeasureSpec, heightMeasureSpec);
        int widthMode = MeasureSpec.getMode(widthMeasureSpec);
        int widthSize = MeasureSpec.getSize(widthMeasureSpec);
        int heightMode = MeasureSpec.getMode(heightMeasureSpec);
        int heightSize = MeasureSpec.getSize(heightMeasureSpec);

        int childCount = getChildCount();
        if (childCount == 0) {
            setMeasuredDimension(0, 0);
        } else {
            if (widthMode == MeasureSpec.AT_MOST && heightMode == MeasureSpec.AT_MOST) {
                int width = getTotalWidth();
                int height = getTotalHeight();
                setMeasuredDimension(width, height);
            } else if (widthMode == MeasureSpec.AT_MOST) {
                setMeasuredDimension(getTotalWidth(), heightSize);
            } else if (heightMode == MeasureSpec.AT_MOST) {
                setMeasuredDimension(widthSize, getTotalHeight());
            }
        }
    }

    @Override
    protected void onLayout(boolean changed, int l, int t, int r, int b) {
        int count = getChildCount();
        int curHeight = t;
        int curWidth = l;
        for (int i = 0; i < count; i++) {
            View childView = getChildAt(i);
            int height = childView.getMeasuredHeight();
            int width = childView.getMeasuredWidth();
            childView.layout(curWidth, curHeight, curWidth + width, curHeight + height);
            curWidth += width / 2;
            curHeight += height / 2;
        }
    }

    /**
     * 获取总宽度
     *
     * @return
     */
    private int getTotalWidth() {
        int childCount = getChildCount();
        int totalWidth = 0;
        for (int i = 0; i < childCount; i++) {
            View childView = getChildAt(i);
            if (i == childCount - 1) {
                totalWidth += childView.getWidth();
            } else {
                totalWidth += childView.getWidth() / 2;
            }
        }
        return totalWidth;
    }

    /**
     * 获取总高度
     *
     * @return
     */
    private int getTotalHeight() {
        int childCount = getChildCount();
        int totalHeight = 0;
        for (int i = 0; i < childCount; i++) {
            View childView = getChildAt(i);
            if (i == childCount - 1) {
                totalHeight += childView.getHeight();
            } else {
                totalHeight += childView.getHeight() / 2;
            }
        }
        return totalHeight;
    }
}
自定义布局之继承已有Layout
这也是自定义View相对常用的做法。例如我们现在要做一个ViewGroup,需要展示一系列的TextView,这些TextView数量未知,且随时可能改变数量。这样我们就不能用.xml来进行配置,需要用代码的方式来进行配置。我们可以继承LinearLayout,通过调用ViewGroup.addView()方法来将view添加到我们的布局中即可。这里放一个我之前实现的,展示一横列圆点的功能。当时做这个主要是为了跟ViewPager结合。效果图和相应代码如下:
MyDotView:
public class MyDotView extends View {
    public int mIndex;

    public MyDotView(Context context) {
        super(context);
    }

    public MyDotView(Context context, @Nullable AttributeSet attrs) {
        super(context, attrs);
    }

    public MyDotView(Context context, @Nullable AttributeSet attrs, int defStyleAttr) {
        super(context, attrs, defStyleAttr);
    }

    public void setIndex(int index) {
        mIndex = index;
    }

    public int getIndex() {
        return mIndex;
    }
}
MyDotListView:
public class MyDotListView extends LinearLayout {
    public int DOT_SIZE;
    private List mDotList;
    private int mNum;
    private Context mContext;

    public MyDotListView(Context context) {
        super(context);
        mContext = context;
        mDotList = new ArrayList<>();
        this.setOrientation(LinearLayout.HORIZONTAL);
    }

    public MyDotListView(Context context, AttributeSet attrs) {
        super(context, attrs);
        mContext = context;
        mDotList = new ArrayList<>();
        this.setOrientation(LinearLayout.HORIZONTAL);
    }

    public void setData(int num) {
        removeAllViews();
        mDotList.clear();
        mNum = num;
        for (int i = 0; i < num; i++) {
            MyDotView view = new MyDotView(mContext);
            view.setIndex(i);
            view.setBackgroundResource(R.drawable.circle_gray);
            DOT_SIZE = UIUtils.dp2px(mContext, 8);
            LinearLayout.LayoutParams lp = new LinearLayout.LayoutParams(DOT_SIZE, DOT_SIZE);
            lp.leftMargin = UIUtils.dp2px(mContext, 4);
            lp.rightMargin = UIUtils.dp2px(mContext, 4);
            this.addView(view, lp);
            mDotList.add(view);
        }
        requestLayout();
    }
}
使用:
MyDotListView mDotListView = (MyDotListView) findViewById(R.id.my_dot_list_view);
mDotListView.setData(7);
这一篇就先写到这里了,以后学到新的东西再来继续补充。感觉学的东西不整理真的是过目就忘,希望以后能够更多的时间来做知识整理吧。


