超详细 Seafile 7.0.X 专业版搭建教程 配置nginx解决网页无法访问
前言

Seafile是一个开源、专业、可靠的云存储平台;使用Seafile我们可以搭建属于自己的私有云,实现随时随地访问自己的文件。
seafile的最大优势:
直接通过本地 S 盘来访问云端文件,不占用本地存储。为电脑提供服务器的海量存储空间。同操作系统无缝集成,还可以离线修改文件。
Seafile官方文档:https://cloud.seafile.com/published/seafile-manual-cn/home.md
注意:7.0.x 版本之后,8000端口默认监听在127.0.0.1地址上,这意味着您无法直接通过8000端口访问Seafile服务。建议您配置nginx反向代理。
本文安装环境为CentOS 7
一、准备工作
- 下载seafile-server专业版:官方下载
- Python(2.7及以上)
- 安装MySQL :菜鸟教程(建议数据库选择MySQL,SQLite容易出错)
- 安装Nginx:菜鸟教程(非必须,7.0以上版本推荐使用,外网访问推荐使用)
- 公网IP:非必须,通过外网访问时需要
- Frp:Github地址(非必须,内网穿透工具,本地没有公网IP时配合有公网IP的服务器使用)
二、安装Seafile 服务器
(一)安装依赖
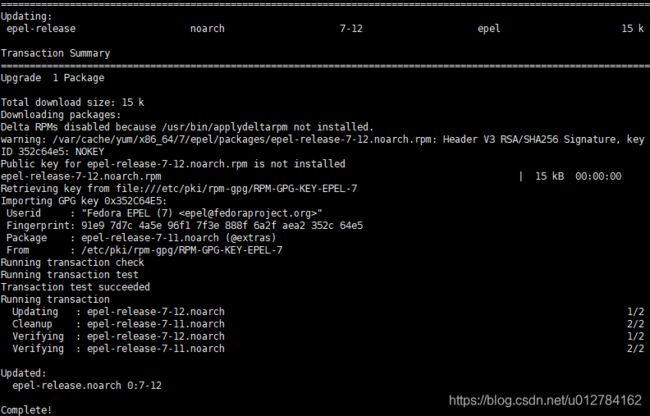
1. 安装epel
yum -y install epel-release
2. 安装pip
yum -y install python-pip
3. 安装依赖
yum -y install python-imaging MySQL-python python-memcached python-ldap python-urllib3 ffmpeg ffmpeg-devel

pip install pillow moviepy
(二)安装Seafile 服务器
1. 创建文件夹
mkdir -p /usr/local/seafile-server
2.解压
tar -zxvf seafile-pro-server_7.0.9_x86-64.tar.gz -C /usr/local/seafile-server/
进入解压后的文件夹
cd /usr/local/seafile-server/seafile-pro-server-7.0.9/
3.执行安装脚本
./setup-seafile-mysql.sh
初始化脚本会检查是否满足安装的条件,条件满足后按回车键继续
该脚本会依次询问你一些问题,从而一步步引导你配置 Seafile 的各项参数,直接敲回车为使用默认配置

输入服务器名称

输入服务器ip或域名

设置文件存放的目录,也就是要共享的主目录,这个目录必须之前不存在

设置文件服务端口,可使用默认设置

选择创建数据库的方式,通常情况下选1
- 如果选择1, 你需要提供根密码. 脚本程序会创建数据库和用户。
- 如果选择2, ccnet/seafile/seahub 数据库应该已经被你(或者其他人)提前创建。

输入数据库的地址,数据库安装在本机时可使用默认设置

输入数据库端口号

输入数据库root用户的密码

输入数据库seafile用户的用户名,如果用户不存在则创建该用户,可使用默认设置

输入刚才输入的用户的密码

设置数据库名,可使用默认设置

确认配置无误后按回车键继续

稍作等待,安装完成

(三)配置Nginx
我们需要根据官方文档的配置稍作修改,以符合自己的实际情况
1.打开Nginx配置文件
vim /usr/local/webserver/nginx/conf/nginx.conf
2.Nginx配置文件
可以参考配置:
注意:中文注释地方是需要根据实际情况修改的地方
#user  nobody;
user www www;
worker_processes  4;

#error_log  logs/error.log;
#error_log  logs/error.log  notice;
#error_log  logs/error.log  info;
error_log /data/logs/nginx/error.log crit;
pid /usr/local/webserver/nginx/nginx.pid;

#pid        logs/nginx.pid;


events {
    worker_connections  1024;
}


http {
    include       mime.types;
    default_type  application/octet-stream;

    #log_format  main  '$remote_addr - $remote_user [$time_local] "$request" '
    #                  '$status $body_bytes_sent "$http_referer" '
    #                  '"$http_user_agent" "$http_x_forwarded_for"';

    #access_log  logs/access.log  main;

    sendfile        on;
    #tcp_nopush     on;

    #keepalive_timeout  0;
    keepalive_timeout  65;
    client_max_body_size 0;
    send_timeout 180;
    #gzip  on;
    fastcgi_send_timeout 300;
    fastcgi_read_timeout 300;
    fastcgi_connect_timeout 300;
    fastcgi_buffer_size 64k;
    fastcgi_buffers 4 64k;
    fastcgi_busy_buffers_size 128k;
    fastcgi_temp_file_write_size 128k;
    proxy_connect_timeout 18000;
    proxy_send_timeout 18000;
    proxy_read_timeout 18000;

    server {
        listen       80;
        server_name  localhost;
        proxy_set_header X-Forwarded-For $remote_addr;
        #charset koi8-r;
        #access_log  logs/host.access.log  main;
        location / {
             #seahub端口,根据实际情况设置,默认是8000
             proxy_pass         http://127.0.0.1:8000;
             proxy_set_header   Host $host;
             proxy_set_header   X-Real-IP $remote_addr;
             proxy_set_header   X-Forwarded-For $proxy_add_x_forwarded_for;
             proxy_set_header   X-Forwarded-Host $server_name;
             proxy_read_timeout  1200s;
             # used for view/edit office file via Office Online Server
             client_max_body_size 0;
        }
        location /seafhttp {
            rewrite ^/seafhttp(.*)$ $1 break;
            #seafile的端口,根据实际情况设置,默认是8082
            proxy_pass http://127.0.0.1:8082;
            client_max_body_size 0;
            proxy_set_header   X-Forwarded-For $proxy_add_x_forwarded_for;
            proxy_connect_timeout  36000s;
            proxy_read_timeout  36000s;
            proxy_send_timeout  36000s;
            send_timeout  36000s;
            proxy_request_buffering off;
        }
        location /media {
            #静态文件路径,根据实际安装路径找到/seafile-server-latest/seahub的位置
            root /usr/local/seafile-server/seafile-server-latest/seahub;
        }
        #error_page  404              /404.html;

        # redirect server error pages to the static page /50x.html
        #
        error_page   500 502 503 504  /50x.html;
        location = /50x.html {
            root   html;
        }
    }
}
3.检查Nginx配置文件正确性
nginx -t
这里我已经把nginx的目录添加到环境变量中了,所以可以直接使用nginx命令,如果没有设置环境变量需要进入nginx的目录执行./nginx -t

出现test is successful代表校验通过
4.让Nginx重新加载配置
nginx -s reload
(三)启动seafile-server
进入seafile-server-latest目录
cd ../seafile-server-latest/
1.启动seafile
./seafile.sh start
2.启动seahub
./seahub.sh start
3.进入网页
在浏览器输入http://ip:port进入网页(ip为机器IP,port为nginx监听端口)
如果机器有防火墙,需要先开放nginx监听的端口
可以参考:linux防火墙查看状态firewall、iptable

三、使用客户端访问

客户端下载
可以使用Windows 挂载盘客户端挂载为本地硬盘使用

四、开启WebDAV
一种基于 HTTP 1.1协议的通信协议,开启后可以使用支持该协议的第三方客户端访问文件。
开启方法:官方文档
以下为使用Nginx的教程
1. 编辑seafdav.conf文件
vim ../conf/seafdav.conf
port为WedDAV监听端口,可自行设置
[WEBDAV]
enabled = true
port = 8080
fastcgi = true
share_name = /seafdav
2. 修改Nginx配置
在server里添加以下内容(中文注释处需要根据实际修改)
location /seafdav {
            #此处端口号改为刚才设置的WedDAV监听端口
            fastcgi_pass    127.0.0.1:8080;
            fastcgi_param   SCRIPT_FILENAME     $document_root$fastcgi_script_name;
            fastcgi_param   PATH_INFO           $fastcgi_script_name;
            fastcgi_param   SERVER_PROTOCOL     $server_protocol;
            fastcgi_param   QUERY_STRING        $query_string;
            fastcgi_param   REQUEST_METHOD      $request_method;
            fastcgi_param   CONTENT_TYPE        $content_type;
            fastcgi_param   CONTENT_LENGTH      $content_length;
            fastcgi_param   SERVER_ADDR         $server_addr;
            fastcgi_param   SERVER_PORT         $server_port;
            fastcgi_param   SERVER_NAME         $server_name;
            client_max_body_size 0;
            proxy_connect_timeout  36000s;
            proxy_read_timeout  36000s;
            proxy_send_timeout  36000s;
            send_timeout  36000s;
            # This option is only available for Nginx >= 1.8.0. See more details below.
            proxy_request_buffering off;
        }
3. 使Nginx配置生效
nginx -t
nginx -s reload
4. 重启seafile
./seafile.sh restart
5. 使用WebDAV
在浏览器输入http://ip:port/seafdav,登录后可访问文件

还可以使用其他第三方支持WebDAV的客户端,请自行摸索
五、设置外网访问
(一)情况分析
通过外网访问需要有公网IP,目前大致可分为三种情况:
1. 本机有公网IP
适用情景:在VPS提供商(例如阿里云等)购买VPS,并用该机器搭建SeafileServer。
解决方案:在安装的时候填入本机的公网IP即可
2. 路由器有公网IP
适用情景:跟运营商py后拿到公网IP,搭建SeafileServer的机器连接到该路由器上
解决方案:在安装时填入公网IP,路由器设置端口转发即可
3. 本地没有公网IP,但有 有公网IP的VPS
适用情景:在VPS提供商(例如阿里云等)购买VPS,但由于空间太小或其他原因不想把SeafileServer搭建在VPS上
解决方案:使用内网穿透,把本地Nginx端口映射到有公网IP的VPS上。可以使用frp,简单易用,参见中文文档
(二)系统设置
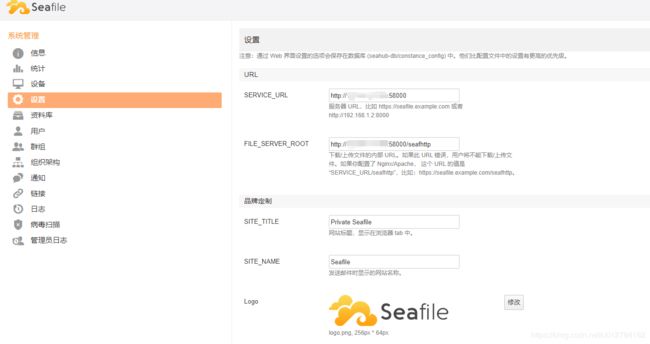
在按照以上方法设置好公网IP后还需要管理员登录网页,进入系统管理-设置,设置SERVICE_URL和FILE_SERVER_ROOT,否则无法上传和下载文件

(三)局域网流量不走远端服务器
如果使用内网穿透并且按照上面的设置,那么就算在局域网内也会通过远端服务器访问,这样速度就不如局域网直接访问快了,这里提供一个简单的解决方法:
在上一步设置中SERVICE_URL和FILE_SERVER_ROOT仍然填局域网内的地址,这样局域网就正常访问,如果需要外网访问时可以通过支持WebDAV的客户端访问。


