ElK架构初步设计流程即使用方法介绍
ElK架构初步设计流程即使用方法介绍
1、Elastic Stack
Elasticsearch
Elasticsearch 基于java,是个开源分布式搜索引擎,它的特点有:分布式,零配置,自动发现,索引自动分片,索引
副本机制,restful风格接口,多数据源,自动搜索负载等。
Logstash
Logstash 基于java,是一个开源的用于收集,分析和存储日志的工具。
Kibana
Kibana 基于nodejs,也是一个开源和免费的工具,Kibana可以为 Logstash 和 ElasticSearch
提供的日志分析友好的 Web 界面,可以汇总、分析和搜索重要数据日志。
Beats
Beats是elastic公司开源的一款采集系统监控数据的代理agent,是在被监控服务器上以客户端形式运行的数据收集
器的统称,可以直接把数据发送给Elasticsearch或者通过Logstash发送给Elasticsearch,然后进行后续的数据分析活
动。
Beats由如下组成:
- Packetbeat:是一个网络数据包分析器,用于监控、收集网络流量信息,Packetbeat嗅探服务器之间的流量, 解析应用层协议,并关联到消息的处理,其支 持ICMP (v4 and v6)、DNS、HTTP、Mysql、PostgreSQL、 Redis、MongoDB、Memcache等协议;
- Filebeat:用于监控、收集服务器日志文件,其已取代 logstash forwarder;
- Metricbeat:可定期获取外部系统的监控指标信息,其可以监控、收集 Apache、HAProxy、MongoDB MySQL、Nginx、PostgreSQL、Redis、System、Zookeeper等服务;
2、搭建elk架构
前提:下载elasticsearch、kibana、Logstash、filebeat、nginx等,创建新用户。ps:elasticsearch、kibana等不支持root启动。
2、1 elasticsearch搭建
解压到新用户文件夹,此文件夹归属于新用户而不是root。
配置:
vim /elasticsearch/conf/elasticsearch.yml
vim /etc/security/limits.conf
vim /etc/sysctl.conf

添加vm.max_map_count=655360

执行以下命令生效:
sysctl -p

关闭防火墙:systemctl stop firewalld.service
Cd /elasticsearch/bin
./elasticsearch
启动
2、2 elasticsearch-head插件
在google商店中安装elasticsearch-head,连接ip:9100
``

2、3安装kibana
解压到新文件夹
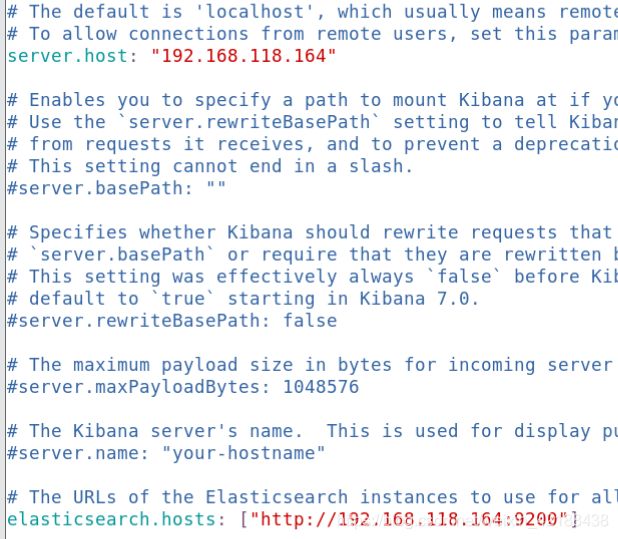
vim kibana/config/kibana.yml
将server.host,elasticsearch.url修改成所在服务器的ip地址
Kibana的默认端口是5601

开启防火墙:systemctl start firewalld.service

开启5601端口:firewall-cmd --permanent --zone=public --add-port=5601/tcp

重启防火墙:firewall-cmd –reload

启动kbana
cd /kabana/bin
./kabana

关闭防火墙可在windows下浏览
浏览器访问:http://192.168.25.131:5601
2、4安装filebeat
解压到指定文件
cd filebeat-6.5.4-linux-x86_64
#创建如下配置文件
itcast.yml
filebeat.inputs:
  - type: stdin
  - enabled: true
setup.template.settings:
  index.number_of_shards: 3
  output.console:
  	pretty: true
  	enable: true
  #启动filebeat ./filebeat -e -c itcast.yml
内置了很多的module,但是都没有启用,如果需要启用需要进行enable操作:
./filebeat modules enable nginx #启动
./filebeat modules disable nginx #禁用

进入moudels.d进行配置nginx

- module: nginx
  # Access logs
  access:
    enabled: true

    # Set custom paths for the log files. If left empty,
    # Filebeat will choose the paths depending on your OS.
    var.paths: ["/usr/local/nginx/logs/access.log"]

  # Error logs
  error:
    enabled: true

    # Set custom paths for the log files. If left empty,
    # Filebeat will choose the paths depending on your OS.
    var.paths: ["/usr/local/nginx/logs/error.log"]
    #

  # Ingress-nginx controller logs. This is disabled by default. It could be used in Kubernetes environments to parse ingress-nginx logs
  ingress_controller:
    enabled: false

    # Set custom paths for the log files. If left empty,
    # Filebeat will choose the paths depending on your OS.
   # var.paths:
配置itcast,然后启动,可以分词Logstash也可以。

2、5安装logstash
解压
#第一个logstash示例
bin/logstash -e 'input { stdin { } } output { stdout {} }'

基本配置如下
input {
#输入  stdin
 { ... }
 #标准输入 }
filter {
 #过滤,对数据进行分割、截取等处理
 ... }
output { #输出
stdout { ... }
 #标准输出 }


例如#vim itcast-pipeline.conf
input {
   file {
         path => "/itcast/logstash/logs/app.log"      		start_position => "beginning"}}
filter {
    mutate {
          split => {"message"=>"|"
          }}}
output {    stdout { codec => rubydebug } }

#启动 ./bin/logstash -f ./itcast-pipeline.conf
3、elk综合构建
nginx产生日志
通过Filebeat读取日志文件中的内容,并且将内容发送给Logstash
Logstash接收到内容后,进行处理,如分割操作,然后将内容发送到Elasticsearch中
Kibana会读取Elasticsearch中的数据,并且在Kibana中进行设计Dashboard,最后进行展示
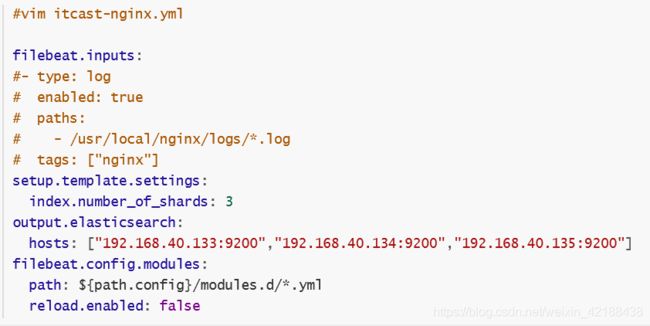
#fb_nginx.yml

filebeat.inputs:
#- type: log
#  enabled: true
#  paths:
#    - /urs/local/nginx/logs/*.log
#  tags: ["nginx"]
setup.template.settings:
  index.number_of_shards: 3
output.logstash:
  hosts: ["192.168.118.164:5044"]
filebeat.config.modules:
  path: ${path.config}/modules.d/*.yml
  reload.enabled: false
#setup.kibana:
#  host: "192.168.118.164:5601"

#output.console:
#  pretty: true
#  enable: true
~
./filebeat -c -e fb_nginx.yml 执行
Logstash配置
#Logstash_nginx.yml

 input {
  beats {
    port=> 5044
  }
}


filter {
  mutate{
    split => {"message" => " " }
  }
}

output {
  elasticsearch {
    hosts => ["192.168.118.164:9200"]
  }
}
./bin/logstash -f logstash_nginx.yml


