SpringBoot整合quartz2.2.3自定义数据源和websocket服务端主动发起通信
背景:
某小白看了《Netty权威指南2》看到了websocket这里,感觉很有意义,于是就一路踩坑,首先搞了websocket,加上之前一直对quartz框架的兴趣很高,然后觉得坑踩得还不够多,真的是一踩坑一时爽,一直踩一直爽,于是就有了这篇文章。
参考资料:
https://blog.csdn.net/u010176542/article/details/79774470
https://blog.csdn.net/moshowgame/article/details/80275084
quartz2.2.3使用的是官网的数据库,我用的是tables_oracle.sql和tables_mysql_innodb.sql这两个数据库,下载地址链接:
http://www.quartz-scheduler.org/downloads/files/quartz-2.2.3-distribution.tar.gz
使用springboot多模块项目开发结构,有版本的maven依赖放到common模块的pom.xml,没有版本的放到父模块,我这里是rabbitmqs的pom.xml,因为是个例子项目,依赖比较多,有经验的自己看着配置就行了。
1.common的pom.xml
            org.mybatis.spring.boot
            mybatis-spring-boot-starter
            2.0.0


            org.projectlombok
            lombok
            true
            ${lombok.version}


            io.protostuff
            protostuff-core
            1.6.0


            io.protostuff
            protostuff-runtime
            1.6.0


            com.alibaba
            druid
            1.1.14


            com.oracle
            ojdbc6
            ${oracle.version}


            commons-beanutils
            commons-beanutils
            1.9.3


            net.sf.json-lib
            json-lib
            2.4
            jdk15


            io.netty
            netty-all
            5.0.0.Alpha1


            org.quartz-scheduler
            quartz
            2.2.3


            org.quartz-scheduler
            quartz-jobs
            2.2.3
2.rabbitmqs的pom.xml
            org.springframework.boot
            spring-boot-starter-test
            test


            org.springframework.boot
            spring-boot-starter-web


            org.springframework.boot
            spring-boot-starter-thymeleaf


            org.springframework.boot
            spring-boot-starter-websocket


            org.springframework.boot
            spring-boot-starter-data-redis


            mysql
            mysql-connector-java
3.quartz.properties文件配置
# 固定前缀org.quartz
org.quartz.scheduler.instanceName = DefaultQuartzScheduler
org.quartz.scheduler.instanceId = AUTO
org.quartz.scheduler.rmi.export = false
org.quartz.scheduler.rmi.proxy = false
org.quartz.scheduler.wrapJobExecutionInUserTransaction = false
# 实例化ThreadPool时,使用的线程类为SimpleThreadPool
org.quartz.threadPool.class = org.quartz.simpl.SimpleThreadPool
org.quartz.threadPool.threadPriority = 5
org.quartz.threadPool.threadsInheritContextClassLoaderOfInitializingThread = true
org.quartz.jobStore.misfireThreshold = 5000
#持久化
org.quartz.jobStore.class = org.quartz.impl.jdbcjobstore.JobStoreTX
#org.quartz.jobStore.driverDelegateClass=org.quartz.impl.jdbcjobstore.StdJDBCDelegate
org.quartz.jobStore.tablePrefix = QRTZ_
org.quartz.jobStore.clusterCheckinInterval = 15000
## 集群模式,true为开启,false为关闭
org.quartz.jobStore.isClustered = false
## 防止因为数据库出现blob等字段时可能会出现问题
org.quartz.jobStore.useProperties = true
4.application.yml文件配置
server:
  port: 8090
  tomcat:
    uri-encoding: utf-8
spring:
   datasource:
     url: jdbc:oracle:thin:@localhost:1521:orcl
     username: scott
     password: 123456
     name: datasource
     type: com.alibaba.druid.pool.DruidDataSource
     driver-class-name: oracle.jdbc.OracleDriver
     # 下面为连接池的补充设置,应用到上面所有数据源中
     # 初始化大小,最小,最大
     initialSize: 1
     minIdle: 3
     maxActive: 216
         # 配置获取连接等待超时的时间
     maxWait: 30000
         # 配置间隔多久才进行一次检测,检测需要关闭的空闲连接,单位是毫秒
     timeBetweenEvictionRunsMillis: 60000
         # 配置一个连接在池中最小生存的时间,单位是毫秒
     minEvictableIdleTimeMillis: 30000
     validationQuery: select 1 from dual
     testWhileIdle: true
     testOnBorrow: false
     testOnReturn: false
         # 打开PSCache,并且指定每个连接上PSCache的大小
     poolPreparedStatements: true
     maxPoolPreparedStatementPerConnectionSize: 20
         # 配置监控统计拦截的filters,去掉后监控界面sql无法统计,'wall'用于防火墙
     filters: stat,wall,slf4j
         # 通过connectProperties属性来打开mergeSql功能;慢SQL记录
     connectionProperties: druid.stat.mergeSql=true;druid.stat.slowSqlMillis=5000
         # 合并多个DruidDataSource的监控数据
         #useGlobalDataSourceStat: true
         # 设置,mapper 接口路径,mapper 接口对应的xml 配置文件
# mysql 数据源配置
#       url: jdbc:mysql://127.0.0.1:3306/rabbit?autoReconnect=true&autoReconnectForPools=true&useUnicode=true&characterEncoding=UTF-8&serverTimezone=UTC&useSSL=true
#       username: root
#       password:
#       driver-class-name: com.mysql.cj.jdbc.Driver
   thymeleaf:
       prefix: classpath:/templates/
       suffix: .html
       mode: HTML5
       encoding: utf-8
       cache: false
       servlet:
         content-type: text/html
   resources:
     chain:
       strategy:
         content:
           enabled: true
           paths: /**
logging:
  config: classpath:logback-spring.xml
  level:
#    com.rabbit.rabbitmps: debug
  ## 打印 mybaits sql语句方式一(推荐)
    com.rabbit.rabbitmqs.dao: debug

mybatis:
   mapper-locations: classpath:mybatis/mapper/*.xml
   ## 打印 mybaits sql语句方式二(不推荐)
#   configuration:
#      log-impl: org.apache.ibatis.logging.stdout.StdOutImpl
logback-spring.xml
    logback


            debug


            %green([%thread]线程) %highlight(%-5level) %red(%d{yyyy-MM-dd HH:mm:ss})  %boldMagenta(%logger) - %cyan(%msg%n)
            utf8


        ${path}/debug/logback_debug.log


            ${path}/debug/logback_debug.log.%d{yyyy-MM-dd}-%i.zip
            ${maxHistory}

                ${maxFileSize}

            2GB


            %date %level [%thread] %logger{36} [%file : %line] %msg%n


            DEBUG
            ACCEPT
            DENY


        ${path}/info/logback_info.log


            ${path}/info/logback_info.log.%d{yyyy-MM-dd}-%i.zip
            ${maxHistory}

                ${maxFileSize}


            %date %level [%thread] %logger{36} [%file : %line] %msg%n


            INFO
            ACCEPT
            DENY


        ${path}/warn/logback_warn.log


            ${path}/warn/logback_warn.log.%d{yyyy-MM-dd}-%i.zip
            ${maxHistory}

                ${maxFileSize}


            %date %level [%thread] %logger{36} [%file : %line] %msg%n


            WARN
            ACCEPT
            DENY


        ${path}/error/logback_error.log


            ${path}/error/logback_error.log.%d{yyyy-MM-dd}-%i.zip
            ${maxHistory}

                ${maxFileSize}


            %date %level [%thread] %logger{36} [%file : %line] %msg%n


            ERROR
            ACCEPT
            DENY
5.springboot注入quartz的bean配置JobFactory
import org.quartz.spi.TriggerFiredBundle;
import org.springframework.beans.factory.annotation.Autowired;
import org.springframework.beans.factory.config.AutowireCapableBeanFactory;
import org.springframework.scheduling.quartz.AdaptableJobFactory;
import org.springframework.stereotype.Component;

@Component
public class JobFactory extends AdaptableJobFactory {
    @Autowired
    private AutowireCapableBeanFactory autowireCapableBeanFactory;

    @Override
    protected Object createJobInstance(TriggerFiredBundle bundle) throws Exception {
        //调用父类的方法
        Object jobInstance = super.createJobInstance(bundle);
        //进行注入
        autowireCapableBeanFactory.autowireBean(jobInstance); return jobInstance;
    }
}
6.quartz创建和管理job的组件,这里包括了quartz的增删改查,很详细了,可能每个人的quartz需求都不同,有其他需求的可以多看一下资料。
https://www.w3cschool.cn/quartz_doc/quartz_doc-kixe2cq3.html
import com.rabbit.common.utils.DateUtil;
import com.rabbit.rabbitmqs.scheduler.BaseSchedulerJob;
import lombok.extern.slf4j.Slf4j;
import org.quartz.*;
import org.springframework.beans.factory.annotation.Autowired;
import org.springframework.stereotype.Component;

/**
 * @author quite
 * @version V1.0
 * @Description:  job任务创建工具
 * @date 2019/3/21.
 */
@Component
@Slf4j
public class JobUtil {
    private static JobUtil jobUtil;

    @Autowired
    private Scheduler scheduler;

    public JobUtil(){
        log.info("===========================init jobUtil==================================");
        jobUtil = this;
    }

    public static JobUtil getInstance(){
        log.info("==========================retun  JobCreateUtil=============================");
        return JobUtil.jobUtil;
    }

    /**
     * 创建使用Cron表达式的Job
     * @param jobClassName
     * @param jobGroupName
     * @param cronExpression
     * @throws Exception
     */
    public  void addCronJob(String jobClassName,
                            String jobGroupName,
                            String cronExpression,
                            String startTime,
                            String endTime,
                            String remark
    ) throws Exception {
        log.info("==============prepare to start scheduler===================");
        // 启动调度器
        scheduler.start();
        //构建job信息
        JobDetail jobDetail = JobBuilder.newJob(getClass(jobClassName).getClass())
                .withIdentity(jobClassName, jobGroupName)
                .build();
        //表达式调度构建器(即任务执行的时间)
        CronScheduleBuilder scheduleBuilder = CronScheduleBuilder.cronSchedule(cronExpression);

        //按新的cronExpression表达式构建一个新的trigger
        CronTrigger trigger = TriggerBuilder.newTrigger()
                .startAt(DateUtil.stringToDate(startTime)) // 设置开始时间
                .endAt(DateUtil.stringToDate(endTime)) // 设置结束时间
                .withDescription(remark) // 任务描述
                .withIdentity(jobClassName, jobGroupName)
                .withSchedule(scheduleBuilder).build();
        scheduler.scheduleJob(jobDetail, trigger);
    }


    /**
     * 暂停job
     * @param jobClassName
     * @param jobGroupName
     * @throws SchedulerException
     */
    public void pauseJob(String jobClassName,String jobGroupName) throws SchedulerException {
        scheduler.pauseJob(JobKey.jobKey(jobClassName, jobGroupName));
    }

    /**
     * 恢复job
     * @param jobClassName
     * @param jobGroupName
     * @throws SchedulerException
     */
    public void resumeJob(String jobClassName,String jobGroupName) throws SchedulerException {

        scheduler.resumeJob(JobKey.jobKey(jobClassName, jobGroupName));
    }


    /**
     * job 更新
     * @param jobClassName
     * @param jobGroupName
     * @param cronExpression
     * @throws Exception
     */
    public void jobreschedule(String jobClassName,
                              String jobGroupName,
                              String cronExpression,
                              String startTime,
                              String endTime,
                              String remark
    ) throws Exception
    {
        TriggerKey triggerKey = TriggerKey.triggerKey(jobClassName, jobGroupName);
        // 表达式调度构建器
        CronScheduleBuilder scheduleBuilder = CronScheduleBuilder.cronSchedule(cronExpression);

        CronTrigger trigger = (CronTrigger) scheduler.getTrigger(triggerKey);

        // 按新的cronExpression表达式重新构建trigger
        trigger = trigger.getTriggerBuilder()
                .startAt(DateUtil.stringToDate(startTime)) // 设置开始时间
                .endAt(DateUtil.stringToDate(endTime)) // 设置结束时间
                .withDescription(remark) // 任务描述
                .withIdentity(triggerKey)
                .withSchedule(scheduleBuilder)
                .build();

        // 按新的trigger重新设置job执行
        scheduler.rescheduleJob(triggerKey, trigger);

    }

    /**
     * job 删除
     * @param jobClassName
     * @param jobGroupName
     * @throws Exception
     */
    public void jobdelete(String jobClassName, String jobGroupName) throws Exception
    {
        scheduler.pauseTrigger(TriggerKey.triggerKey(jobClassName, jobGroupName));
        scheduler.unscheduleJob(TriggerKey.triggerKey(jobClassName, jobGroupName));
        scheduler.deleteJob(JobKey.jobKey(jobClassName, jobGroupName));
    }

    /**
     * 获取Job状态
     * @param jobClassName
     * @param jobGroupName
     * @return
     * @throws SchedulerException
     */
    public String getJobState(String jobClassName, String jobGroupName) throws SchedulerException {
        TriggerKey triggerKey = new TriggerKey(jobClassName, jobGroupName);
        return scheduler.getTriggerState(triggerKey).name();
    }

    /**
     * 暂停所有任务
     * @throws SchedulerException
     */
    public void pauseAllJob() throws SchedulerException {
        scheduler.pauseAll();
    }

    /**
     * 恢复所有任务
     * @throws SchedulerException
     */
    public void resumeAllJob() throws SchedulerException {
        scheduler.resumeAll();
    }

    /**
     *  根据包名得到类创建实例
     * @param classname
     * @return
     * @throws Exception
     */
    private  static BaseSchedulerJob getClass(String classname) throws Exception
    {
        Class class1 = Class.forName(classname);
        return (BaseSchedulerJob)class1.newInstance();
    }
}
9.新建一系列需要的业务逻辑接口实现类...
一些job任务的查询列表要依赖的mvc代码。
JobAndTrigger.java类
import com.rabbit.common.base.BaseDO;
import lombok.Data;

import java.math.BigInteger;
@Data
public class JobAndTrigger extends BaseDO {
	private String jobName;
	private String jobroup;
	private String jobClassName; // 类名
	private String jobGroupName; // 组名称
	private String triggerName; // 调度名称
	private String triggerGroup; // 调度组
	private String triggerSTATE; // 运行状态
	private String startTmie; // 开始时间
	private String endTime; // 结束时间
	private String description; // 定时任务描述
	private BigInteger repeatInterval;
	private BigInteger timesTriggered;
	private String cronExpression;
	private String timeZoneId;
	private boolean running;

}
IJobAndTriggerDAO.java DAO接口
public interface IJobAndTriggerDAO {

   List getJobAndTriggerDetails() throws Exception;
}
IJobAndTriggerDAO.xml xml配置文件
service就不贴了,案例一般都是写得稀巴烂。
controller JobController.java控制层文件,有一些代码是我自己的返回封装,这里就不贴了。
import com.rabbit.common.quartz.domain.JobAndTrigger;
import com.rabbit.rabbitmqs.bean.JobUtil;
import com.rabbit.rabbitmqs.result.ApiReturnObject;
import com.rabbit.rabbitmqs.result.ReturnObject;
import com.rabbit.rabbitmqs.services.IJobAndTriggerService;
import lombok.extern.slf4j.Slf4j;
import org.quartz.SchedulerException;
import org.springframework.beans.factory.annotation.Autowired;
import org.springframework.web.bind.annotation.*;

import java.util.List;

@Slf4j
@RestController
@RequestMapping(value="/job")
public class JobController {
	@Autowired
	private IJobAndTriggerService jobAndTriggerService;

	@Autowired
	private JobUtil jobUtil;

	@PostMapping(value="/addCronJob")
	public ApiReturnObject addjob(@RequestParam(value="jobClassName")String jobClassName,
										  @RequestParam(value="jobGroupName")String jobGroupName,
										  @RequestParam(value="cronExpression")String cronExpression,
										  @RequestParam(value="startTime")String startTime,
										  @RequestParam(value="endTime")String endTime,
										  @RequestParam(value="remark")String remark
										  ){
		try {
			jobUtil.addCronJob(jobClassName, jobGroupName, cronExpression, startTime, endTime,remark);
//			JobUtil.getInstance().addJob(jobClassName, jobGroupName, cronExpression);
		} catch (Exception e) {
			log.error("创建任务调度失败"+e.getMessage(),e);
			return ReturnObject.error(1,"创建任务调度失败");
		}
		return ReturnObject.success("任务调度增加成功");
	}


	@PostMapping(value="/pausejob")
	public ApiReturnObject pausejob(@RequestParam(value="jobClassName")String jobClassName, @RequestParam(value="jobGroupName")String jobGroupName)

	{
		try {
			jobUtil.pauseJob(jobClassName, jobGroupName);
//			JobUtil.getInstance().pauseJob(jobClassName, jobGroupName);
		} catch (Exception e) {
			log.error("任务调度停止失败"+e.getMessage(),e);
			return ReturnObject.error(1,"任务调度停止失败");
		}
		return ReturnObject.success("任务调度停止成功");
	}

	@PostMapping(value="/resume")
	public  ApiReturnObject resumejob(@RequestParam(value="jobClassName")String jobClassName, @RequestParam(value="jobGroupName")String jobGroupName) throws Exception
	{
		try {
			jobUtil.resumeJob(jobClassName, jobGroupName);
//			JobUtil.getInstance().resumeJob(jobClassName, jobGroupName);
		} catch (Exception e) {
			log.error("任务调度恢复失败"+e.getMessage(),e);
			return ReturnObject.error(1,"任务调度恢复失败");
		}
		return ReturnObject.success("任务调度恢复成功");
	}


	@PostMapping(value="/reschedule")
	public ApiReturnObject rescheduleJob(@RequestParam(value="jobClassName")String jobClassName,
			                                     @RequestParam(value="jobGroupName")String jobGroupName,
			                                     @RequestParam(value="cronExpression")String cronExpression,
												 @RequestParam(value="startTime")String startTime,
												 @RequestParam(value="endTime")String endTime,
												 @RequestParam(value="remark")String remark
	) throws Exception
	{
		try {
			jobUtil.jobreschedule(jobClassName, jobGroupName, cronExpression, startTime, endTime, remark);
//			JobUtil.getInstance().jobreschedule(jobClassName, jobGroupName, cronExpression);
		} catch (Exception e) {
			log.error("更新定时任务失败"+e.getMessage(),e);
			return ReturnObject.error(1,"更新定时任务失败");
		}
		return ReturnObject.success("更新定时任务成功");
	}


	@PostMapping(value="/delete")
	public  ApiReturnObject deletejob(@RequestParam(value="jobClassName")String jobClassName, @RequestParam(value="jobGroupName")String jobGroupName) throws Exception
	{
		try {
			jobUtil.jobdelete(jobClassName, jobGroupName);
//			JobUtil.getInstance().jobdelete(jobClassName, jobGroupName);
		} catch (Exception e) {
			log.error("删除定时任务失败"+e.getMessage(),e);
			return ReturnObject.error(1,"删除定时任务失败");
		}
		return ReturnObject.success("删除定时任务成功");
	}

	@PostMapping(value="/getTriggerState")
	public ApiReturnObject getTriggerState(@RequestParam(value="jobClassName")String jobClassName, @RequestParam(value="jobGroupName")String jobGroupName){
		String jobState = null;
		try {
			jobState = jobUtil.getJobState(jobClassName, jobGroupName);
		} catch (SchedulerException e) {
			log.error("获取定时任务运行状态失败"+e.getMessage(), e);
			return ReturnObject.error(1, "获取定时任务运行状态失败");
		}
		return ReturnObject.success(jobState);
	}


	@GetMapping(value="/findAll")
	public  ApiReturnObject> queryjob()
	{
		List jobAndTrigger;
		try {
			jobAndTrigger = jobAndTriggerService.getJobAndTriggerDetails();
		} catch (Exception e) {
			log.error("定时任务查询失败"+e.getMessage(),e);
			return ReturnObject.error(1,"定时任务查询失败");
		}
		return ReturnObject.success(jobAndTrigger);
	}
}
Springboot启动类
import org.mybatis.spring.annotation.MapperScan;
import org.springframework.boot.SpringApplication;
import org.springframework.boot.autoconfigure.SpringBootApplication;
import org.springframework.context.annotation.ComponentScan;
@SpringBootApplication
@ComponentScan(value = "com.rabbit.rabbitmqs")
@MapperScan("com.rabbit.rabbitmqs.dao")
public class RabbitstartApplication {
public static void main(String[] args) {
SpringApplication.run(RabbitstartApplication.class, args);
}
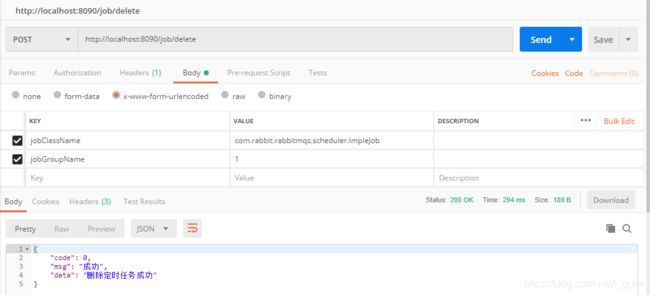
}对应的测试数据已经结果,因为好久没有纯手写前端了,就不写页面了,postman测试一样的效果,截几张效果图。
添加

查询

暂停任务

删除任务
10.下面是用quartz配置Websocket部分
10.1 WebSocket服务 WebSocketServer.java
import lombok.extern.slf4j.Slf4j;
import org.springframework.stereotype.Component;

import javax.websocket.*;
import javax.websocket.server.PathParam;
import javax.websocket.server.ServerEndpoint;
import java.io.IOException;
import java.util.concurrent.CopyOnWriteArraySet;

@Slf4j
@ServerEndpoint("/websocket/{sid}")
@Component
public class WebSocketServer {
    // 记录当前连接数
    private static int onlineCount = 0;
    //concurrent包的线程安全Set,用来存放每个客户端对应的MyWebSocket对象。 private static CopyOnWriteArraySet webSocketSet = new CopyOnWriteArraySet();
    private static CopyOnWriteArraySet webSocketSet = new CopyOnWriteArraySet();

    //与某个客户端的连接会话,需要通过它来给客户端发送数据
    private Session session;
    //接收sid
    private String sid="";

    /** * 连接建立成功调用的方法*/
    @OnOpen
    public void onOpen(Session session,@PathParam("sid") String sid) {
        this.session = session;
    webSocketSet.add(this);
    //加入set中
     addOnlineCount();
     //在线数加1
     log.info("有新窗口开始监听:"+sid+",当前在线人数为" + getOnlineCount());
     this.sid=sid;
     try {
         sendMessage("连接成功");
     } catch (IOException e) {
         log.error("websocket IO异常");
     }
    }

    /** * 连接关闭调用的方法 */
    @OnClose
    public void onClose() {
        webSocketSet.remove(this);
        //从set中删除
        subOnlineCount();
        //在线数减1
        log.info("有一连接关闭!当前在线人数为" + getOnlineCount());
    }

    /** * 收到客户端消息后调用的方法
     * *
     @param message 客户端发送过来的消息
     */
    @OnMessage
    public void onMessage(String message, Session session) {
        log.info("收到来自窗口"+sid+"的信息:"+message);
        //群发消息
        for (WebSocketServer item : webSocketSet) {
            try { item.sendMessage(message);
            } catch (IOException e) {
                e.printStackTrace();
            }
        }
    }

    /** * * @param session * @param error */
    @OnError
    public void onError(Session session, Throwable error) {
        log.error("发生错误");
        error.printStackTrace();
    }
    /** * 实现服务器主动推送 */
    public void sendMessage(String message) throws IOException {
        log.info("服务器主动发送消息:"+message);
        this.session.getBasicRemote().sendText(message);
    }
    /** * 群发自定义消息 * */
    public static void sendInfo(String message,@PathParam("sid") String sid) throws IOException {
        log.info("推送消息到窗口"+sid+",推送内容:"+message);
        for (WebSocketServer item : webSocketSet) {
            try {
                //这里可以设定只推送给这个sid的,为null则全部推送
                if(sid==null) {
                    item.sendMessage(message);
                }else if(item.sid.equals(sid)){
                    item.sendMessage(message);
                }
            } catch (IOException e) {
                continue;
            }
        }
    }


    public static synchronized int getOnlineCount() {
        return onlineCount;
    }
    public static synchronized void addOnlineCount() {
        WebSocketServer.onlineCount++;
    }
    public static synchronized void subOnlineCount() {
        WebSocketServer.onlineCount--;
    }
}
10.2 SpringBoot开启WebSocket支持
/**
 * 开启webSocket支持
 */
@Configuration
public class WebSocketConfig {
    @Bean
    public ServerEndpointExporter serverEndpointExporter() {
        return new ServerEndpointExporter();
    }
}
10.3 WebSocket控制层
import com.rabbit.rabbitmqs.WebSocket.WebSocketServer;
import com.rabbit.rabbitmqs.result.ApiReturnObject;
import com.rabbit.rabbitmqs.result.ReturnObject;
import org.springframework.stereotype.Controller;
import org.springframework.ui.Model;
import org.springframework.web.bind.annotation.GetMapping;
import org.springframework.web.bind.annotation.PathVariable;
import org.springframework.web.bind.annotation.RequestMapping;
import org.springframework.web.bind.annotation.ResponseBody;

import java.io.IOException;

/**
 * 后台数据主动推送
 */
@Controller
@RequestMapping("/websocket")
public class WebScoketController {

    @GetMapping("/socket/{cid}")
    public String socket(@PathVariable String cid, Model model){
        model.addAttribute("cid", cid);
        return "thymeleaf/socket";
    }

    @ResponseBody
    @RequestMapping("/socket/push/{cid}")
    public ApiReturnObject pushToweb(@PathVariable String cid, String mssage){
       try {
           WebSocketServer.sendInfo(mssage, cid);
       } catch (IOException e) {
           e.printStackTrace();
           return ReturnObject.error(2,e.getMessage());
       }
       return ReturnObject.success(cid);
   }

}
10.5 前端websocket.js,上面已经讲了,不想纯手写前端。。。万恶的前端。。。
var socket;
// 获取地址栏的参数数组
var search = window.location.href;
var sp = search.lastIndexOf("/");
var params = search.substring(sp+1, search.length);
console.log(params);


if(typeof(WebSocket) == "undefined") {
    console.log("您的浏览器不支持WebSocket");
}else {
    console.log("您的浏览器支持WebSocket");
  //实现化WebSocket对象,指定要连接的服务器地址与端口 建立连接
   //等同于
    socket = new WebSocket("ws://localhost:8090/websocket/"+params+"");
//     socket = new WebSocket("http://localhost:8090/websocket/1".replace("http", "ws"));
   //打开事件
    socket.onopen = function () {
        console.log("Socket 已打开");
        //socket.send("这是来自客户端的消息" + location.href + new Date());
    };

    // 获得消息事件
    socket.onmessage = function (msg) {
        console.log("来自服务器主动推送的消息:"+msg.data);
        //发现消息进入 开始处理前端触发逻辑
        //关闭事件
    }
    socket.onclose = function () {
        console.log("Socket已关闭");
    };
    //发生了错误事件
    socket.onerror = function () {
        alert("Socket发生了错误");
        //此时可以尝试刷新页面
    }
}
10.6 quartz的定时操作websocket后台消息推送组件,哈哈哈,有没有被坑的感觉。。。
import com.rabbit.common.utils.DateUtil;
import com.rabbit.rabbitmqs.WebSocket.WebSocketServer;
import lombok.extern.slf4j.Slf4j;
import org.quartz.JobExecutionContext;
import org.quartz.JobExecutionException;
import org.springframework.stereotype.Component;

import java.io.IOException;

@Component
@Slf4j
public class ImpleJob implements  BaseSchedulerJob{

    @Override
    public void execute(JobExecutionContext context) throws JobExecutionException {
        log.info("运行+++++++定时任务++++++++"+DateUtil.getDateTime()+"+++++++++++++++++++++");
        try {
            WebSocketServer.sendInfo("后台主动发送数据", "1");
        } catch (IOException e) {
            e.printStackTrace();
        }
    }
}

只要前后端建立了一次通讯,就能看到quartz配合的websocket通讯效果了

案例已上传到我的资源,分被定位有点高,有需要的再去看下源码,有问题也可以直接留言,我看到就回复。
https://download.csdn.net/download/i_quite/11045662