本文由币乎(bihu.com)内容支持计划奖励
The Most Powerful Infrastructure for Decentralized Applications
智能合约发布
- 按照官方文档介绍,首先执行eosd程序,肯定会报错,原因是相关的配置文件必要项没有
- 配置config.ini,该文件在第一步运行一次后,会产生
cd ~/eos/eos/build/programs
vi data-dir/config.ini
需要修改的主要几项是(官方文档提供):
其中对于创世块的位置,可以默认使用程序自带的,位置在programs目录下,注意大坑!!!!这个genesis.json里面的initial_timestamp千万别改的太临近当前时间,不然无法产生块。。。。
# Load the testnet genesis state, which creates some initial block producers with the default key
genesis-json = ~/eos/eos/build/programs/genesis.json
 # Enable production on a stale chain, since a single-node test chain is pretty much always stale
enable-stale-production = true
# Enable block production with the testnet producers
producer-name = inita
producer-name = initb
producer-name = initc
producer-name = initd
producer-name = inite
producer-name = initf
producer-name = initg
producer-name = inith
producer-name = initi
producer-name = initj
producer-name = initk
producer-name = initl
producer-name = initm
producer-name = initn
producer-name = inito
producer-name = initp
producer-name = initq
producer-name = initr
producer-name = inits
producer-name = initt
producer-name = initu
# Load the block producer plugin, so you can produce blocks
plugin = eosio::producer_plugin
# Wallet plugin
plugin = eosio::wallet_api_plugin
# As well as API and HTTP plugins
plugin = eosio::chain_api_plugin
plugin = eosio::http_plugin
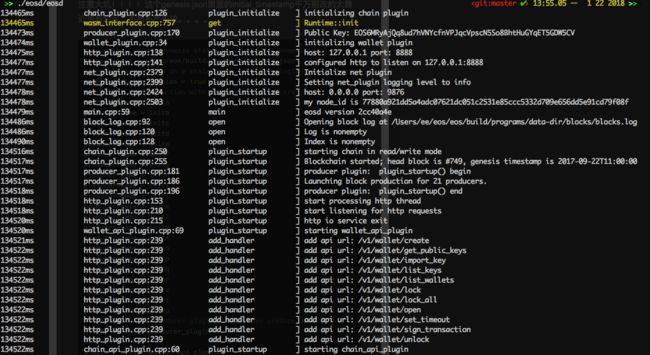
现在启动就好了
./eosd/eosd
紧接着下面会有block产生,由于我是第二次启动的所以block没有从第一个开始
- 创建一个钱包
cd ~/eos/eos/build/programs/eosc
./eosc wallet create
这一步会产生钱包的名称以及钱包的密钥
密钥需要保存好,后面需要unlock的时候回用到
- 导入账户
在创世文件中有初始化多个账户,其中一个inita, 它对应的public key 可以看到是
EOS6MRyAjQq8ud7hVNYcfnVPJqcVpscN5So8BhtHuGYqET5GDW5CV
将该账户导入到钱包需要知道的private key,在config.ini中有提供
5KQwrPbwdL6PhXujxW37FSSQZ1JiwsST4cqQzDeyXtP79zkvFD3
执行
./eosc wallet import 5KQwrPbwdL6PhXujxW37FSSQZ1JiwsST4cqQzDeyXtP79zkvFD3
导入成功,现在钱包中有了一个inita的账户,下面还需要再创建一个账户,该账户是我们将创建的合约的拥有者,每个账户需要两个key,所以如下我们创建两个key,并在创建账户的时候,使用上这两个key
> ./eosc create key
Private key: 5Jta_pri1
Public key: EOS8_pub1
> ./eosc create key
Private key: 5JJG_pri2
Public key: EOS5_pub2
# inita 在这里是授权账户,该账户创建了currency账户
./eosc create account inita currency EOS8_pub1 EOS5_pub2
注意上面生成的两个私钥都需要保存
同时把创建的key继续导入的钱包中
./eosc wallet import 5JJG_pri2
现在可以查看这个账户的信息了
./eosc/eosc get account currency
{
  "account_name": "currency",
  "eos_balance": "0.0000 EOS",
  "staked_balance": "0.0001 EOS",
  "unstaking_balance": "0.0000 EOS",
  "last_unstaking_time": "2106-02-07T06:28:15",
  "permissions": [{
      "perm_name": "active",
      "parent": "owner",
      "required_auth": {
        "threshold": 1,
        "keys": [{
            "key": "EOS5n7NbqJb5r6vGVFTB6r5mfBE8fp93xARSxomSHSqTcsvxt1fD9",
            "weight": 1
          }
        ],
        "accounts": []
      }
    },{
      "perm_name": "owner",
      "parent": "",
      "required_auth": {
        "threshold": 1,
        "keys": [{
            "key": "EOS8M1GXvH3k6vC5KuVLvm4hUU1AwHozE2nEKTT3yNYFE71V3PVGW",
            "weight": 1
          }
        ],
        "accounts": []
      }
    }
  ]
}
- 合约上传
eos项目默认提供了一个currency合约,我们直接使用该合约上传到eos上,上传之前可以先检验下合约是否存在
./eosc get code currency
code hash: 0000000000000000000000000000000000000000000000000000000000000000
类似的hash值返回表示没有该合约
./eosc set contract currency ../../contracts/currency/currency.wast ../../contracts/currency/currency.abi
这会返回一大串json,就不截图了
我们可以直接查看合约的地址
> ./eosc/eosc get code currency
code hash: 86968a9091ce32255777e2017fccaede8cea2d4978b30f25b41ee97b9d77bed0
- 调用合约
6.1 首先查看两个账户的余额
> ./eosc/eosc get table currency currency account
{
  "rows": [{
      "key": "account",
      "balance": 1000000000
    }
  ],
  "more": false
}
> ./eosc/eosc get table inita currency account
{
  "rows": [{
      "key": "account",
      "balance": 0
    }
  ],
  "more": false
}
下面调用该合约完成转账,从currency账户转50到inita
./eosc push message currency transfer '{"from":"currency","to":"inita","quantity":50}' --scope currency,inita --permission currency@active
执行完成后,重新查询余额
> ./eosc/eosc get table currency currency account
{
  "rows": [{
      "key": "account",
      "balance": 1000000000
    }
  ],
  "more": false
}
> ./eosc/eosc get table inita currency account
{
  "rows": [{
      "key": "account",
      "balance": 0
    }
  ],
  "more": false
}


