element 源码学习六 —— Carousel 走马灯学习
简单使用
走马灯功能在展示图片时经常用到,而 element 中提供了 Carousel 组件。出于好奇学习一下它的实现原理。
具体的功能详情请查阅官方文档。
关于组件属性,该组件提供了组件高度、索引、指示器、切换时间等一众配置,这个只要动手试一遍都能理解。
关于事件,提供了一个 change 事件。可以通过 v-on:change="changeFun" 事件绑定来监听。该事件传递了两个参数:当前页索引和前一页索引。参考源码中的 $emit 方法:
  watch: {
    activeIndex(val, oldVal) {
      this.resetItemPosition(oldVal);
      this.$emit('change', val, oldVal);
    },
  },
关于方法,组件提供了三个方法用于操作组件页面的切换。使用方法是通过 $ref 子组件引用来访问子组件,执行其方法。
                // 假设为 el-carousel 设置了 ref="car"
                // setActiveItem	手动切换幻灯片	需要切换的幻灯片的索引,从 0 开始;或相应 el-carousel-item 的 name 属性值
                // prev	切换至上一张幻灯片
                // next 切换至下一张幻灯片
                pre() {
                    this.$refs.car.prev()
                },
                next() {
                    this.$refs.car.next()
                },
                first() {
                    this.$refs.car.setActiveItem(0)
                }
源码位置
Carousel 的源码位于 package/carousel/ 目录下。源码目录如下:
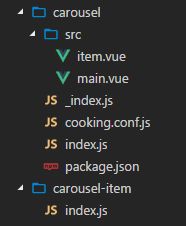
简单说下目录内容:
- item.vue carousel-item 组件代码
- main.vue carousel 组件代码
- _index.js 导出 carousel-item 和 carousel
- cooking.conf.js cooking 配置
- index.js 导出 carousel 组件
- package.json 组件信息
- index.js 导出 carousel-item 组件
其实主要就是两个 .vue 文件,其他都是些配置、导出的功能文件,这里可以忽略不看~
源码解析
老规矩,我们通过几个问题切入去看源代码。
1. 基本原理:页面切换 + 指示器 + 切换按钮的实现
页面切换
看了一下 DOM 的 Elements 排列,发现页面切换使用的是 transform 2D 转换和 transition 过渡。
一般页面切换其实是几个页面使用 translateX 进行位移切换。

而卡片变化切换同时使用了 translateX 位移和 scale 缩放实现中间一张卡最大,左右卡片小的效果的。

而卡片的层叠使用 z-index 值得大小来实现。
**所以,逻辑计算只需要根据当前显示页面计算下每个页面的位移值。**而 carousel-item 中也的确有计算的逻辑:
    // item.vue
    // index 当前 item 索引
    // activeIndex 激活的 item 索引
    // oldIndex 之前 item 索引
    translateItem(index, activeIndex, oldIndex) {
      // 获取父元素宽度 https://developer.mozilla.org/en-US/docs/Web/API/HTMLElement/offsetWidth
      const parentWidth = this.$parent.$el.offsetWidth;
      // 获取 item 页面数量
      const length = this.$parent.items.length;
      // 判断是否需要过渡动画 class
      // .el-carousel__item.is-animating {
      //  transition: transform 0.4s ease-in-out;
      // }
      if (this.$parent.type !== "card" && oldIndex !== undefined) {
        this.animating = index === activeIndex || index === oldIndex;
      }
      // 处理 index
      if (index !== activeIndex && length > 2) {
        index = this.processIndex(index, activeIndex, length);
      }
      if (this.$parent.type === "card") {
        // 卡片化
        this.inStage = Math.round(Math.abs(index - activeIndex)) <= 1; // 激活组件及其前后组件定义 cursor: pointer; z-index: 1;
        this.active = index === activeIndex; // 激活 class
        // 计算卡片化偏移量
        this.translate = this.calculateTranslate(
          index,
          activeIndex,
          parentWidth
        );
        // 激活卡片不缩放,其他卡片缩放为 0.83
        this.scale = this.active ? 1 : CARD_SCALE;
      } else {
        // 非卡片化
        this.active = index === activeIndex; // 激活 class
        this.translate = parentWidth * (index - activeIndex); // 计算位移 根据父组件宽度计算
      }
      // 计算完后显示
      this.ready = true;
    },
指示器
指示器就是多个 button 组成的横向列表,根据当前显示页面修改某个指示器背景颜色。
    <ul
      class="el-carousel__indicators"
      v-if="indicatorPosition !== 'none'"
      :class="{ 'el-carousel__indicators--labels': hasLabel, 'el-carousel__indicators--outside': indicatorPosition === 'outside' || type === 'card' }">
      <li
        v-for="(item, index) in items"
        class="el-carousel__indicator"
        :class="{ 'is-active': index === activeIndex }"
        @mouseenter="throttledIndicatorHover(index)"
        @click.stop="handleIndicatorClick(index)">
        <button class="el-carousel__button"><span v-if="hasLabel">{{ item.label }}span>button>
      li>
切换按钮
切换按钮其实就是两个 absolute 的按钮,点击实现页面切换即可。
      <transition name="carousel-arrow-left">
        <button
          type="button"
          v-if="arrow !== 'never'"
          v-show="arrow === 'always' || hover"
          @mouseenter="handleButtonEnter('left')"
          @mouseleave="handleButtonLeave"
          @click.stop="throttledArrowClick(activeIndex - 1)"
          class="el-carousel__arrow el-carousel__arrow--left">
          <i class="el-icon-arrow-left">i>
        button>
      transition>
      <transition name="carousel-arrow-right">
        <button
          type="button"
          v-if="arrow !== 'never'"
          v-show="arrow === 'always' || hover"
          @mouseenter="handleButtonEnter('right')"
          @mouseleave="handleButtonLeave"
          @click.stop="throttledArrowClick(activeIndex + 1)"
          class="el-carousel__arrow el-carousel__arrow--right">
          <i class="el-icon-arrow-right">i>
        button>
      transition>
这里要注意的就是按钮外包裹了 标签来实现按钮进入和离开的过渡效果。
2. 页面切换动画如何实现?
其实在基本原理里面都提到了,可以从源码中找到两个样式:
# 内联样式
element.style {
  transform: translateX(888.56px) scale(0.83);
}

# 过渡样式
.is-animating {
  transition: transform 0.4s ease-in-out;
}
静态情况下,使用 transitionX 维持页面位置,显示当前页面。过渡行为时,加入 0.4 秒的 transition 过渡效果。
3. 卡片化如何实现效果?
卡片化切换其实和一般的切换差不多,只是显示卡片从一张变为三张。中间的卡片 z-index 为 2,而左右的卡片 z-index 为 1,从而实现中间卡片在前面的样式。而计算三张卡片位置的方法如下:
    calculateTranslate(index, activeIndex, parentWidth) {
      if (this.inStage) {
        return parentWidth * ((2 - CARD_SCALE) * (index - activeIndex) + 1) / 4;
      } else if (index < activeIndex) {
        return -(1 + CARD_SCALE) * parentWidth / 4;
      } else {
        return (3 + CARD_SCALE) * parentWidth / 4;
      }
    },
而卡片的宽度为容器宽度的一半~左右两边的卡片缩放了 83% 。
.el-carousel__item--card {
  width: 50%;
  transition: transform 0.4s ease-in-out;
}

element.style {
  transform: translateX(-39.44px) scale(0.83)
}
总结下:
- 显示三张卡片。
- 三张卡片高度跟随容器,宽度为容器的 50%。
- 左右两张卡片缩放了 83% 大小。
- 左右两张卡片 z-index 为 1;中间卡片 z-index 为 2。
4. 按钮出现和消失的效果如何实现?
使用了 vue 的 transition 标签来实现。具体效果为:
.el-carousel__arrow {
  border: none;
  outline: none;
  padding: 0;
  margin: 0;
  height: 36px;
  width: 36px;
  cursor: pointer;
  transition: 0.3s;
  border-radius: 50%;
  background-color: rgba(31, 45, 61, 0.11);
  color: #fff;
  position: absolute;
  top: 50%;
  z-index: 10;
  transform: translateY(-50%);
  text-align: center;
  font-size: 12px;
}

.carousel-arrow-left-enter,
.carousel-arrow-left-leave-active {
  transform: translateY(-50%) translateX(-10px);
  opacity: 0;
}

.carousel-arrow-right-enter,
.carousel-arrow-right-leave-active {
  transform: translateY(-50%) translateX(10px);
  opacity: 0;
}
实现的效果为:左边箭头向从左边 10px 位置进入和离开,而右边箭头从右边 10px 位置进入和离开。而 translateY 是为了垂直居中。
5. 如何实现自动切换功能?
使用 setInterval 方法来实现定时向后切换页面。
    playSlides() {
      if (this.activeIndex < this.items.length - 1) {
        this.activeIndex++;
      } else {
        // 如果是最后一页则跳转到第一页
        this.activeIndex = 0;
      }
    },
    // 取消 timer
    pauseTimer() {
      clearInterval(this.timer);
    },
    // 开始 timer
    startTimer() {
      if (this.interval <= 0 || !this.autoplay) return;
      this.timer = setInterval(this.playSlides, this.interval);
    },
自己实现个走马灯玩玩~
学以致用,这里写个简单的 demo,实现下走马灯功能。
例一:走马灯效果
例二:卡片化走马灯效果
其中,例一和例二实现了走马灯和卡片化的自动切换、手动切换、切换效果。
这里留了一个问题待解决:
- 走马灯中第一页和最后一页的切换如何做到更好?
这些问题将会尽快解决!
最后
至此,我们了解了走马灯的实现原理,以及一些小功能的实现。最后也用两个例子证明了我们的分析。
Vue 实验室
《Vue 实验室》 至今也写了不少了,作者将在把最后几篇计划中的博客写完后,以当前的知识认知水平重新改进《Vue 实验室》往期的文章,并整理到 gitbook 中便于读者阅读,敬请期待。
打个广告
链家上海研发中心招聘前端、后端、测试。
机会不多,需要内推机会的请将简历发送至 [email protected]。