初识ComputeShader
同其他shader一样,ComputeShader也是一段直接运行在GPU上的代码,只是它不在传统的渲染管线当中。它支持海量数据的传输和计算。下面通过具体的例子来见识一下ComputerShader的魅力所在。
我们通过ComputeShader+VFShader+C#来实现粒子效果,并且实时控制这些粒子的颜色和位置。在Computeshader中我们定义粒子对象的结构体,包含位置和颜色,定义一个粒子对象的缓冲用来传输所有的粒子对象,核心代码段中实现单个粒子对象的位置和颜色的设置(随时间变化)。
#pragma kernel ParticleFunction

float time;

struct ParticleData {
	float3 pos;
	float4 color;
};

RWStructuredBuffer outputBuffer;

[numthreads(10, 10, 10)]
void ParticleFunction(uint3 id : SV_DispatchThreadID)
{
    //根据线程的索引计算buffer的索引
	int index = id.x + (id.y * 10 *10 ) + (id.z * 10 * 10* 10 * 10);//x*x,x*y*x*y
	//操作buffer中单个对象,设置点的位置和颜色,并且返回新的buffer;
	ParticleData ThisParticle = outputBuffer[index];
	ThisParticle.pos = float3(sin(index+time),cos(index+time),index*0.1f);
	ThisParticle.color=float4(abs(sin(time)),0,0,1);
	outputBuffer[index] = ThisParticle;
}
c#代码中需要定义一个与Computeshader中一致的结构体ParticleData,在FillBuffers中填充Buffer的ParticleData对象,可以给pos和color一个初始值,也可以不给。然后将Buffer传入到Computeshader中,再将从Computeshader中返回的Buffer传入到VFshader中作为带颜色信息的顶点,让VFshader脱离模型数据和材质,通过Graphics渲染.在SetData()中实时传入时间值,让点的位置和颜色变化起来。值得一提的是:如果我们在c#脚本中利用for循环实时更改pos和color,如图,把这段代码放到update中,当count较大时效率会很低。

using System.Collections;
using System.Collections.Generic;
using UnityEngine;
public struct ParticleData
{
    public Vector3 pos;
    public Color color;
}
public class ComputeExample : MonoBehaviour
{
    public ComputeShader compute;
    public Material graphics;
    public int count = 50000000;
    ComputeBuffer Buffer;
    ParticleData[] Data;
    int Stride;
    int KernelIndex;
    void Start()
    {
        InitialiseBuffers();
        FillBuffers();
    }
    void OnDestroy()
    {
        Buffer.Release();
        Buffer.Dispose();
    }
    void InitialiseBuffers()
    {
        int vector3Stride = sizeof(float) * 3;
        int colorStride = sizeof(int) * 4;
        Stride = vector3Stride + colorStride;
        Buffer = new ComputeBuffer(count, Stride);
        KernelIndex = compute.FindKernel("ParticleFunction");
    }

    void FillBuffers()
    {
        Data = new ParticleData[count];
        for (int i = 0; i < Data.Length; i++)
        {
            Data[i] = new ParticleData();
        }
        Buffer.SetData(Data);
        compute.SetBuffer(KernelIndex, "outputBuffer", Buffer);
        graphics.SetBuffer("inputBuffer", Buffer);
    }
    void OnRenderObject()
    {
        SetData();
        compute.Dispatch(KernelIndex, 10, 10, 100);
        graphics.SetPass(0);
        Graphics.DrawProcedural(MeshTopology.Points, Buffer.count);
    }

    void SetData()
    {
        if (Input.GetMouseButton(0))
        {
            compute.SetFloat("time", Time.time);
        }
    }
}
VFshdader部分就比较简单了,uint id : SV_VertexID 此处我们传自己定义的顶点和颜色,就是把Buffer的ParticleData的pos和color填充过来。用shader画线什么的也可以这么干,给点就行。VFshader会通过v2f输出结构体的SV_POSITION和COLOR语义自动对上传入的值。
Shader "bufferShader"
{
Properties {
_Color ("Color", Color) = (1, 1, 1, 1)
}
SubShader
{
LOD 200
Pass
{
Blend SrcAlpha OneMinusSrcAlpha
CGPROGRAM
#include "UnityCG.cginc"
#pragma vertex myVertexShader
#pragma fragment myFragmentShader
struct data {
float3 pos;
float4 color;
};
float4 _Color;
StructuredBuffer inputBuffer;
struct v2f {
float4 pos : SV_POSITION;
float4 col : COLOR0;
};
v2f myVertexShader(uint id : SV_VertexID)
{
v2f o;
o.col = inputBuffer[id].color;
o.pos = UnityObjectToClipPos(float4(inputBuffer[id].pos, 1.0));
return o;
}
float4 myFragmentShader(v2f IN) : COLOR
{
return IN.col * _Color;
}
ENDCG
}
}
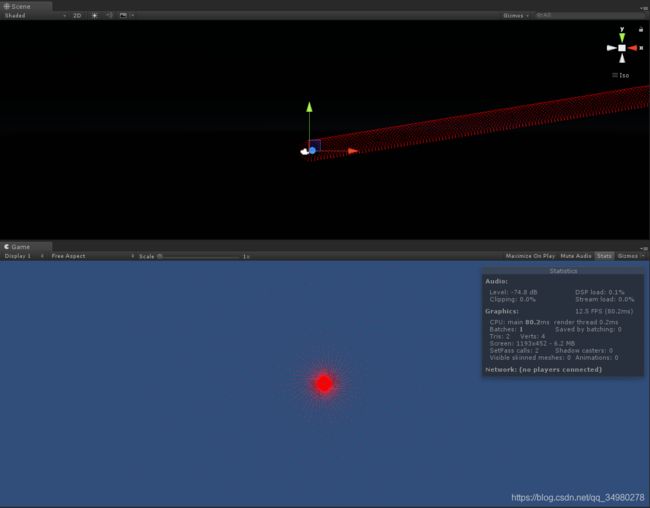
}接下来看看五千万个点的效果,按下鼠标,点位置和颜色随时间变化。前后帧率无明显变化。
当然,Computeshader能干的事情远不止这些,比如体渲染中处理海量的体数据,总之Computeshader说:数据不够大别烦我。