热更新
1,游戏项目是使用脚本语言进行编写的(如lua,js),那么一旦需要更新,则可以通过从服务器下载最新的脚本和资源,从而 跳过平台直接实现在线更新
Cocos2dx的类asserts manager,它在引擎的extensions/assertmanager可以看到
Assetsmanager传三个参数,资源的zip包路径,version路径,写文件的路径
然后调用assetsmanager的update函数进行下载更新
设置资源包名称
这里继续沿用cocos2dx的assetsmanager类中默认的名称:cocos2dx-update-temp-package.zip
如果想要修改文件名---
可以直接修改引擎下extensions/assets-manager/assetmanager.cpp的TEMP_PACKAGE_FILE_NAME
选定服务器地址和设置版本号
C++代码实现
新建upgrade类,继承自CCLayer
编辑Upgrade.h文件
//  Upgrade.h
//  Created by Sharezer on 14-11-23.
//

#ifndef _UPGRADE_H_
#define _UPGRADE_H_
#include "cocos2d.h"
#include "extensions/cocos-ext.h"


class Upgrade : public cocos2d::CCLayer, public cocos2d::extension::AssetsManagerDelegateProtocol
{
public:
  Upgrade();
  virtual ~Upgrade();

  virtual bool init();

  void upgrade(cocos2d::Ref* pSender);	//检查版本更新
  void reset(cocos2d::Ref* pSender);	 //重置版本

  virtual void onError(cocos2d::extension::AssetsManager::ErrorCode errorCode);	 //错误信息
  virtual void onProgress(int percent);	//更新下载进度
  virtual void onSuccess();	 //下载成功
  CREATE_FUNC(Upgrade);
private:
  cocos2d::extension::AssetsManager* getAssetManager();
  void initDownloadDir();	 //创建下载目录

private:
  std::string _pathToSave;
  cocos2d::Label *_showDownloadInfo;
};


#endif
修改upgrade.cpp文件
//Upgrade.cpp
#include "Upgrade.h"
#include "CCLuaEngine.h"

#if (CC_TARGET_PLATFORM != CC_PLATFORM_WIN32)
#include
#include .h>
#endif

USING_NS_CC;
USING_NS_CC_EXT;

#define DOWNLOAD_FIEL	 "download"	//下载后保存的文件夹名

Upgrade::Upgrade():
_pathToSave(""),
_showDownloadInfo(NULL)
{

}

Upgrade::~Upgrade()
{
  AssetsManager* assetManager = getAssetManager();
  CC_SAFE_DELETE(assetManager);
}

bool Upgrade::init()
{
  if (!CCLayer::init())
  {
    return false;
  }
  Size winSize = Director::getInstance()->getWinSize();
  initDownloadDir();
  _showDownloadInfo = Label::createWithSystemFont("", "Arial", 20);
  this->addChild(_showDownloadInfo);
  _showDownloadInfo->setPosition(Vec2(winSize.width / 2, winSize.height / 2 - 20));


  auto itemLabel1 = MenuItemLabel::create(
    Label::createWithSystemFont("Reset", "Arail", 20), CC_CALLBACK_1(Upgrade::reset, this));
  auto itemLabel2 = MenuItemLabel::create(
    Label::createWithSystemFont("Upgrad", "Arail", 20), CC_CALLBACK_1(Upgrade::upgrade, this));

  auto menu = Menu::create(itemLabel1, itemLabel2, NULL);
  this->addChild(menu);

  itemLabel1->setPosition(Vec2(winSize.width / 2, winSize.height / 2 + 20));
  itemLabel2->setPosition(Vec2(winSize.width / 2, winSize.height / 2 ));

  menu->setPosition(Vec2::ZERO);

  return true;
}

void Upgrade::onError(AssetsManager::ErrorCode errorCode)
{
  if (errorCode == AssetsManager::ErrorCode::NO_NEW_VERSION)
  {
    _showDownloadInfo->setString("no new version");
  }
  else if (errorCode == AssetsManager::ErrorCode::NETWORK)
  {
    _showDownloadInfo->setString("network error");
  }
  else if (errorCode == AssetsManager::ErrorCode::CREATE_FILE)
  {
    _showDownloadInfo->setString("create file error");
  }
}

void Upgrade::onProgress(int percent)
{
  if (percent < 0)
    return;
  char progress[20];
  snprintf(progress, 20, "download %d%%", percent);
  _showDownloadInfo->setString(progress);
}

void Upgrade::onSuccess()
{
  CCLOG("download success");
  _showDownloadInfo->setString("download success");
  std::string path = FileUtils::getInstance()->getWritablePath() + DOWNLOAD_FIEL;


  auto engine = LuaEngine::getInstance();
  ScriptEngineManager::getInstance()->setScriptEngine(engine);
  if (engine->executeScriptFile("src/main.lua")) {
    return ;
  }

}

AssetsManager* Upgrade::getAssetManager()
{
  static AssetsManager *assetManager = NULL;
  if (!assetManager)
  {
    assetManager = new AssetsManager("http://shezzer.sinaapp.com/downloadTest/cocos2dx-update-temp-package.zip",
    "http://shezzer.sinaapp.com/downloadTest/version.php",
    _pathToSave.c_str());
    assetManager->setDelegate(this);
    assetManager->setConnectionTimeout(8);
  }
  return assetManager;
}

void Upgrade::initDownloadDir()
{
  CCLOG("initDownloadDir");
  _pathToSave = CCFileUtils::getInstance()->getWritablePath();
  _pathToSave += DOWNLOAD_FIEL;
CCLOG("Path: %s", _pathToSave.c_str());
#if (CC_TARGET_PLATFORM != CC_PLATFORM_WIN32)
  DIR *pDir = NULL;
  pDir = opendir(_pathToSave.c_str());
  if (!pDir)
  {
    mkdir(_pathToSave.c_str(), S_IRWXU | S_IRWXG | S_IRWXO);
  }
#else
  if ((GetFileAttributesA(_pathToSave.c_str())) == INVALID_FILE_ATTRIBUTES)
  {
    CreateDirectoryA(_pathToSave.c_str(), 0);
  }
#endif
  CCLOG("initDownloadDir end");
}

void Upgrade::reset(Ref* pSender)
{
  _showDownloadInfo->setString("");
  // Remove downloaded files
#if (CC_TARGET_PLATFORM != CC_PLATFORM_WIN32)
  string command = "rm -r ";
  // Path may include space.
  command += "\"" + _pathToSave + "\"";
  system(command.c_str());
#else
  std::string command = "rd /s /q ";
  // Path may include space.
  command += "\"" + _pathToSave + "\"";
  system(command.c_str());
#endif
  getAssetManager()->deleteVersion();
  initDownloadDir();
}

void Upgrade::upgrade(Ref* pSender)
{
  _showDownloadInfo->setString("");
  getAssetManager()->update();

}
如果是c++项目。可以自己调用相应的c++文件
如:
#include “helloWorldScene.h”
auto scene = helloWorld::scene();
Director::getInstance()->replaceScene(scene);
修改appdelegate.cpp文件调用upgrade类
Appdelegate.h无需修改,cpp稍微修改一下就可以了
头文件中加入#include “upgrade.h”,
主要是修改了appdelegate::applicationdidfinishlaunching函数中调用upgrade类
#include "AppDelegate.h"
#include "CCLuaEngine.h"
#include "SimpleAudioEngine.h"
#include "cocos2d.h"
#include "Upgrade.h"

using namespace CocosDenshion;

USING_NS_CC;
using namespace std;

AppDelegate::AppDelegate()
{
}

AppDelegate::~AppDelegate()
{
  SimpleAudioEngine::end();
}

bool AppDelegate::applicationDidFinishLaunching()
{
  // initialize director
  auto director = Director::getInstance();
  auto glview = director->getOpenGLView();
  if(!glview) {
    glview = GLView::createWithRect("dragan", Rect(0,0,900,640));
    director->setOpenGLView(glview);
  }

  glview->setDesignResolutionSize(480, 320, ResolutionPolicy::NO_BORDER);

  // turn on display FPS
  director->setDisplayStats(true);

  // set FPS. the default value is 1.0/60 if you don't call this
  director->setAnimationInterval(1.0 / 60);


  //auto engine = LuaEngine::getInstance();
  //ScriptEngineManager::getInstance()->setScriptEngine(engine);
  //if (engine->executeScriptFile("src/main.lua")) {
  //	return false;
  //}

  auto scene = Scene::create();
  auto layer =  Upgrade::create();
  Director::getInstance()->runWithScene(scene);
  scene->addChild(layer);

  return true;
}

// This function will be called when the app is inactive. When comes a phone call,it's be invoked too
void AppDelegate::applicationDidEnterBackground()
{
  Director::getInstance()->stopAnimation();

  SimpleAudioEngine::getInstance()->pauseBackgroundMusic();
}

// this function will be called when the app is active again
void AppDelegate::applicationWillEnterForeground()
{
  Director::getInstance()->startAnimation();

  SimpleAudioEngine::getInstance()->resumeBackgroundMusic();
}++++++++++++++++++++++++介个好怪好怪
===============================
Xcode6之后,苹果开放了iOS的动态库编译权限。所谓的动态库,就是可以在运行时加载。正好利用这一特性,用来做iOS的热更新
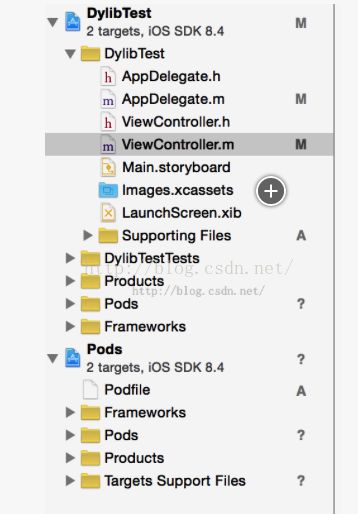
建立一个动态库,如图。。。
动态库包含需要使用的viewcontroller,当然可以包含任何需要使用的自定义ui和逻辑
动态库的入口是一个jkDylib的类。它的.h和.m文件分别入下
//JKDylib.h
#import
@interface JKDylib:NSObject
-(void)showViewAfterVC:(id)fromVc inbundle:(NSBundle*)bundle;
@end
.m文件
//JKDylib.m
#import JKDylib.h
#import JKViewcontroller.h
@implementation JDKylib
-(void)showViewAfterVC:(id)fromVc inBundle:(NSBundle*)bundle
{
if(fromVc == nil){return;}
JKViewcontroller *vc =[[JKViewController alloc] init];
UIViewController *preVc = (UIViewController *)fromVc;
if(preVc.navigationController)
{
[preVc.navigationController pushViewController:vc animated:YES];
}
else
{
UINavigationController *navi =[[UINavigationCcontroler alloc] init];
[navi pushViewController:vc animated:YES];
}
}
@end
上述代码意图非常明显
就是调用该动态库的时候
-(void)showViewAfterVC:(id)fromVc inBundle:(NSBundle*)bundle
在该函数中,创建一个viewController然后使用mainBundler的navigationController push新建的viewController,显示动态库的ui界面。
而动态库中的JKViewController内容则可以根据需要随便定义
2,完成上述动态库的编译工作后,现在需要做的就是在主工程中,写一段加载该动态库的代码
在最重要的viewcontroler里面,定义了加载动态库的方法
Viewcontroller.m
#import ViewController.h
#import AFNetWorking.h

@interface ViewController ()

@end

@implementation ViewController

- (void)viewDidLoad {
    [super viewDidLoad];
    self.view.backgroundColor = [UIColor whiteColor];
    self.title = @bundle test;

    AFHTTPRequestOperationManager *manager = [[AFHTTPRequestOperationManager alloc] init];
    manager.responseSerializer = [AFJSONResponseSerializer serializer];
    NSURLRequest *request = [NSURLRequest requestWithURL:[NSURL URLWithString:@http://www.baidu.com]];
    [manager HTTPRequestOperationWithRequest:request success:^(AFHTTPRequestOperation *operation, id responseObject) {
        NSLog(@request success);
    } failure:^(AFHTTPRequestOperation *operation, NSError *error) {
        NSLog(@request failure);
    }];


    UIButton *btn = [[UIButton alloc] initWithFrame:CGRectMake(0, 100, 100, 50)];
    btn.backgroundColor = [UIColor blueColor];

    [btn addTarget:self
            action:@selector(btnHandler)
  forControlEvents:UIControlEventTouchUpInside];

    [self.view addSubview:btn];

    NSString *document = [NSSearchPathForDirectoriesInDomains(NSDocumentDirectory, NSUserDomainMask, YES) lastObject];

    BOOL writeResult =
    [@hellow writeToFile:[NSString stringWithFormat:@%@/%@,document,@hello.plist] atomically:YES encoding:NSUTF8StringEncoding error:nil];

    // Do any additional setup after loading the view, typically from a nib.
}


-(void)btnHandler
{

    //AFHTTPRequestOperationManager *manager = [[AFHTTPRequestOperationManager alloc] init];
    //manager.responseSerializer = [AFJSONResponseSerializer serializer];
   // NSURLRequest *request = [NSURLRequest requestWithURL:[NSURL URLWithString:@http://www.baidu.com]];
   // [manager HTTPRequestOperationWithRequest:request success:^(AFHTTPRequestOperation *operation, id responseObject) {
    //    NSLog(@request success);
   // } failure:^(AFHTTPRequestOperation *operation, NSError *error) {
      // NSLog(@request failure);
    //}];

    NSString *documentDirectory = [NSSearchPathForDirectoriesInDomains(NSDocumentDirectory, NSUserDomainMask, YES) lastObject];
    NSString *bundlePath = [NSString stringWithFormat:@%@/%@,documentDirectory,@JKDylb.framework];

    if (![[NSFileManager defaultManager] fileExistsAtPath:bundlePath]) {
        NSLog(@file not exist ,now  return);
        return;
    }
    NSBundle *bundle = [NSBundle bundleWithPath:bundlePath];

    if (!bundle || ![bundle load]) {
        NSLog(@bundle load error);
    }

    Class loadClass = [bundle principalClass];
    if (!loadClass) {
        NSLog(@get bundle class fail);
        return;
    }
    NSObject *bundleObj = [loadClass new];
    [bundleObj performSelector:@selector(showViewAfterVC:inBundle:) withObject:self withObject:bundle];

    NSString *framePath = [[NSBundle mainBundle] privateFrameworksPath];
    NSLog(@framePath is %@,framePath);

    NSLog(@file attri
 %@,bundle.localizations);

//    [bundleObj showViewAfterVC:self inBundle:bundle];
}

- (void)didReceiveMemoryWarning {
    [super didReceiveMemoryWarning];
    // Dispose of any resources that can be recreated.
}

@end
viewController试图中有一个按钮,点击按钮后,从document目录下面找到动态库(虽然此时 document下并没有动态库)
,动态库的名称约定好JKDylib.framework.
然后使用NSBundle加载该动态库,具体见代码。
加载成功后,调用在动态库中实现的方法
[bundleObj performSelector:@selectoe(showViewAfterVC:inBundle:)withObject:self withObject:bundle]
编译该工程,然后运行到手机上,然后退出该程序
3. 打开itunes 然后将动态库同步到刚才的测试工程目录下。
4.在此打开测试工程程序,点击button,则会发现能够进入在动态库中定义的ui界面了。
关于动态更新的思考:
采用动态库方式实现热更新其实还是有一个问题,就是如何在主工程和动态库之间共享组建
比如网络组件以及其他等等第三方组件。
目前我没发现好方法,只能在动态库和主工程之间分别添加并且编译。