Unreal Engine 4 C++ Component介绍——WidgetComponent
- Unreal Engine 4 C Component介绍WidgetComponent
- WidgetComponent简介
- 添加UMG依赖
- UMG控件蓝图
- UUserWidget的UMG控件
- SWidget的Slate控件
- 扩展WidgetComponent
Unreal Engine 4 C++ Component介绍——WidgetComponent
好记性不如烂笔头啊,还是记录一下!
WidgetComponent简介
WidgetComponent是用来渲染UI的一种组件,可以被添加到Actor、Pawn、Character上。在游戏中可以用来显示角色的头顶信息以及游戏场景中的公告板。
WidgetComponent可以渲染下列类型:
- UMG的控件蓝图
- 继承UUserWidget的控件
- 继承SWidget的Slate控件
添加UMG依赖
首先,在你的工程中找到工程文件,找到以下行并添加UMG:
- .Build.cs
PublicDependencyModuleNames.AddRange(
    new string[] {
        "Core",
        "CoreUObject",
        "Engine",
        "InputCore",
        "UMG"
    }
);
并取消以下行的注释:
// Uncomment if you are using Slate UI
PrivateDependencyModuleNames.AddRange(new string[] { "Slate", "SlateCore" });
修改后的完整文件如下:
// Fill out your copyright notice in the Description page of Project Settings.

using UnrealBuildTool;

public class YourProject : ModuleRules
{
    public YourProject(TargetInfo Target)
    {
        PublicDependencyModuleNames.AddRange(new string[] {
            "Core",
            "CoreUObject",
            "Engine",
            "InputCore",
            "UMG"
            }
        );

        PrivateDependencyModuleNames.AddRange(new string[] {  });

        // Uncomment if you are using Slate UI
        PrivateDependencyModuleNames.AddRange(new string[] {
            "Slate",
            "SlateCore"
            }
        );

        // Uncomment if you are using online features
        // PrivateDependencyModuleNames.Add("OnlineSubsystem");

        // To include OnlineSubsystemSteam, add it to the plugins section in your uproject file with the Enabled attribute set to true
    }
}
UMG控件蓝图
1 创建控件蓝图
在工程中任意创建一个控件蓝图:

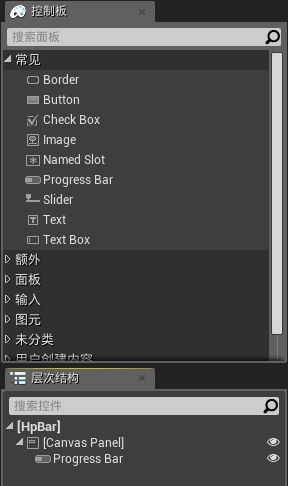
接着在控件中的CanvasPanel中创建一个ProgressBar
任意调整下细节设置,我的细节设置如下:

一个蓝图控件就创建完成了,我们将控件命名为HpBar
2 添加到WidgetComponent
往任意Actor上添加一个新的WidgetComponent:

设置WidgetComponent如下图所示:

这里也有几个参数要讲一下:
Space 有两种方式World和Screen
World方式是绘制在场景中,会被物体遮挡,相当于一个场景的公告板。
Screen方式是绘制在屏幕上,不会被物体遮挡,并且一直面向摄像机。Widget Class 就是选择你要渲染的控件,选择刚才你创建的空间蓝图。
- Draw Size 就是你要绘制的尺寸,根据你的需要调整。
调整完后我们来测试一下,就会发现控件已经正常显示了:

UUserWidget的UMG控件
此方式需要使用C++
在你的Actor类中添加该属性
- YourActor.h
// WidgetComponent
UPROPERTY(EditAnywhere, Category = WidgetComponent)
class UWidgetComponent* WidgetComponent;- YourActor.cpp
YourActor::YourActor(const FObjectInitializer& ObjectInitializer)
    : Super(ObjectInitializer)
{

    // ....你的代码

    // 初始化WidgetComponent
    WidgetComponent = CreateDefaultSubobject(TEXT("WidgetComponent"));
    WidgetComponent->AttachToComponent(RootComponent, FAttachmentTransformRules::KeepRelativeTransform);

    // 设置控件蓝图
    UClass* Widget = LoadClass(NULL, TEXT("WidgetBlueprint'/Game/UI/widget/HpBar.HpBar_C'"));
    WidgetComponent->SetWidgetClass(Widget);

    // 设置User Widget
    WidgetComponent->SetWidgetClass(MyUserWidget::StaticClass());
} 这里值得注意的是SetWidgetClass这个方法。
如果你需要加载的是控件蓝图
就要像实例中使用LoadClass模板函数,加载Class后进行设置。
// 设置控件蓝图
UClass* Widget = LoadClass(NULL, TEXT("WidgetBlueprint'/Game/UI/widget/HpBar.HpBar_C'"));
WidgetComponent->SetWidgetClass(Widget); 如果你需要加载的是一个继承自UUserWidget的C++类
你可以像下面这样直接设置:
// 设置User Widget
WidgetComponent->SetWidgetClass(MyUserWidget::StaticClass());
SWidget的Slate控件
此方式需要使用C++
在你的Actor类中添加该属性,这里我用SProgressBar举例,原理相同,换成你想要的继承自SWidget的Slate控件就可以了,重写Slate:
- YourActor.h
// 在初始化完组件之后调用
virtual void PostInitializeComponents() override;

// Slate Widget
TSharedPtr<class SProgressBar> CurrentSlateWidget;- YourActor.cpp
void AMyCharacter::PostInitializeComponents()
{
    CurrentSlateWidget = SNew(SProgressBar);

    if ( CurrentSlateWidget.IsValid() )
    {
        WidgetComponent->SetSlateWidget(CurrentSlateWidget);
        // WidgetComponent->SetWidgetSpace(EWidgetSpace::Screen);
    }
}
这里有个大坑,可能是WidgetComponent设计漏洞,只要用Slate Widget,就不能使用屏幕绘制模式(EWidgetSpace::Screen),使用就会崩溃。
如果用Slate制作的血条不能朝向摄像机,那真是太蛋疼了。
最后,我选择了旋转WidgetComponent的方式来解决这个问题。
扩展WidgetComponent
创建一个新类继承自WidgetComponent的新组建,取名为MyWidgetComponent。
- MyWidgetComponent.h
// Fill out your copyright notice in the Description page of Project Settings.

#pragma once

#include "Components/WidgetComponent.h"
#include "MyWidgetComponent.generated.h"

/**
 *
 */
UCLASS(Blueprintable, ClassGroup="UserInterface", hidecategories=(Object,Activation,"Components|Activation",Sockets,Base,Lighting,LOD,Mesh), editinlinenew, meta=(BlueprintSpawnableComponent) )
class TESTMOBILE_API UMyWidgetComponent : public UWidgetComponent
{
    GENERATED_BODY()

public:
    // 设置该角色属性的默认值
    UMyWidgetComponent(const FObjectInitializer& ObjectInitializer = FObjectInitializer::Get());

    virtual void TickComponent(float DeltaTime, enum ELevelTick TickType, FActorComponentTickFunction *ThisTickFunction) override;

protected:

    /** Should we Toward Camera */
    UPROPERTY(EditAnywhere, Category=UserInterface)
    bool bTowardCamera;
};在类体重增加了一个是否朝向摄像机的属性,然后重写父类的TickComponent方法,实现如下:
- MyWidgetComponent.h
// Fill out your copyright notice in the Description page of Project Settings.

#include "Kismet/GameplayStatics.h"
#include "MyWidgetComponent.h"


// 设置默认属性
UMyWidgetComponent::UMyWidgetComponent(const FObjectInitializer& ObjectInitializer /*= FObjectInitializer::Get()*/)
    : Super(ObjectInitializer)
    , bTowardCamera(true)
{
}


// Tick函数
void UMyWidgetComponent::TickComponent(float DeltaTime, enum ELevelTick TickType, FActorComponentTickFunction *ThisTickFunction)
{
    Super::TickComponent(DeltaTime, TickType, ThisTickFunction);

    if (Space != EWidgetSpace::Screen  && bTowardCamera)
    {

        FRotator WidgetComponentRotator = GetComponentRotation();
        FRotator CameraRotator = UGameplayStatics::GetPlayerCameraManager(this, 0)->GetCameraRotation();

        this->SetWorldRotation(FRotator(-CameraRotator.Pitch, CameraRotator.Yaw+180, WidgetComponentRotator.Roll));

    }
}在TickComponent方法中,获取了当前摄像机的旋转信息,并根据旋转信息,并给MyWidgetComponent了一个朝向摄像机的旋转。
现在,你的Slate控件可以朝向摄像机了。
关于方法传入的Pitch-Yaw—Roll可以参考Unreal Engine 4 C++ Camera Pitch Yaw Roll 直观理解
关于头顶血条的详细方法可以参考Unreal Engine 4 C++ UMG血条及头顶信息
搞定,这样就可以让Slate控件朝向摄像机。