
NameServer介绍
NameServer是RocketMQ集群的服务配置、管理中心,负责维护Broker集群、Broker信息、主题和队列信息。
Broker启动时会向所有NameServer注册,Producer在发送消息之前先从NameServer获取Broker服务器地址列表,然后根据负载均衡算法从列表中选择一个Broker进行消息发送。NameServer与每个Broker保持长链接,如果检测到Broker宕机,则从路由列表中将其剔除。
NameServer和Zookeeper、Eureka不同,每个NameServer之间是不通信的。NameServer本身的高可用是通过部署多台NameServer服务器来实现,由于每个NameServer互不通信,在某个时刻的数据并不会完全相同,但这对消息发送不会造成任何影响,这也是RocketMQ NameServer设计的一个亮点,RocketMQ NameServer设计的亮点,追求简单高效。
NameServer包结构
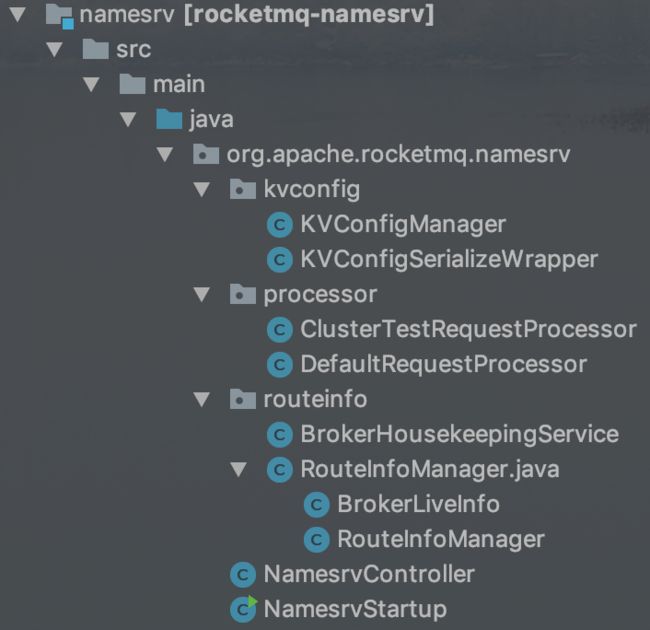
NamesrvStartup启动类
最下面可以看到核心的启动类,NamesrvStartup,来看下这个启动类的main方法。
public static void main(String[] args) {
    main0(args);
}

public static NamesrvController main0(String[] args) {

    try {
        // 创建NamesrvController
        NamesrvController controller = createNamesrvController(args);
        // 启动NamesrvController
        start(controller);
        String tip = "The Name Server boot success. serializeType=" + RemotingCommand.getSerializeTypeConfigInThisServer();
        log.info(tip);
        System.out.printf("%s%n", tip);
        return controller;
    } catch (Throwable e) {
        e.printStackTrace();
        System.exit(-1);
    }

    return null;
}
在main方法中会创建NamesrvController,并启动,接下来进入创建NamesrvController的createNamesrvController(args)
public static NamesrvController createNamesrvController(final String[] args) throws IOException, JoranException {
    System.setProperty(RemotingCommand.REMOTING_VERSION_KEY, Integer.toString(MQVersion.CURRENT_VERSION));
    //PackageConflictDetect.detectFastjson();

    final Options options = ServerUtil.buildCommandlineOptions(new Options());
    commandLine = ServerUtil.parseCmdLine("mqnamesrv", args, buildCommandlineOptions(options), new PosixParser());
    if (null == commandLine) {
        System.exit(-1);
        return null;
    }

    // NameServer属性配置类
    final NamesrvConfig namesrvConfig = new NamesrvConfig();
    // NettyServer属性配置类
    final NettyServerConfig nettyServerConfig = new NettyServerConfig();
    nettyServerConfig.setListenPort(9876);
    if (commandLine.hasOption('c')) {
        final String file = commandLine.getOptionValue('c');
        if (file != null) {
            final InputStream in = new BufferedInputStream(new FileInputStream(file));
            properties = new Properties();
            properties.load(in);
            // 填充NameServer和NettyServer属性
            MixAll.properties2Object(properties, namesrvConfig);
            MixAll.properties2Object(properties, nettyServerConfig);

            namesrvConfig.setConfigStorePath(file);

            System.out.printf("load config properties file OK, %s%n", file);
            in.close();
        }
    }

    if (commandLine.hasOption('p')) {
        final InternalLogger console = InternalLoggerFactory.getLogger(LoggerName.NAMESRV_CONSOLE_NAME);
        // 填充NameServer和NettyServer属性
        MixAll.printObjectProperties(console, namesrvConfig);
        MixAll.printObjectProperties(console, nettyServerConfig);
        System.exit(0);
    }

    MixAll.properties2Object(ServerUtil.commandLine2Properties(commandLine), namesrvConfig);

    if (null == namesrvConfig.getRocketmqHome()) {
        System.out.printf("Please set the %s variable in your environment to match the location of the RocketMQ installation%n", MixAll.ROCKETMQ_HOME_ENV);
        System.exit(-2);
    }

    final LoggerContext lc = (LoggerContext) LoggerFactory.getILoggerFactory();
    final JoranConfigurator configurator = new JoranConfigurator();
    configurator.setContext(lc);
    lc.reset();
    configurator.doConfigure(namesrvConfig.getRocketmqHome() + "/conf/logback_namesrv.xml");

    log = InternalLoggerFactory.getLogger(LoggerName.NAMESRV_LOGGER_NAME);

    MixAll.printObjectProperties(log, namesrvConfig);
    MixAll.printObjectProperties(log, nettyServerConfig);

    // 创建NamesrvController实例 并把NamesrvConfig、NettyServerConfig注入进去
    final NamesrvController controller = new NamesrvController(namesrvConfig, nettyServerConfig);

    // remember all configs to prevent discard
    controller.getConfiguration().registerConfig(properties);

    return controller;
}
在这里会看到两个配置类NamesrvConfig和NettyServerConfig,在启动时会把制定的配置文件或启动命令中的选项值填充到这两个类的实例中。这两个类的具体参数信息,此处不再做详细解释。该方法,会完成创建NamesrvController类,创建好之后会启动NamesrvController类,即调用start方法
public static NamesrvController start(final NamesrvController controller) throws Exception {

    if (null == controller) {
        throw new IllegalArgumentException("NamesrvController is null");
    }

    // 调用NamesrvController的初始化方法
    final boolean initResult = controller.initialize();
    if (!initResult) {
        // 如果初始化失败,则调用shutdown方法
        controller.shutdown();
        System.exit(-3);
    }

    // 注册JVM钩子函数,监听Broker
    Runtime.getRuntime().addShutdownHook(new ShutdownHookThread(log, new Callable() {
        @Override
        public Void call() throws Exception {
            controller.shutdown();
            return null;
        }
    }));

    controller.start();

    return controller;
}
这个启动方法相对容易理解,不过,注册JVM钩子函数这里是一种常见的技巧,如果我们在代码中使用了线程池,一种优雅的做法就是注册一个JVM钩子函数,在JVM关闭之前,先将线程池关闭,及时释放资源。
至此NamesrvStartup类主要内容已分析完毕。
NamesrvController
我们先看下在NamesrvStartup类调用的构造器方法
public class NamesrvController {
    private static final InternalLogger log = InternalLoggerFactory.getLogger(LoggerName.NAMESRV_LOGGER_NAME);

    private final NamesrvConfig namesrvConfig;

    private final NettyServerConfig nettyServerConfig;

    private final ScheduledExecutorService scheduledExecutorService = Executors.newSingleThreadScheduledExecutor(new ThreadFactoryImpl(
        "NSScheduledThread"));
    private final KVConfigManager kvConfigManager;
    private final RouteInfoManager routeInfoManager;

    private RemotingServer remotingServer;

    private BrokerHousekeepingService brokerHousekeepingService;

    private ExecutorService remotingExecutor;

    private Configuration configuration;
    private FileWatchService fileWatchService;

    public NamesrvController(NamesrvConfig namesrvConfig, NettyServerConfig nettyServerConfig) {
        this.namesrvConfig = namesrvConfig;
        this.nettyServerConfig = nettyServerConfig;
        this.kvConfigManager = new KVConfigManager(this);
        this.routeInfoManager = new RouteInfoManager();
        this.brokerHousekeepingService = new BrokerHousekeepingService(this);
        this.configuration = new Configuration(
            log,
            this.namesrvConfig, this.nettyServerConfig
        );
        this.configuration.setStorePathFromConfig(this.namesrvConfig, "configStorePath");
    }
    ···省略代码
}
在构造器方法中会对一些成员变量完成初始化,下面我们对这些成员变量简单解释一下:
- KVConfigManager:读取或变更NameServer的配置属性,加载NamesrvConfig中配置的配置文件到内存,此类一个亮点就是使用轻量级的非线程安全容器,再结合读写锁对资源读写进行保护。尽最大程度提高线程的并发度。
- RouteInfoManager:路由信息的管理类,记录broker、topic、queue、cluster、brokerLive等信息
- RemotingServer:远程调用服务
- BrokerHousekeepingService:BrokerHouseKeepingService实现 ChannelEventListener接口,可以说是通道在发送异常时的回调方法(Nameserver与Broker的连接通道在关闭、通道发送异常、通道空闲时),例如移除已Down掉的Broker。
现在看一下initialize方法
public boolean initialize() {
    // 将配置文件的内容加载内存
    this.kvConfigManager.load();

    // 初始化netty组件
    this.remotingServer = new NettyRemotingServer(this.nettyServerConfig, this.brokerHousekeepingService);

    // 创建一个线程容量为serverWorkerThreads的的线程池
    this.remotingExecutor =
            Executors.newFixedThreadPool(this.nettyServerConfig.getServerWorkerThreads(), new ThreadFactoryImpl("RemotingExecutorThread_"));

    // 将DefaultRequestProcessor和remotingExecutor绑定到一起
    this.registerProcessor();

    // 每隔10s扫描一次Broker,移除处于不激活状态的Broker
    this.scheduledExecutorService.scheduleAtFixedRate(new Runnable() {

        @Override
        public void run() {
            NamesrvController.this.routeInfoManager.scanNotActiveBroker();
        }
    }, 5, 10, TimeUnit.SECONDS);

    // 每隔10分钟打印一次kv配置
    this.scheduledExecutorService.scheduleAtFixedRate(new Runnable() {

        @Override
        public void run() {
            NamesrvController.this.kvConfigManager.printAllPeriodically();
        }
    }, 1, 10, TimeUnit.MINUTES);

    if (TlsSystemConfig.tlsMode != TlsMode.DISABLED) {
        // Register a listener to reload SslContext 注册一个重新加载SslContext的监听
        try {
            this.fileWatchService = new FileWatchService(
                    new String[]{
                            TlsSystemConfig.tlsServerCertPath,
                            TlsSystemConfig.tlsServerKeyPath,
                            TlsSystemConfig.tlsServerTrustCertPath
                    },
                    new FileWatchService.Listener() {
                        boolean certChanged, keyChanged = false;

                        @Override
                        public void onChanged(final String path) {
                            if (path.equals(TlsSystemConfig.tlsServerTrustCertPath)) {
                                log.info("The trust certificate changed, reload the ssl context");
                                reloadServerSslContext();
                            }
                            if (path.equals(TlsSystemConfig.tlsServerCertPath)) {
                                this.certChanged = true;
                            }
                            if (path.equals(TlsSystemConfig.tlsServerKeyPath)) {
                                this.keyChanged = true;
                            }
                            if (this.certChanged && this.keyChanged) {
                                log.info("The certificate and private key changed, reload the ssl context");
                                this.certChanged = this.keyChanged = false;
                                reloadServerSslContext();
                            }
                        }

                        private void reloadServerSslContext() {
                            ((NettyRemotingServer) NamesrvController.this.remotingServer).loadSslContext();
                        }
                    });
        } catch (final Exception e) {
            log.warn("FileWatchService created error, can't load the certificate dynamically");
        }
    }

    return true;
}
如果NamesrvController的initialize方法执行成功,会继续调用start方法
public void start() throws Exception {
    // 启动netty服务端
    this.remotingServer.start();

    if (this.fileWatchService != null) {
        this.fileWatchService.start();
    }
}
正确启动后,就可以提供路由发现、注册服务了。
下一篇会分析一下路由注册和发现的源码,敬请期待