微信小程序之圆形进度条
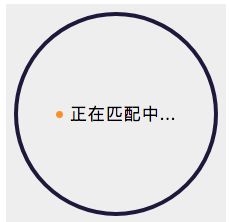
需求概要
思路
1.使用2个canvas 一个是背景圆环,一个是彩色圆环。
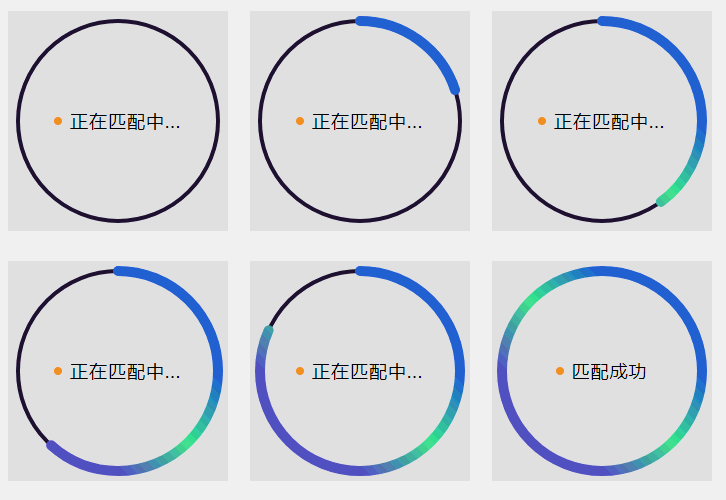
2.使用setInterval 让彩色圆环逐步绘制。
第一步先写结构
- 一个盒子包裹2个canvas以及文字盒子;
- 盒子使用相对定位作为父级,flex布局,设置居中;;
- 一个canvas,使用绝对定位作为背景,canvas-id=“canvasProgressbg”
- 另一个canvas,使用相对定位作为进度条,canvas-id=“canvasProgress”
代码如下:
	// wxml
 <view class="container">
     <view class='progress_box'>
        <canvas class="progress_bg"   canvas-id="canvasProgressbg">  </canvas>
        <canvas class="progress_canvas"   canvas-id="canvasProgress">  </canvas>
        <view class="progress_text">
            <view class="progress_dot"></view>
            <text class='progress_info'> {{progress_txt}}</text>
        </view>
    </view>
</view>
	// wxss
.progress_box{
  position: relative;
  width:220px;
  height: 220px;
// 这里的宽高是必须大于等于canvas圆环的直径 否则绘制到盒子外面就看不见了
// 一开始设置 width:440rpx; height:440rpx; 发现 在360X640分辨率的设备,下绘制的圆环跑盒子外去了
// 小程序使用rpx单位适配 ,但是canvas绘制的是px单位的。所以只能用px单位绘制的圆环在盒子内显示
  display: flex;
  align-items: center;
  justify-content: center;
  background-color: #eee;
}
.progress_bg{
  position: absolute;
    width:220px;
	height: 220px;
}
.progress_canvas{
  width:220px;
  height: 220px;
}
.progress_text{
  position: absolute;
  display: flex;
  align-items: center;
  justify-content: center
}
.progress_info{
  font-size: 36rpx;
  padding-left: 16rpx;
  letter-spacing: 2rpx
}
.progress_dot{
  width:16rpx;
  height: 16rpx;
  border-radius: 50%;
  background-color: #fb9126;
}
第二步数据绑定
从wxml中可以看到我们使用了一个数据progress_txt,所以在js中设置data如下:
 data: {
    progress_txt: '正在匹配中...',
  },
第三步canvas绘制
- 先绘制背景
1.在js中封装一个画圆环的函数drawProgressbg,canvas 画圆
2.在onReady中执行这个函数;
小程序canvas组件与H5的canvas有点差别,请查看文档,代码如下:
 drawProgressbg: function(){
	// 使用 wx.createContext 获取绘图上下文 context
    var ctx = wx.createCanvasContext('canvasProgressbg')
    ctx.setLineWidth(4);
	// 设置圆环的宽度
    ctx.setStrokeStyle('#20183b');
	// 设置圆环的颜色
    ctx.setLineCap('round')
	// 设置圆环端点的形状
    ctx.beginPath();
	//开始一个新的路径
    ctx.arc(110, 110, 100, 0, 2 * Math.PI, false);
	//设置一个原点(100,100),半径为90的圆的路径到当前路径
    ctx.stroke();
	//对当前路径进行描边
    ctx.draw();
  },
  onReady: function () {
	this.drawProgressbg();
  },
- 绘制彩色圆环
1.在js中封装一个画圆环的函数drawCircle,
2.在onReady中执行这个函数
代码如下:
drawCircle: function (step){
    var context = wx.createCanvasContext('canvasProgress');
	// 设置渐变
	var gradient = context.createLinearGradient(200, 100, 100, 200);
      gradient.addColorStop("0", "#2661DD");
      gradient.addColorStop("0.5", "#40ED94");
      gradient.addColorStop("1.0", "#5956CC");
      context.setLineWidth(10);
      context.setStrokeStyle(gradient);
      context.setLineCap('round')
      context.beginPath();
	// 参数step 为绘制的圆环周长,从0到2为一周 。-Math.PI / 2 将起始角设在12点钟位置 ,结束角 通过改变 step 的值确定
      context.arc(110, 110, 100, -Math.PI / 2, step * Math.PI - Math.PI / 2, false);
      context.stroke();
      context.draw()
  },
  onReady: function () {
	this.drawProgressbg();
	this.drawCircle(2)
  },
- 设置一个定时器
1.在js中的data设置一个计数器 count,一个步骤step,一个定时器
2.在js中封装一个定时器的函数countInterval,
代码如下:
data: {
    progress_txt: '正在匹配中...',
    count:0,
	// 设置 计数器 初始为0
    countTimer: null
	// 设置 定时器 初始为null
  },
  countInterval: function () {
	// 设置倒计时 定时器 每100毫秒执行一次,计数器count+1 ,耗时6秒绘一圈
	this.countTimer = setInterval(() => {
		if (this.data.count <= 60) {
			/* 绘制彩色圆环进度条
			        注意此处 传参 step 取值范围是0到2,
			        所以 计数器 最大值 60 对应 2 做处理,计数器count=60的时候step=2
			        */

			this.drawCircle(
			this.data.count / (60/2))
			this.data.count++;
		 } else {
			this.setData({progress_txt: "匹配成功"});
		    clearInterval(this.countTimer);
	    }
	}, 100)
},
 onReady: function () {
	this.drawProgressbg();
	// this.drawCircle(2)
	this.countInterval()
},
原文链接:segmentfault.com/a/1190000013219501


