spring cloud 之ribbon组件的学习与使用
Ribbon是什么
ribbon是一种可以实现客户端负载均衡的组件,它和服务端负载均衡有什么区别呢?
客户端负载均衡:
原理:部署在客户端,客户端获取所有的服务器列表,然后可以根据各自不同客户端的负载均衡算法,找到要访问的服务器
优势:
1.更自由的为不同客户端实现不同的负载均衡算法
2. 稳定性好,就算挂了一台客户端或服务器,也不会对其他可用的客户端的负载均衡有任何影响
服务端负载均衡
原理:当有请求时,拦截请求,然后使用比如nginx的反向代理的方式去获取到要访问的服务器
优势:
1. 统一维护,成本低,因为都放在类似nginx这个统一的地方进行处理了
不足:如果nginx宕机了,那么所有服务都用不了了
1.Ribbon使用前
服务提供者与服务消费者之间的调用方式一般就是通过RestTemplate,或者HttpClient等请求方式直接请求接口获取数据
1.1 服务提供者
1.1.1 application.yml:
server:
  port: 8085
spring:
  application:
    name: ribbon-service-provider
1.1.2 controller
@RestController
public class ServiceProviderController {

    @Value("${server.port}")
    private Integer port;

    @PostMapping("/greeting")
    public String greeting(@RequestBody User user) {
        return "Greeting , " + user + " on port : " + port;
    }
}
然后使用postman请求一下,发现返回正常,那么服务提供方是没有问题了
1.2 服务消费者
1.2.1 启动类
package cn.tanfp.cloudstudy.ribbondemo;

import org.springframework.boot.SpringApplication;
import org.springframework.boot.autoconfigure.SpringBootApplication;
import org.springframework.context.annotation.Bean;
import org.springframework.web.client.RestTemplate;

@SpringBootApplication
public class RibbonDemoApplication {

    public static void main(String[] args) {
        SpringApplication.run(RibbonDemoApplication.class, args);
    }

    @Bean
    public RestTemplate restTemplate(){
        return new RestTemplate();
    }
}
1.2.2 application.yml
server:
  port: 8086
spring:
  application:
    name: ribbon-demo

serivce-provider:
  host: localhost
  port: 8085
1.2.3 controller
package cn.tanfp.cloudstudy.ribbondemo.web.controller;

import cn.tanfp.cloudstudy.ribbondemo.domain.User;
import org.springframework.beans.factory.annotation.Autowired;
import org.springframework.beans.factory.annotation.Value;
import org.springframework.web.bind.annotation.GetMapping;
import org.springframework.web.bind.annotation.RestController;
import org.springframework.web.client.RestTemplate;

@RestController
public class ClientController {

    @Autowired
    private RestTemplate restTemplate;

    @Value("${serivce-provider.host}")
    private String serviceProviderHost;

    @Value("${serivce-provider.port}")
    private Integer serviceProviderPort;


    @GetMapping("/a")
    public String index() {
        User user = new User();
        user.setId(1L);
        user.setName("tanfp");
        return restTemplate.postForObject("http://" +
                        serviceProviderHost + ":" + serviceProviderPort +
                        "/greeting",
                user, String.class);

    }

}
1.2.4 测试
调用http://localhost:8086/a发现正常返回结果,说明使用restTemplate直接调用服务提供者的url是可以的。这种方式很直接,但是有几个问题:
1. 用不了客户端负载均衡(服务端负载均衡是可以的,但是使用服务端的负载均衡配置量会很大,而且每有新的客户端服务器都需要配置一下负载均衡的配置,不能动态生成)
2. 写起来麻烦
2. 使用ribbon(不集成eureka的情况)
2.1 引入依赖
   org.springframework.cloud
   spring-cloud-starter-netflix-ribbon
2.2 启动类
@SpringBootApplication
public class RibbonDemoApplication {

    public static void main(String[] args) {
        SpringApplication.run(RibbonDemoApplication.class, args);
    }

    //声明 RestTemplate
    // 启用ribbon
    @LoadBalanced
    @Bean
    public RestTemplate restTemplate(){
        return new RestTemplate();
    }
}
2.3 application.yml
server:
  port: 8086
spring:
  application:
    name: ribbon-demo

serivce-provider:
  host: localhost
  port: 8085
  name: ribbon-service-provider

ribbon-service-provider:
  ribbon:
    listOfServers: http://${serivce-provider.host}:${serivce-provider.port}
定义ribbon的服务列表格式:服务提供方的应用名.ribbon.listOfServers,多个用逗号隔开
2.4 controller
package cn.tanfp.cloudstudy.ribbondemo.web.controller;

import cn.tanfp.cloudstudy.ribbondemo.domain.User;
import org.springframework.beans.factory.annotation.Autowired;
import org.springframework.beans.factory.annotation.Value;
import org.springframework.web.bind.annotation.GetMapping;
import org.springframework.web.bind.annotation.RestController;
import org.springframework.web.client.RestTemplate;

/**
 * Client {@link RestController}
 *
 * @author Mercy
 * @since TODO
 */
@RestController
public class ClientController {

    @Autowired
    private RestTemplate restTemplate;

    @Value("${serivce-provider.name}")
    private String serviceProviderName;


    @GetMapping("/a")
    public String index() {
        User user = new User();
        user.setId(1L);
        user.setName("tanfp");

        return restTemplate.postForObject("http://" +
                        serviceProviderName +
                        "/greeting",
                user, String.class);
    }

}
这里是使用服务名代替了上面的域名+端口的形式
2.5 测试是否可用
调用http://localhost:8086/a发现正常返回结果,说明使用restTemplate直接调用服务提供者的服务名是可以的
2.6 总结:使用ribbon这种方式相对于上面的传统直接调用的方式优势就在于,只需要服务名就能调用了,就算有多个服务提供者,也不需要关注他们的域名和端口,只需要在application.yml进行简单配置即可,且实现了客户端负载均衡,但是这样还是有些问题,比如我又加了一台服务提供者,那么我需要在每个消费者的application.yml中维护一下listOfServers属性,这是非常麻烦的,所以我们想到了将eureka+ribbon结合的方式来做,这样我们就不需要管理那些服务提供者的具体实例了,只需要知道他们的应用名就行了
3. Ribbon+Eureka
高可用的服务注册中心我就不写了,网上很容易找,我的博客中也有
3.1 服务提供方
3.1.1 添加依赖
    org.springframework.cloud
    spring-cloud-starter-netflix-eureka-client
3.1.2 启动类
@SpringBootApplication
@EnableDiscoveryClient
public class RibbonServiceProviderDemoApplication {

    public static void main(String[] args) {
        SpringApplication.run(RibbonServiceProviderDemoApplication.class, args);
    }

}
3.1.3 配置
server:
  port: 8085
spring:
  application:
    name: ribbon-service-provider

eureka:
  client:
    serviceUrl:
      #配置多个eureka注册中心
      defaultZone: http://localhost:9094/eureka/,http://localhost:9093/eureka/
#关闭管理端actuator的安全,即/env /health端口完全开放
#management.security.enabled 在spring-boot2.0时过时,使用如下配置代替
management:
  endpoints:
    web:
      exposure:
        include: "*"
3.1.4 controller,这里打印port是为了测试负载均衡
@RestController
public class ServiceProviderController {

    @Value("${server.port}")
    private Integer port;

    @PostMapping("/greeting")
    public String greeting(@RequestBody User user) {
        return "Greeting , " + user + " on port : " + port;
    }

}
3.2 服务消费者
3.2.1 pom
    org.springframework.cloud
    spring-cloud-starter-netflix-eureka-client


    org.springframework.cloud
    spring-cloud-starter-netflix-ribbon
3.2.2 启动类
@SpringBootApplication
@EnableDiscoveryClient
public class RibbonDemoApplication {

    public static void main(String[] args) {
        SpringApplication.run(RibbonDemoApplication.class, args);
    }

    //声明 RestTemplate
    // 启用ribbon
    @LoadBalanced
    @Bean
    public RestTemplate restTemplate(){
        return new RestTemplate();
    }
}
3.2.3 配置
server:
  port: 8086
spring:
  application:
    name: ribbon-demo

serivce-provider:
  name: ribbon-service-provider

eureka:
  client:
    serviceUrl:
      #配置多个eureka注册中心
      defaultZone: http://localhost:9094/eureka/,http://localhost:9093/eureka/
3.2.4 controller
@RestController
public class ClientController {

    @Autowired
    private RestTemplate restTemplate;

    @Value("${serivce-provider.name}")
    private String serviceProviderName;


    @GetMapping("/a")
    public String index() {
        User user = new User();
        user.setId(1L);
        user.setName("tanfp");

        return restTemplate.postForObject("http://" +
                        serviceProviderName +
                        "/greeting",
                user, String.class);
    }

}
3.2.5 测试是否可用
调用http://localhost:8086/a,结果返回正常就行了
3.2.6 测试负载均衡
为了方便一点,我就不复制服务提供者项目了,直接在idea 中修改下启动参数,然后开不同端口就好了。
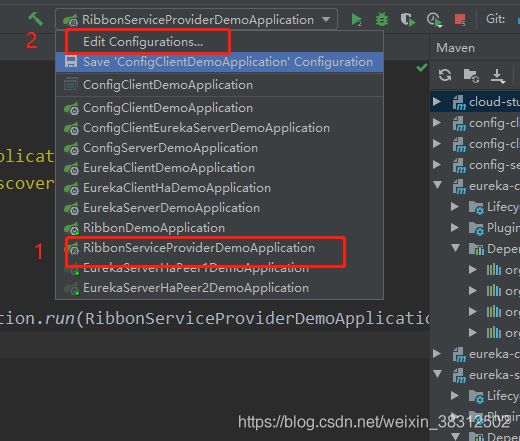
选择项目后,点击编辑config,然后:

这里一定要把allow parallel run 勾选上,意思是是否允许同一个项目可并行运行,第二步就是添加program 参数,
--server.port=8087,修改下端口,这样等火启动时不会报端口冲突错误。
保存后,你会发现之前已经运行的项目现在变成了可启动的图标,然后点击即可

启动后需要稍微一伙,让该服务注册到注册中心上,然后请求http://localhost:8086/a,会发现,打印的端口会有变化,且时按轮询的规则访问的服务提供者