实现页面静态化
模板+数据模型=输出
页面静态化需要准备数据模型和模板,先知道数
据模型的结构才可以编写模板,因为在模板中要引用数据模型中的数据
如何获取页面的数据模型?
在编辑页面信息时指定一个DataUrl,此DataUrl便是获取数据模型的Url,它基于Http方式,CMS对页面进行静态
化时会从页面信息中读取DataUrl,通过Http远程调用的方法请求DataUrl获取数据模型。
页面静态化流程如下图:
1、静态化程序首先读取页面获取DataUrl。
2、静态化程序远程请求DataUrl得到数据模型。
3、获取页面模板。
4、执行页面静态化。

轮播图DataUrl接口
轮播图管理是通过可视化的操作界面由管理
员指定轮播图图片地址,最后将轮播图图片地址保存在cms_config集合中,下边是轮播图数据模型:
{
    "_id" : ObjectId("5a791725dd573c3574ee333f"),
    "_class" : "com.xuecheng.framework.domain.cms.CmsConfig",
    "name" : "轮播图",
    "model" : [
        {
            "key" : "banner1",
            "name" : "轮播图1地址",
            "value" : "http://192.168.101.64/group1/M00/00/01/wKhlQFp5wnCAG-kAAATMXxpSaMg864.png"
        },
        {
            "key" : "banner2",
            "name" : "轮播图2地址",
            "value" : "http://192.168.101.64/group1/M00/00/01/wKhlQVp5wqyALcrGAAGUeHA3nvU867.jpg"
        },
        {
            "key" : "banner3",
            "name" : "轮播图3地址",
            "value" : "http://192.168.101.64/group1/M00/00/01/wKhlQFp5wtWAWNY2AAIkOHlpWcs395.jpg"
        }
    ]
}
cms_config有固定的数据结构,如下:
@Data
@ToString
@Document(collection = "cms_config")
public class CmsConfig {
    @Id
    private String id;//主键
    private String name;//数据模型的名称
    private List<CmsConfigModel> model;//数据模型项目
}
数据模型项目内容如下:
@Data
@ToString
public class CmsConfigModel {
    private String key;//主键
    private String name;//项目名称
    private String url;//项目url
    private Map mapValue;//项目复杂值
    private String value;//项目简单值
}
根据配置信息Id查询配置信息,定义接口如下:
@Api(value="cms配置管理接口",description = "cms配置管理接口,提供数据模型的管理、查询接口")
public interface CmsConfigControllerApi {
    @ApiOperation("根据id查询CMS配置信息")
    public CmsConfig getmodel(String id);
}
定义CmsConfig的dao接口:
public interface CmsConfigRepository extends MongoRepository<CmsConfig,String> {
}
定义CmsConfigService实现根据id查询CmsConfig信息。
@Service
public class CmsConfigService {
    @Autowired
    CmsConfigRepository cmsConfigRepository;
    //根据id查询配置管理信息
    public CmsConfig getConfigById(String id){
        Optional<CmsConfig> optional = cmsConfigRepository.findById(id);
        if(optional.isPresent()){
            CmsConfig cmsConfig = optional.get();
            return cmsConfig;
        }
        return null;
    }
}
Controller
@RestController
@RequestMapping("/cms/config")
public class CmsConfigController implements CmsConfigControllerApi {
    @Autowired
    CmsConfigService cmsConfigService;
    @Override
    @GetMapping("/getmodel/{id}")
    public CmsConfig getmodel(@PathVariable("id") String id) {
        return cmsConfigService.getConfigById(id);
    }
}
测试
使用postman测试接口:
get请求:http://localhost:31001/cms/config/getmodel/5a791725dd573c3574ee333f (轮播图信息)
远程请求接口
SpringMVC提供 RestTemplate请求http接口,RestTemplate的底层可以使用第三方的http客户端工具实现http 的
请求,常用的http客户端工具有Apache HttpClient、OkHttpClient等,本项目使用OkHttpClient完成http请求,
原因也是因为它的性能比较出众。
1、添加依赖
<dependency>
    <groupId>com.squareup.okhttp3</groupId>
    <artifactId>okhttp</artifactId>
</dependency>
2、配置RestTemplate
在SpringBoot启动类中配置 RestTemplate
public class ManageCmsApplication {
    public static void main(String[] args) {
        SpringApplication.run(ManageCmsApplication.class,args);
    }
    @Bean
    public RestTemplate restTemplate() {
        return new RestTemplate(new OkHttp3ClientHttpRequestFactory());
    }
}
3、测试RestTemplate
根据url获取数据,并转为map格式。
@Test
public void testRestTemplate(){
    ResponseEntity<Map> forEntity =
restTemplate.getForEntity("http://localhost:31001/cms/config/get/5a791725dd573c3574ee333f",
Map.class);
    System.out.println(forEntity);
}
模板管理业务流程

1、要增加新模板首先需要制作模板,模板的内容就是Freemarker ftl模板内容。
2、通过模板管理模块功能新增模板、修改模板、删除模板。
3、模板信息存储在MongoDB数据库,其中模板信息存储在cms_template集合中,模板文件存储在GridFS文件系
统中。
cms_template集合:
下边是一个模板的例子:
{
    "_id" : ObjectId("5a962b52b00ffc514038faf7"),
    "_class" : "com.xuecheng.framework.domain.cms.CmsTemplate",
    "siteId" : "5a751fab6abb5044e0d19ea1",
    "templateName" : "首页",
    "templateParameter" : "",
    "templateFileId" : "5a962b52b00ffc514038faf5"
}
上边模板信息中templateFileId是模板文件的ID,此ID对应GridFS文件系统中文件ID。
模板制作
1、轮播图页面原型
在门户的静态工程目录有轮播图的静态页面,路径是:/include/index_banner.html。
2 、数据模型为:
通过http 获取到数据模型如下:
下图数据模型的图片路径改成可以浏览的正确路径。
{
    "id": "5a791725dd573c3574ee333f",
    "name": "轮播图",
    "model": [
      {
        "key": "banner1",
        "name": "轮播图1地址",
        "url": null,
        "mapValue": null,
        "value": "http://www.xuecheng.com/img/widget‐bannerB.jpg"
      },
      {
        "key": "banner2",
        "name": "轮播图2地址",
        "url": null,
        "mapValue": null,
        "value": "http://www.xuecheng.com/img/widget‐bannerA.jpg"
      },
      {
        "key": "banner3",
        "name": "轮播图3地址",
        "url": null,
        "mapValue": null,
        "value": "http://www.xuecheng.com/img/widget‐banner3.jpg"
      }
    ]
}
3、编写模板
在freemarker测试工程中新建模板index_banner.ftl
<html lang="en">
<head>
<meta charset="UTF‐8">
<title>Titletitle>
<link rel="stylesheet" href="http://www.xuecheng.com/plugins/normalize‐css/normalize.css" />
<link rel="stylesheet"
href="http://www.xuecheng.com/plugins/bootstrap/dist/css/bootstrap.css" />
<link rel="stylesheet" href="http://www.xuecheng.com/css/page‐learing‐index.css" />
<link rel="stylesheet" href="http://www.xuecheng.com/css/page‐header.css" />
head>
<body>
<div class="banner‐roll">
<div class="banner‐item">
<#if model??>
<#list model as item>
<div class="item" style="background‐image: url(${item.value});">div>
#list>
#if>
<#‐‐ class="item" style="background‐image: url(../img/widget‐bannerA.jpg);"> div>
<div class="item" style="background‐image: url(../img/widget‐banner3.png);">div>
<div class="item" style="background‐image: url(../img/widget‐bannerB.jpg);">div>
<div class="item" style="background‐image: url(../img/widget‐bannerA.jpg);">div>
<div class="item" style="background‐image: url(../img/widget‐banner3.png);">div>‐‐>
div>
<div class="indicators">div>
div>
<script type="text/javascript" src="http://www.xuecheng.com/plugins/jquery/dist/jquery.js">
script>
<script type="text/javascript"
src="http://www.xuecheng.com/plugins/bootstrap/dist/js/bootstrap.js">script>
<script type="text/javascript">
var tg = $('.banner‐item .item');
var num = 0;
for (i = 0; i < tg.length; i++) {
$('.indicators').append('');
$('.indicators').find('span').eq(num).addClass('active');
}
function roll() {
tg.eq(num).animate({
'opacity': '1',
'z‐index': num
}, 1000).siblings().animate({
'opacity': '0',
'z‐index': 0
}, 1000);
$('.indicators').find('span').eq(num).addClass('active').siblings().removeClass('active');
if (num >= tg.length ‐ 1) {
num = 0;
} else {
num++;
}
}
$('.indicators').find('span').click(function() {
num = $(this).index();
roll();
});
var timer = setInterval(roll, 3000);
$('.banner‐item').mouseover(function() {
clearInterval(timer)
});
$('.banner‐item').mouseout(function() {
timer = setInterval(roll, 3000)
});
script>
body>
html>
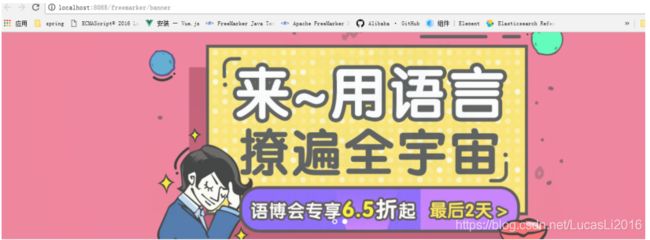
模板测试
在freemarker测试工程编写一个方法测试轮播图模板,代码如下:
@Autowired
RestTemplate restTemplate;
@RequestMapping("/banner")
public String index_banner(Map<String, Object> map){
    String dataUrl = "http://localhost:31001/cms/config/getmodel/5a791725dd573c3574ee333f";
    ResponseEntity<Map> forEntity = restTemplate.getForEntity(dataUrl, Map.class);
    Map body = forEntity.getBody();
    map.putAll(body);
    return "index_banner";
}
