springboot集成Druid与Mybatis
集成Druid
1.1Java程序很大的一部分都是要操作数据库的,为了提高操作数据库的性能,所以一般会使用连接池! Druid 是阿里巴巴的开源组件之一,结合了C3P0,DBCP的优点,并且自带日志监控! Druid 可以天然的监控 SQL 和 数据库连接池的状况!
 要使用第三方数据源
1、导入依赖
2、看源码配置
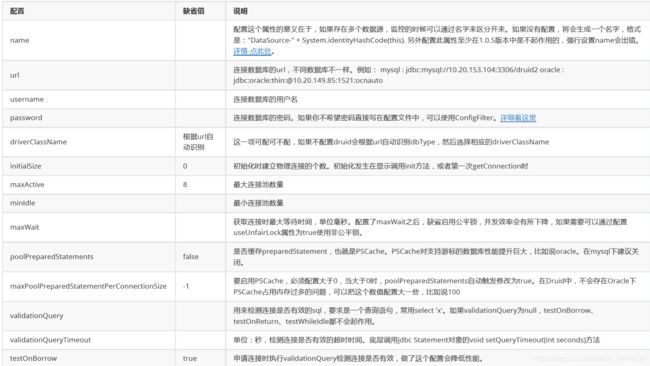
3、看官方解释
4、测试使用!
1、导入依赖
            com.alibaba
            druid
            1.0.9


            log4j
            log4j
            1.2.17
2、看源码配置
spring:
 datasource:
   username: root
   password: root
# 注意8.0以上需要时区的配置
   url: jdbc:mysql://localhost:3306/springboot?useSSL=false
   driverClassName: com.mysql.jdbc.Driver
   type:  com.alibaba.druid.pool.DruidDataSource

#Spring Boot 默认是不注入这些属性值的,需要自己绑定
#druid 数据源专有配置
   initialSize: 5
   minIdle: 5
   maxActive: 20
   maxWait: 60000
   timeBetweenEvictionRunsMillis: 60000
   minEvictableIdleTimeMillis: 300000
   validationQuery: SELECT 1 FROM DUAL
   testWhileIdle: true
   testOnBorrow: false
   testOnReturn: false
   poolPreparedStatements: true

#配置监控统计拦截的filters,stat:监控统计、log4j:日志记录、wall:防御sql注入
#如果允许时报错	java.lang.ClassNotFoundException: org.apache.log4j.Priority #则导入 log4j 依赖即可,Maven 地址:
#https://mvnrepository.com/artifact/log4j/log4j
   filters: stat,wall,log4j
   maxPoolPreparedStatementPerConnectionSize: 20
   useGlobalDataSourceStat: true
   connectionProperties: druid.stat.mergeSql=true;druid.stat.slowSqlMillis=500
3.Druid参数不会自动生效需要自己手动配置
@Configuration
public class DruidConfig {
@ConfigurationProperties("spring.datasource")
@Bean
public DataSource druidDataSource(){
return new DruidDataSource();
}
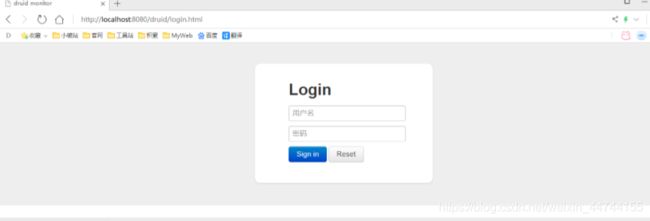
// 注册后台监控页面。SpringBoot 如何注册Servlet
// 没有web.xml 的情况配置 Servlet 的方法 : ServletRegistrationBean
// 测试访问 /drui
@Bean
public ServletRegistrationBean statViewServlet(){
//StatViewServlet 配置后台监控
ServletRegistrationBean servletRegistrationBean = new ServletRegistrationBean(new StatViewServlet(),"/druid/*");
HashMapmap = new HashMap<>();
//后台登陆
map.put("loginUsername","admin");
map.put("loginPassword","123456");
//访问权
//只允许本地访问
// map.put("allow","localhost");
map.put("allow","");//允许所有人
// map.put("deny","196.168.1.1"); 拒绝ip...访问
servletRegistrationBean.setInitParameters(map);
return servletRegistrationBean;
}
//过滤器的配置
//没有web.xml 的情况配置 Filter 的方法! FilterRegistrationBean
@Bean
public FilterRegistrationBean webStatFilter(){
FilterRegistrationBean bean = new FilterRegistrationBean();
bean.setFilter(new WebStatFilter());
// 配置内容
// 配置哪些请求可以被过滤
HashMapmap = new HashMap<>();
map.put("exclusions","*.js,*.css,/druid/*");
bean.setInitParameters(map);
bean.setUrlPatterns(Arrays.asList("/*"));
return bean;
}
}
测试

 在SpringBoot未来的集成中
1、导入pom依赖
2、编写一些配置
3、编写Config
SpringCloud 套路
1、导入pom配置文件
2、编写一些配置
3、开启一个注解!
集成Mybatis
MyBatis:https://mybatis.org/mybatis-3/getting-started.html
MyBatis-Spring:http://mybatis.org/spring/zh/factorybean.html
MyBatis Spring Boot Starter:http://mybatis.org/spring-boot-starter/mybatis-spring-boot-autocon figure/
1、导入pom依赖
            org.mybatis.spring.boot
            mybatis-spring-boot-starter
            2.1.2
2、编写一些配置
debug=false
spring.datasource.driverClassName=com.mysql.jdbc.Driver
# 注意8.0以上需要时区的配置
# url: jdbc:mysql://localhost:3306/springboot? serverTimezone=UTC&useUnicode=true&characterEncoding=utf-8
spring.datasource.url=jdbc:mysql://localhost:3306/springboot?useSSL=false
spring.datasource.username=root
spring.datasource.password=root
#mybatis-plus.configuration.logimpl=org.apache.ibatis.logging.stdout.StdOutImpl
#mybatis-plus.global-config.db-config.logic-delete-value=1
#mybatis-plus.global-config.db-config.logic-not-delete-value=0
spring.profiles.active=dev
# 配置mybatis的配置
mybatis.configuration.map-underscore-to-camel-case=true
mybatis.type-aliases-package=com.shying.pojo
# mybatis.config-location=
mybatis.mapper-locations=classpath:com/shying/mapper/xml/*.xml
3、测试是否连接成功
@SpringBootTest
class ShyingMybatisApplicationTests {
    @Autowired
    DataSource dataSource;
    @Test
    void contextLoads() throws SQLException {
        System.out.println(dataSource.getClass());
        Connection connection = dataSource.getConnection();
        System.out.println(connection);
        DruidDataSource druidDataSource = (DruidDataSource)this.dataSource;
        System.out.println(druidDataSource.getActiveCount());
        System.out.println(druidDataSource.getActivePeak());
        System.out.println(druidDataSource.getMaxActive());
        System.out.println(druidDataSource.getMinIdle());
        connection.close();
    }

}
4、编写实体类
@Data
@AllArgsConstructor
@NoArgsConstructor
public class Department {
private int id;
    private String departmentName;
}
5、编写Mapper.xml

6.配置maven资源过滤
                src/main/java

                    **/*.properties
                    **/*.xml

                false


                src/main/resources

                    **/*.*

                false
7.测试
@RestController
public class DepartmentController {
    @Autowired
    DepartmentMapper departmentMapper;
    @RequestMapping("/select")
    public List selectAll(){
        List departments = departmentMapper.selectAll();
        return departments;
    }
}
![]()