Java架构师升级之路Spring基础回顾以及源码解析
模拟Spring基础应用---->创建对象和给属性赋值
代码:
package com.bjpowernode.service;

public interface UserService {

	public void addUser();
}
package com.bjpowernode.service;

import com.bjpowernode.dao.UserDao;
import com.bjpowernode.dao.UserDaoMySQLImpl;
import com.bjpowernode.dao.UserDaoOracleImpl;

/**
 * 依赖关系: classA使用了classB的属性或者方法。 classA依赖classB.
 * UserServiceImpl的addUser方法的实现需要依赖UserDao对象
 *
 */
public class UserServiceImpl implements UserService {

	//定义Dao对象
//	private UserDao userDao = new UserDaoMySQLImpl();
	private UserDao userDao;// = new UserDaoOracleImpl();

	//可以给userDao赋值的
	public void setUserDao(UserDao userDao) {
		this.userDao = userDao;
	}

	@Override
	public void addUser() {
		//调用Dao类的方法,实现插入操作
		userDao.insertUser();
	}

}
package com.bjpowernode.dao;

public interface UserDao {

	void insertUser();
}
package com.bjpowernode.dao;

/**
 * 对象MySQL数据库的实现
 *
 */
public class UserDaoMySQLImpl implements UserDao {

	@Override
	public void insertUser() {
		System.out.println("执行了对mysql的插入操作");

	}

}
package com.bjpowernode.dao;

public class UserDaoOracleImpl implements UserDao {

	@Override
	public void insertUser() {
		System.out.println("执行了oracle的插入操作");

	}

}
package com.bjpowernode;

import java.io.BufferedReader;
import java.io.File;
import java.io.FileReader;
import java.io.IOException;
import java.lang.reflect.Field;
import java.util.HashMap;
import java.util.Map;

/**
 * 读取myobject.txt文件
 * 1.使用反射创建对象
 * 2.给对象的属性(依赖对象)赋值
 *
 */
public class Container {
	//使用集合保存创建好的对象
	private Map<String,Object> map = new HashMap<>();

	public Container(File file) throws IOException, NoSuchFieldException, SecurityException, IllegalArgumentException, IllegalAccessException{
		init(file);
	}

	//从Map中获取程序中使用对象
	public Object getBean(String name){
		Object object = null;
		if( map.containsKey(name)){
			object = map.get(name);
		}
		return object;
	}

	/**
	 * 读取文件myobject
	 * @param file
	 * @throws IOException
	 * @throws SecurityException
	 * @throws NoSuchFieldException
	 * @throws IllegalAccessException
	 * @throws IllegalArgumentException
	 */
	public void init(File file) throws IOException, NoSuchFieldException, SecurityException, IllegalArgumentException, IllegalAccessException{
		FileReader fr = new FileReader(file);
		BufferedReader br = new BufferedReader(fr);
		String line = null;

		while( (line = br.readLine()) != null ){
			/*
			 *  service=com.bjpowernode.service.UserServiceImpl
				myUserDao=com.bjpowernode.dao.UserDaoMySQLImpl
				service#userDao=myUserDao
			 */
			String [] data = line.split("=");
			String left = data[0];//service#userDao
			String right = data[1];//myUserDao

			//区分是第三行数据
			if( left.indexOf("#") > 0 ){
				//第三行数据
				String ref []= left.split("#");
				String refLeft = ref[0];//service
				String refRight = ref[1];//userDao 属性名

				//从Map中取对象
				Object bean = map.get(refLeft);
				//反射机制获取Class
				Class clazz  = bean.getClass();
				//获取要修改的属性 Field
				Field field = clazz.getDeclaredField(refRight); //userDao属性

				//允许属性赋值
				field.setAccessible(true);

				//给属性赋值
				field.set(bean, map.get(right));


			} else {
				//使用反射创建对象
				Object obj  = makeObject(right);
				//创建好的对象放入Map
				map.put(left, obj);
			}

		}


	}


	//创建对象
	private Object makeObject(String className){
		Object object = null;
		try {
			//调用类的无参数构造方法创建对象
			object = Class.forName(className).newInstance();
		} catch (InstantiationException e) {
			// TODO Auto-generated catch block
			e.printStackTrace();
		} catch (IllegalAccessException e) {
			// TODO Auto-generated catch block
			e.printStackTrace();
		} catch (ClassNotFoundException e) {
			// TODO Auto-generated catch block
			e.printStackTrace();
		}
		return object;
	}

}
service=com.bjpowernode.service.UserServiceImpl
myUserDao=com.bjpowernode.dao.UserDaoOracleImpl
service#userDao=myUserDao
package com.bjpowernode.test;

import java.io.File;
import java.io.IOException;

import com.bjpowernode.Container;
import com.bjpowernode.service.UserService;

public class MyTest {

	public static void main(String[] args) throws NoSuchFieldException, SecurityException, IllegalArgumentException, IllegalAccessException, IOException {
		//创建Service对象
//		UserService service = new UserServiceImpl();
//		service.addUser();


		//使用配置文件表示对象的信息, 使用Contianer完成对象创建,属性赋值   E:\JAVA课程内容\07Spring\本阶段代码\第一天代码\01-miniSpring\bin
		String path = MyTest.class.getResource("/").getPath();
		System.out.println("path:"+path);
		File file = new File(path,"myobject.txt");
		Container cc  = new Container(file);


		//从Contianer中获取对象
		UserService service = (UserService) cc.getBean("service");

		service.addUser();

	}

}

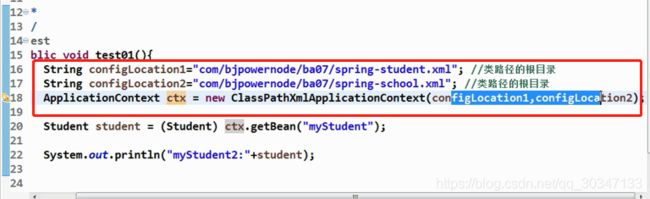
与以上比较一下路径关系:


Spring的第一个java项目:
02-primary:第一个spring项目

步骤:
1.新建 java project
2.导入jar:
  必须的jar:
  1)spring的核心:spring-beans.jar,spring-core.jar,spring-context.jar,spring-expression.jar
  2)日志:commons-logging.jar
 可选的:
  1)日志的实现:log4j.jar
  2)单元测试:junit.jar
3.定义接口和实现类(可没有接口):和没有使用框架一样定义
4.定义spring的配置文件(myobject.txt)
  1)加入约束文件spring-beans.xsd
  2)声明bean对象。 bean对象就是java对象
     bean:在spring中把java对象称为bean.
5.定义测试类,在代码中使用spring
    创建接口ApplicationContext,表示spring框架
package com.bjpowernode.service;

public interface SomeService {

	void doSome();
}
package com.bjpowernode.service;

public class SomeServiceImpl implements SomeService {


	public SomeServiceImpl() {
		super();
		System.out.println("SomeServiceImpl的无参数构造方法");
	}

	@Override
	public void doSome() {
		System.out.println("==****===业务方法doSome()==*****===");

	}

}
<?xml version="1.0" encoding="UTF-8"?>
<beans xmlns="http://www.springframework.org/schema/beans"
    xmlns:xsi="http://www.w3.org/2001/XMLSchema-instance"
    xsi:schemaLocation="
        http://www.springframework.org/schema/beans
        http://www.springframework.org/schema/beans/spring-beans.xsd">

    <!-- 声明bean对象:java对象
         id:自定义对象名称,必须是唯一值。 对象名称命名规则同变量
         class:全限定类名(不能是接口)

        <bean>的作用等同于:
        SomeService someService = new com.bjpowernode.service.SomeServiceImpl()
    -->
    <bean id="someService" class="com.bjpowernode.service.SomeServiceImpl" />
    <bean id="someService1" class="com.bjpowernode.service.SomeServiceImpl" />

</beans>
package com.bjpowernode.test;

import org.junit.Test;
import org.springframework.context.ApplicationContext;
import org.springframework.context.support.ClassPathXmlApplicationContext;
import org.springframework.context.support.FileSystemXmlApplicationContext;

import com.bjpowernode.service.SomeService;

public class MyTest {

	public static void main(String[] args) {
		// 要使用spring管理的对象

		//1.定义变量,保存spring配置文件的路径和名称
		String configLocation="applicationContext.xml"; //类路径的根目录

		//2.创建spring容器对象, ApplicationContext接口。
		//根据配置文件的位置,使用不同的实现类。
		//如果配置文件放在类路径中(classpath),需要使用ClassPathXmlApplicationContext实现类
		ApplicationContext ctx = new ClassPathXmlApplicationContext(configLocation);

		//3.从容器中获取对象, 使用getBean("的id属性值")
		SomeService service = (SomeService) ctx.getBean("someService");

		//4.调用对象的业务方法
		service.doSome();

	}

	/**
	 * spring的配置文件放在磁盘目录中,
	 * 需要使用FileSystemXmlApplilcationContext实现读取磁盘中的配置文件
	 */
	@Test
	public void test01(){
		//读取磁盘中的配置文件
		String configLocation="D:/data/applicationContext.xml";
		ApplicationContext ctx = new FileSystemXmlApplicationContext(configLocation);
		SomeService service = (SomeService) ctx.getBean("someService");
		service.doSome();
	}

	/**
	 * spring的配置文件放在项目的根目录下,和 src ,lib是同级的
	 * 需要使用FileSystemXmlApplilcationContext实现读取配置文件
	 */

	@Test
	public void test02(){
		//配置文件放在项目的根目录下, 只需提供文件名称就行
		String configLocation="applicationContext.xml";
		ApplicationContext ctx = new FileSystemXmlApplicationContext(configLocation);
		SomeService service = (SomeService) ctx.getBean("someService");
		service.doSome();
	}

	/**
	 * 在创建spring容器对象的时候,会创建spring配置文件中的所有对象
	 */
	@Test
	public void test03(){
		String configLocation="applicationContext.xml"; //类路径的根目录
		ApplicationContext ctx = new ClassPathXmlApplicationContext(configLocation);

		//SomeService service = (SomeService) ctx.getBean("someService");
		//service.doSome();
	}

	/**
	 * 获取容器中对象的信息
	 */
	@Test
	public void test04(){
		String configLocation="applicationContext.xml";
		ApplicationContext ctx = new ClassPathXmlApplicationContext(configLocation);

		//获取容器中定义的对象个数
		 int counts  = ctx.getBeanDefinitionCount();
		 System.out.println("容器中定义的对象个数:"+counts);

		 //获取容器中定义的每个对象的名称
		 String names [] = ctx.getBeanDefinitionNames();
		 for(String name : names){
			 System.out.println(name + "|"+ctx.getBean(name));
		 }
	}

}
beanAssemble:bean的装配
bean的装配:就是bean对象的创建,属性赋值,把创建好的对象赋值给程序的过程。

步骤:
1.新建 java project
2.导入jar:
  必须的jar:
  1)spring的核心:spring-beans.jar,spring-core.jar,spring-context.jar,spring-expression.jar
  2)日志:commons-logging.jar
 可选的:
  1)日志的实现:log4j.jar
  2)单元测试:junit.jar
3.定义接口和实现类(可没有接口):和没有使用框架一样定义
4.定义spring的配置文件(myobject.txt)
  1)加入约束文件spring-beans.xsd
  2)声明bean对象。 bean对象就是java对象
     bean:在spring中把java对象称为bean.
5.定义测试类,在代码中使用spring
    创建接口ApplicationContext,表示spring框架
<?xml version="1.0" encoding="UTF-8"?>
<beans xmlns="http://www.springframework.org/schema/beans"
    xmlns:xsi="http://www.w3.org/2001/XMLSchema-instance"
    xsi:schemaLocation="
        http://www.springframework.org/schema/beans
        http://www.springframework.org/schema/beans/spring-beans.xsd">

    <!-- 声明bean对象:java对象
         id:自定义对象名称,必须是唯一值。 对象名称命名规则同变量
         class:全限定类名(不能是接口)

                 默认装配方式:spring框架调用类的无参数构造方法创建对象
    -->
    <bean id="someService" class="com.bjpowernode.ba01.SomeServiceImpl" />

</beans>
package com.bjpowernode.ba01;

public interface SomeService {

	void doSome();
}
package com.bjpowernode.ba01;

public class SomeServiceImpl implements SomeService {

	/**
	 * 框架默认是使用无参数构造方法创建对象。
	 */
	public SomeServiceImpl() {
		super();
		System.out.println("SomeServiceImpl的无参数构造方法");
	}

	@Override
	public void doSome() {
		System.out.println("==****===业务方法doSome()==*****===");

	}

}
package com.bjpowernode.ba01;

import org.junit.Test;
import org.springframework.context.ApplicationContext;
import org.springframework.context.support.ClassPathXmlApplicationContext;
import org.springframework.context.support.FileSystemXmlApplicationContext;

public class MyTest {


	/**
	 * 在创建spring容器对象的时候,会创建spring配置文件中的所有对象
	 */
	@Test
	public void test01(){
		String configLocation="com/bjpowernode/ba01/applicationContext.xml"; //类路径的根目录
		ApplicationContext ctx = new ClassPathXmlApplicationContext(configLocation);

		SomeService service = (SomeService) ctx.getBean("someService");
		service.doSome();
	}


}
指定bean对象的作用域:作用域指对象的存在范围和可见性
<?xml version="1.0" encoding="UTF-8"?>
<beans xmlns="http://www.springframework.org/schema/beans"
    xmlns:xsi="http://www.w3.org/2001/XMLSchema-instance"
    xsi:schemaLocation="
        http://www.springframework.org/schema/beans
        http://www.springframework.org/schema/beans/spring-beans.xsd">

    <!-- 指定bean对象的作用域:作用域指对象的存在范围和可见性。
         1.singleton:单例,在spring容器中对象只有一个,默认值。
                     如何指定单例:
           <bean id="xx" class="yyy" scope="singleton"/>

         2.prototype:原型,每次使用getBean()都获取到一个新的对象
                   如何指定原型:
           <bean id="xx" class="yyy" scope="prototype"/>
    -->

    <!-- 单例 -->
    <bean id="someService" class="com.bjpowernode.ba02.SomeServiceImpl" scope="singleton"/>

    <!-- 原型 -->
   <!--  <bean id="someService" class="com.bjpowernode.ba02.SomeServiceImpl" scope="prototype"/> -->

</beans>
package com.bjpowernode.ba02;

public interface SomeService {

	void doSome();
}
package com.bjpowernode.ba02;

public class SomeServiceImpl implements SomeService {

	/**
	 * 框架默认是使用无参数构方法创建对象
	 */
	public SomeServiceImpl() {
		super();
		System.out.println("SomeServiceImpl的无参数构造方法");
	}

	@Override
	public void doSome() {
		System.out.println("==****===业务方法doSome()==*****===");

	}

}
package com.bjpowernode.ba02;

import org.junit.Test;
import org.springframework.context.ApplicationContext;
import org.springframework.context.support.ClassPathXmlApplicationContext;
import org.springframework.context.support.FileSystemXmlApplicationContext;

public class MyTest {


	/**
	 * 单例作用域:存在范围是和容器对象一样
	 * 单例作用域的对象创建时间?在创建容器对象时,会创建好所有的单例对象。
	 * 创建好的对象放入到Spring的Map中。
	 *
	 * 优点:获取对象的速度快。
	 * 缺点:占内存。
	 *
	 */
	@Test
	public void test01(){
		String configLocation="com/bjpowernode/ba02/applicationContext.xml";
		ApplicationContext ctx = new ClassPathXmlApplicationContext(configLocation);
/*
		SomeService service1 = (SomeService) ctx.getBean("someService");
		SomeService service2 = (SomeService) ctx.getBean("someService");

		if( service1 == service2){
			System.out.println("service1和service2是同一个对象");
		} else {
			System.out.println("service1和service2 【不是】同一个对象");
		}*/
	}


	/**
	 * 测试原型作用域
	 *
	 * 原型作用域的对象在什么时候创建的?
	 *  在执行getBean()方法的时候才创建对象, 原型作用域是把对象的创建
	 *  时间延迟了,延迟到使用对象的时候
	 *
	 * 优点:不占内存
	 * 缺点:获取对象的速度慢
	 */
	@Test
	public void test02(){


		String configLocation="com/bjpowernode/ba02/applicationContext.xml";
		ApplicationContext ctx = new ClassPathXmlApplicationContext(configLocation);

		SomeService service1 = (SomeService) ctx.getBean("someService");
		SomeService service2 = (SomeService) ctx.getBean("someService");

		/*if( service1 == service2){
			System.out.println("service1和service2是同一个对象");
		} else {
			System.out.println("service1和service2 【不是】同一个对象");
		}*/
	}

}
定义bean的生命始末方法:自定义方法参与到spring创建和销毁对象的过程中
<?xml version="1.0" encoding="UTF-8"?>
<beans xmlns="http://www.springframework.org/schema/beans"
    xmlns:xsi="http://www.w3.org/2001/XMLSchema-instance"
    xsi:schemaLocation="
        http://www.springframework.org/schema/beans
        http://www.springframework.org/schema/beans/spring-beans.xsd">

    <!-- 定义bean的生命始末方法:自定义方法参与到spring创建和销毁对象的过程中。
         1)在java类中定义方法, 方法的原型: public void 方法名自定义的(无参数){ 。。。}
         2)在定义bean对象的时候,告诉spring两个方法的存在
           <bean id="xx" class="yyy" init-method="bean的初始化的方法名"
              destory-method="bean销毁之前执行的方法名" >
    -->

    <!-- 单例 -->
    <bean id="someService" class="com.bjpowernode.ba03.SomeServiceImpl"
           init-method="setUp" destroy-method="tearDown" scope="singleton"/>


</beans>
package com.bjpowernode.ba03;

public interface SomeService {

	void doSome();
}
package com.bjpowernode.ba03;

public class SomeServiceImpl implements SomeService {

	/**
	 * 框架默认是使用无参数构方法创建对象
	 */
	public SomeServiceImpl() {
		super();
		System.out.println("SomeServiceImpl的无参数构造方法");
	}

	@Override
	public void doSome() {
		System.out.println("==****===业务方法doSome()==*****===");

	}

	/**
	 * 自定义方法,参与到spring创建对象的过程中
	 */

	//初始化方法
	public void setUp(){
		System.out.println("bean的初始化方法,可以完成构造方法的功能,给属性赋值,初始化其他对象");
	}

	//bean销毁之前执行的方法
	public void tearDown(){
		System.out.println("bean对象销毁之前执行的方法, 清除对象, 释放内存");
	}

}
package com.bjpowernode.ba03;

import org.junit.Test;
import org.springframework.context.ApplicationContext;
import org.springframework.context.support.ClassPathXmlApplicationContext;
import org.springframework.context.support.FileSystemXmlApplicationContext;

public class MyTest {


	/**
	 * 初始方法的执行:
	 *  1) SomeService service = new SomeService();
	 *  2) service.setUp();
	 *
	 *  单例对象调用销毁方法
	 *  service.tearDown();
	 */
	@Test
	public void test01(){
		String configLocation="com/bjpowernode/ba03/applicationContext.xml";
		ApplicationContext ctx = new ClassPathXmlApplicationContext(configLocation);

		SomeService service = (SomeService) ctx.getBean("someService");
		service.doSome();

		/**
		 * 销毁方法的执行:
		 * 1.关闭容器,关闭容器时会通知容器中的单例对象,调用对象自己的销毁方法
		 * 2.对象必须是单例的
		 */
		((ClassPathXmlApplicationContext)ctx).close();

	}

}
依赖注入:
在配置文件中使用bean的属性赋值
di:依赖注入,给属性赋值。
di注入的分类:
1.设值注入:调用java类中的set方法,给属性赋值。
2.构造注入:调用java类中的有参数构造方法,创建对象的同时,给属性赋值
di的语法:
1.基于xml配置文件, 在xml文件中使用标签和属性,完成属性的赋值
2.基于注解的方式,使用注解创建对象,给属性赋值。
步骤:
1.新建 java project
2.导入jar:
必须的jar:
1)spring的核心:spring-beans.jar,spring-core.jar,spring-context.jar,spring-expression.jar
2)日志:commons-logging.jar
可选的:
1)日志的实现:log4j.jar
2)单元测试:junit.jar
3.定义接口和实现类(可没有接口):和没有使用框架一样定义
4.定义spring的配置文件(myobject.txt)
1)加入约束文件spring-beans.xsd
2)声明bean对象。 bean对象就是java对象
bean:在spring中把java对象称为bean.
5.定义测试类,在代码中使用spring
创建接口ApplicationContext,表示spring框架
简单类型的设值注入:
<?xml version="1.0" encoding="UTF-8"?>
<beans xmlns="http://www.springframework.org/schema/beans"
    xmlns:xsi="http://www.w3.org/2001/XMLSchema-instance"
    xsi:schemaLocation="
        http://www.springframework.org/schema/beans
        http://www.springframework.org/schema/beans/spring-beans.xsd">

    <!-- 设值注入:调用类中的set方法完成属性赋值
                  简单类型:spring中把String和java基本数据类型,称为简单类型。
                  简单类型的设值注入:
         <bean id="xxx" class="yyy">
            <property name="属性名" value="简单类型的属性值"/>
            <property name="属性名" value="简单类型的属性值"/>
            ...
         </bean>

     -->

     <bean id="myStudent" class="com.bjpowernode.ba01.Student">
     	<!-- 设值注入 -->
     	<property name="name" value="张三" /> <!-- setName("张三") -->
     	<property name="age" value="22" /> <!-- setAge(22) -->
     	<property name="sex" value="男" /> <!-- setSex("男") -->
     </bean>


</beans>
package com.bjpowernode.ba01;

public class Student {

	private String name;
	private int age;


	public Student() {
		super();
		System.out.println("student无参数构造方法");
	}
	public void setName(String name) {
		System.out.println("setName:"+name);
		this.name = name;
	}
	public void setAge(int age) {
		System.out.println("setAge:"+age);
		this.age = age;
	}

	public void setSex(String sex){
		System.out.println("setSex:"+sex);
	}
	@Override
	public String toString() {
		return "Student [name=" + name + ", age=" + age + "]";
	}


}
package com.bjpowernode.ba01;

import org.junit.Test;
import org.springframework.context.ApplicationContext;
import org.springframework.context.support.ClassPathXmlApplicationContext;
import org.springframework.context.support.FileSystemXmlApplicationContext;

public class MyTest {


	/**
	 * Student student = new Student();
	 * student.setName("张三")
	 * student.setAge(22)
	 */
	@Test
	public void test01(){
		String configLocation="com/bjpowernode/ba01/applicationContext.xml"; //类路径的根目录
		ApplicationContext ctx = new ClassPathXmlApplicationContext(configLocation);

		Student student = (Student) ctx.getBean("myStudent");

		System.out.println("student:"+student);
	}


}
引用类型的两种设值注入(ref作为属性或者子标签):
<?xml version="1.0" encoding="UTF-8"?>
<beans xmlns="http://www.springframework.org/schema/beans"
    xmlns:xsi="http://www.w3.org/2001/XMLSchema-instance"
    xsi:schemaLocation="
        http://www.springframework.org/schema/beans
        http://www.springframework.org/schema/beans/spring-beans.xsd">

    <!-- 设值注入:调用类中的set方法完成属性赋值
         1) 简单类型:spring中把String和java基本数据类型,称为简单类型。
                  简单类型的设值注入:
         <bean id="xxx" class="yyy">
            <property name="属性名" value="简单类型的属性值"/>
            <property name="属性名" value="简单类型的属性值"/>
            ...
         </bean>

         2)引用类型的设值注入
                  语法1:使用ref作为属性
         <bean id="xx" class="yyy">
           <property name="属性名" ref="bean的id"/>
         </bean>

                 语法2:使用ref作为子标签
         <bean id="xx" class="yyy">
           <property name="属性名">
             <ref bean="bean的id"/>
           </property>
         </bean>

     -->

     <bean id="myXueXiao" class="com.bjpowernode.ba02.School">
     	<property name="name" value="北京大学" />
     	<property name="address" value="北京的海淀区" />
     </bean>

     <!-- 使用语法1 给引用类型赋值, ref作为属性 -->
     <bean id="myStudent" class="com.bjpowernode.ba02.Student">
     	<!-- 设值注入 -->
     	<property name="name" value="张三" /> <!-- setName("张三") -->
     	<property name="age" value="22" /> <!-- setAge(22) -->
     	<!-- ref作为属性 -->
     	<property name="mySchool" ref="myXueXiao" /> <!-- setMySchool(myXueXiao) -->
     </bean>

     <!-- 使用语法2,ref作为子标签 -->
     <bean id="myStudent2" class="com.bjpowernode.ba02.Student">
     	<property name="name" value="李四" />
     	<property name="age" value="22" />
     	<!-- ref作为子标签 -->
     	<property name="mySchool">
     		<ref bean="myXueXiao"/>
     	</property>
     </bean>


</beans>
package com.bjpowernode.ba02;

public class School {

	private String name;
	private String address;

	public void setName(String name) {
		this.name = name;
	}
	public void setAddress(String address) {
		this.address = address;
	}
	@Override
	public String toString() {
		return "School [name=" + name + ", address=" + address + "]";
	}


}
package com.bjpowernode.ba02;

public class Student {

	private String name;
	private int age;

	//定义引用类型
	private School mySchool;


	public Student() {
		super();
		System.out.println("student无参数构造方法");
	}
	public void setName(String name) {
		System.out.println("setName:"+name);
		this.name = name;
	}
	public void setAge(int age) {
		System.out.println("setAge:"+age);
		this.age = age;
	}

	public void setSex(String sex){
		System.out.println("setSex:"+sex);
	}


	public void setMySchool(School mySchool) {
		System.out.println("setMySchool:"+mySchool);
		this.mySchool = mySchool;
	}
	@Override
	public String toString() {
		return "Student [name=" + name + ", age=" + age + ", mySchool=" + mySchool + "]";
	}


}
package com.bjpowernode.ba02;

import org.junit.Test;
import org.springframework.context.ApplicationContext;
import org.springframework.context.support.ClassPathXmlApplicationContext;
import org.springframework.context.support.FileSystemXmlApplicationContext;

public class MyTest {


	/**
	 */
	@Test
	public void test01(){
		String configLocation="com/bjpowernode/ba02/applicationContext.xml"; //类路径的根目录
		ApplicationContext ctx = new ClassPathXmlApplicationContext(configLocation);

		Student student = (Student) ctx.getBean("myStudent2");

		System.out.println("myStudent2:"+student);
	}
	public void test02(){

		Student student = new Student();
		student.setAge(20);
		student.setName("张三");

		School mySchool = new School();
		mySchool.setAddress("北京海淀区");
		mySchool.setName("北京大学");
		student.setMySchool(mySchool);
	}


}
构造注入(两种方式:使用name属性;使用index属性):
<?xml version="1.0" encoding="UTF-8"?>
<beans xmlns="http://www.springframework.org/schema/beans"
    xmlns:xsi="http://www.w3.org/2001/XMLSchema-instance"
    xsi:schemaLocation="
        http://www.springframework.org/schema/beans
        http://www.springframework.org/schema/beans/spring-beans.xsd">

    <!-- 构造注入:spring调用类的有参数构造方法,在构造方法中给属性赋值。
                 语法:使用<constructor-arg>表示构造方法的参数。
                  一个构造方法的参数对应一个<constructor-arg>标签
     -->


     <!-- 构造注入, 使用name属性-->
     <bean id="myStudent" class="com.bjpowernode.ba03.Student">
     	<!-- 构造注入,使用name属性
     	     name:构造方法的形参名
     	     value:简单类型参数的值
     	     ref:引用类型参数的值
     	 -->
     	 <constructor-arg name="myage" value="22" />
     	 <constructor-arg name="myname" value="张三" />
     	 <constructor-arg name="myXueXiao" ref="mySchool" />
     </bean>


    <!-- 构造注入,使用index属性 -->
    <bean id="myStudent1" class="com.bjpowernode.ba03.Student">
    	<!-- 使用构造注入,使用index属性
    	     index:表示构造方法参数的位置, 从 0 开始
    	     value:简单类型参数的值
     	     ref:引用类型参数的值
    	 -->
    	 <constructor-arg index="1" value="26" />
    	 <constructor-arg index="0" value="李四" />
    	 <constructor-arg index="2" ref="mySchool" />
    </bean>

    <!-- 构造注入,省略index -->
    <bean id="myStudent2" class="com.bjpowernode.ba03.Student">
    	<!-- 使用构造注入,使用index属性

    	     value:简单类型参数的值
     	     ref:引用类型参数的值
    	 -->
    	 <constructor-arg  value="周丽" />
    	 <constructor-arg  value="20" />
    	 <constructor-arg  ref="mySchool" />
    </bean>

     <bean id="mySchool" class="com.bjpowernode.ba03.School">
     	<property name="name" value="清华大学" />
     	<property name="address" value="北京的海淀区" />
     </bean>


</beans>
给具有集性质的属性赋值
<?xml version="1.0" encoding="UTF-8"?>
<beans xmlns="http://www.springframework.org/schema/beans"
    xmlns:xsi="http://www.w3.org/2001/XMLSchema-instance"
    xsi:schemaLocation="
        http://www.springframework.org/schema/beans
        http://www.springframework.org/schema/beans/spring-beans.xsd">

     <!--  给具有集性质的属性赋值
                    什么类型的属性,就用什么类型的子标签,
                    集合中是简单类型就用value, 是对象类型就用ref
     -->
     <bean id="myCollections" class="com.bjpowernode.ba04.MyCollections">
        <!-- Array<String> -->
     	<property name="mystr">
     		<array>
     			<value>大兴区</value>
     			<value>朝阳区</value>
     		</array>
     	</property>

     	<!-- Set<String> -->
     	<property name="myset">
     		<set>
     			<value>北京</value>
     			<value>上海</value>
     			<value>杭州</value>
     		</set>
     	</property>

     	<!-- List<Student> -->
     	<property name="mylist">
     		<list>
     			<ref bean="myStudent"/>
     			<ref bean="myStudent1"/>
     			<ref bean="myStudent2"/>
     		</list>
     	</property>

     	<!-- Map<String,Integer> -->
     	<property name="mymap">
     		<map>
     			<entry key="weight" value="80" /> <!-- key-value -->
     			<entry key="height" value="180" />
     		</map>
     	</property>

     	<!-- Properties -->
     	<property name="myprop">
     		<props>
     			<prop key="tel">010-14678979</prop> <!-- key-value -->
     			<prop key="phone">1234578978</prop>
     		</props>
     	</property>


     	<!-- 下面是复杂的集合类型-->
     	<!-- List<Map<String,String>> -->
     	<property name="mylistmap">
     		<list>
     			<map> <!-- 0 -->
     				<entry key="weight" value="80kg" />
     				<entry key="height" value="180cm" />
     			</map>

     			<map> <!-- 1 -->
     				<entry key="tel" value="1534879" />
     				<entry key="phone" value="1649879" />
     			</map>
     		</list>

     	</property>
     </bean>

     <!-- 构造注入, 使用name属性-->
     <bean id="myStudent" class="com.bjpowernode.ba04.Student">
     	 <constructor-arg name="myage" value="22" />
     	 <constructor-arg name="myname" value="张三" />
     	 <constructor-arg name="myXueXiao" ref="mySchool" />
     </bean>


    <!-- 构造注入,使用index属性 -->
    <bean id="myStudent1" class="com.bjpowernode.ba04.Student">
    	 <constructor-arg index="1" value="26" />
    	 <constructor-arg index="0" value="李四" />
    	 <constructor-arg index="2" ref="mySchool" />
    </bean>

    <!-- 构造注入,省略index -->
    <bean id="myStudent2" class="com.bjpowernode.ba04.Student">
    	 <constructor-arg  value="周丽" />
    	 <constructor-arg  value="20" />
    	 <constructor-arg  ref="mySchool" />
    </bean>

     <bean id="mySchool" class="com.bjpowernode.ba04.School">
     	<property name="name" value="清华大学" />
     	<property name="address" value="北京的海淀区" />
     </bean>


</beans>
package com.bjpowernode.ba04;

import java.util.Arrays;
import java.util.List;
import java.util.Map;
import java.util.Properties;
import java.util.Set;

public class MyCollections {

	private String [] mystr;
	private Set<String> myset;
	private List<Student> mylist;
	private Map<String,Integer> mymap;
	// Properties也是key-value的结构, key-value都是String类型。
	private Properties myprop;

	//复杂的集合类型
	private List<Map<String,String>> mylistmap;

	public void setMylistmap(List<Map<String, String>> mylistmap) {
		this.mylistmap = mylistmap;
	}
	public void setMystr(String[] mystr) {
		this.mystr = mystr;
	}
	public void setMyset(Set<String> myset) {
		this.myset = myset;
	}
	public void setMylist(List<Student> mylist) {
		this.mylist = mylist;
	}
	public void setMymap(Map<String, Integer> mymap) {
		this.mymap = mymap;
	}
	public void setMyprop(Properties myprop) {
		this.myprop = myprop;
	}
	@Override
	public String toString() {
		return "MyCollections [mylistmap=" + mylistmap + "]";
	}


}
package com.bjpowernode.ba04;

public class School {

	private String name;
	private String address;

	public void setName(String name) {
		this.name = name;
	}
	public void setAddress(String address) {
		this.address = address;
	}
	@Override
	public String toString() {
		return "School [name=" + name + ", address=" + address + "]";
	}


}
package com.bjpowernode.ba04;

public class Student {

	private String name;
	private int age;

	//定义引用类型
	private School mySchool;


	public Student() {
		super();
		System.out.println("student无参数构造方法");
	}

	//定义有参数的构造方法
	public Student(String myname,int myage,School myXueXiao){
		System.out.println("Student的有参数构造方法");
		//给属性赋值
		this.name = myname;
		this.age  = myage;
		this.mySchool  = myXueXiao;
	}

	public void setName(String name) {
		System.out.println("setName:"+name);
		this.name = name;
	}
	public void setAge(int age) {
		System.out.println("setAge:"+age);
		this.age = age;
	}

	public void setSex(String sex){
		System.out.println("setSex:"+sex);
	}


	public void setMySchool(School mySchool) {
		System.out.println("setMySchool:"+mySchool);
		this.mySchool = mySchool;
	}
	@Override
	public String toString() {
		return "Student [name=" + name + ", age=" + age + ", mySchool=" + mySchool + "]";
	}


}
package com.bjpowernode.ba04;

import org.junit.Test;
import org.springframework.context.ApplicationContext;
import org.springframework.context.support.ClassPathXmlApplicationContext;
import org.springframework.context.support.FileSystemXmlApplicationContext;

public class MyTest {


	/**
	 */
	@Test
	public void test01(){
		String configLocation="com/bjpowernode/ba04/applicationContext.xml"; //类路径的根目录
		ApplicationContext ctx = new ClassPathXmlApplicationContext(configLocation);

		MyCollections coll = (MyCollections) ctx.getBean("myCollections");
		System.out.println("coll:"+coll);
	}


}

引用类型的自动注入(byName形式)

  <bean id="mySchool" class="com.bjpowernode.ba02.School">
     	<property name="name" value="北京大学" />
     	<property name="address" value="北京的海淀区" />
     </bean>

     <!-- 使用语法1 给引用类型赋值, ref作为属性 -->
     <bean id="myStudent" class="com.bjpowernode.ba02.Student" autowire="byName">
     	<!-- 设值注入 -->
     	<property name="name" value="张三" /> <!-- setName("张三") -->
     	<property name="age" value="22" /> <!-- setAge(22) -->
     	<!-- ref作为属性 -->
     	<!-- <property name="mySchool" ref="myXueXiao" />  引用类型自动注入,可以省了 -->
     </bean>
引用类型的自动注入(byType形式)

只需要把autowire=byType改一下就可以了。
Spring平等关系的配置文件:(两个配置文件完全独立,互相隔离)


包含关系的配置文件


Spring所有的约束xsd

配置文件的优势
1.配置文件的内容和源代码是完全分离的。 修改属值,只需要修改配置文件。
  把经常可能改变属性值的bean定义在xml配置文件中
2.在没有源代码的情况下, 现在需要使用配置文件的方式创建对象。

配置文件的缺点
1.代码多,麻烦,开发的效率低。

注解的优势
1.简单,方便
2.开发的效率高。
3.可读性好, 看到源代码的时候,就能知道属性的信息

注解的缺点
1.对代码是有侵入的。
2.每次修改,都需要编译文件。
基于注解的DI
06-di-annotation:使用注解创建对象,给属性赋值

di:依赖注入,给属性赋值。

di注入的分类:
1.设值注入:调用java类中的set方法,给属性赋值。
2.构造注入:调用java类中的有参数构造方法,创建对象的同时,给属性赋值

di的语法:
1.基于xml配置文件, 在xml文件中使用标签和属性,完成属性的赋值
2.基于注解的方式,使用注解创建对象,给属性赋值。

步骤:
1.新建 java project
2.导入jar:
  必须的jar:
  1)spring的核心:spring-beans.jar,spring-core.jar,spring-context.jar,spring-expression.jar
  2)日志:commons-logging.jar
  3)支持注解的使用:spring-aop.jar
 可选的:
  1)日志的实现:log4j.jar
  2)单元测试:junit.jar
3.定义接口和实现类(可没有接口):和没有使用框架一样定义
4.定义spring的配置文件(myobject.txt)
  1)加入约束文件spring-beans.xsd ,spring-context.xsd
  2)声明组件扫描器,用注解方式创建对象
5.定义测试类,在代码中使用spring
    创建接口ApplicationContext,表示spring框架
<?xml version="1.0" encoding="UTF-8"?>
<beans xmlns="http://www.springframework.org/schema/beans"
    xmlns:xsi="http://www.w3.org/2001/XMLSchema-instance"
    xmlns:context="http://www.springframework.org/schema/context"
    xsi:schemaLocation="
        http://www.springframework.org/schema/beans
        http://www.springframework.org/schema/beans/spring-beans.xsd
        http://www.springframework.org/schema/context
        http://www.springframework.org/schema/context/spring-context.xsd">

     <!-- 加入spring-context.xsd -->
     <!-- 声明组件扫描器:指定注解所在的包名
          component-scan标签叫做组件扫描器(组件指的是java对象)
          base-package:指定注解所在的包名,框架会扫描这个包和子包中类中的注解
     -->
     <context:component-scan base-package="com.bjpowernode.ba01" />


     <!-- 指定多个包中的注解 -->
     <!-- 第一种方式:多次使用 component-scan -->
     <context:component-scan base-package="com.bjpowernode.ba01" />
     <context:component-scan base-package="com.bjpowernode.ba02" />

     <!-- 第二种方式:使用分隔符(,或;),指定多个包 -->
     <context:component-scan base-package="com.bjpowernode.ba01;com.bjpowernode.ba02" />

     <!-- 第三种方式:指定父包 -->
     <context:component-scan base-package="com.bjpowernode" />

</beans>
注解创建对象:
package com.bjpowernode.ba01;
import org.springframework.stereotype.Component;
import org.springframework.stereotype.Repository;
/**
* @Component:创建对象,默认创建的是单例对象
* 属性:value , 表示对象的id
* 位置:在类的上面,表示创建该类的对象
*
* @Component(value="myStudent")等同于
* package com.bjpowernode.ba01;
import org.junit.Test;
import org.springframework.context.ApplicationContext;
import org.springframework.context.support.ClassPathXmlApplicationContext;
import org.springframework.context.support.FileSystemXmlApplicationContext;
public class MyTest {
@Test
public void test01(){
String configLocation="com/bjpowernode/ba01/applicationContext.xml"; //类路径的根目录
ApplicationContext ctx = new ClassPathXmlApplicationContext(configLocation);
Student student = (Student) ctx.getBean("myStudent");
System.out.println("student:"+student);
}
}
注解对简单类型的属性赋值:
package com.bjpowernode.ba02;

import org.springframework.beans.factory.annotation.Value;
import org.springframework.stereotype.Component;
import org.springframework.stereotype.Repository;

/**
 * @Component:创建对象,默认创建的是单例对象
 *        属性:value , 表示对象的id
 *        位置:在类的上面,表示创建该类的对象
 *
 */
//省略value
@Component("myStudent")
public class Student {

	/**
	 * 简单类型的属性赋值:@Value
	 *            属性: value ,指定简单类型的属性值
	 *            位置:1)在属性定义的上面, 无需set方法, 推荐使用。
	 *                 2)在set方法的上面。
	 */
	@Value(value="张三")
	private String name;


	private int age;

	public Student() {
		super();
		System.out.println("student无参数构造方法");
	}
	public void setName(String name) {
		System.out.println("setName:"+name);
		this.name = name;
	}

	@Value(value="26")
	public void setAge(int age) {
		System.out.println("setAge:"+age);
		this.age = age;
	}

	@Override
	public String toString() {
		return "Student [name=" + name + ", age=" + age + "]";
	}


}
<?xml version="1.0" encoding="UTF-8"?>
<beans xmlns="http://www.springframework.org/schema/beans"
    xmlns:xsi="http://www.w3.org/2001/XMLSchema-instance"
    xmlns:context="http://www.springframework.org/schema/context"
    xsi:schemaLocation="
        http://www.springframework.org/schema/beans
        http://www.springframework.org/schema/beans/spring-beans.xsd
        http://www.springframework.org/schema/context
        http://www.springframework.org/schema/context/spring-context.xsd">

     <!-- 加入spring-context.xsd -->
     <!-- 声明组件扫描器:指定注解所在的包名
          component-scan标签叫做组件扫描器(组件指的是java对象)
          base-package:指定注解所在的包名,框架会扫描这个包和子包中类中的注解
     -->
     <context:component-scan base-package="com.bjpowernode.ba02" />


</beans>
package com.bjpowernode.ba02;

import org.junit.Test;
import org.springframework.context.ApplicationContext;
import org.springframework.context.support.ClassPathXmlApplicationContext;
import org.springframework.context.support.FileSystemXmlApplicationContext;

public class MyTest {


	@Test
	public void test01(){
		String configLocation="com/bjpowernode/ba02/applicationContext.xml"; //类路径的根目录
		ApplicationContext ctx = new ClassPathXmlApplicationContext(configLocation);

		Student student = (Student) ctx.getBean("myStudent");

		System.out.println("student:"+student);
	}


}
注解对引用类型赋值:
byType
<?xml version="1.0" encoding="UTF-8"?>
<beans xmlns="http://www.springframework.org/schema/beans"
    xmlns:xsi="http://www.w3.org/2001/XMLSchema-instance"
    xmlns:context="http://www.springframework.org/schema/context"
    xsi:schemaLocation="
        http://www.springframework.org/schema/beans
        http://www.springframework.org/schema/beans/spring-beans.xsd
        http://www.springframework.org/schema/context
        http://www.springframework.org/schema/context/spring-context.xsd">

     <!-- 加入spring-context.xsd -->
     <!-- 声明组件扫描器:指定注解所在的包名
          component-scan标签叫做组件扫描器(组件指的是java对象)
          base-package:指定注解所在的包名,框架会扫描这个包和子包中类中的注解
     -->
     <context:component-scan base-package="com.bjpowernode.ba03" />


</beans>
package com.bjpowernode.ba03;

import org.springframework.beans.factory.annotation.Value;
import org.springframework.stereotype.Component;

@Component(value="myXueXiao")
public class School {

	@Value("北京大学")
	private String name;
	@Value("北京的海淀区")
	private String address;


	@Override
	public String toString() {
		return "School [name=" + name + ", address=" + address + "]";
	}


}
package com.bjpowernode.ba03;

import org.springframework.beans.factory.annotation.Autowired;
import org.springframework.beans.factory.annotation.Value;
import org.springframework.stereotype.Component;
import org.springframework.stereotype.Repository;

/**
 * @Component:创建对象,默认创建的是单例对象
 *        属性:value , 表示对象的id
 *        位置:在类的上面,表示创建该类的对象
 *
 */
//省略value
@Component("myStudent")
public class Student {

	/**
	 * 简单类型的属性赋值:@Value
	 *            属性: value ,指定简单类型的属性值
	 *            位置:1)在属性定义的上面, 无需set方法, 推荐使用。
	 *                 2)在set方法的上面。
	 */
	@Value(value="张三")
	private String name;
	private int age;

	/**
	 * 引用类型: 使用框架的自动注入
	 * @Autowired: spring框架提供的注解,给引用类型赋值
	 *       位置:1)在属性定义的上面,无需set方法,推荐使用
	 *            2)在set方法的上面
	 * @Autowired支持自动注入的byName,byType. 默认是byType
	 */

	//byType
	@Autowired
	private School mySchool;

	public Student() {
		super();
		System.out.println("student无参数构造方法");
	}
	public void setName(String name) {
		System.out.println("setName:"+name);
		this.name = name;
	}

	@Value(value="26")
	public void setAge(int age) {
		System.out.println("setAge:"+age);
		this.age = age;
	}
	@Override
	public String toString() {
		return "Student [name=" + name + ", age=" + age + ", mySchool=" + mySchool + "]";
	}


}
package com.bjpowernode.ba03;

import org.junit.Test;
import org.springframework.context.ApplicationContext;
import org.springframework.context.support.ClassPathXmlApplicationContext;
import org.springframework.context.support.FileSystemXmlApplicationContext;

public class MyTest {


	@Test
	public void test01(){
		String configLocation="com/bjpowernode/ba03/applicationContext.xml"; //类路径的根目录
		ApplicationContext ctx = new ClassPathXmlApplicationContext(configLocation);

		Student student = (Student) ctx.getBean("myStudent");

		System.out.println("student:"+student);
	}


}
byName
<?xml version="1.0" encoding="UTF-8"?>
<beans xmlns="http://www.springframework.org/schema/beans"
    xmlns:xsi="http://www.w3.org/2001/XMLSchema-instance"
    xmlns:context="http://www.springframework.org/schema/context"
    xsi:schemaLocation="
        http://www.springframework.org/schema/beans
        http://www.springframework.org/schema/beans/spring-beans.xsd
        http://www.springframework.org/schema/context
        http://www.springframework.org/schema/context/spring-context.xsd">

     <!-- 加入spring-context.xsd -->
     <!-- 声明组件扫描器:指定注解所在的包名
          component-scan标签叫做组件扫描器(组件指的是java对象)
          base-package:指定注解所在的包名,框架会扫描这个包和子包中类中的注解
     -->
     <context:component-scan base-package="com.bjpowernode.ba04" />


</beans>
package com.bjpowernode.ba04;

import org.springframework.beans.factory.annotation.Value;
import org.springframework.stereotype.Component;

@Component(value="myXueXiao")
public class School {

	@Value("人民大学")
	private String name;
	@Value("北京的海淀区")
	private String address;


	@Override
	public String toString() {
		return "School [name=" + name + ", address=" + address + "]";
	}


}
package com.bjpowernode.ba04;

import org.springframework.beans.factory.annotation.Autowired;
import org.springframework.beans.factory.annotation.Qualifier;
import org.springframework.beans.factory.annotation.Value;
import org.springframework.stereotype.Component;
import org.springframework.stereotype.Repository;

/**
 * @Component:创建对象,默认创建的是单例对象
 *        属性:value , 表示对象的id
 *        位置:在类的上面,表示创建该类的对象
 *
 */
//省略value
@Component("myStudent")
public class Student {

	/**
	 * 简单类型的属性赋值:@Value
	 *            属性: value ,指定简单类型的属性值
	 *            位置:1)在属性定义的上面, 无需set方法, 推荐使用。
	 *                 2)在set方法的上面。
	 */
	@Value(value="张三")
	private String name;
	private int age;

	/**
	 * 引用类型: 使用框架的自动注入
	 * @Autowired: spring框架提供的注解,给引用类型赋值
	 *       位置:1)在属性定义的上面,无需set方法,推荐使用
	 *            2)在set方法的上面
	 * @Autowired支持自动注入的byName,byType. 默认是byType
	 *
	 * 使用byName:
	 * 1)@Autowired
	 * 2)@Qualifer(value="bean的id")
	 */

	//byName
	@Autowired
	@Qualifier(value="myXueXiao")
	private School mySchool;

	public Student() {
		super();
		System.out.println("student无参数构造方法");
	}
	public void setName(String name) {
		System.out.println("setName:"+name);
		this.name = name;
	}

	@Value(value="26")
	public void setAge(int age) {
		System.out.println("setAge:"+age);
		this.age = age;
	}
	@Override
	public String toString() {
		return "Student [name=" + name + ", age=" + age + ", mySchool=" + mySchool + "]";
	}


}
package com.bjpowernode.ba04;

import org.junit.Test;
import org.springframework.context.ApplicationContext;
import org.springframework.context.support.ClassPathXmlApplicationContext;
import org.springframework.context.support.FileSystemXmlApplicationContext;

public class MyTest {


	@Test
	public void test01(){
		String configLocation="com/bjpowernode/ba04/applicationContext.xml"; //类路径的根目录
		ApplicationContext ctx = new ClassPathXmlApplicationContext(configLocation);

		Student student = (Student) ctx.getBean("myStudent");

		System.out.println("student:"+student);
	}


}
required属性
<?xml version="1.0" encoding="UTF-8"?>
<beans xmlns="http://www.springframework.org/schema/beans"
    xmlns:xsi="http://www.w3.org/2001/XMLSchema-instance"
    xmlns:context="http://www.springframework.org/schema/context"
    xsi:schemaLocation="
        http://www.springframework.org/schema/beans
        http://www.springframework.org/schema/beans/spring-beans.xsd
        http://www.springframework.org/schema/context
        http://www.springframework.org/schema/context/spring-context.xsd">

     <!-- 加入spring-context.xsd -->
     <!-- 声明组件扫描器:指定注解所在的包名
          component-scan标签叫做组件扫描器(组件指的是java对象)
          base-package:指定注解所在的包名,框架会扫描这个包和子包中类中的注解
     -->
     <context:component-scan base-package="com.bjpowernode.ba05" />


</beans>
package com.bjpowernode.ba05;

import org.springframework.beans.factory.annotation.Value;
import org.springframework.stereotype.Component;

@Component(value="myXueXiao")
public class School {

	@Value("人民大学")
	private String name;
	@Value("北京的海淀区")
	private String address;


	@Override
	public String toString() {
		return "School [name=" + name + ", address=" + address + "]";
	}


}
package com.bjpowernode.ba05;

import org.springframework.beans.factory.annotation.Autowired;
import org.springframework.beans.factory.annotation.Qualifier;
import org.springframework.beans.factory.annotation.Value;
import org.springframework.stereotype.Component;
import org.springframework.stereotype.Repository;

/**
 * @Component:创建对象,默认创建的是单例对象
 *        属性:value , 表示对象的id
 *        位置:在类的上面,表示创建该类的对象
 *
 */
//省略value
@Component("myStudent")
public class Student {

	/**
	 * 简单类型的属性赋值:@Value
	 *            属性: value ,指定简单类型的属性值
	 *            位置:1)在属性定义的上面, 无需set方法, 推荐使用。
	 *                 2)在set方法的上面。
	 */
	@Value(value="张三")
	private String name;
	private int age;

	/**
	 * 引用类型: 使用框架的自动注入
	 * @Autowired: spring框架提供的注解,给引用类型赋值
	 *       属性:required:是true ,表示必须给引用类型赋值成
	 *             默认功,如果赋值失败,程序报错,并终止执行。
	 *             false,如果引用类型赋值失败,程序不报错,征程执行,引用类型是 null.
	 *       位置:1)在属性定义的上面,无需set方法,推荐使用
	 *            2)在set方法的上面
	 * @Autowired支持自动注入的byName,byType. 默认是byType
	 *
	 * 使用byName:
	 * 1)@Autowired
	 * 2)@Qualifer(value="bean的id")
	 */

	//byName
	@Autowired(required=false)
	@Qualifier(value="myXueXiao111")
	private School mySchool;

	public Student() {
		super();
		System.out.println("student无参数构造方法");
	}
	public void setName(String name) {
		System.out.println("setName:"+name);
		this.name = name;
	}

	@Value(value="26")
	public void setAge(int age) {
		System.out.println("setAge:"+age);
		this.age = age;
	}
	@Override
	public String toString() {
		return "Student [name=" + name + ", age=" + age + ", mySchool=" + mySchool + "]";
	}


}
package com.bjpowernode.ba05;

import org.junit.Test;
import org.springframework.context.ApplicationContext;
import org.springframework.context.support.ClassPathXmlApplicationContext;
import org.springframework.context.support.FileSystemXmlApplicationContext;

public class MyTest {


	@Test
	public void test01(){
		String configLocation="com/bjpowernode/ba05/applicationContext.xml"; //类路径的根目录
		ApplicationContext ctx = new ClassPathXmlApplicationContext(configLocation);

		Student student = (Student) ctx.getBean("myStudent");

		System.out.println("student:"+student);
	}


}
@Resource注解


定义bean的初始化与销毁方法
package com.bjpowernode.ba08;

import javax.annotation.PostConstruct;
import javax.annotation.PreDestroy;
import javax.annotation.Resource;

import org.springframework.beans.factory.annotation.Autowired;
import org.springframework.beans.factory.annotation.Qualifier;
import org.springframework.beans.factory.annotation.Value;
import org.springframework.stereotype.Component;
import org.springframework.stereotype.Repository;

/**
 * @Component:创建对象,默认创建的是单例对象
 *        属性:value , 表示对象的id
 *        位置:在类的上面,表示创建该类的对象
 *
 */
//省略value
@Component("myStudent")
public class Student {

	/**
	 * 简单类型的属性赋值:@Value
	 *            属性: value ,指定简单类型的属性值
	 *            位置:1)在属性定义的上面, 无需set方法, 推荐使用。
	 *                 2)在set方法的上面。
	 */
	@Value(value="张三")
	private String name;
	private int age;

	/**
	 * 引用类型: 使用框架的自动注入
	 * @Resource:来自jdk中的注解,给引用类型赋值, 支持byName, byType。 默认是byName
	 *       位置:1)在属性定义的上面, 推荐使用,无需set方法
	 *            2)在set方法的上面
	 */
	//只按byName, 需要指定@Resource的name属性, name指定bean对象的名称
	@Resource(name="myXueXiao")
	private School mySchool;

	public Student() {
		super();
		System.out.println("student无参数构造方法");
	}
	public void setName(String name) {
		System.out.println("setName:"+name);
		this.name = name;
	}

	@Value(value="26")
	public void setAge(int age) {
		System.out.println("setAge:"+age);
		this.age = age;
	}

	//定义bean的初始化方法
	@PostConstruct
	public void myInit(){
		System.out.println("bean的初始化方法:等同于配置文件的init-method");
	}

	//定义bean的销毁方法
	@PreDestroy
	public void myDestroy(){
		System.out.println("bean的销毁方法:等同于配置文件的destroy-method");
	}


	@Override
	public String toString() {
		return "Student [name=" + name + ", age=" + age + ", mySchool=" + mySchool + "]";
	}


}
package com.bjpowernode.ba08;

import org.junit.Test;
import org.springframework.context.ApplicationContext;
import org.springframework.context.support.ClassPathXmlApplicationContext;
import org.springframework.context.support.FileSystemXmlApplicationContext;

public class MyTest {


	@Test
	public void test01(){
		String configLocation="com/bjpowernode/ba08/applicationContext.xml"; //类路径的根目录
		ApplicationContext ctx = new ClassPathXmlApplicationContext(configLocation);

		Student student = (Student) ctx.getBean("myStudent");

		System.out.println("student:"+student);

		//执行销毁方法,关闭容器
		((ClassPathXmlApplicationContext)ctx).close();
	}


}
Spring AOP面向切面编程:
cglib动态代理
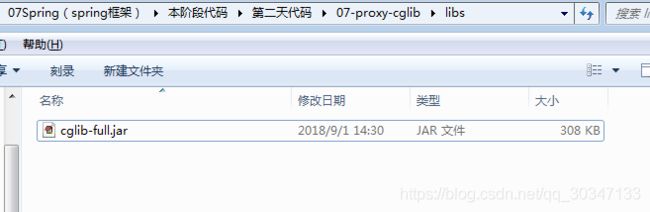
07-proxy-cglib:使用cglib动态代理

步骤:
1.新建 java project
2.导入cglib的jar: cglib-full.jar
3.定义目标类,不需要实现接口
4.定义类实现cglib中的接口MethodInterceptor(等同于jdk中的InvocationHandler)
5.定义工具类, 在工具方法中创建代理对象
  cglib中的关键对象 Enhancer , 使用Enhancer创建代理对象
6.定义测试类, 创建代理对象, 通过代理对象执行业务方法,实现功能的增强。
导入外部jar
package com.bjpowernode.service;

//目标类
public class SomeServiceImpl {

	public String doSome(){
		System.out.println("执行了业务方法doSome");
		return "abcd";
	}
}
package com.bjpowernode.proxy;

import java.lang.reflect.Method;

import net.sf.cglib.proxy.MethodInterceptor;
import net.sf.cglib.proxy.MethodProxy;

//方法拦截器类, 实现功能的增强
public class MyInterceptor implements MethodInterceptor {

	private Object target;


	public MyInterceptor(Object target) {
		super();
		this.target = target;
	}


	public MyInterceptor() {
		super();
		// TODO Auto-generated constructor stub
	}


	/**
	 * intercept()等同于jdk中invoke()
	 * 作用:拦截用户的请求, 调用业务方法的时候,首先执行intercept
	 *
	 * 参数:
	 *  Object obj:系统生成的代理对象
	 *  Method method:正在执行的业务方法(目标方法)
	 *  Object[] args:目标方法的参数列表
	 *  MethodProxy proxy:目标方法的代理对象
	 *
	 *  返回
	 *   Object:目标方法的执行结果(可以是修改后的结果)
	 */
	@Override
	public Object intercept(Object obj, Method method, Object[] args, MethodProxy proxy) throws Throwable {
		System.out.println("==========intercept==========");
		Object result = null;
		//调用目标方法
		result  = method.invoke(target, args); //doSome()

		//修改result的结果
		if( result != null){
			//实现小写转大写
			String str = (String)result;
			result  = str.toUpperCase();
		}
		//返回目标方法的执行结果
		return result;
	}


}
package com.bjpowernode.proxy;

import com.bjpowernode.service.SomeServiceImpl;

import net.sf.cglib.proxy.Enhancer;

public class ProxyFactory {

	//定义工具方法,创建代理对象
	public Object createProxy(Object target){
		//1.创建cglib中的Enhancer对象
		Enhancer en  = new Enhancer();
		//2.指定目标类对象
		en.setSuperclass(SomeServiceImpl.class);
		//3.指定方法拦截器对象
		en.setCallback(new MyInterceptor(target));
		//4.创建代理对象
		return en.create();
	}
}
package com.bjpowernode.test;

import com.bjpowernode.proxy.ProxyFactory;
import com.bjpowernode.service.SomeServiceImpl;

public class MyTest {

	public static void main(String[] args) {
		//创建目标对象
		SomeServiceImpl target = new SomeServiceImpl();
		//创建工具类对象
		ProxyFactory factory = new ProxyFactory();
		//调用工具方法
		SomeServiceImpl proxy  = (SomeServiceImpl) factory.createProxy(target);
		System.out.println("proxy:"+proxy.getClass().getName());
		//通过代理对象执行业务方法
		String str = proxy.doSome();
		System.out.println("通过代理对象执行业务方法的结果:"+str);
	}

}
JDK动态代理:
package com.bjpowernode.utils;

public class ServiceTools {

	public static void doLog(){
		System.out.println("非业务功能,打印日志");
	}

	public static void doTrans(){
		System.out.println("非业务功能,事务处理");
	}
}
package com.bjpowernode.service;

public interface SomeService {

	void doSome();
	void doOther();
}
package com.bjpowernode.service;

import com.bjpowernode.utils.ServiceTools;

public class SomeServiceImpl implements SomeService {

	//业务功能和非业务功能的耦合
	@Override
	public void doSome() {
		//ServiceTools.doLog();
		System.out.println("执行了业务方法doSome");
		//ServiceTools.doTrans();
	}

	@Override
	public void doOther() {
		//ServiceTools.doLog();
		System.out.println("执行了业务方法doOther");
		//ServiceTools.doTrans();
	}

	//public void com.bjpowernode.service.SomeServiceImpl.doSome() throws Exception

	//execution(* com.xyz.service..*.*(..))
	//com.xyz.service.impl.OtherService
	//com.xyz.service.SomeService

    //execution(* *..service.*.*(..))
	// com.service.OtherService
	// cn.service.SomeService
	// org.cn.service.FirstService
}
package com.bjpowernode.proxy;

import java.lang.reflect.InvocationHandler;
import java.lang.reflect.Method;

import com.bjpowernode.utils.ServiceTools;

//使用jdk动态代理   处理器对象
public class MyInvocationHanlder implements InvocationHandler {

	private Object target;


	public MyInvocationHanlder(Object target) {
		super();
		this.target = target;
	}


	public MyInvocationHanlder() {
		super();
		// TODO Auto-generated constructor stub
	}


	/**
	 * invoke:能截取对目标方法的访问,调用
	 * 参数:
	 *  Object proxy:系统生成的代理对象
	 *  Method method:目标方法,业务方法
	 *  Object[] args:目标方法的参数列表
	 * 返回
	 *  Object:目标方法的执行结果(可以是修改后的结果)
	 */
	@Override
	public Object invoke(Object proxy, Method method, Object[] args) throws Throwable {
		Object result = null;

		String methodName  = method.getName();
		System.out.println("methodName:"+methodName);

		if("doSome".equals(methodName)){
			//在目标方法执行开始,加入日志
			ServiceTools.doLog();
			//目标方法的调用
			result = method.invoke(target, args); //doSome
			//在目标方法执行之后,提交事务
			ServiceTools.doTrans();
		} else {
			// doOther()
			//目标方法的调用
			result = method.invoke(target, args); //doOther
		}


		//返回目标方法的执行结果
		return result;
	}

}
package com.bjpowernode.test;

import java.lang.reflect.Proxy;

import com.bjpowernode.proxy.MyInvocationHanlder;
import com.bjpowernode.service.SomeService;
import com.bjpowernode.service.SomeServiceImpl;

public class MyTest {

	public static void main(String[] args) {
		//创建目标对象
		SomeService target = new SomeServiceImpl();
		//创建调用处理器对象
		MyInvocationHanlder handler = new MyInvocationHanlder(target);
		//创建代理对象
		SomeService proxy  = (SomeService) Proxy.newProxyInstance(
				target.getClass().getClassLoader(),
				target.getClass().getInterfaces(),
				handler);
		//通过代理对象,执行业务方法,实现日志,事务的增强
		System.out.println("proxy:"+proxy.getClass().getName());
		proxy.doSome();
		System.out.println("==================");
		proxy.doOther();
	}

}

注释:如上例中的日志和事务都是切面,
AOP(是一种思想)以切面为核心?
怎么理解以切面为核心?
1> 找出项目中可以作为切面的功能,把这些功能放到单独的模块或者类中定义。
2>把切面的功能在合适的时候和位置加入给目标方法。
AOP最重要实现业务功能与非业务功能耦合,IOC解决的是对象之间的耦合
几个重要名词解释:
.切面(Aspect): 任何增加的功能都是切面;
.织入(Weaving): 把切面功能加到业务方法的过程;
.连接点(JoinPoint): 被切面织入的具体方法(一个方法),表示切面织入的位置。
.切入点(PointCut): 是连接点的集合(一堆方法),表示切面织入的位置。
.目标对象(target): 给哪个类增加功能哪个就是目标对象;
.通知(Advice):是切面在代码中的一种表现方式,可以是注解、也可以是接口 ;也表示切面的执行时间
总结一句话:在指定的位置(切入点),指定的时间(通知),加Aspect(切面)功能。
AspectJ框架是对AOP思想的实现。实际项目中,Spring也实现了动态代理,只是比较弱。AspectJ框架是专门实现动态代理技术的。


第一个使用AspectJ框架实现AOP
引入jar文件:

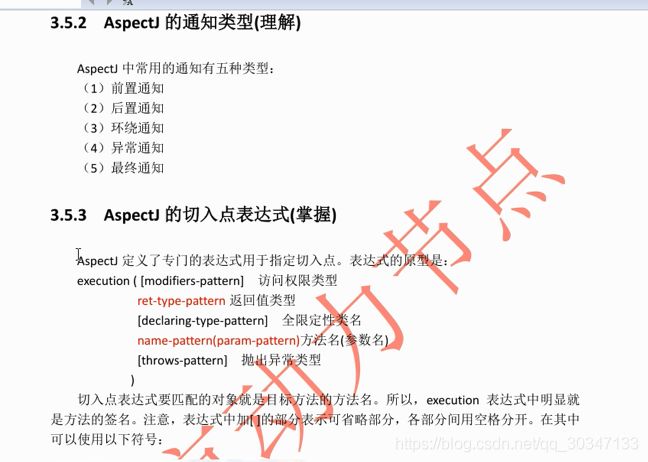
共5种通知
1.前置通知
11-aspectj-aop:使用asepctj框架实现aop
aop是理论,基于动态代理的

实现aop的框架有很多:
1.spring框架实现aop, spring使用接口表示切面的, 使用方式比较笨重。
2.aspectj框架实现aop, aspectj可以使用注解和xml配置文件实现aop

使用aspectj框架实现aop的准备工作:
1.加入支持aop的jar:
  1)spring-aop.jar
  2)aspectj框架对aop的实现jar: aspectjrt.jar, aspectjweaver.jar
2.加入新的约束文件spring-aop.xsd

步骤:
1.新建 java project
2.导入jar:
  必须的jar:
  1)spring的核心:spring-beans.jar,spring-core.jar,spring-context.jar,spring-expression.jar
  2)日志:commons-logging.jar
  3)支持注解的使用:spring-aop.jar
  4)aspectj框架对aop的实现jar: aspectjrt.jar, aspectjweaver.jar
 可选的:
  1)日志的实现:log4j.jar
  2)单元测试:junit.jar

3.定义目标类,实现业务接口

4.定义切面类,在切面类中定义方法实现切面的功能
  1)在类的上面加入@Aspect ,表示当前类是切面类
  2)在类中自定义方法, 实现切面的功能。 在方法的上面加入AspectJ框架中的通知注解。
        例如@Before(value="aspectj框架自己的切入点表达式")

5.定义spring的配置文件
  1)加入约束文件spring-beans.xsd ,spring-context.xsd,spring-aop.xsd
  2)声明目标类对象
  3)声明切面类对象,把对象交给spring创建和管理
  4)声明自动代理生成器, 自动代理生成器是aspectj框架的一个功能, 根据目标对象和切面类生成符合条件的所有代理对象
     aspectj会修改目标对象,加入切面的功能, 所有目标对象实际就是代理对象
6.定义测试类,在代码中使用spring
    创建接口ApplicationContext,表示spring框架
   从spring容器中获取目标对象(是修改后的代理对象) ,通过代理对象执行业务方法, 实现功能的增强(执行切面)
cglib动态代理:通过继承的方式, 由cglib库生成目标类的子类
               子类就是代理类,在子类中实现功能的增强
	       cglib是继承方式,目标类不能是final, 目标方法也不能是final。static也不行。


AOP:基于动态代理的, 使用jdk,cglib的动态代理
AOP:面向切面编程, 以切面核心。
怎么理解以切面为核心
1.找出项目中可以作为切面的功能, 把这些功能放到单独模块或类中定义。
2.把切面的功能在合适的时候和位置加入给目标方法。

AOP最重要的是实现解耦合: 业务功能和非业务功能的耦合。
IoC:解决的业务对象之间的耦合。例如Service和Dao对象之间的耦合。
<?xml version="1.0" encoding="UTF-8"?>
<beans xmlns="http://www.springframework.org/schema/beans"
    xmlns:xsi="http://www.w3.org/2001/XMLSchema-instance"
    xmlns:context="http://www.springframework.org/schema/context"
    xmlns:aop="http://www.springframework.org/schema/aop"
    xsi:schemaLocation="
        http://www.springframework.org/schema/beans
        http://www.springframework.org/schema/beans/spring-beans.xsd
        http://www.springframework.org/schema/context
        http://www.springframework.org/schema/context/spring-context.xsd
        http://www.springframework.org/schema/aop
        http://www.springframework.org/schema/aop/spring-aop.xsd">

	<!-- 声明目标类对象 -->
	<bean id="someServiceTarget" class="com.bjpowernode.ba01.SomeServiceImpl" />

	<!-- 声明切面类对象 -->
	<bean id="myAspect" class="com.bjpowernode.ba01.MyAspect" />

    <!-- 声明自动代理生成器:创建代理对象 -->
    <aop:aspectj-autoproxy />
</beans>
package com.bjpowernode.ba01;

public interface SomeService {

	void doSome();
}
package com.bjpowernode.ba01;

public class SomeServiceImpl implements SomeService {

	@Override
	public void doSome() {
		//myBefore()
		System.out.println("执行了业务方法doSome()");

	}

}
package com.bjpowernode.ba01;

import org.aspectj.lang.annotation.Aspect;
import org.aspectj.lang.annotation.Before;

/**
 * @Aspect:来自aspectj框架,表示当前类是切面类。
 * 切面类是用来给业务方法增强功能的类。
 *
 * 位置:在类的上面
 */
@Aspect
public class MyAspect {

	//自定义方法实现切面的功能,例如打印日志
	/**
	 * @Before:前置通知
	 *    属性:value , 表示切入点表达式(切面功能加入的位置)
	 *    位置:在方法的上面
	 * 特点:
	 *  1.在目标方法之前先执行的。
	 *  2.不能改变目标方法的执行结果。
	 *  3.不会影响目标方法的执行
	 */
	@Before(value="execution(* com.bjpowernode.ba01.SomeServiceImpl.doSome())")
	public void myBefore(){
		//实现日志的打印功能。
		System.out.println("前置通知:在目标方法之前,实现日志的功能");
	}
}
package com.bjpowernode.ba01;

import org.junit.Test;
import org.springframework.context.ApplicationContext;
import org.springframework.context.support.ClassPathXmlApplicationContext;

public class MyTest {


	@Test
	public void test01(){
		String configLocation="com/bjpowernode/ba01/applicationContext.xml"; //类路径的根目录
		ApplicationContext ctx = new ClassPathXmlApplicationContext(configLocation);

		//从spring中获取目标对象(修改后的代理对象)
		SomeService proxy  = (SomeService) ctx.getBean("someServiceTarget");
		//目标对象有接口,框架默认使用jdk动态代理
		System.out.println("proxy:"+proxy.getClass().getName());
		//com.sun.proxy.$Proxy0   com.sun.proxy.$Proxy6
		//通过代理执行目标方法
		proxy.doSome();
	}


}
以上功能新增:
package com.bjpowernode.ba01;

public interface SomeService {

	void doSome();

	void doOther(int i);
}
package com.bjpowernode.ba01;

public class SomeServiceImpl implements SomeService {

	@Override
	public void doSome() {
		//myBefore()
		System.out.println("执行了业务方法doSome()");

	}


	public void doOther(int i) {
		//myBefore()
		System.out.println("执行了业务方法doOther():"+i);

	}

}
package com.bjpowernode.ba01;

import org.aspectj.lang.JoinPoint;
import org.aspectj.lang.annotation.Aspect;
import org.aspectj.lang.annotation.Before;

/**
 * @Aspect:来自aspectj框架,表示当前类是切面类。
 * 切面类是用来给业务方法增强功能的类。
 *
 * 位置:在类的上面
 */
@Aspect
public class MyAspect {

	//自定义方法实现切面的功能,例如打印日志
	/**
	 * @Before:前置通知
	 *    属性:value , 表示切入点表达式(切面功能加入的位置)
	 *    位置:在方法的上面
	 * 特点:
	 *  1.在目标方法之前先执行的。
	 *  2.不能改变目标方法的执行结果。
	 *  3.不会影响目标方法的执行
	 */
//	@Before(value="execution(* com.bjpowernode.ba01.SomeServiceImpl.doSome())")
//	public void myBefore(){
//		//实现日志的打印功能。
//		System.out.println("前置通知:在目标方法之前,实现日志的功能");
//	}

	/*@Before(value="execution(* *..SomeServiceImpl.do*(..))")
	public void myBefore(){
		//实现日志的打印功能。
		System.out.println("前置通知:在目标方法之前,实现日志的功能");
	}*/

	/**
	 * 通知方法可以带有参数:
	 * JoinPoint:连接点, 是一个方法, 表示切入点表达式中每一个方法
	 */
	@Before(value="execution(* *..SomeServiceImpl.do*(..))")
	public void myBefore(JoinPoint jp){
		//获取方法的签名,方法的定义
		System.out.println("连接点方法的定义:"+jp.getSignature());
		//获取连接点方法的参数列表
		Object args [] = jp.getArgs();
		System.out.println("连接点方法的参数个数:"+args.length);
		System.out.println("连接点方法的参数值:"+args[0]);
		//实现日志的打印功能。
		System.out.println("前置通知:在目标方法之前,实现日志的功能");
	}
}
package com.bjpowernode.ba01;

import org.junit.Test;
import org.springframework.context.ApplicationContext;
import org.springframework.context.support.ClassPathXmlApplicationContext;

public class MyTest {


	@Test
	public void test01(){
		String configLocation="com/bjpowernode/ba01/applicationContext.xml"; //类路径的根目录
		ApplicationContext ctx = new ClassPathXmlApplicationContext(configLocation);

		//从spring中获取目标对象(修改后的代理对象)
		SomeService proxy  = (SomeService) ctx.getBean("someServiceTarget");
		//目标对象有接口,框架默认使用jdk动态代理
		System.out.println("proxy:"+proxy.getClass().getName());
		//com.sun.proxy.$Proxy0   com.sun.proxy.$Proxy6
		//通过代理执行目标方法
		//proxy.doSome();

		proxy.doOther(10);
	}


}
2.后置通知
package com.bjpowernode.ba02;

public interface SomeService {

	void doSome();

	String doOther(int i);

	Student doOther2(int i);
}
package com.bjpowernode.ba02;

public class SomeServiceImpl implements SomeService {

	@Override
	public void doSome() {
		//myBefore()
		System.out.println("执行了业务方法doSome()");

	}


	public String doOther(int i) {

		System.out.println("执行了业务方法doOther():"+i);
		return "abcd";

	}


	@Override
	public Student doOther2(int i) {
		System.out.println("执行了业务方法doOther2():"+i);

		Student stu = new Student();
		stu.setAge(29);
		stu.setName("李四");
		return stu;
	}

}
package com.bjpowernode.ba02;

public class Student {

	private String name;
	private int age;

	public Student() {
		super();
	}
	public void setName(String name) {
		this.name = name;
	}
	public void setAge(int age) {
		this.age = age;
	}
	@Override
	public String toString() {
		return "Student [name=" + name + ", age=" + age + "]";
	}


}
package com.bjpowernode.ba02;

import org.aspectj.lang.JoinPoint;
import org.aspectj.lang.annotation.AfterReturning;
import org.aspectj.lang.annotation.Aspect;
import org.aspectj.lang.annotation.Before;

/**
 * @Aspect:来自aspectj框架,表示当前类是切面类。
 * 切面类是用来给业务方法增强功能的类。
 *
 * 位置:在类的上面
 */
@Aspect
public class MyAspect {

	//自定义方法实现切面的功能,例如打印日志
	/**
	 * @AfterReturning:后置通知,在目标方法之后执行的。
	 *           属性:1.value,表示切入点表达式
	 *                2.returning,自定义的变量名,表示目标方法的返回值。 自定义的变量名需要和通知方法的参数名一样。
	 *           位置:在方法的上面
	 * 后置通知的特点 :
	 *  1.在目标方法之后执行的。
	 *  2.能够获取到目标方法的执行结果, 还可以对执行结果做修改。
	 *     1)目标方法返回值是简单类型(String和java基本数据类型),在通知方法中修改返回值不会影响目标方法的最终结果
	 *     2)目标方法返回值是非简单类型的, 在通知方法中修改其属性值, 能够影响目标方法的执行的最终结果。
	 *  3.不会影响目标方法的执行
	 *
	 *  Object result = doOther(); //返回值是String
	 *  myAfterReturning(result);//传值
	 */
	/*@AfterReturning(value="execution(* *..SomeServiceImpl.doOther(..))",returning="result")
	public void myAfterReturning(Object result){
		//修改目标方法的执行结果
		if( result != null){
			String s = (String)result;
			result = "hello "+s.toLowerCase();
		}
		//执行后置通知,例如处理事务
		System.out.println("后置通知,在目标方法执行后执行的,能够获取到目标方法的执行结果:"+result);
	}
*/

	/**
	 *
	 *  Object result  = doOther2(..) 返回值是对象
	 *  myAfterReturning(result);  //传引用
	 *
	 *  通知方法中可以有参数JoinPoint, 如果通知方法中有多个参数JoinPoint一定是第一个参数
	 */
	@AfterReturning(value="execution(* *..SomeServiceImpl.doOther2(..))",returning="result")
	public void myAfterReturning(JoinPoint jp,Object result){
		System.out.println("获取切入点的方法名称:"+jp.getSignature().getName());
		//修改目标方法的执行结果
		if( result != null){
			Student st = (Student)result;
			st.setAge(22);
			st.setName("张三同学");
		}
		//执行后置通知,例如处理事务
		System.out.println("后置通知,在目标方法执行后执行的,能够获取到目标方法的执行结果:"+result);
	}

}
<?xml version="1.0" encoding="UTF-8"?>
<beans xmlns="http://www.springframework.org/schema/beans"
    xmlns:xsi="http://www.w3.org/2001/XMLSchema-instance"
    xmlns:context="http://www.springframework.org/schema/context"
    xmlns:aop="http://www.springframework.org/schema/aop"
    xsi:schemaLocation="
        http://www.springframework.org/schema/beans
        http://www.springframework.org/schema/beans/spring-beans.xsd
        http://www.springframework.org/schema/context
        http://www.springframework.org/schema/context/spring-context.xsd
        http://www.springframework.org/schema/aop
        http://www.springframework.org/schema/aop/spring-aop.xsd">

	<!-- 声明目标类对象 -->
	<bean id="someServiceTarget" class="com.bjpowernode.ba02.SomeServiceImpl" />

	<!-- 声明切面类对象 -->
	<bean id="myAspect" class="com.bjpowernode.ba02.MyAspect" />

    <!-- 声明自动代理生成器:创建代理对象 -->
    <aop:aspectj-autoproxy />
</beans>
package com.bjpowernode.ba02;

import org.junit.Test;
import org.springframework.context.ApplicationContext;
import org.springframework.context.support.ClassPathXmlApplicationContext;

public class MyTest {


	@Test
	public void test01(){
		String configLocation="com/bjpowernode/ba02/applicationContext.xml"; //类路径的根目录
		ApplicationContext ctx = new ClassPathXmlApplicationContext(configLocation);

		//从spring中获取目标对象(修改后的代理对象)
		SomeService proxy  = (SomeService) ctx.getBean("someServiceTarget");
		//目标对象有接口,框架默认使用jdk动态代理
		//System.out.println("proxy:"+proxy.getClass().getName());
		//com.sun.proxy.$Proxy0   com.sun.proxy.$Proxy6
		//通过代理执行目标方法


		/*String str  = proxy.doOther(10);
		System.out.println("调用目标方法的结果:"+str);*/

		Student stu = proxy.doOther2(100);
		System.out.println(stu);
	}


}
3.环绕通知
package com.bjpowernode.ba03;

public interface SomeService {

	void doSome();

	String doOther(int i);

	Student doOther2(int i);

	String doFirst();
}
package com.bjpowernode.ba03;

public class SomeServiceImpl implements SomeService {

	@Override
	public void doSome() {
		//myBefore()
		System.out.println("执行了业务方法doSome()");

	}


	public String doOther(int i) {

		System.out.println("执行了业务方法doOther():"+i);
		return "abcd";

	}


	@Override
	public Student doOther2(int i) {
		System.out.println("执行了业务方法doOther2():"+i);

		Student stu = new Student();
		stu.setAge(29);
		stu.setName("李四");
		return stu;
	}


	@Override
	public String doFirst() {
		System.out.println("执行了业务方法doFirst()");
		return "doFirst";
	}

}
package com.bjpowernode.ba03;

public class Student {

	private String name;
	private int age;

	public Student() {
		super();
	}
	public void setName(String name) {
		this.name = name;
	}
	public void setAge(int age) {
		this.age = age;
	}
	@Override
	public String toString() {
		return "Student [name=" + name + ", age=" + age + "]";
	}


}
package com.bjpowernode.ba03;

import org.aspectj.lang.JoinPoint;
import org.aspectj.lang.ProceedingJoinPoint;
import org.aspectj.lang.annotation.AfterReturning;
import org.aspectj.lang.annotation.Around;
import org.aspectj.lang.annotation.Aspect;
import org.aspectj.lang.annotation.Before;

/**
 * @Aspect:来自aspectj框架,表示当前类是切面类。
 * 切面类是用来给业务方法增强功能的类。
 *
 * 位置:在类的上面
 */
@Aspect
public class MyAspect {

	//自定义方法实现切面的功能,例如打印日志
	/**
	 * @throws Throwable
	 * @Around:环绕通知,在目标方法的前和后都能增强功能
	 *    属性: value,表示切入点表达式
	 *    位置:在方法的上面
	 * 特点:
	 * 1.在目标方法的前和后都能增强功能
	 * 2.能修改目标方法的执行结果。
	 * 3.能控制目标方法是否执行
	 *
	 * 参数:
	 *   ProceedingJoinPoint: 继承org.aspectj.lang.JoinPoint ,表示切入点
	 *
	 * 返回值:
	 *   Object:表示目标方法的执行结果
	 */
	@Around(value="execution(* *..SomeServiceImpl.doFirst(..))")
	public Object myAround(ProceedingJoinPoint pjp) throws Throwable{
		//myAround就相当于 jdk中的InvocationHandler中的invoke()

		//获取切入点的定义
		System.out.println("切入点的信息:"+pjp.getSignature());
		//获取目标方法的参数
		Object args [] = pjp.getArgs();
		System.out.println("目标方法(切入点)的参数个数:"+args.length);


		Object result = null;
		//在目标方法之前,增强功能
		System.out.println("环绕通知:在目标方法之前,加入日志功能");
		//执行目标方法
		result = pjp.proceed(); //method.invoke() //doFirst();
		//修改目标方法的执行结果
		if( result != null){
			String str = (String)result;
			result = "Hello AspectJ "+ str.toUpperCase();
		}
		//在目标方法之后,加入事务
		System.out.println("环绕通知:在目标方法之后,加入事务功能");

		//返回目标方法的执行结果
		return result;
	}

}
<?xml version="1.0" encoding="UTF-8"?>
<beans xmlns="http://www.springframework.org/schema/beans"
    xmlns:xsi="http://www.w3.org/2001/XMLSchema-instance"
    xmlns:context="http://www.springframework.org/schema/context"
    xmlns:aop="http://www.springframework.org/schema/aop"
    xsi:schemaLocation="
        http://www.springframework.org/schema/beans
        http://www.springframework.org/schema/beans/spring-beans.xsd
        http://www.springframework.org/schema/context
        http://www.springframework.org/schema/context/spring-context.xsd
        http://www.springframework.org/schema/aop
        http://www.springframework.org/schema/aop/spring-aop.xsd">

	<!-- 声明目标类对象 -->
	<bean id="someServiceTarget" class="com.bjpowernode.ba03.SomeServiceImpl" />

	<!-- 声明切面类对象 -->
	<bean id="myAspect" class="com.bjpowernode.ba03.MyAspect" />

    <!-- 声明自动代理生成器:创建代理对象 -->
    <aop:aspectj-autoproxy />
</beans>
package com.bjpowernode.ba03;

import org.junit.Test;
import org.springframework.context.ApplicationContext;
import org.springframework.context.support.ClassPathXmlApplicationContext;

public class MyTest {


	@Test
	public void test01(){
		String configLocation="com/bjpowernode/ba03/applicationContext.xml"; //类路径的根目录
		ApplicationContext ctx = new ClassPathXmlApplicationContext(configLocation);

		//从spring中获取目标对象(修改后的代理对象)
		SomeService proxy  = (SomeService) ctx.getBean("someServiceTarget");
		//目标对象有接口,框架默认使用jdk动态代理
		//System.out.println("proxy:"+proxy.getClass().getName());
		//com.sun.proxy.$Proxy0   com.sun.proxy.$Proxy6
		//通过代理执行目标方法

	    String str = proxy.doFirst();
	    System.out.println("目标的执行结果:"+str);
	}


}
4.异常通知
:是监控目标方法执行是否出现异常,并不是异常处理程序
package com.bjpowernode.ba04;

public interface SomeService {

	void doSome();

	String doOther(int i);

	Student doOther2(int i);

	String doFirst();

	void doSecond();
}
package com.bjpowernode.ba04;

public class SomeServiceImpl implements SomeService {

	@Override
	public void doSome() {
		//myBefore()
		System.out.println("执行了业务方法doSome()");

	}


	public String doOther(int i) {

		System.out.println("执行了业务方法doOther():"+i);
		return "abcd";

	}


	@Override
	public Student doOther2(int i) {
		System.out.println("执行了业务方法doOther2():"+i);

		Student stu = new Student();
		stu.setAge(29);
		stu.setName("李四");
		return stu;
	}


	@Override
	public String doFirst() {
		System.out.println("执行了业务方法doFirst()");
		return "doFirst";
	}


	@Override
	public void doSecond() {
		System.out.println("执行了业务方法doSecond()"+(10/0));
	}

}
package com.bjpowernode.ba04;

public class Student {

	private String name;
	private int age;

	public Student() {
		super();
	}
	public void setName(String name) {
		this.name = name;
	}
	public void setAge(int age) {
		this.age = age;
	}
	@Override
	public String toString() {
		return "Student [name=" + name + ", age=" + age + "]";
	}


}
package com.bjpowernode.ba04;

import org.aspectj.lang.JoinPoint;
import org.aspectj.lang.ProceedingJoinPoint;
import org.aspectj.lang.annotation.AfterReturning;
import org.aspectj.lang.annotation.AfterThrowing;
import org.aspectj.lang.annotation.Around;
import org.aspectj.lang.annotation.Aspect;
import org.aspectj.lang.annotation.Before;

/**
 * @Aspect:来自aspectj框架,表示当前类是切面类。
 * 切面类是用来给业务方法增强功能的类。
 *
 * 位置:在类的上面
 */
@Aspect
public class MyAspect {

	//自定义方法实现切面的功能,例如打印日志
	/**
	 * @AfterThrowing:异常通知,目标方法抛出异常时执行的。
	 *          属性: 1. value ,表示切入点表达式
	 *               2. throwing,自定义的变量,表示目标方法抛出的异常对象,需要和通知方法的参数名一样。
	 *          位置:在方法的上面
	 * 特点:
	 * 1.在目标方法抛出异常时执行的
	 * 2.不是异常处理程序, 只是得到异常的消息。
	 * 3.可以作为目标方法的监控程序,检查目标方法是否正常执行
	 *
	 * try{
	 *    doSecond()
	 * }catch(Exception e){
	 *    myAfterThrowing(e)
	 * }
	 */

	@AfterThrowing(value="execution(* *..SomeServiceImpl.doSecond(..))",throwing="ex")
	public void myAfterThrowing(Throwable ex){
		//对得到的异常信息,可以做处理。 发送邮件,短信通知相关人员,处理问题。
		//把得到的异常记录到数据库, 日志文件,以后可以排查错误
		System.out.println("异常通知:在目标方法抛出异常时执行,异常是:"+ex.getMessage());
	}

}
<?xml version="1.0" encoding="UTF-8"?>
<beans xmlns="http://www.springframework.org/schema/beans"
    xmlns:xsi="http://www.w3.org/2001/XMLSchema-instance"
    xmlns:context="http://www.springframework.org/schema/context"
    xmlns:aop="http://www.springframework.org/schema/aop"
    xsi:schemaLocation="
        http://www.springframework.org/schema/beans
        http://www.springframework.org/schema/beans/spring-beans.xsd
        http://www.springframework.org/schema/context
        http://www.springframework.org/schema/context/spring-context.xsd
        http://www.springframework.org/schema/aop
        http://www.springframework.org/schema/aop/spring-aop.xsd">

	<!-- 声明目标类对象 -->
	<bean id="someServiceTarget" class="com.bjpowernode.ba04.SomeServiceImpl" />

	<!-- 声明切面类对象 -->
	<bean id="myAspect" class="com.bjpowernode.ba04.MyAspect" />

    <!-- 声明自动代理生成器:创建代理对象 -->
    <aop:aspectj-autoproxy />
</beans>
package com.bjpowernode.ba04;

import org.junit.Test;
import org.springframework.context.ApplicationContext;
import org.springframework.context.support.ClassPathXmlApplicationContext;

public class MyTest {


	@Test
	public void test01(){
		String configLocation="com/bjpowernode/ba04/applicationContext.xml"; //类路径的根目录
		ApplicationContext ctx = new ClassPathXmlApplicationContext(configLocation);

		//从spring中获取目标对象(修改后的代理对象)
		SomeService proxy  = (SomeService) ctx.getBean("someServiceTarget");
		//目标对象有接口,框架默认使用jdk动态代理
		//System.out.println("proxy:"+proxy.getClass().getName());
		//com.sun.proxy.$Proxy0   com.sun.proxy.$Proxy6
		//通过代理执行目标方法

	    proxy.doSecond();
	}


}
5.最终通知
package com.bjpowernode.ba05;

public interface SomeService {

	void doSome();

	String doOther(int i);

	Student doOther2(int i);

	String doFirst();

	void doSecond();

	void doThird();
}
package com.bjpowernode.ba05;

public class SomeServiceImpl implements SomeService {

	@Override
	public void doSome() {
		//myBefore()
		System.out.println("执行了业务方法doSome()");

	}


	public String doOther(int i) {

		System.out.println("执行了业务方法doOther():"+i);
		return "abcd";

	}


	@Override
	public Student doOther2(int i) {
		System.out.println("执行了业务方法doOther2():"+i);

		Student stu = new Student();
		stu.setAge(29);
		stu.setName("李四");
		return stu;
	}


	@Override
	public String doFirst() {
		System.out.println("执行了业务方法doFirst()");
		return "doFirst";
	}


	@Override
	public void doSecond() {
		System.out.println("执行了业务方法doSecond()"+(10/0));
	}


	@Override
	public void doThird() {
		System.out.println("执行了业务方法doThird()"+(10/0));

	}

}
package com.bjpowernode.ba05;

public class Student {

	private String name;
	private int age;

	public Student() {
		super();
	}
	public void setName(String name) {
		this.name = name;
	}
	public void setAge(int age) {
		this.age = age;
	}
	@Override
	public String toString() {
		return "Student [name=" + name + ", age=" + age + "]";
	}


}
package com.bjpowernode.ba05;

import org.aspectj.lang.JoinPoint;
import org.aspectj.lang.ProceedingJoinPoint;
import org.aspectj.lang.annotation.After;
import org.aspectj.lang.annotation.AfterReturning;
import org.aspectj.lang.annotation.AfterThrowing;
import org.aspectj.lang.annotation.Around;
import org.aspectj.lang.annotation.Aspect;
import org.aspectj.lang.annotation.Before;

/**
 * @Aspect:来自aspectj框架,表示当前类是切面类。
 * 切面类是用来给业务方法增强功能的类。
 *
 * 位置:在类的上面
 */
@Aspect
public class MyAspect {

	//自定义方法实现切面的功能,例如打印日志
	/**
	 *  @After:最终通知
	 *     属性:value,表示切入点表达式
	 *     位置:在方法的上面
	 *  特点:
	 *   1.在目标方法之后执行的
	 *   2.总是会被执行的
	 *
	 *   try{
	 *   }finally{
	 *     //最终通知的代码
	 *   }
	 */
	@After(value="execution(* *..SomeServiceImpl.doThird(..))")
	public void myAfter(){
		//程序执行完毕后最后要执行的工作, 例如释放数据库的连接池, 释放内存。
		System.out.println("最终通知:总是会被执行的内容");
	}
}
<?xml version="1.0" encoding="UTF-8"?>
<beans xmlns="http://www.springframework.org/schema/beans"
    xmlns:xsi="http://www.w3.org/2001/XMLSchema-instance"
    xmlns:context="http://www.springframework.org/schema/context"
    xmlns:aop="http://www.springframework.org/schema/aop"
    xsi:schemaLocation="
        http://www.springframework.org/schema/beans
        http://www.springframework.org/schema/beans/spring-beans.xsd
        http://www.springframework.org/schema/context
        http://www.springframework.org/schema/context/spring-context.xsd
        http://www.springframework.org/schema/aop
        http://www.springframework.org/schema/aop/spring-aop.xsd">

	<!-- 声明目标类对象 -->
	<bean id="someServiceTarget" class="com.bjpowernode.ba05.SomeServiceImpl" />

	<!-- 声明切面类对象 -->
	<bean id="myAspect" class="com.bjpowernode.ba05.MyAspect" />

    <!-- 声明自动代理生成器:创建代理对象 -->
    <aop:aspectj-autoproxy />
</beans>
package com.bjpowernode.ba05;

import org.junit.Test;
import org.springframework.context.ApplicationContext;
import org.springframework.context.support.ClassPathXmlApplicationContext;

public class MyTest {


	@Test
	public void test01(){
		String configLocation="com/bjpowernode/ba05/applicationContext.xml"; //类路径的根目录
		ApplicationContext ctx = new ClassPathXmlApplicationContext(configLocation);

		//从spring中获取目标对象(修改后的代理对象)
		SomeService proxy  = (SomeService) ctx.getBean("someServiceTarget");
		//目标对象有接口,框架默认使用jdk动态代理
		//System.out.println("proxy:"+proxy.getClass().getName());
		//com.sun.proxy.$Proxy0   com.sun.proxy.$Proxy6
		//通过代理执行目标方法

	    proxy.doThird();
	}


}
另外一个注解(@Pointcut,不是通知注解)
package com.bjpowernode.ba06;

public interface SomeService {

	void doSome();

	String doOther(int i);

	Student doOther2(int i);

	String doFirst();

	void doSecond();

	void doThird();
}
package com.bjpowernode.ba06;

public class SomeServiceImpl implements SomeService {

	@Override
	public void doSome() {
		//myBefore()
		System.out.println("执行了业务方法doSome()");

	}


	public String doOther(int i) {

		System.out.println("执行了业务方法doOther():"+i);
		return "abcd";

	}


	@Override
	public Student doOther2(int i) {
		System.out.println("执行了业务方法doOther2():"+i);

		Student stu = new Student();
		stu.setAge(29);
		stu.setName("李四");
		return stu;
	}


	@Override
	public String doFirst() {
		System.out.println("执行了业务方法doFirst()");
		return "doFirst";
	}


	@Override
	public void doSecond() {
		System.out.println("执行了业务方法doSecond()"+(10/0));
	}


	@Override
	public void doThird() {
		System.out.println("执行了业务方法doThird()");

	}

}
package com.bjpowernode.ba06;

public class Student {

	private String name;
	private int age;

	public Student() {
		super();
	}
	public void setName(String name) {
		this.name = name;
	}
	public void setAge(int age) {
		this.age = age;
	}
	@Override
	public String toString() {
		return "Student [name=" + name + ", age=" + age + "]";
	}


}
package com.bjpowernode.ba06;

import org.aspectj.lang.JoinPoint;
import org.aspectj.lang.ProceedingJoinPoint;
import org.aspectj.lang.annotation.After;
import org.aspectj.lang.annotation.AfterReturning;
import org.aspectj.lang.annotation.AfterThrowing;
import org.aspectj.lang.annotation.Around;
import org.aspectj.lang.annotation.Aspect;
import org.aspectj.lang.annotation.Before;
import org.aspectj.lang.annotation.Pointcut;

/**
 * @Aspect:来自aspectj框架,表示当前类是切面类。
 * 切面类是用来给业务方法增强功能的类。
 *
 * 位置:在类的上面
 */
@Aspect
public class MyAspect {

	//自定义方法实现切面的功能,例如打印日志
	/**
	 *  @After:最终通知
	 *     属性:value,表示切入点表达式
	 *     位置:在方法的上面
	 *  特点:
	 *   1.在目标方法之后执行的
	 *   2.总是会被执行的
	 *
	 *   try{
	 *   }finally{
	 *     //最终通知的代码
	 *   }
	 */
	@After(value="mypt()")
	public void myAfter(){
		//程序执行完毕后最后要执行的工作, 例如释放数据库的连接池, 释放内存。
		System.out.println("最终通知:总是会被执行的内容");
	}

	@Before(value="mypt()")
	public void myBefore(){
		//实现日志的打印功能。
		System.out.println("前置通知:在目标方法之前,实现日志的功能");
	}

	/**
	 * @Pointcut: 管理和定义切入点的,不是通知注解。 如果切面有多个通知使用相同的切入点表达式。
	 *            可以使用@Pointcut集中定义切入点】
	 *       属性: value, 切入点表达式
	 *       位置:在自定义的方法上面
	 * 特点:
	 *  1.集中定义和管理切入点
	 *  2.使用@Pointcut定义的方法名,就是切入点的别名。
	 *    其他通知注解的中的value属性可以使用方法名,表示切入点。
	 */
	@Pointcut(value="execution(* *..SomeServiceImpl.doThird(..))")
	private void mypt(){
		//不需要代码
	}
}
<?xml version="1.0" encoding="UTF-8"?>
<beans xmlns="http://www.springframework.org/schema/beans"
    xmlns:xsi="http://www.w3.org/2001/XMLSchema-instance"
    xmlns:context="http://www.springframework.org/schema/context"
    xmlns:aop="http://www.springframework.org/schema/aop"
    xsi:schemaLocation="
        http://www.springframework.org/schema/beans
        http://www.springframework.org/schema/beans/spring-beans.xsd
        http://www.springframework.org/schema/context
        http://www.springframework.org/schema/context/spring-context.xsd
        http://www.springframework.org/schema/aop
        http://www.springframework.org/schema/aop/spring-aop.xsd">

	<!-- 声明目标类对象 -->
	<bean id="someServiceTarget" class="com.bjpowernode.ba06.SomeServiceImpl" />

	<!-- 声明切面类对象 -->
	<bean id="myAspect" class="com.bjpowernode.ba06.MyAspect" />

    <!-- 声明自动代理生成器:创建代理对象 -->
    <aop:aspectj-autoproxy />
</beans>
package com.bjpowernode.ba06;

import org.junit.Test;
import org.springframework.context.ApplicationContext;
import org.springframework.context.support.ClassPathXmlApplicationContext;

public class MyTest {


	@Test
	public void test01(){
		String configLocation="com/bjpowernode/ba06/applicationContext.xml"; //类路径的根目录
		ApplicationContext ctx = new ClassPathXmlApplicationContext(configLocation);

		//从spring中获取目标对象(修改后的代理对象)
		SomeService proxy  = (SomeService) ctx.getBean("someServiceTarget");
		//目标对象有接口,框架默认使用jdk动态代理
		System.out.println("proxy:"+proxy.getClass().getName());
		//com.sun.proxy.$Proxy0   com.sun.proxy.$Proxy6
		//通过代理执行目标方法

	    proxy.doThird();
	}


}
采用CGLIB动态代理
package com.bjpowernode.ba07;

public class Student {

	private String name;
	private int age;

	public Student() {
		super();
	}
	public void setName(String name) {
		this.name = name;
	}
	public void setAge(int age) {
		this.age = age;
	}
	@Override
	public String toString() {
		return "Student [name=" + name + ", age=" + age + "]";
	}


}
package com.bjpowernode.ba07;

//没有接口
public class SomeServiceImpl {


	public void doSome() {
		//myBefore()
		System.out.println("执行了业务方法doSome()");

	}


	public String doOther(int i) {

		System.out.println("执行了业务方法doOther():"+i);
		return "abcd";

	}


	public Student doOther2(int i) {
		System.out.println("执行了业务方法doOther2():"+i);

		Student stu = new Student();
		stu.setAge(29);
		stu.setName("李四");
		return stu;
	}


	public String doFirst() {
		System.out.println("执行了业务方法doFirst()");
		return "doFirst";
	}


	public void doSecond() {
		System.out.println("执行了业务方法doSecond()"+(10/0));
	}


	public void doThird() {
		System.out.println("执行了业务方法doThird()");

	}

}
package com.bjpowernode.ba07;

import org.aspectj.lang.JoinPoint;
import org.aspectj.lang.ProceedingJoinPoint;
import org.aspectj.lang.annotation.After;
import org.aspectj.lang.annotation.AfterReturning;
import org.aspectj.lang.annotation.AfterThrowing;
import org.aspectj.lang.annotation.Around;
import org.aspectj.lang.annotation.Aspect;
import org.aspectj.lang.annotation.Before;
import org.aspectj.lang.annotation.Pointcut;

/**
 * @Aspect:来自aspectj框架,表示当前类是切面类。
 * 切面类是用来给业务方法增强功能的类。
 *
 * 位置:在类的上面
 */
@Aspect
public class MyAspect {

	//自定义方法实现切面的功能,例如打印日志
	/**
	 *  @After:最终通知
	 *     属性:value,表示切入点表达式
	 *     位置:在方法的上面
	 *  特点:
	 *   1.在目标方法之后执行的
	 *   2.总是会被执行的
	 *
	 *   try{
	 *   }finally{
	 *     //最终通知的代码
	 *   }
	 */
	@After(value="mypt()")
	public void myAfter(){
		//程序执行完毕后最后要执行的工作, 例如释放数据库的连接池, 释放内存。
		System.out.println("最终通知:总是会被执行的内容");
	}

	@Before(value="mypt()")
	public void myBefore(){
		//实现日志的打印功能。
		System.out.println("前置通知:在目标方法之前,实现日志的功能");
	}

	/**
	 * @Pointcut: 管理和定义切入点的,不是通知注解。 如果切面有多个通知使用相同的切入点表达式。
	 *            可以使用@Pointcut集中定义切入点】
	 *       属性: value, 切入点表达式
	 *       位置:在自定义的方法上面
	 * 特点:
	 *  1.集中定义和管理切入点
	 *  2.使用@Pointcut定义的方法名,就是切入点的别名。
	 *    其他通知注解的中的value属性可以使用方法名,表示切入点。
	 */
	@Pointcut(value="execution(* *..SomeServiceImpl.doThird(..))")
	private void mypt(){
		//不需要代码
	}
}
<?xml version="1.0" encoding="UTF-8"?>
<beans xmlns="http://www.springframework.org/schema/beans"
    xmlns:xsi="http://www.w3.org/2001/XMLSchema-instance"
    xmlns:context="http://www.springframework.org/schema/context"
    xmlns:aop="http://www.springframework.org/schema/aop"
    xsi:schemaLocation="
        http://www.springframework.org/schema/beans
        http://www.springframework.org/schema/beans/spring-beans.xsd
        http://www.springframework.org/schema/context
        http://www.springframework.org/schema/context/spring-context.xsd
        http://www.springframework.org/schema/aop
        http://www.springframework.org/schema/aop/spring-aop.xsd">

	<!-- 声明目标类对象 -->
	<bean id="someServiceTarget" class="com.bjpowernode.ba07.SomeServiceImpl" />

	<!-- 声明切面类对象 -->
	<bean id="myAspect" class="com.bjpowernode.ba07.MyAspect" />

    <!-- 声明自动代理生成器:创建代理对象 -->
    <aop:aspectj-autoproxy />
</beans>
package com.bjpowernode.ba07;

import org.junit.Test;
import org.springframework.context.ApplicationContext;
import org.springframework.context.support.ClassPathXmlApplicationContext;

public class MyTest {


	@Test
	public void test01(){
		String configLocation="com/bjpowernode/ba07/applicationContext.xml"; //类路径的根目录
		ApplicationContext ctx = new ClassPathXmlApplicationContext(configLocation);

		//从spring中获取目标对象(修改后的代理对象)
		SomeServiceImpl proxy  = (SomeServiceImpl) ctx.getBean("someServiceTarget");
		//目标对象没有接口,框架使用cglib动态代理
		System.out.println("proxy:"+proxy.getClass().getName());
		//com.bjpowernode.ba07.SomeServiceImpl$$EnhancerBySpringCGLIB$$d76567
		//通过代理执行目标方法

	    proxy.doThird();
	}


}
方式二:
声明自动代理生成器:创建代理对象 proxy-target-class: true使用cglib动态代理
<?xml version="1.0" encoding="UTF-8"?>
<beans xmlns="http://www.springframework.org/schema/beans"
    xmlns:xsi="http://www.w3.org/2001/XMLSchema-instance"
    xmlns:context="http://www.springframework.org/schema/context"
    xmlns:aop="http://www.springframework.org/schema/aop"
    xsi:schemaLocation="
        http://www.springframework.org/schema/beans
        http://www.springframework.org/schema/beans/spring-beans.xsd
        http://www.springframework.org/schema/context
        http://www.springframework.org/schema/context/spring-context.xsd
        http://www.springframework.org/schema/aop
        http://www.springframework.org/schema/aop/spring-aop.xsd">

	<!-- 声明目标类对象 -->
	<bean id="someServiceTarget" class="com.bjpowernode.ba08.SomeServiceImpl" />

	<!-- 声明切面类对象 -->
	<bean id="myAspect" class="com.bjpowernode.ba08.MyAspect" />

    <!-- 声明自动代理生成器:创建代理对象
         proxy-target-class: true使用cglib动态代理
     -->
    <aop:aspectj-autoproxy proxy-target-class="true"/>
</beans>
package com.bjpowernode.ba08;

public class Student {

	private String name;
	private int age;

	public Student() {
		super();
	}
	public void setName(String name) {
		this.name = name;
	}
	public void setAge(int age) {
		this.age = age;
	}
	@Override
	public String toString() {
		return "Student [name=" + name + ", age=" + age + "]";
	}


}
package com.bjpowernode.ba08;

public interface SomeService {

	void doSome();

	String doOther(int i);

	Student doOther2(int i);

	String doFirst();

	void doSecond();

	void doThird();
}
package com.bjpowernode.ba08;

public class SomeServiceImpl implements SomeService {

	@Override
	public void doSome() {
		//myBefore()
		System.out.println("执行了业务方法doSome()");

	}


	public String doOther(int i) {

		System.out.println("执行了业务方法doOther():"+i);
		return "abcd";

	}


	@Override
	public Student doOther2(int i) {
		System.out.println("执行了业务方法doOther2():"+i);

		Student stu = new Student();
		stu.setAge(29);
		stu.setName("李四");
		return stu;
	}


	@Override
	public String doFirst() {
		System.out.println("执行了业务方法doFirst()");
		return "doFirst";
	}


	@Override
	public void doSecond() {
		System.out.println("执行了业务方法doSecond()"+(10/0));
	}


	@Override
	public void doThird() {
		System.out.println("执行了业务方法doThird()");

	}

}
package com.bjpowernode.ba08;

import org.aspectj.lang.JoinPoint;
import org.aspectj.lang.ProceedingJoinPoint;
import org.aspectj.lang.annotation.After;
import org.aspectj.lang.annotation.AfterReturning;
import org.aspectj.lang.annotation.AfterThrowing;
import org.aspectj.lang.annotation.Around;
import org.aspectj.lang.annotation.Aspect;
import org.aspectj.lang.annotation.Before;
import org.aspectj.lang.annotation.Pointcut;

/**
 * @Aspect:来自aspectj框架,表示当前类是切面类。
 * 切面类是用来给业务方法增强功能的类。
 *
 * 位置:在类的上面
 */
@Aspect
public class MyAspect {

	//自定义方法实现切面的功能,例如打印日志
	/**
	 *  @After:最终通知
	 *     属性:value,表示切入点表达式
	 *     位置:在方法的上面
	 *  特点:
	 *   1.在目标方法之后执行的
	 *   2.总是会被执行的
	 *
	 *   try{
	 *   }finally{
	 *     //最终通知的代码
	 *   }
	 */
	@After(value="mypt()")
	public void myAfter(){
		//程序执行完毕后最后要执行的工作, 例如释放数据库的连接池, 释放内存。
		System.out.println("最终通知:总是会被执行的内容");
	}

	@Before(value="mypt()")
	public void myBefore(){
		//实现日志的打印功能。
		System.out.println("前置通知:在目标方法之前,实现日志的功能");
	}

	/**
	 * @Pointcut: 管理和定义切入点的,不是通知注解。 如果切面有多个通知使用相同的切入点表达式。
	 *            可以使用@Pointcut集中定义切入点】
	 *       属性: value, 切入点表达式
	 *       位置:在自定义的方法上面
	 * 特点:
	 *  1.集中定义和管理切入点
	 *  2.使用@Pointcut定义的方法名,就是切入点的别名。
	 *    其他通知注解的中的value属性可以使用方法名,表示切入点。
	 */
	@Pointcut(value="execution(* *..SomeServiceImpl.doThird(..))")
	private void mypt(){
		//不需要代码
	}
}
package com.bjpowernode.ba08;

import org.junit.Test;
import org.springframework.context.ApplicationContext;
import org.springframework.context.support.ClassPathXmlApplicationContext;

public class MyTest {


	@Test
	public void test01(){
		String configLocation="com/bjpowernode/ba08/applicationContext.xml"; //类路径的根目录
		ApplicationContext ctx = new ClassPathXmlApplicationContext(configLocation);

		//从spring中获取目标对象(修改后的代理对象)
		SomeService proxy  = (SomeService) ctx.getBean("someServiceTarget");
		//目标对象有接口,框架默认使用jdk动态代理
		System.out.println("proxy:"+proxy.getClass().getName());
		//com.sun.proxy.$Proxy0   com.sun.proxy.$Proxy6
		//通过代理执行目标方法

	    proxy.doThird();
	}


}