C++ set&mulitset 与 仿函数(函数对象)
在学习仿函数(函数对象)前,我们得先了解set 与 mulitset 的底层排序原理!
set 与 mulitset 也是一个容器,是一个集合容器。
而set存储的元素始终都是唯一的,而mulitset可以存储相同的元素。
这篇文章就以set为例子说明,mulitset和set的用法完全一样!
如果不懂得set 与 mulitest 容器的,可以点下面链接去学习:
https://blog.csdn.net/cpp_learner/article/details/104751672
set 和 mulitset 都是顺序存储元素的。
在看例子前,先了解一下,set 和 mulitset 都有两个函数来提同排序:less 和 greater
其中less是顺序排序,而greater是逆序排序!
下面请看一个例子:
#include > s1;
//set> s1; // 正序排序
for (int i = 0; i < 10; i++) {
s1.insert(10 - i);
}
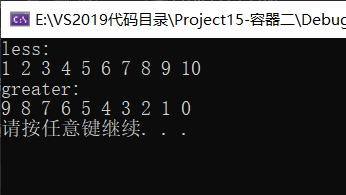
cout << "less:" << endl;
for (set<int>::iterator it = s1.begin(); it != s1.end(); it++) {
cout << *it << " ";
}
cout << endl;
set<int, greater<int>> s3; // 倒序排序
for (int i = 0; i < 10; i++) {
s3.insert(i);
}
cout << "greater:" << endl;
for (set<int>::iterator it = s3.begin(); it != s3.end(); it++) {
cout << *it << " ";
}
cout << endl;
system("pause");
return 0;
}
代码中,我们逆序将1 - 10 存储进s1中,将0 - 9 正序存出进s3中,但是数出来的结果却是,s1是正序输出,而s3是逆序输出!
有这样的结果都是less 和 greater 这两个函数搞的鬼。
这两个函数都是在头文件#include 中。
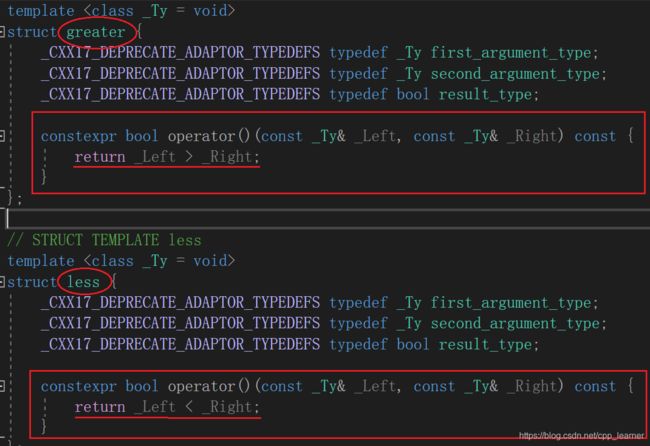
我们可以知道,它底层实现原理实际上就是函数模板和重载了()运算符。
比如:
less中,假如比较 3 和 4, 那么就会返回true,3就会排在4的前面,形成顺序排序。
greater中,也比较3 和 4,那么就会返回false,3就会排在4的后面,形成逆序排序。
好了,知道了这些,我们再来假如:容器不可能一直都会存储int类型的元素,也会存储其他类型的元素,比如类的对象!
那么存储对象时,他是如何比较排序的呢?
我们先看代码:
#include > s1;
// 将两个临时对象插入容器中
s1.insert(Student(20, "张三"));
s1.insert(Student(22, "李四"));
for (set<Student>::iterator it = s1.begin(); it != s1.end(); it++) {
cout << "年龄:" << it->getAge() << " 姓名:" << it->getName() << endl;
}
system("pause");
return 0;
}
还是和刚才差不多的代码,只是多定义一个Student类。
我们把对象存入容器中,然后在打印出来,看看他是如何排序的!
运行后:
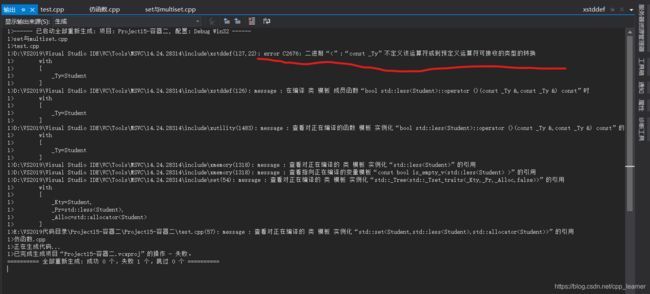
居然运行报错了,编译不通过啊,这是怎么回事啊???
大家请看第一行画红线部分,那些标明了错误的原因!
是 “<" 运算符的问题。
他是一个模板哎,当模板替换为类时,对象是不能直接比较的,所以才会编译不通过。
解决办法就是:当要使用less时,重载<运算符。当要使用greater,重载>运算符!
我这里就两个都写下来!
#include > s1;
// 将两个临时对象插入容器中
s1.insert(Student(20, "张三"));
s1.insert(Student(22, "李四"));
for (set<Student>::iterator it = s1.begin(); it != s1.end(); it++) {
cout << "年龄:" << it->getAge() << " 姓名:" << it->getName() << endl;
}
system("pause");
return 0;
}
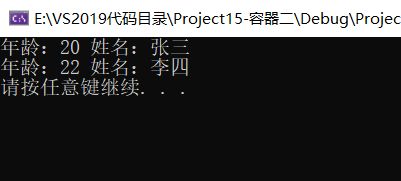
完美运行!!!
好了,有了以上的铺垫,我们可以来讲 仿函数(函数对象) 了
仿函数(函数对象)
仿函数概念
- 尽管函数指针被广泛用于实现函数回调,但C++还提供了一个重要的实现回调函数的方法,那就是函数对象。
- functor,翻译成函数对象,伪函数,它是是重载了“()”操作符的普通类对象。从语法上讲,它与普通函数行为类似。
- functional头文件中包含的 greater<>与less<>就是函数对象。
下面举出greater 和 less的简易实现原理。
struct greater
{
bool operator() (const int& iLeft, const int& iRight)
{
return (iLeft>iRight);
}
}
struct less
{
bool operator() (const int& iLeft, const int& iRight)
{
return (iLeft
}
set/setmulti容器就是调用函数对象的operator()方法去比较两个值的大小。
运用仿函数我们可以自行调用自己写的函数对象来排序set 和 mulitset.
例如:
以less为例:
// 仿函数(函数对象)
class FunStudent {
public:
	bool operator()(const Student& s1, const Student& s2) const {
		return s1.getAge() < s2.getAge();
	}
};
把他复制到上面的代码中:
#include > s1;
Student stu1(20, "张三");
Student stu2(22, "李四");
// 函数对象(仿函数)可以像函数一样直接调用
//FunStudent funStudent;
//funStudent(stu1, stu2);
s1.insert(stu1);
s1.insert(stu2);
for (set<Student, FunStudent>::iterator it = s1.begin(); it != s1.end(); it++) {
cout << "年龄:" << it->getAge() << " 姓名:" << it->getName() << endl;
}
system("pause");
return 0;
}
定义仿函数后,就可以使用它来代替less/greater了。
例如:set
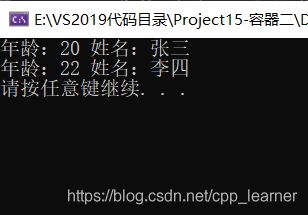
也是完美运行!!!
也许会有人问,自己定义的仿函数和上面的输出结果没有什么变化啊,那我还搞那么多代码干嘛??
有这样的疑问时正常的,其实他的用处大着呢!
比如,他是一个类,我们可以随意的改写它,使他能更好的运行!
举一个例子:
// 仿函数(函数对象)
class FunStudent {
public:
	bool operator()(const Student& s1, const Student& s2) const {
		ret = s1.getAge() < s2.getAge();
		return ret;
	}

	bool getRet() const {
		return ret;
	}
private:
	bool ret;
};
你可以这样获取他的返回值!
还有其他很多使用的,可以自己根据具体请看进行编写代码!!
到了这里,仿函数也讲完了,总的来说,仿函数也还是比较实用的!
