初识Lightning web component(lwc)
今年在做lightning项目的时候,突然component-library默认是lwc的标签,于是好奇的开始lwc的学习之路,以此来做笔记,如有犯错,欢迎评论指点。
可以在这边学习哦:https://trailhead.salesforce.com/en/users/strailhead/trailmixes/lightning-web-components
配置环境:https://trailhead.salesforce.com/en/content/learn/projects/quick-start-lightning-web-components
1.下载安装Command Line Interface (CLI)
| Operating System | Link to Installer |
|---|---|
| macOS | https://sfdc.co/sfdx_cli_osx |
| Windows 32-bit | https://sfdc.co/sfdx_cli_win |
| Windows 64-bit | https://sfdc.co/sfdx_cli_win64 |
| Debian/Ubuntu 64 | https://sfdc.co/sfdx_cli_linux Download the archive from one of the URLs in the manifest, extract the archive, then run the ./install script. |
| Debian/Ubuntu x86 | https://sfdc.co/sfdx_cli_linux_x86 Download the archive from one of the URLs in the manifest, extract the archive, then run the ./install script. |
2.安装Visual Studio Code
https://code.visualstudio.com/
3.创建项目
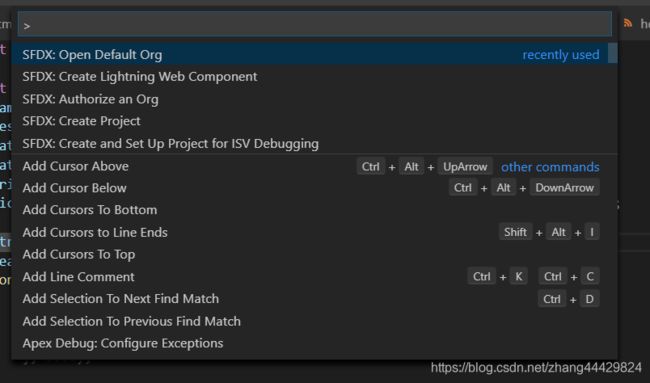
在软件快捷键Ctrl+shift+P,打开搜索器:
输入:SFDX
选择:SFDX: Create Project.
然后输入项目名称,回车确定
选择文件夹本地保存
点击Create Project
然后继续Ctrl+shift+P,打开搜索器:
输入SFDX: Authorize an Org
然后输入项目默认登陆URL,登陆确认
继续打开搜索器:输入SFDX: Create Lightning Web Component.
回车选择默认force-app/main/default/lwc.
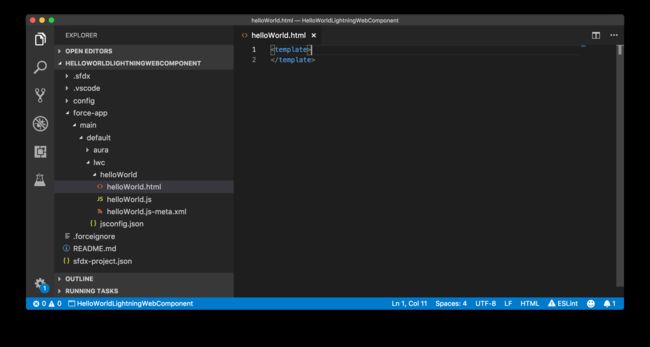
输入component名称,回车确认,项目创建成功!
如图:
右键项目选择SFDX: Deploy Source to Org 上传到org服务器
之后可以在app builder中拖出lwc放到页面上如图:
4 部分代码解析:
// import module elements
import { LightningElement, track } from 'lwc';
// declare class to expose the component
export default class App extends LightningElement {
// add decorator
@track
ready = false;
// use lifecycle hook
connectedCallback() {
setTimeout(() => {
this.ready = true;
}, 3000);
}
}
- @api: Marks a property as public for use in your template or other components.
- @track: Marks a property for internal monitoring. A template or function using this property forces a component to rerender when the property’s value changes. Use this to store values locally, especially as a user interacts with your component.
- @wire: Gives you a way to get and bind data. This implementation simplifies getting data from a Salesforce org.
一个属性只能选择@api或@track其中一个,不能两者都有。
5.关于.js-meta.xml文件
举例代码:
apiVersion :必填,绑定Salesforce API 版本。
isExposed (true or false) : 使component能够在其他namespace使用,仅将此设置为true以使组件可在托管包(managed package)中使用,或者由另一组织中的Lightning App Builder使用。
targets:指定可以在Lightning App Builder中添加组件的Lightning页面类型。
targetConfigs:允许您指定特定于每种类型的Lightning页面的行为,包括哪些对象支持该组件
具体可以参考:https://developer.salesforce.com/docs/component-library/documentation/lwc/lwc.reference_configuration_tags
6.push code
请参考github,很详细:https://github.com/trailheadapps/ebikes-lwc#installing-e-bikes-using-salesforce-dx
部分电脑通过git 拉取代码出现error,此时用管理员打开git进入库文件夹拉取即可!
7.deploy 文件(此处是采用git来deploy,tips中有编译器push的办法,类似git)
1.首先验证登陆的org:
sfdx force:auth:web:login -d -a myhuborg
2.使用用户名从ebikes-lwc目录部署项目文件,以登录Dev Hub org(而不是临时org(
sfdx force:org:create -s -f config/project-scratch-def.json -a ebikes这一段表示临时创建一个org,类似于lightning中的.app用来查看效果))[tips:username的<>注意去掉哦]
sfdx force:source:deploy -p force-app -u
3.在org中设置权限。
sfdx force:user:permset:assign -n ebikes -u
Tips1: 如若git已经通过验证,可直接:sfdx force:source:deploy -p force-app/main/default
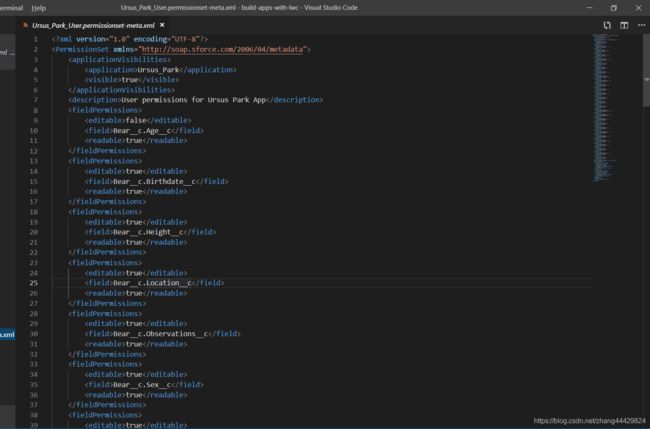
如若自定义permission set的xml,可通过此命令deploy:sfdx force:user:permset:assign -n Ursus_Park_User (Ursus_Park_User为Ursus_Park_User.permissionset-meta.xml文件),如图
然后导入example date可以使用此命令:sfdx force:data:tree:import -p data/plan.json
Bear_cs.json和Contracts.json是具体records
Tips2: 另一种deploy方法是在visual studio code TERMINAL中输入命令部署:
sfdx force:source:push
然后右键文件夹选择 SFDX: Deploy Source to Org
最后通过:sfdx force:org:open 来打开org。
此处有有example:https://trailhead.salesforce.com/content/learn/projects/lwc-build-flexible-apps/hello-world?trailmix_creator_id=strailhead&trailmix_id=lightning-web-components
8.event in lwc
lwc的event与lightning的event还是有不同的,它不需要新建event文件,直接在子component新建,父component通过on来调用即可,下面给出子component创建event以及父component调用的代码列子:
子component:
import { LightningElement, api } from 'lwc';
export default class Tile extends LightningElement {
@api product;
tileClick() {
const event = new CustomEvent('tileclick', {
// detail contains only primitives
detail: this.product.fields.Id.value
});
console.log('tile--event-->'+JSON.stringify(event));
// Fire the event from c-tile
this.dispatchEvent(event);
}
}
父component:
key={bike.fields.Id.value} product={bike} ontileclick={handleTileClick}>
标红部分分别是新建event,以及调用event,lwc通过on来实现调用event。
9.css in lwc
与lightning,html类似,也可以使用标准的lightning class,如slds-text-heading_small等待。
10. data get (动态获取数据)
code:
import { adapterId } from 'adapter-module';
@wire(adapterId, adapterConfig)
propertyOrFunction;
- adapterId (Identifier)—The identifier of the wire adapter.
- adapter-module (String)—The identifier of the module that contains the wire adapter function.
- adapterConfig (Object)—A configuration object specific to the wire adapter.
- propertyOrFunction—A private property or function that receives the stream of data from the wire service. If a property is decorated with @wire, the results are returned to the property’s data property or error property. If a function is decorated with @wire, the results are returned in an object with a data property and an error property.
Code Demo:
JS:
import { LightningElement, track, wire } from 'lwc';
import { getRecord, getFieldValue } from 'lightning/uiRecordApi';
import Id from '@salesforce/user/Id';
import NAME_FIELD from '@salesforce/schema/User.Name';
const fields = [NAME_FIELD];
export default class Selector extends LightningElement {
@track selectedProductId;
handleProductSelected(evt) {
this.selectedProductId = evt.detail;
}
userId = Id;
@wire(getRecord, { recordId: '$userId', fields })
user;
get name() {
return getFieldValue(this.user.data, NAME_FIELD);
}
}
Component:


