基于原生JS封装Modal对话框插件,具体内容如下所示:
原生JS封装Modal对话框插件,个人用来学习原理与思想,只有简单的基本框架的实现,可在此基础上添加更多配置项
API配置
//基本语法
  let modal = ModalPlugin({
    //提示的标题信息
    title:'系统提示',
    //内容模板 字符串 /模板字符串/DOM元素对象
    template:null,
    //自定义按钮信息
    buttons:[{
      //按钮文字
      text:'确定',
      click(){
        //this:当前实例
      }
    }]
  })
  modal.open()//=>打开
  modal.close()//=>关闭

//基于发布订阅,实现回调函数的监听
  modal.on('input/open/close/dragstart/dragmove/dragend',[func])
		modal.fire(...)
  modal.off(...)
Modal插件核心功能的开发
导出
(function () {
  function ModalPlugin() {
    return
  }

  // 浏览器直接导入,这样的方法是暴露到全局的
  window.ModalPlugin = ModalPlugin;
  //如果还需要支持ES6Module/CommonJS模块导入规范,在react项目当中,vue项目当中也想用
  if (typeof module !== 'undefined' && module.exports !== 'undefined') {//如果module不存在,typeof不会出错,会返回undefined
    module.exports = ModalPlugin;//CommonJS规范,只有在webpack环境下才支持
  }
})()
使用对象和函数创建实例
想使用创建对象的方式new ModalPlugin()创建实例或当做普通函数执行ModalPlugin(),创建实例,需要这样做
(function () {
  function ModalPlugin() {
    return new init()
  }
//想使用创建对象的方式`new ModalPlugin()`创建实例或当做普通函数执行`ModalPlugin()`,创建实例,需要这样做

  //类的原型: 公共的属性方法
  ModalPlugin.prototype = {
    constructor: ModalPlugin
  }

  function init() {}
  init.prototype = ModalPlugin.prototype;
  // 浏览器直接导入,这样的方法是暴露到全局的
  window.ModalPlugin = ModalPlugin;
  //如果还需要支持ES6Module/CommonJS模块导入规范,在react项目当中,vue项目当中也想用
  if (typeof module !== 'undefined' && module.exports !== 'undefined') {//如果module不存在,typeof不会出错,会返回undefined
    module.exports = ModalPlugin;//CommonJS规范,只有在webpack环境下才支持
  }
})()
配置项
//封装插件的时候,需要支持很多配置项,有的配置项不传递有默认值,此时我们千万不要一个个定义形参,用对象的方式传形参,好处是可以不传,而且可以不用考虑顺序
  function ModalPlugin(options) {
    return new init(options)
  }
//想使用创建对象的方式创建实例new ModalPlugin()或当做普通函数执行也能创建实例ModalPlugin(),需要这样做
  ModalPlugin.prototype = {
    constructor: ModalPlugin
  }

  function init(options) {
    //接下来将所有的操作全部写在init里面
    //参数初始化:传递进来的配置项替换默认的配置项
    options = Object.assign({
      title:'系统提示',
      template:null,
      frag:true,
      buttons:[{
        text:'确定',
        click(){
        }
      }]
    },options)

  }
命令模式init()执行逻辑

创建DOM
//创建DOM结构
creatDom(){
//如果用creatElement插入DOM,每一次动态插入,都会导致DOM的回流,非常消耗性能,所以最外面使用createElement创建,内部使用字符串的方式拼写进去,创建好了之后放到最外层的容器当中,只引起一次回流
let frag = document.createDocumentFragment()
let dpnDialog = document.createElement('div')
dpnDialog.className = 'dpn-dialog'
dpnDialog.innerHTML = `
系统温馨提示
`
frag.appendChild(dpnDialog)
let dpnModel = document.createElement('div')
dpnModel.className = 'dpn-model'
frag.appendChild(dpnModel)
document.body.appendChild(frag)//使用frag只需要往页面中插入一次,减少回流次数
frag = null
this.dpnDialog = dpnDialog//挂载到实例上,便于其他方法的控制隐藏,并且是私有的实例,
this.dpnModel = dpnModel
}
对参数进行处理

creatDom() {
let {title, template, buttons} = this.options
//如果用creatElement插入DOM,每一次动态插入,都会导致DOM的回流,非常消耗性能,所以最外面使用createElement创建,内部使用字符串的方式拼写进去,创建好了之后放到最外层的容器当中,只引起一次回流
let frag = document.createDocumentFragment()
let dpnDialog = document.createElement('div')
dpnDialog.className = 'dpn-dialog'
dpnDialog.innerHTML = `
${title}
X
${template && typeof template === 'object' && template.nodeType === 1
? template.outerHTML
: template}
${buttons.length > 0
? `
${buttons.map((item, index) => {
return ``
}).join('')}
`
: ''
}
`
frag.appendChild(dpnDialog)
let dpnModel = document.createElement('div')
dpnModel.className = 'dpn-model'
frag.appendChild(dpnModel)
document.body.appendChild(frag)//使用frag只需要往页面中插入一次,减少回流次数
frag = null
this.dpnDialog = dpnDialog//挂载到实例上,便于其他方法的控制隐藏,并且是私有的实例,
this.dpnModel = dpnModel
},
控制隐藏与显示
//控制他显示
    open() {
      this.dpnDialog.style.display = 'block'
      this.dpnModel.style.display = 'block'
    },
    //控制隐藏
    close() {
      this.dpnDialog.style.display = 'none'
      this.dpnModel.style.display = 'none'
    }
基于事件委托处理点击事件
init() {
      this.creatDom()

      //基于事件委托,实现点击事件的处理
      this.dpnDialog.addEventListener('click', (ev)=>{
        let target = ev.target,
          {tagName,className}= target
        console.log([target])
        //点击的关闭按钮
        if(tagName==='I'&&className.includes('dpn-close')){
          this.close()
          return
        }
        //点击的是底部按钮
        if(tagName==='BUTTON' && target.parentNode.className.includes('dpn-handle')){
          let index = target.getAttribute('index')
          //让传过来的函数执行,并且函数中的this还必须是当前实例
          let func = this.options.buttons[index]['click']
          if(typeof func==='function'){
            func.call(this)
          }
          return
        }

      })
    },
基于发布订阅实现回调函数的监听(生命周期)

//使用:
完整代码
//modalplugin.js
(function () {
//封装插件的时候,需要支持很多配置项,有的配置项不传递有默认值,此时我们千万不要一个个定义形参,用对象的方式传形参,好处是可以不穿,而且可以不用考虑顺序
function ModalPlugin(options) {
return new init(options)
}
//想使用创建对象的方式创建实例new ModalPlugin()或当做普通函数执行也能创建实例ModalPlugin(),需要这样做
ModalPlugin.prototype = {
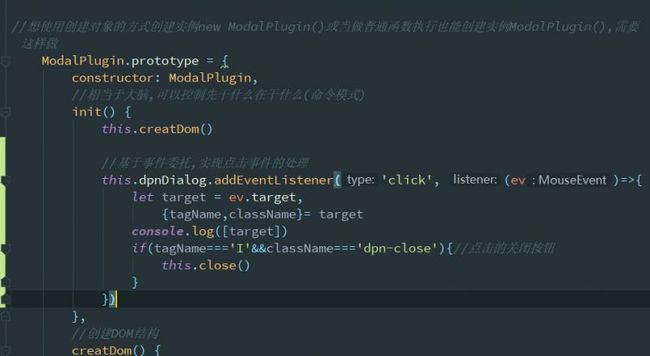
constructor: ModalPlugin,
//相当于大脑,可以控制先干什么在干什么(命令模式)
init() {
//创建DOM结构
this.creatDom()
//基于事件委托,实现点击事件的处理
this.dpnDialog.addEventListener('click', (ev) => {
let target = ev.target,
{tagName, className} = target
//点击的关闭按钮
if (tagName === 'I' && className.includes('dpn-close')) {
this.close()
return
}
//点击的是底部按钮
if (tagName === 'BUTTON' && target.parentNode.className.includes('dpn-handle')) {
let index = target.getAttribute('index')
//让传过来的函数执行,并且函数中的this还必须是当前实例
let func = this.options.buttons[index]['click']
if (typeof func === 'function') {
func.call(this)
}
return
}
})
this.fire('init')//通知init方法执行成功
},
//创建DOM结构
creatDom() {
let {title, template, buttons} = this.options
//如果用creatElement插入DOM,每一次动态插入,都会导致DOM的回流,非常消耗性能,所以最外面使用createElement创建,内部使用字符串的方式拼写进去,创建好了之后放到最外层的容器当中,只引起一次回流
let frag = document.createDocumentFragment()
let dpnDialog = document.createElement('div')
dpnDialog.className = 'dpn-dialog'
dpnDialog.innerHTML = `
${title}
X
${template && typeof template === 'object' && template.nodeType === 1
? template.outerHTML
: template}
${buttons.length > 0
? `
${buttons.map((item, index) => {
return ``
}).join('')}
`
: ''
}
`
frag.appendChild(dpnDialog)
let dpnModel = document.createElement('div')
dpnModel.className = 'dpn-model'
frag.appendChild(dpnModel)
document.body.appendChild(frag)//使用frag只需要往页面中插入一次,减少回流次数
frag = null
this.dpnDialog = dpnDialog//挂载到实例上,便于其他方法的控制隐藏,并且是私有的实例,
this.dpnModel = dpnModel
},
//控制他显示
open() {
this.dpnDialog.style.display = 'block'
this.dpnModel.style.display = 'block'
this.fire('open')//通知open方法执行成功
},
//控制隐藏
close() {
this.dpnDialog.style.display = 'none'
this.dpnModel.style.display = 'none'
this.fire('close')//通知close方法执行成功
},
//on向事件池中订阅方法
on(type, func) {
let arr = this.pond[type]
if(arr.includes(func)) return
arr.push(func)
},
//通知事件池中的方法执行
fire(type) {
let arr = this.pond[type]
arr.forEach(item => {
if(typeof item ==='function'){
item.call(this)
}
})
}
}
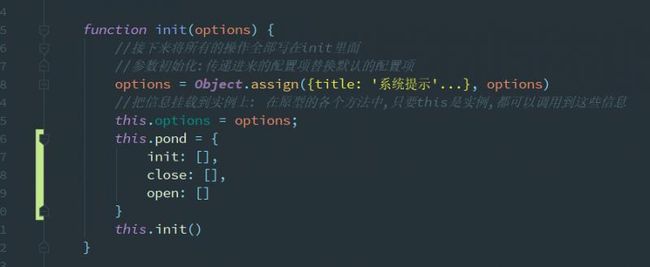
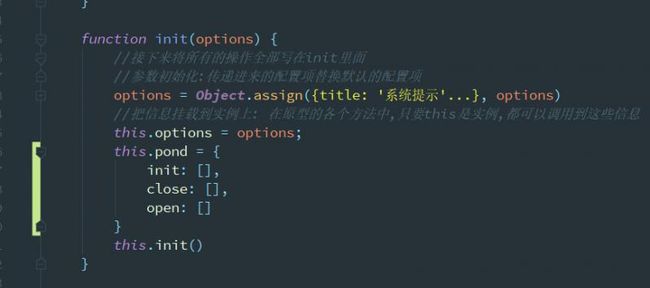
function init(options) {
//接下来将所有的操作全部写在init里面
//参数初始化:传递进来的配置项替换默认的配置项
options = Object.assign({
title: '系统提示',
template: null,
frag: true,
buttons: [{}]
}, options)
//把信息挂载到实例上: 在原型的各个方法中,只要this是实例,都可以调用到这些信息
this.options = options;
this.pond = {
init: [],
close: [],
open: []
}
this.init()
}
init.prototype = ModalPlugin.prototype;
// 浏览器直接导入,这样的方法是暴露到全局的
window.ModalPlugin = ModalPlugin;
//如果还需要支持ES6Module/CommonJS模块导入规范,在react项目当中,vue项目当中也想用
if (typeof module !== 'undefined' && module.exports !== 'undefined') {//如果module不存在,typeof不会出错,会返回undefined
module.exports = ModalPlugin;//CommonJS规范,只有在webpack环境下才支持
}
})()
使用
使用时需要引入modalpugin.js和modalpugin.css
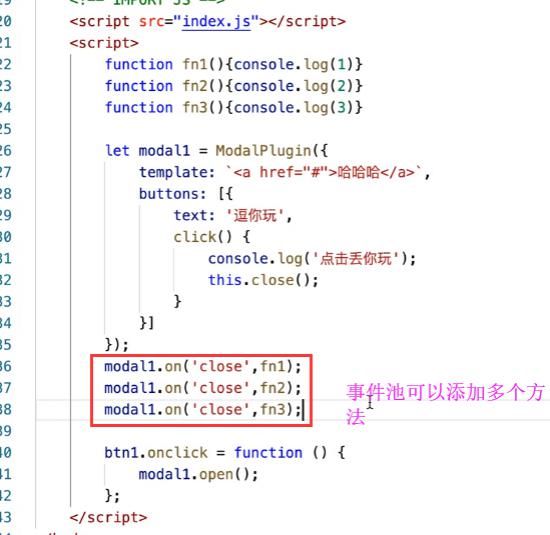
使用示例1:
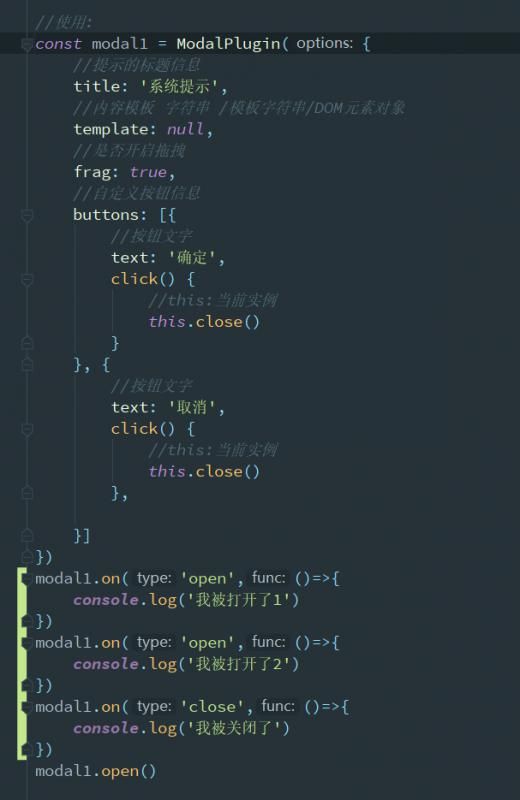
//使用:
const modal1 = ModalPlugin({
//提示的标题信息
title: '系统提示',
//内容模板 字符串 /模板字符串/DOM元素对象
template: null,
//自定义按钮信息
buttons: [{
//按钮文字
text: '确定',
click() {
//this:当前实例
this.close()
}
}, {
//按钮文字
text: '取消',
click() {
//this:当前实例
this.close()
},
}]
})
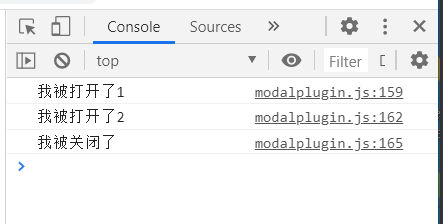
modal1.on('open',()=>{
console.log('我被打开了1')
})
modal1.on('open',()=>{
console.log('我被打开了2')
})
modal1.on('close',()=>{
console.log('我被关闭了')
})
modal1.open()
使用示例2:
github
完整代码github
到此这篇关于基于原生JS封装的Modal对话框插件的示例代码的文章就介绍到这了,更多相关JS封装Modal对话框插件内容请搜索脚本之家以前的文章或继续浏览下面的相关文章希望大家以后多多支持脚本之家!