Mooc项目开发笔记(六):添加讲师信息前端实现、修改讲师信息前端实现
一、添加讲师信息实现
1、定义api
在src/api/edu/teacher.js文件中添加添加讲师的api
    /**
     * 添加讲师信息
     * @param {*} teacher
     */
    save(teacher){
        return request({
            url: `/eduservice/teacher/add`,
            method: 'post',
            data: teacher
        })
    },
2、初始化组件
在src/views/edu/teacher/save.vue文件中添加下面的html片段:
<template>
  <div class="app-container">
    <el-form label-width="120px">
      <el-form-item label="讲师名称">
        <el-input v-model="teacher.name"/>
      el-form-item>
      <el-form-item label="讲师排序">
        <el-input-number v-model="teacher.sort" controls-position="right" min="0"/>
      el-form-item>
      <el-form-item label="讲师头衔">
        <el-select v-model="teacher.level" clearable placeholder="请选择">

          <el-option :value="1" label="高级讲师"/>
          <el-option :value="2" label="首席讲师"/>
        el-select>
      el-form-item>
      <el-form-item label="讲师资历">
        <el-input v-model="teacher.career"/>
      el-form-item>
      <el-form-item label="讲师简介">
        <el-input v-model="teacher.intro" :rows="10" type="textarea"/>
      el-form-item>


      <el-form-item>
        <el-button :disabled="saveBtnDisabled" type="primary" @click="saveOrUpdate">保存el-button>
      el-form-item>
    el-form>
  div>
template>其中每个el-form-item中都有与下面数据进行双向绑定过的信息例如:v-model="teacher.intro"。
同时最后的el-button点击事件绑定了下面的将要定义的saveOrUpdate方法,另外它上面的:disabled="saveBtnDisabled"属性,是为了方法多次提交。
接着在下面添加对应的js片段:同于提交数据:
<script>
import teacherApi from '@/api/edu/teacher.js'

export default {
    data(){
      return {
        teacher: {
          name : '',
          sort : 0,
          level : 1,
          career : '',
          intro : '',
          avatar : '',
        },
        saveBtnDisabled: false // 保存按钮是否禁用,
      }
    },

    created:{
		saveBtnDisabled = false
    },

    methods: {
      saveOrUpdate(){
        saveBtnDisabled = true
        this.saveTeacher()
      },

      //添加讲师方法
      saveTeacher(){
        teacherApi.save(this.teacher)
                .then(response => { //添加成功会调用该方法
                    //显示保存成功提示信息
                      this.$message({
                        type: 'success',
                        message: '保存成功!'
                      });
                    //回到列表页面  路由跳转
                    this.$router.push({path : "/teacher/table"})
                })
      }
    },
}
</script>
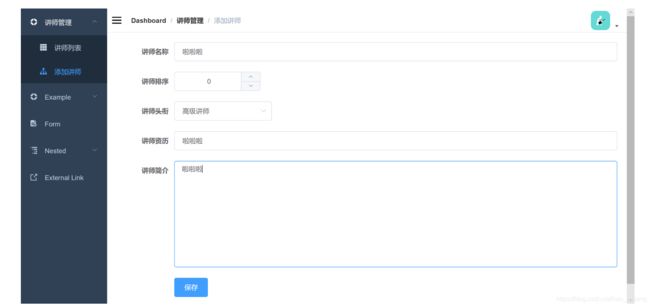
效果:
二、修改讲师信息实现
1、添加隐藏路由
点击修改按钮之后,首先要跳转到表单页面进行数据回显。在表单页面修改完数据之后再进行提交修改。接下载就完成数据回显功能。
数据回显的具体做法就是根据讲师id查询讲师信息,然后跳转到单页面并显示。
首先要在scr/router/index.js中加入跳转的路由。
需要注意的是:
-
path: 'edit/:id',说明路径中需要传入参数id -
里边
hidden: true表示该路由不在界面上显示,因为我们只需要跳转到表单即可
      {
        path: 'edit/:id',
        name: '修改讲师',
        component: () => import('@/views/edu/teacher/save'),
        meta: { title: '修改讲师', icon: 'tree' },
        hidden: true
      }
2、在每条记录后面添加修改的按钮
实现代码(之前已经添加过了,这里只需要修改router-link中的值):
- 其中router-link指定点击修改按钮要跳转的页面,要与上面的路径对应
      <el-table-column label="操作" width="200" align="center">
        <template slot-scope="scope">
          <router-link :to="'/teacher/edit/'+scope.row.id">
            <el-button type="primary" size="mini" icon="el-icon-edit">修改el-button>
          router-link>
          <el-button type="danger" size="mini" icon="el-icon-delete" @click="removeDataById(scope.row.id)">删除el-button>
        template>
      el-table-column>
3、添加根据id获取讲师信息接口
在src/api/edu/teacher.js文件中添加根据id获取讲师信息的api
    /**
     * 根据id获取讲师信息
     * @param {*} id
     */
    getTeacherInfo(id){
        return request({
            url: `/eduservice/teacher/${id}`,
            method: 'get',
        })
    },
4、在页面中添加调用接口的方法
在save.vue页面的methods中添加如下方法,由于data中的this.teacher是双向绑定,所以调用该方法之后,讲师的信息就会显示在页面上:
	//根据id查询讲师信息
      getInfo(id){
        teacherApi.getTeacherInfo(id)
            .then(response =>{
              this.teacher = response.data.teacher
            })
      },
5、调用获取数据方法实现回显
因为添加和修改都使用了save.vue页面,而只有修改时才需要会数据回显,而添加不需要,所以可以通过路径中是否带有id来判断是否需要回显,已经点击submit所调用的方法。
    created(){
      //页面创建时设置按钮可以点击
      this.saveBtnDisabled = false
      this.fullscreenLoading= false
        debugger
      //如果路由中有参数:id,则进行数据回显
      //注意是this.$route,不是this.$router
      if (this.$route.params && this.$route.params.id){
        const id = this.$route.params.id
        this.getInfo(id)
      }
},注意:
this.$route.params中是route不是router,它可以判断路径中是否有参数this.$route.params.id可以获取路径中id的值,id是上面路由中定义的edit/:id
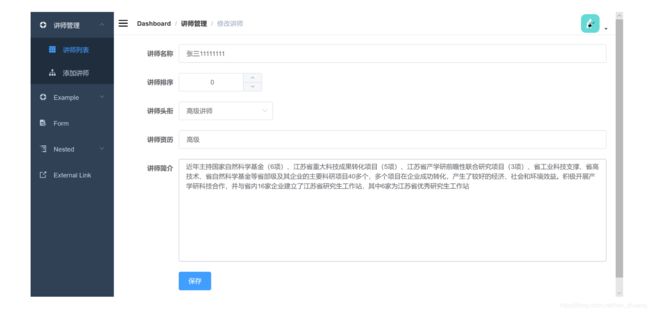
保存文件,并刷新页面,点击修改就可以看到效果:
6、添加讲师信息更新接口
在src/api/edu/teacher.js文件中添加讲师信息更新的api
    /**
     * 根据id获取讲师信息
     * @param {*} id
     */
    getTeacherInfo(id){
        return request({
            url: `/eduservice/teacher/${id}`,
            method: 'get',
        })
    },
7、修改页面
在src/views/edu/teacher/save.vue将js中的内容修改为如下内容所示:
     //点击按钮调用的方法,根据是否有id判断是保存还是修改
	saveOrUpdate(){
        //提交数据之后设置按钮不可以点击
        this.saveBtnDisabled = true

        //设置加载提示显示
        this.fullscreenLoading = true;
        setTimeout(() => {
          this.fullscreenLoading = false;
        }, 2000);


        if (this.teacher.id){
          //修改时传入了id,调用修改方法
          this.updateTeacher()
        } else {
          //新建时没有id,调用保存方法
          this.saveTeacher()
        }
      },

      //添加讲师方法
      saveTeacher(){
        teacherApi.save(this.teacher)
                .then(response => { //添加成功会调用该方法
                    //显示保存成功提示信息
                      this.$message({
                        type: 'success',
                        message: '保存成功!'
                      });
                    //回到列表页面  路由跳转
                    this.$router.push({path : "/teacher/table"})
                })
      },

      //修改讲师信息方法
      updateTeacher(){
        teacherApi.update(this.teacher)
            .then(response => { //修改成功会调用该方法
                     //显示保存成功提示信息
                      this.$message({
                        type: 'success',
                        message: '修改成功!'
                      });
                    //回到列表页面  路由跳转
                    this.$router.push({path : "/teacher/table"})
            })
      },

    },
8、测试
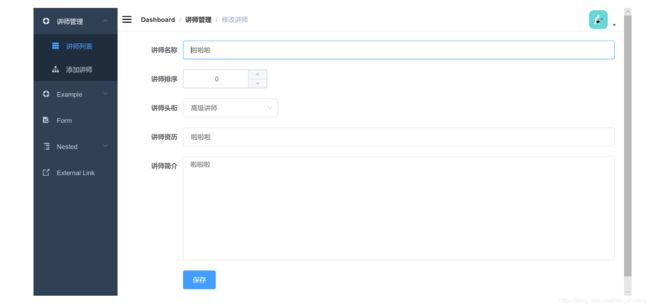
点击修改按钮进入界面:
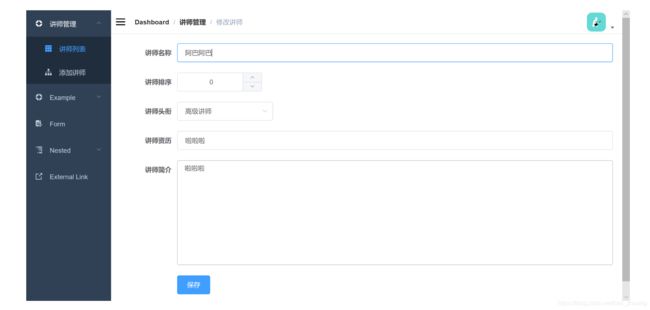
修改讲师信息:
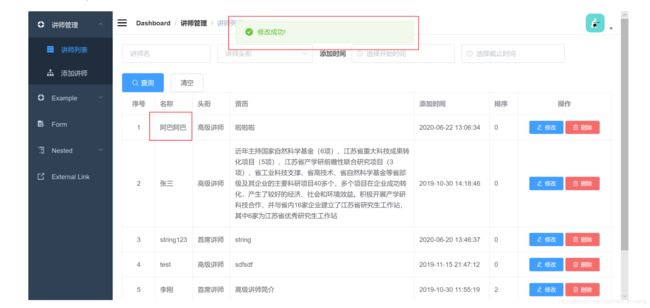
点击提交,回到列表,显示修改成功:
9、解决Bug
Bug复现:
- 点击修改按钮,进入表单页面并且数据回显没有问题
- 直接点击导航中的添加讲师,刚才回显得数据还在(×)
解决方法:使用vue的路由监听,当路由发生变化时调用初始化方法。初始化方法会判断是否有id,从而决定是否回显:
    created(){ //初始化
        this.init()
    },

    //设置vue监听
    watch: {
      $route(to, from) { //路由变化的方式
        console.log('watch $route')
        this.init()
      }
    },

    methods: {
      //页面初始化
      init(){
          //页面创建时设置按钮可以点击
          this.saveBtnDisabled = false
          this.fullscreenLoading= false
            debugger
          //如果路由中有参数:id,则进行数据回显
          //注意是this.$route,不是this.$router
          if (this.$route.params && this.$route.params.id){
            const id = this.$route.params.id
            this.getInfo(id)
          } else {
            this.teacher = {}
          }
      },

      .... //其他方法
	}