dNet命令行编译命令CSC使用详细图解
下面先给出编译示例的代码;
add.cs
using System;
using System.Collections.Generic;
using System.Linq;
using System.Text;

namespace TestClaclulate
{
    class Program
    {
        static void Main(string[] args)
        {
            // 1,定义double变量
            double numberOne;
            double numberTwo;

            // 2,从控制台获得两个数
            try
            {
                numberOne = double.Parse(Console.ReadLine());
                numberTwo = double.Parse(Console.ReadLine());

                // 3,输出这两个数的加,减,乘,除 的结果
                Console.WriteLine(numberOne + " + " + numberTwo + " = " + (numberOne + numberTwo));
                Console.WriteLine(numberOne + " - " + numberTwo + " = " + (numberOne - numberTwo));
                Console.WriteLine(numberOne + " * " + numberTwo + " = " + (numberOne * numberTwo));
                Console.WriteLine(numberOne + " / " + numberTwo + " = " + (numberOne / numberTwo));
            }
            catch (System.FormatException e)
            {
                Console.WriteLine(e.Message);
            }

            //
            Console.ReadKey();
        }
    }
}
main.cs
using System;
using System.Collections.Generic;
using System.Linq;
using System.Text;
using System.IO;
using 读写ini文件;

class Program
    {
        static void Main(string[] args)
        {
            string Current;

            Current = Directory.GetCurrentDirectory();//获取当前根目录
            Console.WriteLine("Current directory {0}", Current);
            // 写入ini
            Ini ini=new Ini(Current+"/config.ini");
            ini.Writue("Setting","key1","hello word!");
            ini.Writue("Setting","key2","hello ini!");
            ini.Writue("SettingImg", "Path", "IMG.Path");
            // 读取ini
            string stemp = ini.ReadValue("Setting","key2");
            Console.WriteLine(stemp);

            Console.ReadKey();
        }
}using System;
using System.Collections.Generic;
using System.Linq;
using System.Text;
using System.IO;
namespace 读写ini文件
{
public class Ini
{
// 声明INI文件的写操作函数 WritePrivateProfileString()
[System.Runtime.InteropServices.DllImport("kernel32")]
private static extern long WritePrivateProfileString(string section, string key, string val, string filePath);
// 声明INI文件的读操作函数 GetPrivateProfileString()
[System.Runtime.InteropServices.DllImport("kernel32")]
private static extern int GetPrivateProfileString(string section, string key, string def, System.Text.StringBuilder retVal, int size, string filePath);
private string sPath = null;
public Ini(string path)
{
this.sPath = path;
}
public void Writue(string section, string key, string value)
{
// section=配置节,key=键名,value=键值,path=路径
WritePrivateProfileString(section, key, value, sPath);
}
public string ReadValue(string section, string key)
{
// 每次从ini中读取多少字节
System.Text.StringBuilder temp = new System.Text.StringBuilder(255);
// section=配置节,key=键名,temp=上面,path=路径
GetPrivateProfileString(section, key, "", temp, 255, sPath);
return temp.ToString();
}
}
}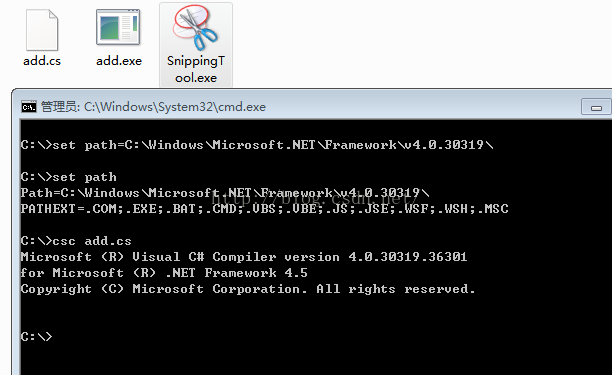
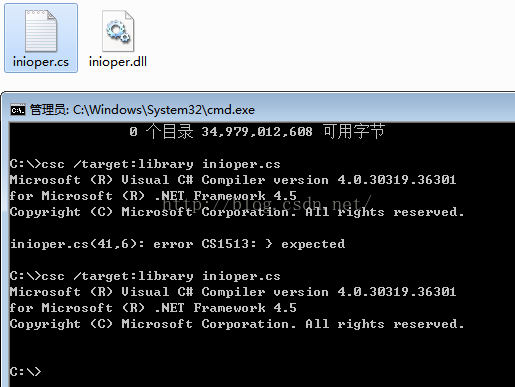
编译第一个cs文件,执行情况如下;
编译为dll,第一次代码中少了一个大括号,第二次成功;编译后的dll见下图;
编译add.cs为my.exe;编译和执行情况如下;
通过使用优化和定义 DEBUG 符号,编译当前目录中所有的 C# 文件;
第一次代码中少了一个大括号;
第二次缺少命名空间引用;第三次main.cs缺少对inioper的命名空间引用;
第四次成功;
执行情况;
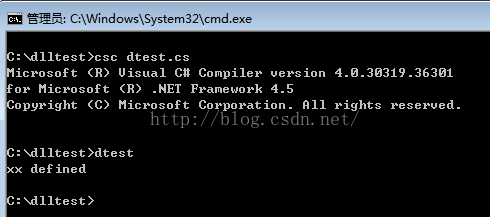
/define 选项的效果与在源文件中使用 #define 预处理器指令一样。符号一直保持定义到源文件中的 #undef 指令移除定义,或者编译器执行到文件尾。
参见
https://msdn.microsoft.com/zh-cn/library/0feaad6z(VS.80).aspx
一个示例的代码和执行情况如下;
// preprocessor_define.cs
// compile with: /define:xx
// or uncomment the next line
#define xx
using System;
public class Test
{
    public static void Main()
    {
        #if (xx)
            Console.WriteLine("xx defined");
        #else
            Console.WriteLine("xx not defined");
        #endif
    }
}
使用响应文件;编译命令存在响应文件中;#开头的行在rsp文件中是注释;
resp1.rsp
# 这是一个简单的响应文件,文件名称为resp1.rsp
# 使用方法: csc @resp1.rsp
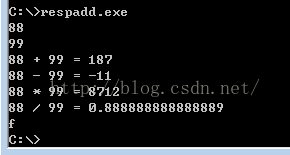
/target:exe /out:respadd.exe add.cs执行情况,跟csc直接编译的一样;
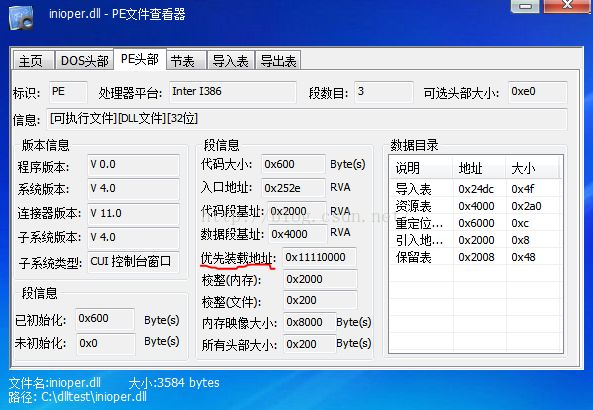
编译为DLL时指定DLL载入首选基地址;编译情况如下图;
用PEInfo打开上述DLL,看红线处,优先装载地址是在编译命令中指定的;
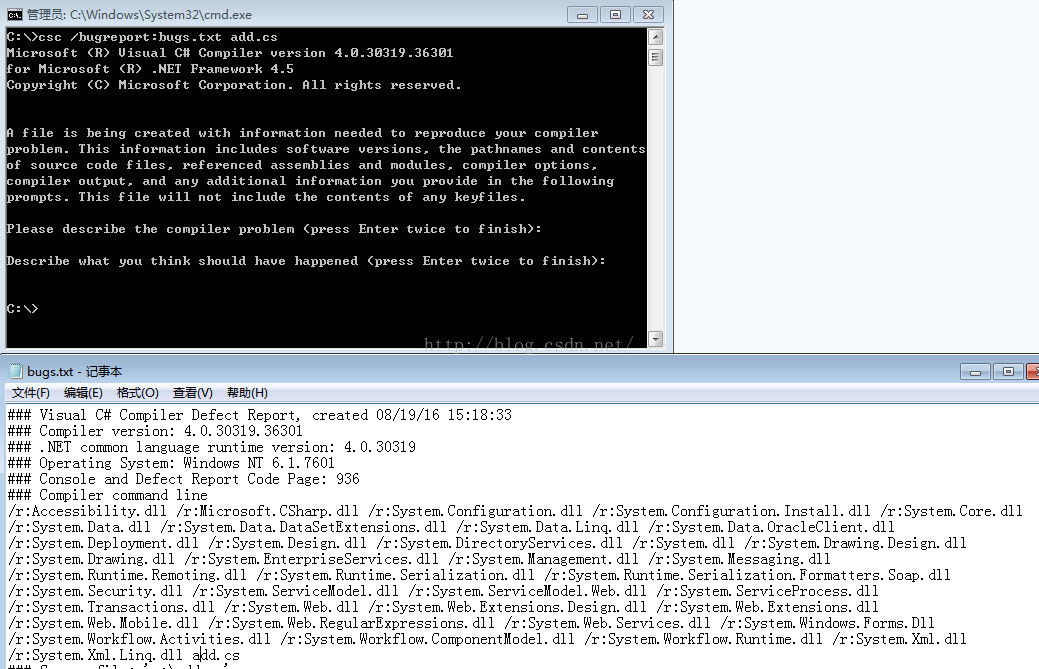
编译时把bug信息输出的一个文件中;
打开debug开关,将会生成pdb文件;
编译时同时为应用程序生成一个xml文档;
增量编译,按网上资料打的命令,提示出错,下次再搞;增量编译是仅仅编译改变后的代码,同时生成.incr文件;
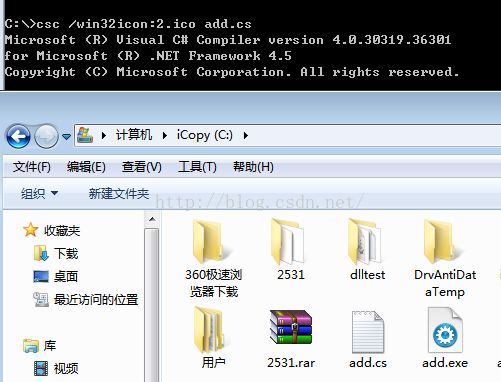
编译时指定一个图标;如下图,编译后的应用程序将具有一个图标;
相关链接:
http://wuyisky.cnblogs.com/archive/2007/07/03/804157.html
http://www.cnblogs.com/shuang121/archive/2012/12/24/2830874.html

