Android绘图技术详解,带你轻松绘出各种图形
转载地址:http://blog.csdn.net/leejizhou/article/details/51524948#rd
【Android 2D绘图解析】系列文章将全面介绍Android绘图相关,这篇简单介绍下如何利用Android API进行一些简单图形的绘制,绘图的前提是需要继承自View,然后重写它的onDraw(Canvas canvas) 方法即可。
首先我们新建一个类继承自View,并重写onDraw方法。
package com.leejz.androiddrawing;
//blog:www.lijizhou.com

public class CustomView extends View {

    public CustomView(Context context, AttributeSet attrs) {
        super(context, attrs);
    }

    @Override
    protected void onDraw(Canvas canvas) {
        super.onDraw(canvas);
    }
}- 1
- 2
- 3
- 4
- 5
- 6
- 7
- 8
- 9
- 10
- 11
- 12
- 13
- 14
- 1
- 2
- 3
- 4
- 5
- 6
- 7
- 8
- 9
- 10
- 11
- 12
- 13
- 14
然后在Layout中进行添加此View
"http://schemas.android.com/apk/res/android"
    xmlns:tools="http://schemas.android.com/tools"
    android:layout_width="match_parent"
    android:layout_height="match_parent"
    tools:context="com.leejz.androiddrawing.MainActivity">

    <com.leejz.androiddrawing.CustomView
        android:layout_width="match_parent"
        android:layout_height="match_parent" />
- 1
- 2
- 3
- 4
- 5
- 6
- 7
- 8
- 9
- 10
- 11
- 1
- 2
- 3
- 4
- 5
- 6
- 7
- 8
- 9
- 10
- 11
这样一个大体的自定义View的流程就搭建起来了,当然现在运行会显示一片空白,因为我们还没在onDraw方法进行任何的绘制,进行绘制前需要了解两个API,Canvas和Paint。
Canvas翻译成中文就是画布的意思,Canvas负责进行绘制各种各样的图形,它有如下的一些绘制图形方法
- drawArc 绘制弧
- drawBitmap 绘制位图
- drawCircle 绘制圆形
- drawLine 绘制线
- drawOval 绘制椭圆
- drawPath 绘制路径
- drawPoint 绘制一个点
- drawPoints 绘制多个点
- drawRect 绘制矩形
- drawRoundRect 绘制圆角矩形
- drawText 绘制字符串
- drawTextOnPath 沿着路径绘制字符串
…更多的绘制方法参考 https://developer.android.com/reference/android/graphics/Canvas.html (需要科学上网)
Paint翻译成中文有油漆涂料的意思,Paint主要负责设置绘图的风格,包括画笔的颜色,粗细,填充风格等,它有如下的一些设置方法。
- setARGB/setColor 设置颜色
- setAlpha 设置透明度
- setAntiAlias 设置是否抗锯齿
- setShader 设置画笔的填充效果
- setShadowLayer 设置阴影
- setStyle 设置画笔风格
- setStrokeWidth 设置空心边框的宽度
- setTextSize 设置绘制文本时文字的大小
…更多的设置方法参考 https://developer.android.com/reference/android/graphics/Paint.html(需要科学上网)
我们利用上面的API进行一些简单的绘图
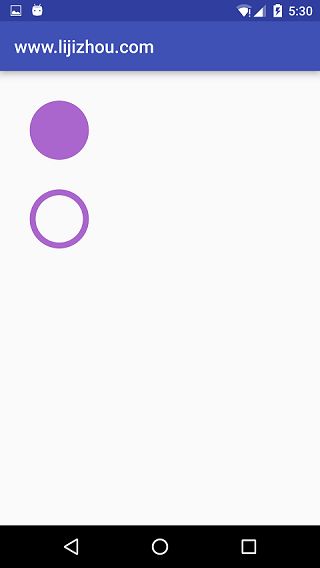
绘制圆形:drawCircle(float cx, float cy, float radius, Paint paint)
cx>圆心的x坐标
cy>圆心的y坐标
radius>圆的半径
paint>绘制风格
 @Override
    protected void onDraw(Canvas canvas) {
        super.onDraw(canvas);
        Paint paint=new Paint();
        //去锯齿
        paint.setAntiAlias(true);
        //设置颜色
        paint.setColor(getResources().getColor(android.R.color.holo_blue_light));
        //绘制普通圆
        canvas.drawCircle(200,200,100,paint);
        //设置空心Style
        paint.setStyle(Paint.Style.STROKE);
        //设置空心边框的宽度
        paint.setStrokeWidth(20);
        //绘制空心圆
        canvas.drawCircle(200,500,90,paint);
}- 1
- 2
- 3
- 4
- 5
- 6
- 7
- 8
- 9
- 10
- 11
- 12
- 13
- 14
- 15
- 16
- 17
- 1
- 2
- 3
- 4
- 5
- 6
- 7
- 8
- 9
- 10
- 11
- 12
- 13
- 14
- 15
- 16
- 17
运行效果:
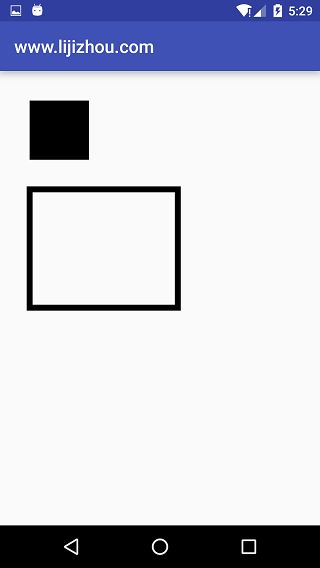
绘制矩形:drawRect(float left, float top, float right, float bottom, Paint paint) / drawRect(RectF rect, Paint paint)
left>矩形left的x坐标
top>矩形top的y坐标
right>矩形right的x坐标
bottom>矩形bottom的y坐标
paint>绘制风格
   @Override
    protected void onDraw(Canvas canvas) {
        super.onDraw(canvas);
        Paint paint = new Paint();
        //去锯齿
        paint.setAntiAlias(true);
        //设置颜色
        paint.setColor(getResources().getColor(android.R.color.holo_blue_light));
        //绘制正方形
        canvas.drawRect(100, 100, 300, 300, paint);
        //上面代码等同于
        //RectF rel=new RectF(100,100,300,300);
        //canvas.drawRect(rel, paint);

        //设置空心Style
        paint.setStyle(Paint.Style.STROKE);
        //设置空心边框的宽度
        paint.setStrokeWidth(20);
        //绘制空心矩形
        canvas.drawRect(100, 400, 600, 800, paint);
}- 1
- 2
- 3
- 4
- 5
- 6
- 7
- 8
- 9
- 10
- 11
- 12
- 13
- 14
- 15
- 16
- 17
- 18
- 19
- 20
- 21
- 1
- 2
- 3
- 4
- 5
- 6
- 7
- 8
- 9
- 10
- 11
- 12
- 13
- 14
- 15
- 16
- 17
- 18
- 19
- 20
- 21
运行效果:
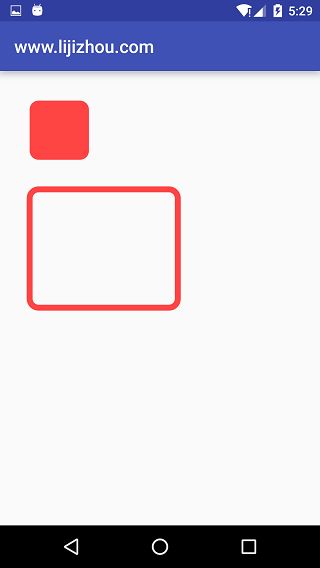
绘制圆角矩形:drawRoundRect(float left, float top, float right, float bottom, float rx, float ry, Paint paint) / drawRoundRect(RectF rect, float rx, float ry, Paint paint)
left>图形left的x坐标
top>图形top的y坐标
right>图形right的x坐标
bottom>图形bottom的y坐标
rx>x方向的圆角半径
ry>y方向的圆角半径
paint>绘制风格
   @Override
    protected void onDraw(Canvas canvas) {
        super.onDraw(canvas);
        Paint paint = new Paint();
        //去锯齿
        paint.setAntiAlias(true);
        //设置颜色
        paint.setColor(getResources().getColor(android.R.color.holo_blue_light));
        //绘制圆角矩形
        canvas.drawRoundRect(100, 100, 300, 300, 30, 30, paint);
        //上面代码等同于
        //RectF rel=new RectF(100,100,300,300);
        //canvas.drawRoundRect(rel,30,30,paint);
        //设置空心Style
        paint.setStyle(Paint.Style.STROKE);
        //设置空心边框的宽度
        paint.setStrokeWidth(20);
        //绘制空心圆角矩形
        canvas.drawRoundRect(100, 400, 600, 800, 30, 30, paint);

}- 1
- 2
- 3
- 4
- 5
- 6
- 7
- 8
- 9
- 10
- 11
- 12
- 13
- 14
- 15
- 16
- 17
- 18
- 19
- 20
- 21
- 1
- 2
- 3
- 4
- 5
- 6
- 7
- 8
- 9
- 10
- 11
- 12
- 13
- 14
- 15
- 16
- 17
- 18
- 19
- 20
- 21
运行效果
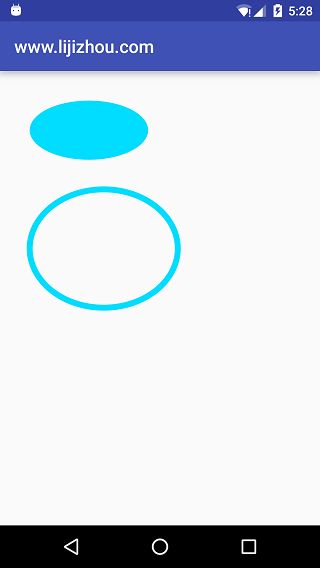
绘制椭圆:drawOval(float left, float top, float right, float bottom, Paint paint)
left>图形left的x坐标
top>图形top的y坐标
right>图形right的x坐标
bottom>图形bottom的y坐标
paint>绘制风格
  @Override
    protected void onDraw(Canvas canvas) {
        super.onDraw(canvas);
        Paint paint = new Paint();
        //去锯齿
        paint.setAntiAlias(true);
        //设置颜色
        paint.setColor(getResources().getColor(android.R.color.holo_orange_dark));
        //绘制椭圆
        canvas.drawOval(100, 100, 500, 300, paint);
        //设置空心Style
        paint.setStyle(Paint.Style.STROKE);
        //设置空心边框的宽度
        paint.setStrokeWidth(20);
        //绘制空心椭圆
        canvas.drawOval(100, 400, 600, 800, paint);
}- 1
- 2
- 3
- 4
- 5
- 6
- 7
- 8
- 9
- 10
- 11
- 12
- 13
- 14
- 15
- 16
- 17
- 1
- 2
- 3
- 4
- 5
- 6
- 7
- 8
- 9
- 10
- 11
- 12
- 13
- 14
- 15
- 16
- 17
运行效果:
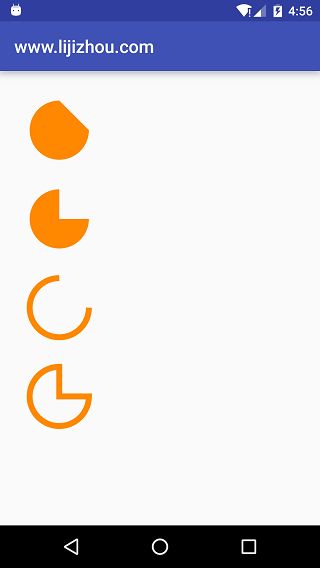
绘制弧:drawArc(RectF oval, float startAngle, float sweepAngle, boolean useCenter, Paint paint)
oval>指定圆弧的外轮廓矩形区域
startAngle>圆弧起始角度,单位为度
sweepAngle>圆弧扫过的角度,顺时针方向,单位为度
useCenter>如果为True时,在绘制圆弧时将圆心包括在内,通常用来绘制扇形
paint>绘制风格
  @Override
    protected void onDraw(Canvas canvas) {
        super.onDraw(canvas);
        Paint paint = new Paint();
        //去锯齿
        paint.setAntiAlias(true);
        //设置颜色
        paint.setColor(getResources().getColor(android.R.color.holo_orange_dark));
        RectF rel = new RectF(100, 100, 300, 300);
        //实心圆弧
        canvas.drawArc(rel, 0, 270, false, paint);
        //实心圆弧 将圆心包含在内
        RectF rel2 = new RectF(100, 400, 300, 600);
        canvas.drawArc(rel2, 0, 270, true, paint);
        //设置空心Style
        paint.setStyle(Paint.Style.STROKE);
        paint.setStrokeWidth(20);

        RectF rel3 = new RectF(100, 700, 300, 900);
        canvas.drawArc(rel3, 0, 270, false, paint);

        RectF rel4 = new RectF(100, 1000, 300, 1200);
        canvas.drawArc(rel4, 0, 270, true, paint);

}- 1
- 2
- 3
- 4
- 5
- 6
- 7
- 8
- 9
- 10
- 11
- 12
- 13
- 14
- 15
- 16
- 17
- 18
- 19
- 20
- 21
- 22
- 23
- 24
- 25
- 1
- 2
- 3
- 4
- 5
- 6
- 7
- 8
- 9
- 10
- 11
- 12
- 13
- 14
- 15
- 16
- 17
- 18
- 19
- 20
- 21
- 22
- 23
- 24
- 25
运行效果
绘制文字:drawText(String text, float x, float y, Paint paint)
text>文本
x>文本origin的x坐标
y>文本baseline的y坐标
paint>绘制风格
*origin和baseline示意图 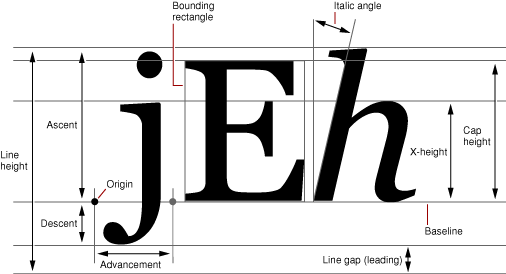
  @Override
    protected void onDraw(Canvas canvas) {
        super.onDraw(canvas);
        Paint paint = new Paint();
        //去锯齿
        paint.setAntiAlias(true);
        //设置颜色
        paint.setColor(getResources().getColor(android.R.color.holo_orange_dark));
        paint.setTextSize(100);
        //绘制文本
        canvas.drawText("jEh", 80, 150, paint);
}- 1
- 2
- 3
- 4
- 5
- 6
- 7
- 8
- 9
- 10
- 11
- 12
- 1
- 2
- 3
- 4
- 5
- 6
- 7
- 8
- 9
- 10
- 11
- 12
运行效果:

OK,Android绘图系列的第一篇关于Canvas和Paint就简单介绍到这,Canvas更多种类的绘图效果可以参考官方文档并动手实践效果。