Linux系统mariadb管理
一、mariadb
MariaDB数据库管理系统是MySQL的一个分支,主要由开源社区在维护,采用GPL授权许可
MariaDB的目的是完全兼容MySQL,包括API和命令行,使之能轻松成为MySQL的代替品。在存储引擎方面,使用XtraDB(英语:XtraDB)来代替MySQL的InnoDB。
MariaDB由MySQL的创始人Michael Widenius(英语:Michael
Widenius)主导开发,他早前曾以10亿美元的价格,将自己创建的公司MySQL
AB卖给了SUN,此后,随着SUN被甲骨文收购,MySQL的所有权也落入Oracle的手中。MariaDB名称来自Michael
Widenius的女儿Maria的名字。
MariaDB基于事务的Maria存储引擎,替换了MySQL的MyISAM存储引擎,它使用了Percona的
XtraDB,InnoDB的变体,分支的开发者希望提供访问即将到来的MySQL 5.4 InnoDB性能。这个版本还包括了
PrimeBase XT (PBXT) 和 FederatedX存储引擎。
二、安装
1 yum install mariadb-server.x86_64    ##安装
-->systemctl start mariadb             ##开启
-->systemclt enable mariadb            ##设置开机启动
2 vim /etc/my.cnf                      ##编辑数据库的配置文件
  10 skip-networking=1                 ##关闭数据库的网络接口
-->systemclt restart mariadb           ##重启数据库
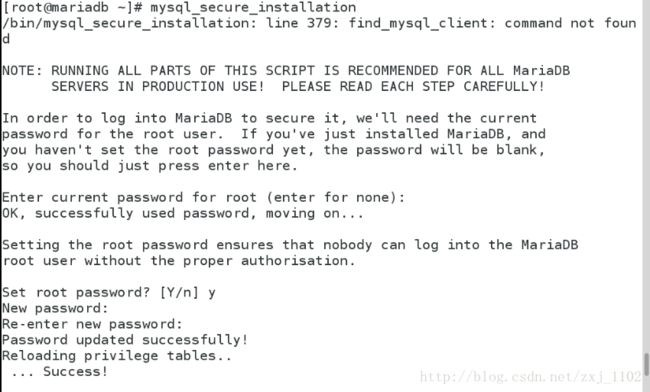
3 mysql_secure_installation ##数据库安全初始化3 数据库安全初始化,除了需要输入密码,其他选项全部回车即可
三、sql的相关语句
查询
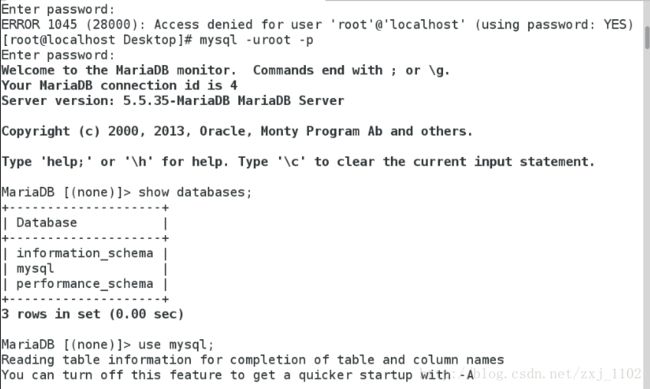
1 show databases;                           ##列出数据库
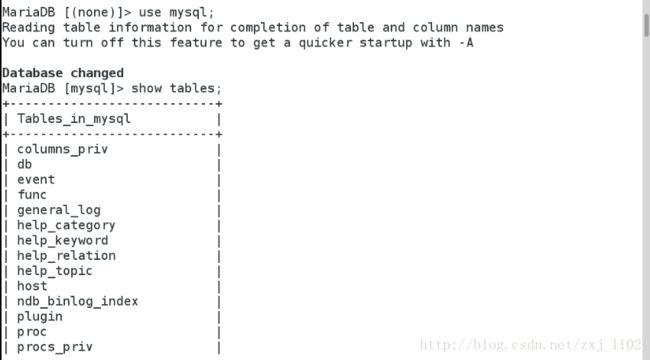
2 use mysql;                                ##使用mysql这个库
3 show tables;                              ##列出数据库mysql里的表
4 desc user;                                ##列出数据库的结构
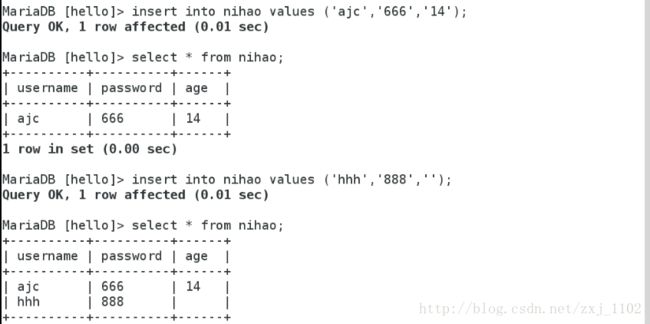
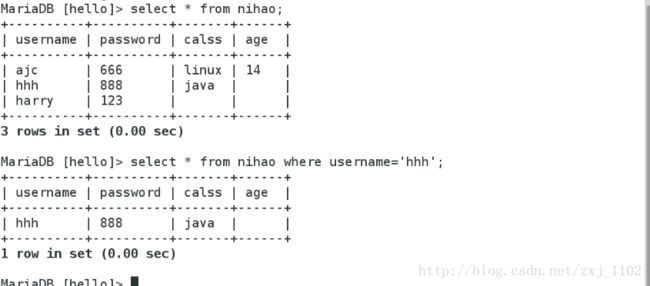
5 select * from nihao;                      ##查看
6 select * from nihao where username='hhh'; ##查找nihao表里用户名是hhh的资料4查看nihao表中的所域内容,查看该表中用户名是hhh的资料
创建
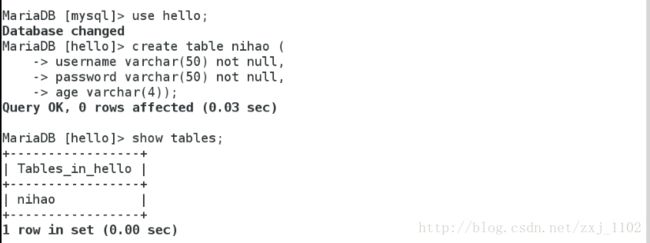
1 create database hello;                         ##创建hello表
2 use hello;                                     ##表的字段名和结构
3 create table linux (
              username varchar(50) not null,
              password varchar(50) not null,
              age varchar(4));
4 insert into linux values ('lee','123','20'); ##往表里插入内容修改
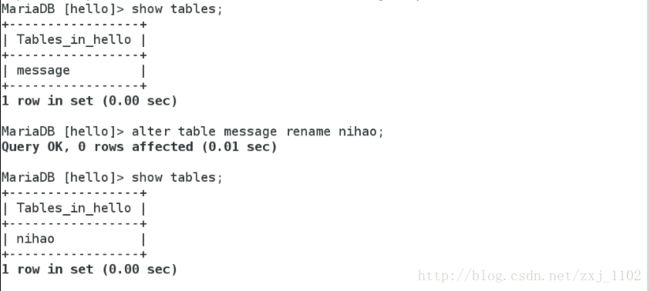
alter table nihao rename message;               ##更改表名
alter table nihao add class varchar(50);      ##增加用户,在字段名后增加
alter table nihao add class varchar(50) after password;                                                           ##指定插入位置
alter table nihao drop clss;                    ##删除字段名
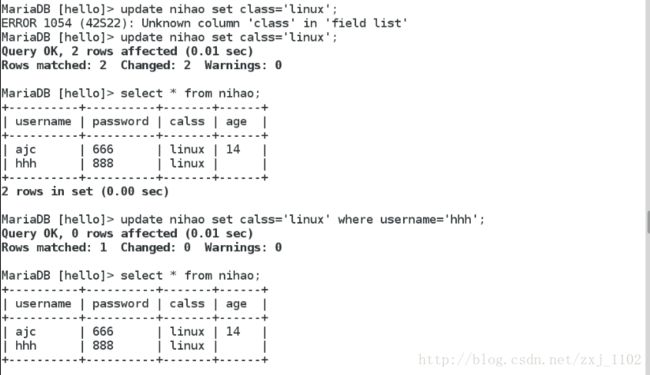
update nihao set class'linux';                  ##修改用户资料
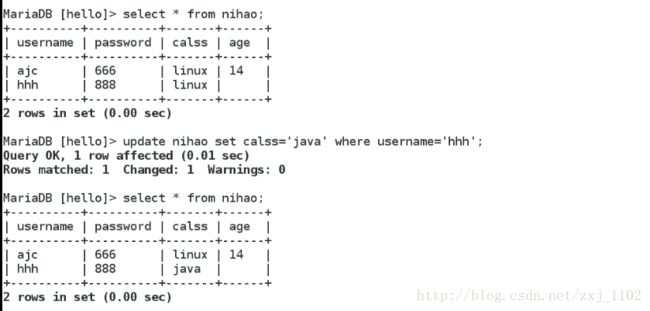
update nihao set class'java' where username='lee'; ##批量修改备份
1 mysqldump -uroot -predhat hello > /mnt/hello.sql
                                                ##重定向数据内容出来
2 drop database hello;;                              ##删除库
3 mysql -uroot -predhat -e "create database hello;"  ##创建库
4 mysql -uroot -predhat hello </mnt/hello.sql ##将备份导入新建的库中删除
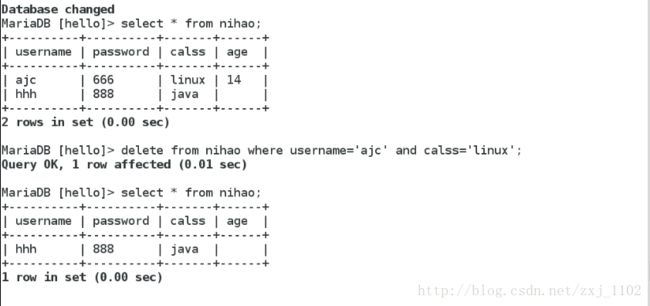
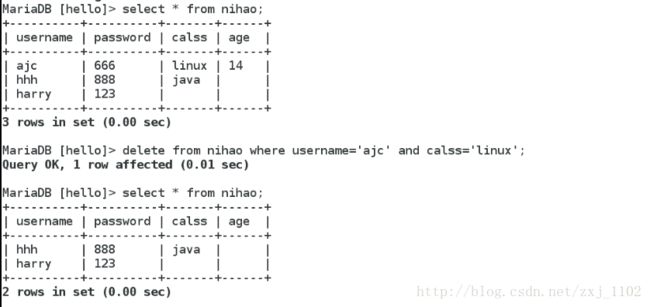
1 delete from nihao where username='ajc' and calss='java'
                                                         ##删除用户
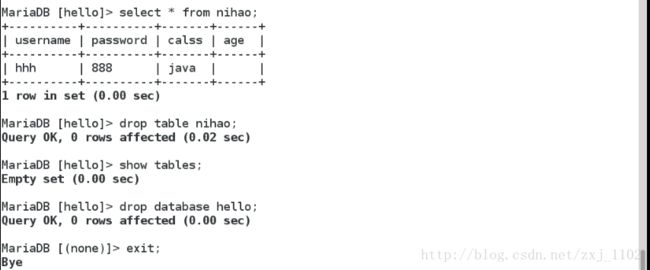
2 drop table nihao;                                      ##删除表
3 drop database hello; ##删除库忘记数据库密码
1 systemctl stop mariadb              ##停止mariabd
2 mysqld_safe --skip-grant-tables &   ##开启mysql登陆接口并忽略授权表
3 进入数据库更新密码
4 ps aux | grep mysql
-->kill -9 数据库进程                  ##过滤mysql进程并杀死这些进程
5 systemclt restart mariadb ##重启用户和访问权限
1创建用户:
  create user tom@localhost identified by 'hello';
 ##创建tom@localhost本地用户并指定密码为hello
  create user lee@'%'identified by 'redhat';
##lee@'%'批量授权一类用户2用户授权
1 grant insert,update,delete,select,drop on mariadb.* to tom@localhost;
##授权数据库插入,更新,删除,查找功能给tom用户
2 grant select on maridb.* to lee@'%';
##.* 库里的所有表3重载授权表
flush privileges;
4查看用户授权
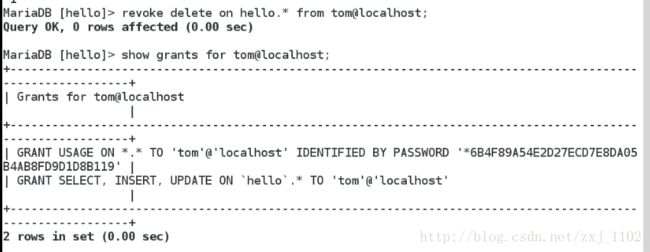
show grants for tom@localhost;5撤销用户权限
revoke delete,update,insert,select,drop on mariadb.* to tom@localhost;
##撤销用户在该数据库中查找等一系列权限6删除用户
drop user tom@localhost; ##删除tom@localhost用户四、mysql 的图形管理工具phpmyadmin
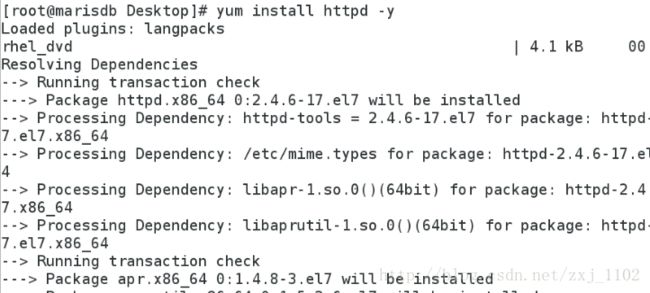
1 yum install htppd -y                          ##安装apache
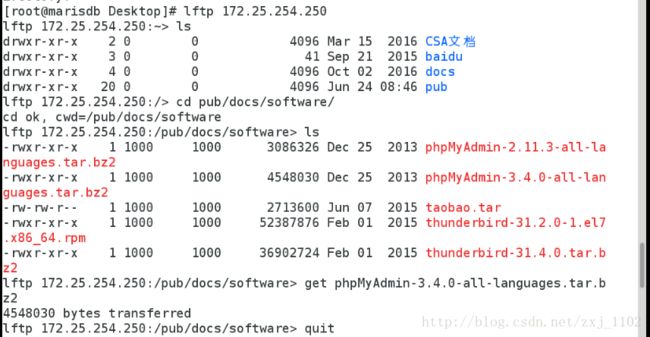
2 tar jxf phpMyAdmin-3.4-all-languages.tar.bz2 -C /var/www/html                                                   ##解压
3 mv phpMyAdmin-3.4-all-languages mysqladmin    ##重命名
4 less Documentation.text                       ##查看安装说明书
5 cp config.sample.inc.php config.inc.php       ##拷贝
6 vim config.inc.php                            ##编辑配置文件
7 17$cfg['blowfish_secret']='ba17clec07d65003'; ##随便填一些数据都可以
8 yum insatll php php-mysql -y                  ##安装php-mysal
-->systemctl restart httpd                      ##重启apache
-->systemctl stop firewalld                    1 yum install htppd -y     ##安装apache
2 tar jxf phpMyAdmin-3.4-all-languages.tar.bz2 -C /var/www/html ##解压
3 mv phpMyAdmin-3.4-all-languages mysqladmin ##重命名
4 less Documentation.text                    ##查看安装说明书
5 cp config.sample.inc.php config.inc.php    ##拷贝
6 vim config.inc.php                         ##编辑配置文件
7 17$cfg['blowfish_secret']='ba17clec07d65003';  ##随便填一些数据都可以
8 yum insatll php php-mysql -y                ##安装php-mysal
-->systemctl restart httpd                   ##重启apache
-->systemctl stop firewalld                  ##关闭火墙

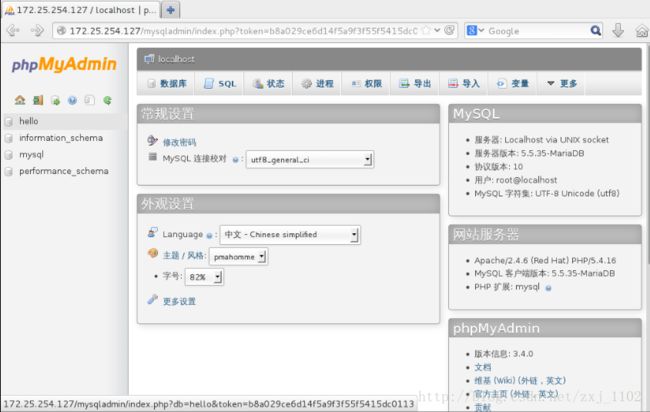
9 测试
  http://172.25.254.127/mysqladmin

