Vue + Spring Boot 项目实战(十六):功能级访问控制的实现
![]()
重要链接:
「系列文章目录」
「项目源码(GitHub)」
本篇目录
- 前言
- 一、数据库与后端准备
-
- 1.表设计
- 2.Service
- 二、Shiro 实现
-
- 1.编写基于 URL 的过滤器
- 2.祖传方法
- 下一步
前言
最近又休了几天假。读者大人们是不是感觉我老是休假?说实话,在这个同事们都努力加班的时候,一开始我也有那么一丢丢不好意思,但休假也是为了以更好的精神状态为公司赚钱嘛(狗头)。
大家出来工作,一定要记住身体是最重要的,透支身体换来的那点回报真的不值得。最近在知乎上看到,脑皮层会在夜间释放大量皮质醇(类似肾上腺素)代替多巴胺,使人进入一种警戒状态,这种神奇的状态被误认为是兴奋、是年轻的象征,其实对身体损伤很大。我看到后立马转发了朋友圈,不知道老板看到会不会想开除我。。。
这篇文章的主要讲解 功能级访问控制 的实现方式。之所以要实现这个粒度的访问控制,是因为仅仅对菜单(页面)进行控制是不够的。
举个例子,假设我们不想让 “内容管理员” 角色有查看用户列表的权限,可以通过对菜单的控制,让这个角色无法加载用户信息组件。但在会话持续状态下,该角色仍然可以向后台展示用户列表的接口发送请求,获取到所有的用户信息,这不就是掩耳盗铃儿响叮当嘛。
为了实现功能控制,我们需要进行如下工作:
- 设计数据库表(功能表与角色-功能表)
- 完善新表对应的 pojo、DAO、service 类
- 编写 shiro 过滤器并配置过滤条件
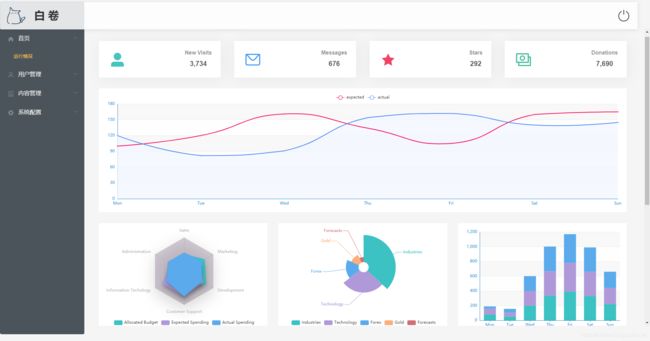
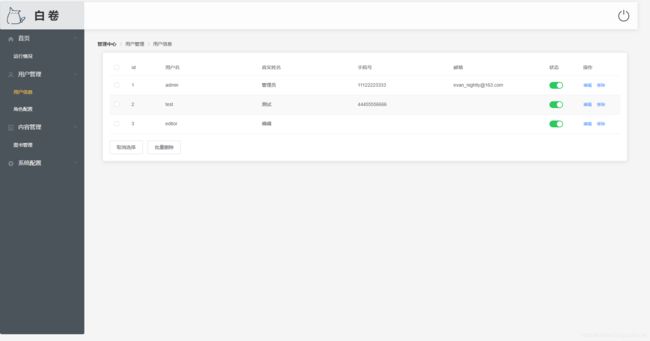
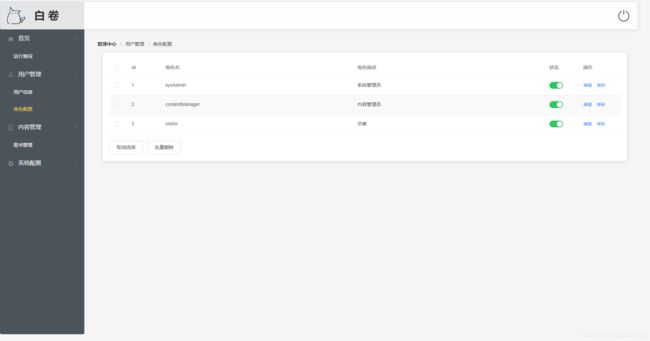
为了展示这一篇的效果,我特意把如下几个后台页面完善了一下。
运行情况(Dashboard):
用户信息:
角色配置:
图书管理:
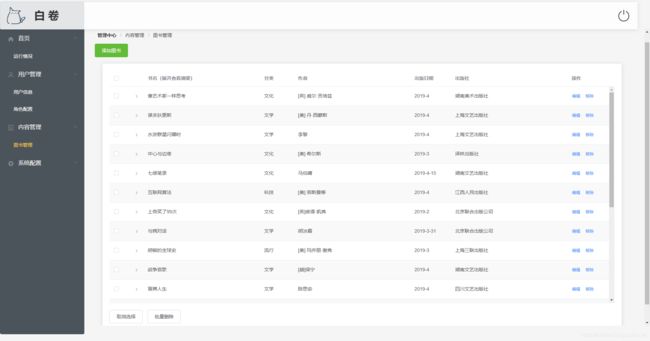
(Dashboard 界面是从 「vue-element-admin」 项目中扒拉下来的,该项目有 45.9k stars ,作者是字节跳动的大神,强烈建议前端小伙伴学习)
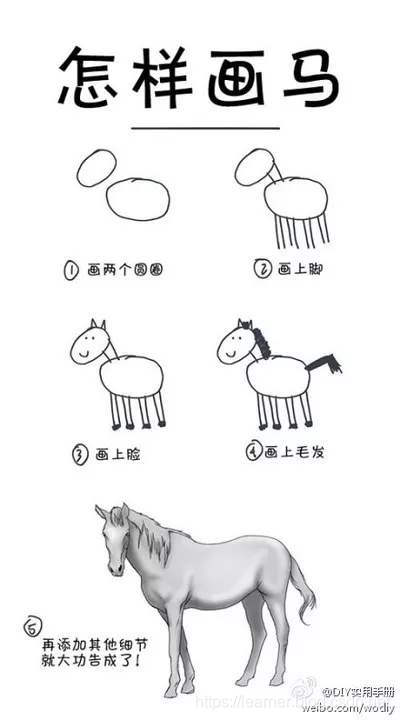
修改界面的过程就像画一匹马一样简单,我就不细讲了。
在正文之前,先提醒一下老读者,按上篇文章实现动态加载后,发现导航栏的点击高亮失效,经过排查,发现是路由守卫里多写了一个 next(),导致在访问需要登陆的页面时若认证成功则会执行两次 next(),影响了 el-menu 响应点击事件的方法。
下面的代码中注释掉了错误的部分:
router.beforeEach((to, from, next) => {

    if (store.state.user.username && to.path.startsWith('/admin')) {

      axios.get('/authentication').then(resp => {

        initAdminMenu(router, store)
      })
    }
    if (to.meta.requireAuth) {

      if (store.state.user.username) {

        axios.get('/authentication').then(resp => {

          if (resp) next()
        })
        // 就是这里多写了一个
        // next()
      } else {

        next({

          path: 'login',
          query: {
     redirect: to.fullPath}
        })
      }
    } else {

      next()
    }
  }
)
一、数据库与后端准备
这个部分老生常谈了,我挑重点说哈。
1.表设计
本篇涉及到的表如下所示:

其实跟上篇的设计是类似的。嫌麻烦的话可以直接运行 wj.sql 文件。除了两张新建的表admin_permission 和 admin_role_permission 外,还对 user 表的字段作了一些扩充(主要是为了列表充实一点好看。。。)
解释一下权限表的设计:
name即权限的名称,推荐使用英文desc_即对权限功能的具体描述url即权限对应的接口,是实现功能控制的关键
建完表记得加点数据,比如设置查询用户的权限,并赋给系统管理员角色,方便之后验证。
2.Service
pojo、DAO 还是那样相貌平平。
AdminPermissionService 中需要实现一个根据当前用户获取所有权限的方法,与上节获取菜单列表不同,这里只需要 url 一个字段。代码如下:
public Set<String> listPermissionURLsByUser(String username) {

    List<Integer> rids = adminRoleService.listRolesByUser(username)
            .stream().map(AdminRole::getId).collect(Collectors.toList());

    List<Integer> pids = adminRolePermissionDAO.findAllByRid(rids)
            .stream().map(AdminRolePermission::getPid).collect(Collectors.toList());

    List<AdminPermission> perms = adminPermissionDAO.findAllById(pids);

    Set<String> URLs = perms.stream().map(AdminPermission::getUrl).collect(Collectors.toSet());

    return URLs;
}
此外,还可以实现一个方法,用于判断用户请求接口的是否在权限列表中。如果没有对应权限,说明不需要维护。代码如下:
public boolean needFilter(String requestAPI) {

    List<AdminPermission> ps = adminPermissionDAO.findAll();
    for (AdminPermission p: ps) {

        if (p.getUrl().equals(requestAPI)) {

            return true;
        }
    }
    return false;
}
同样为了演示效果,可以在 Controller 中编写一个查询所有用户接口:
@GetMapping("/api/admin/user")
public List<User> listUsers() throws Exception {

    return userService.list();
}
这样,准备工作就做充足了。
二、Shiro 实现
之前我们在做登录拦截的时候使用了拦截器,即 Interceptor。由于 Shiro 的权限机制要靠它自身提供的过滤器实现,所以我们现在弃用之前的拦截器。
首先在 MyWebConfigurer 中删除拦截器配置代码:
//    删了删了
//    @Override
//    public void addInterceptors(InterceptorRegistry registry) {

//        registry.addInterceptor(getLoginInterceptor())
//                .addPathPatterns("/**")
//                .excludePathPatterns("/index.html")
//                .excludePathPatterns("/api/register")
//                .excludePathPatterns("/api/login")
//                .excludePathPatterns("/api/logout")
//                .excludePathPatterns("/api/books");
//    }
然后删除 LoginInterceptor 类(甚至可以直接删除 package)。做完这件事我神清气爽,因为在回答问题的过程中我发现你们遇到的跨域问题百分之八十都是这玩意儿没写好造成的。。。
1.编写基于 URL 的过滤器
为了让你们更好地理解 Shiro 过滤器是如何工作的,我们先来尝试自定义一个过滤器实现我们想要的功能。
PathMatchingFilter 是 Shiro 提供的路径过滤器,我们可以通过继承它来编写过滤放行条件,即判断是否具有相应权限。判断的逻辑为:
- 首先,判断当前会话对应的用户是否登录,如果未登录直接 false
- 第二步,判断访问的接口是否有对应的权限,如果没有视为不需要权限即可访问,直接 true
- 如果需要权限,查询出当前用户对应的所有权限,遍历并与需要访问的接口进行比对,如果存在相应权限则 true,否则 false
OK,让我们新建一个 package 命名为 filter,编写 URLPathMatchingFilter 类如下:
package com.gm.wj.filter;

import com.gm.wj.service.AdminPermissionService;
import com.gm.wj.util.SpringContextUtils;
import org.apache.shiro.SecurityUtils;
import org.apache.shiro.subject.Subject;
import org.apache.shiro.web.filter.PathMatchingFilter;
import org.springframework.beans.factory.annotation.Autowired;
import org.springframework.http.HttpMethod;
import org.springframework.http.HttpStatus;

import javax.servlet.ServletRequest;
import javax.servlet.ServletResponse;
import javax.servlet.http.HttpServletRequest;
import javax.servlet.http.HttpServletResponse;
import java.util.Set;

public class URLPathMatchingFilter extends PathMatchingFilter {

    @Autowired
    AdminPermissionService adminPermissionService;

    @Override
    protected boolean onPreHandle(ServletRequest request, ServletResponse response, Object mappedValue) throws Exception {

        HttpServletRequest httpServletRequest = (HttpServletRequest) request;
        HttpServletResponse httpServletResponse = (HttpServletResponse) response;
        // 放行 options 请求
        if (HttpMethod.OPTIONS.toString().equals((httpServletRequest).getMethod())) {

            httpServletResponse.setStatus(HttpStatus.NO_CONTENT.value());
            return true;
        }

        if (null==adminPermissionService) {

            adminPermissionService = SpringContextUtils.getContext().getBean(AdminPermissionService.class);
        }

        String requestAPI = getPathWithinApplication(request);
        System.out.println("访问接口:" + requestAPI);

        Subject subject = SecurityUtils.getSubject();

        if (!subject.isAuthenticated()) {

            System.out.println("需要登录");
            return false;
        }

        // 判断访问接口是否需要过滤(数据库中是否有对应信息)
        boolean needFilter = adminPermissionService.needFilter(requestAPI);
        if (!needFilter) {

            System.out.println("接口:" + requestAPI + "无需权限");
            return true;
        } else {

            System.out.println("验证访问权限:" + requestAPI);
            // 判断当前用户是否有相应权限
            boolean hasPermission = false;
            String username = subject.getPrincipal().toString();
            Set<String> permissionAPIs = adminPermissionService.listPermissionURLsByUser(username);
            for (String api : permissionAPIs) {

                if (api.equals(requestAPI)) {

                    hasPermission = true;
                    break;
                }
            }

            if (hasPermission) {

                System.out.println("访问权限:" + requestAPI + "验证成功");
                return true;
            } else {

                System.out.println("当前用户没有访问接口" + requestAPI + "的权限");
                return false;
            }
        }
    }
}
这里有一段代码解释一下:
if (null==adminPermissionService) {

    adminPermissionService = SpringContextUtils.getContext().getBean(AdminPermissionService.class);
}
在 Shiro 的配置文件中,我们不能把 URLPathMatchingFilter 用 @Bean 被 Spring 管理起来。 原因是 Shiro 存在 bug, 这个也是过滤器,ShiroFilterFactoryBean 也是过滤器,当他们都出现的时候,默认的什么 anno,authc 过滤器就失效了。所以不能把他声明为 @Bean。
因此,我们无法在 URLPathMatchingFilter 中使用 @Autowired 注入 AdminPermissionService 类,所以需要借助一个工具类利用 Spring 应用上下文获取 AdminPermissionService 的实例。
工具类可以放在 utils 包中,代码如下:
package com.gm.wj.util;

import org.springframework.beans.BeansException;
import org.springframework.context.ApplicationContext;
import org.springframework.context.ApplicationContextAware;
import org.springframework.stereotype.Component;

@Component
public class SpringContextUtils implements ApplicationContextAware {

    private static ApplicationContext context;

    public void setApplicationContext(ApplicationContext context) throws BeansException {

        SpringContextUtils.context = context;
    }

    public static ApplicationContext getContext() {

        return context;
    }
}
接下来在配置类 ShiroConfiguration 增加获取过滤器的方法,注意这里不能使用 @Bean :
    public URLPathMatchingFilter getURLPathMatchingFilter() {

        return new URLPathMatchingFilter();
    }
然后编写 shiroFilter 配置方法如下:
@Bean
public ShiroFilterFactoryBean shiroFilter(SecurityManager securityManager) {

    ShiroFilterFactoryBean shiroFilterFactoryBean = new ShiroFilterFactoryBean();
    shiroFilterFactoryBean.setSecurityManager(securityManager);

    Map<String, String > filterChainDefinitionMap = new LinkedHashMap<String, String>();
    Map<String, Filter> customizedFilter = new HashMap<>();

    // 设置自定义过滤器名称为 url
    customizedFilter.put("url", getURLPathMatchingFilter());

    // 对管理接口的访问启用自定义拦截(url 规则),即执行 URLPathMatchingFilter 中定义的过滤方法
    filterChainDefinitionMap.put("/api/admin/**", "url");
    // 启用自定义过滤器
    shiroFilterFactoryBean.setFilters(customizedFilter);
    filterChainDefinitionMap.put("/api/authentication", "authc");
    shiroFilterFactoryBean.setFilterChainDefinitionMap(filterChainDefinitionMap);
    return shiroFilterFactoryBean;
}
OK,这时候你可以测试一下,使用 editor 账号(密码 123)登录,由于获取不到对应权限,请求自动转发到 \login,不过由于我们是前后端分离的,所以\login 这个接口并不存在,可以通过 shiroFilterFactoryBean.setLoginUrl() 方法手动设置跳转路径,不过没有必要,我们在前端配置的规则会引发路由跳转到登录页面。
上面的 filterChainDefinitionMap.put("/api/authentication", "authc"); 是我们的防前端鸡贼登录规则。
这个 authc 即 autentication,是 shiro 自带的过滤器。除了它以外,常用的还有 anon(可匿名访问)、roles(需要角色)、perms(需要权限)等。
讲到这里你可能有疑问,为啥我们不直接用 perms 呢?
其实使用 perms 才是 Shiro 的祖传解决方案,但是为了配合它的实现,我们需要在配置文件中添加规则如filterChainDefinitionMap.put("/api/authentication", "perms[/api/admin/user]"),或者在接口处编写注解如 @RequirePermission("/api/admin/user") ,这样如果我们想要删除或新增权限,除了修改数据库外还需要重新编写源码,这就比较蓝瘦了。
此外,自带过滤器会拦截 options 请求,所以在前后端分离的项目里使用自定义过滤器反而简便一些。。。
不过,其实对很多项目来说不太需要动态增删权限,只需要对现有权限进行分配就够了,所以在不分离的情况下使用自带过滤器当然更好。
2.祖传方法
之前我们已经写好了 Service,接下来要做的事很简单:
- 在 Realm 中配置授权信息
- 为需要控制的接口添加注解
- 编写异常处理类(统一处理未授权异常)
在 WJRealm 中重写获取授权信息的方法如下:
@Override
protected AuthorizationInfo doGetAuthorizationInfo(PrincipalCollection principalCollection) {

    // 获取当前用户的所有权限
    String username = principalCollection.getPrimaryPrincipal().toString();
    Set<String> permissions = adminPermissionService.listPermissionURLsByUser(username);

    // 将权限放入授权信息中
    SimpleAuthorizationInfo s = new SimpleAuthorizationInfo();
    s.setStringPermissions(permissions);
    return s;
}
我们选用注解的方式控制用户信息查询权限如下:
 @RequiresPermissions("/api/admin/user")
 @GetMapping("/api/admin/user")
 public List<User> listUsers() throws Exception {

     return userService.list();
 }
权限的名字就可以灵活一些,不用与接口 url 一致,这里我就不改数据库了。
最后,编写一个处理未授权异常的类,可以放在新的 package 中:
package com.gm.wj.exception;

import com.gm.wj.result.Result;
import com.gm.wj.result.ResultFactory;
import org.apache.shiro.authz.UnauthorizedException;
import org.springframework.web.bind.annotation.ControllerAdvice;
import org.springframework.web.bind.annotation.ExceptionHandler;
import org.springframework.web.bind.annotation.ResponseBody;

@ControllerAdvice
public class DefaultExceptionHandler {

    @ExceptionHandler(Exception.class)
    @ResponseBody
    public Result handleAuthorizationException(UnauthorizedException e) {

        String message = "权限认证失败";
        return ResultFactory.buildFailResult(message);
    }
}
为了验证效果,我们注释掉之前的 shiro 配置中关于自定义拦截器的部分。然后用 authc 过滤器保护后台所有接口,也就是说需要先登录再判断是否存在权限:
filterChainDefinitionMap.put("/api/admin/**", "authc");
// shiroFilterFactoryBean.setFilters(customizedFilter);
shiroFilterFactoryBean.setFilterChainDefinitionMap(filterChainDefinitionMap);
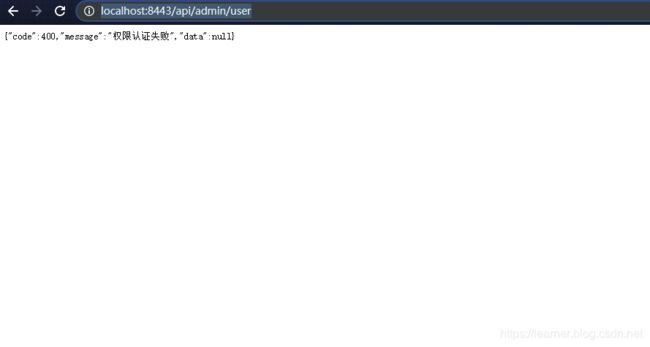
测试一下,用 editor 用户登录,访问用户信息接口
下一步
目前虽然两个层级的访问控制逻辑大概完成了,但还有很多累活需要做,比如用户信息修改、角色信息修改、角色分配、权限分配等等,这些背后的工作不是主线,如果有需要特别注意的地方我会在后面的文章提到。
数据级访问控制的实现需要依托一些具体功能,所以在这之前会先写别的方面。
本篇文章 Shiro 的部分主要参考自:How2J.cn - Shiro 系列教材
另外由于提问的读者越来越多了,我决定中午 12 点到 12 点半集中精力回答,尽量提高一些效率。
上一篇:Vue + Spring Boot 项目实战(十五):动态加载后台菜单
下一篇:Vue + Spring Boot 项目实战(十七):后台角色、权限与菜单分配
