给Guns【基于springboot框架】加入一个富文本编辑器wangEditor
最近写一个小demo,想在Guns中加入一个富文本编辑器,参考网上的一些资料,现在的富文本编辑器非常多,比较出名的有百度的UEditor,功能很多,但是就是因为功能太多,很多功能是用不上的,所以加进去后看起来太过繁杂,所以选用了另外一个富文本编辑器——wangEditor,使用也非常简单
wangEditor地址:http://www.wangeditor.com/
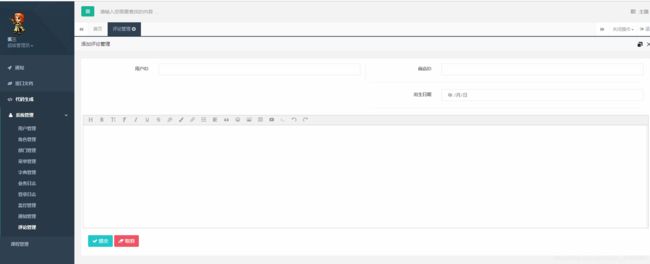
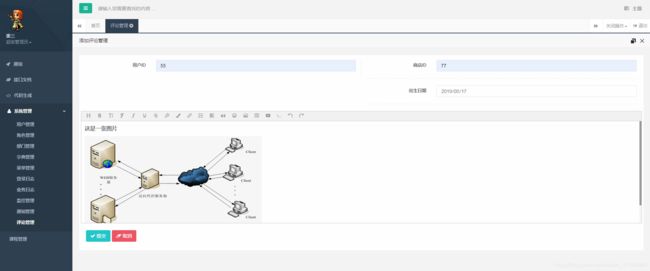
效果如图

先下载wangeditor的源码

把下载下来的编辑器源码直接放进Guns项目中static文件中

接下来就是将编辑器放入页面中了,先解决编辑文字的问题,只需在html页面和js文件中加入以下代码
$(function() {
    var E = window.wangEditor
    var editor = new E('#editor')

    // 或者 var editor = new E( document.getElementById('editor') )

    editor.create()
    /*editor.txt.html($("#contentVal").val())*/
    //获取富文本编辑器中的内容
    editor.txt.html()

});
贴上html页面和js的完整代码
review_add.html
@layout("/common/_container.html"){


                            <#input id="uid" name="用户ID"/>


                            <#input id="sid" name="商店ID" underline="true"/>
                            <#input id="createDate" name="出生日期" underline="true" type="date"
                                    clickFun="laydate({istime: false, format: 'YYYY-MM-DD'})"/>


                    <#button btnCss="info" name="提交" id="ensure" icon="fa-check" clickFun="ReviewInfoDlg.addSubmit()"/>
                    <#button btnCss="danger" name="取消" id="cancel" icon="fa-eraser" clickFun="ReviewInfoDlg.close()"/>


@}
review_info.js
/**
 * 初始化评论管理详情对话框
 */
var ReviewInfoDlg = {
    reviewInfoData : {}
};

/**
 * 清除数据
 */
ReviewInfoDlg.clearData = function() {
    this.reviewInfoData = {};
}

/**
 * 设置对话框中的数据
 *
 * @param key 数据的名称
 * @param val 数据的具体值
 */
ReviewInfoDlg.set = function(key, val) {
    this.reviewInfoData[key] = (typeof val == "undefined") ? $("#" + key).val() : val;
    return this;
}

/**
 * 设置对话框中的数据
 *
 * @param key 数据的名称
 * @param val 数据的具体值
 */
ReviewInfoDlg.get = function(key) {
    return $("#" + key).val();
}

/**
 * 关闭此对话框
 */
ReviewInfoDlg.close = function() {
    parent.layer.close(window.parent.Review.layerIndex);
}

/**
 * 收集数据
 */
ReviewInfoDlg.collectData = function() {

    var temp = document.createElement("div");
    temp.textContent=ReviewInfoDlg.editor.txt.html();
    var output = temp.innerHTML;
    /*console.log("output内容是"+output)*/
    this.reviewInfoData['content'] = output

    this
    .set('id')
    .set('uid')
    .set('sid').set('createDate')
    ;
}

/**
 * 提交添加
 */
ReviewInfoDlg.addSubmit = function() {

    this.clearData();
    this.collectData();

    //提交信息
    var ajax = new $ax(Feng.ctxPath + "/review/add", function(data){
        Feng.success("添加成功!");
        window.parent.Review.table.refresh();
        ReviewInfoDlg.close();
    },function(data){
        Feng.error("添加失败!" + data.responseJSON.message + "!");
    });
    ajax.set(this.reviewInfoData);
    ajax.start();
}

/**
 * 提交修改
 */
ReviewInfoDlg.editSubmit = function() {

    this.clearData();
    this.collectData();

    //提交信息
    var ajax = new $ax(Feng.ctxPath + "/review/update", function(data){
        Feng.success("修改成功!");
        window.parent.Review.table.refresh();
        ReviewInfoDlg.close();
    },function(data){
        Feng.error("修改失败!" + data.responseJSON.message + "!");
    });
    ajax.set(this.reviewInfoData);
    ajax.start();
}

$(function() {
    var E = window.wangEditor
    var editor = new E('#editor')

    // 或者 var editor = new E( document.getElementById('editor') )

    editor.create()
    /*editor.txt.html($("#contentVal").val())*/
    editor.txt.html()
    ReviewInfoDlg.editor = editor

});
后端java代码片段
/**
     * 新增评论管理
     */
    @RequestMapping(value = "/add")
    @ResponseBody
    public Object add(Review review) {
        String content=HtmlUtils.htmlUnescape(review.getContent());
        review.setContent(content);
        reviewService.insert(review);
        return super.SUCCESS_TIP;
    }
运行项目测试存储一条数据到数据库中

是没有问题的 ,然后加入图片上传功能,这里我打算将图片上传到项目路径下,springboot框架和SSM框架不一样在于,springboot是内置tomcat,springboot中不是将项目上传到webroot下面,也不是上传到缓存中,而是上传到运行资源中,也就是target目录中的static的某个文件夹中,而不是源代码static的某个文件中
首先在上传js文件基础上新增图片的一些参数和上传的监听函数
var E = window.wangEditor
    var editor = new E('#editor')

    // 或者 var editor = new E( document.getElementById('editor') )
    // 配置服务器端地址,也就是controller的请求路径,不带项目路径,前面没有/
    editor.customConfig.uploadImgServer = '/review/upload/editor/img';
    //配置属性名称,绑定请求的图片数据
    //controller会用到,可以随便设置,但是一定要与controller一致
    editor.customConfig.uploadFileName = 'img';
    editor.customConfig.uploadImgMaxSize = 3 * 1024 * 1024
    editor.customConfig.uploadImgMaxLength = 5

    editor.create()
    /*editor.txt.html($("#contentVal").val())*/
    editor.txt.html()
    ReviewInfoDlg.editor = editor
editor.customConfig.uploadImgHooks = {
        before: function (xhr, editor, files) {
            // 图片上传之前触发
            // xhr 是 XMLHttpRequst 对象,editor 是编辑器对象,files 是选择的图片文件

            // 如果返回的结果是 {prevent: true, msg: 'xxxx'} 则表示用户放弃上传
            // return {
            //     prevent: true,
            //     msg: '放弃上传'
            // }
        },
        success: function (xhr, editor, result) {
            // 图片上传并返回结果,图片插入成功之后触发
            // xhr 是 XMLHttpRequst 对象,editor 是编辑器对象,result 是服务器端返回的结果
        },
        fail: function (xhr, editor, result) {
            // 图片上传并返回结果,但图片插入错误时触发
            // xhr 是 XMLHttpRequst 对象,editor 是编辑器对象,result 是服务器端返回的结果
        },
        error: function (xhr, editor) {
            // 图片上传出错时触发
            // xhr 是 XMLHttpRequst 对象,editor 是编辑器对象
        },
        timeout: function (xhr, editor) {
            // 图片上传超时时触发
            // xhr 是 XMLHttpRequst 对象,editor 是编辑器对象
        },

        // 如果服务器端返回的不是 {errno:0, data: [...]} 这种格式,可使用该配置
        // (但是,服务器端返回的必须是一个 JSON 格式字符串!!!否则会报错)
        customInsert: function (insertImg, result, editor) {
            // 图片上传并返回结果,自定义插入图片的事件(而不是编辑器自动插入图片!!!)
            // insertImg 是插入图片的函数,editor 是编辑器对象,result 是服务器端返回的结果

            // 举例:假如上传图片成功后,服务器端返回的是 {url:'....'} 这种格式,即可这样插入图片:
            var url = result.url
            insertImg(url)

            // result 必须是一个 JSON 格式字符串!!!否则报错
        }
    }
java后端代码
新增一个dto,作为返回的对象
package com.stylefeng.guns.common.persistence.model;

public class ImgResultDto {
    private int  errno;//错误代码

    private String[] data;//存放数据

    public int getErrno() {
        return errno;
    }

    public void setErrno(int errno) {
        this.errno = errno;
    }

    public String[] getData() {
        return data;
    }

    public void setData(String[] data) {
        this.data = data;
    }
}
图片上传处理代码,我将很多逻辑处理放在了controller里面,其实这样很不规范。。。
/**
     * 上传图片
     */
    @ResponseBody
    @RequestMapping(value="/upload/editor/img")
    //RequestParam中的属性名称要和前端定义的一致,上面说明了.所以写"img"
    //使用List进行接收
    //返回的是一个Dto类,后面会说明,使用@ResponseBody会将其转换为Json格式数据
    public ImgResultDto uploadEditorImg(@RequestParam("img") List list,HttpSession session,HttpServletRequest request) {
        //获取运行状态(编译状态)staitc文件目录,将图片上传到文件下
        String path= Class.class.getClass().getResource("/").getPath();
        path= path+"static"+File.separator+"uploadfiles";
        System.out.println("fileUrl:"+path);

        ImgResultDto imgResultDto = new ImgResultDto();
        String[] urlData = new String[5];
        int index = 0;
        try{
            for(MultipartFile img : list) {
                //获取原始文件名,比如你上传的是 图片.jpg,则fileName=图片.jpg
                String fileName = img.getOriginalFilename();
                if(fileName == "") {
                    continue;
                }
                //处理文件名字
                String Code = new SimpleDateFormat("yyyyMMddHHmmssSSS").format(new Date()) + RandomUtils.nextInt(10000);
                String newName=Code+fileName.substring(fileName.lastIndexOf("."));
                System.out.println("新的文件名"+newName);


                File file = new File(path, newName);
                if (!file.getParentFile().exists()){
                    file.getParentFile().mkdirs();
                }
                //存入文件
                img.transferTo(file);

                String url =request.getContextPath()+"/static/uploadfiles/"+newName;
                urlData[index++]=url;
                System.out.println("Url:"+url);
                //设置异常代号
                imgResultDto.setErrno(0);
            }
            imgResultDto.setData(urlData);
            //返回Dto
            return imgResultDto;
        }catch (Exception e){
            e.printStackTrace();
            return imgResultDto;
        }

    }
这部分就处理完了,试验一下
可以正常回传显示了 ,看看我在控制台打印的文件路径,我们的图片就是传到了这个路径下,并且回传给了前端显示

保存到数据库中

这里就完成了编辑器的新增功能了