Android(8.0treble)多用户问题整理
#多用户问题整理
1.模块图上的虚线和实现分别的含义
A:虚线代表的是模块间的IPC调用,包括binder,socket,intent
B:实现代表的就是直接的函数调用或者消息通知(不包括intent,指的是MessageQueue)
2.每个用户下的package list是否一样
package.list文件位置在/data/system/目录下,和用户独立。
3.packages.list 的格式是什么?
em/app, /vendor/app 是否在用户创建时也在这个list中?
package.list的格式如下:
第一列:app的包名
第二列:app运行时使用的uid
第三列:标记app是否处于调试模式
第四列:app数据的存放位置
第五列:app的seinfo信息,有platform和default区分
第六列:app所属的用户组
而从下图可以看到vendor的app(amapauto是高德地图)也在这个list中![vender app in
4./data/sysem/users/{id}下面具体的是什么? data/user/{userid}/{pkgname}/cache 里面是什么
/data/sysem/users/{id}目录中存放的是用户的一些配置文件
![]()
5.第三方app的cache是什么
第三方APP的cache在之前的基本设计中指的是/data/system/users/${id}/cache目录,从目前演示机上看,所预装的第三方app,主要包括酷我,喜马拉雅,高德地图,都没有使用该目录,而当使用下载功能时,三款APP使用的都是/storage/emulated/目录。
6.当用户切换机能发生时,如果由于app的界面刷新有误,让用户去选择切换到ruxiatu一个已经被删除的用户,会不会发生错误,系统有什么check动作?
app要使用用户切换的机能,是需要调用am的switchUser接口函数的,这个入口对应ActivityManagerService的switchUser函数,函数开始有这么一段check
@Override
    public boolean switchUser(final int targetUserId) {
        enforceShellRestriction(UserManager.DISALLOW_DEBUGGING_FEATURES, targetUserId);
        int currentUserId;
        UserInfo targetUserInfo;
        synchronized (this) {
            currentUserId = mUserController.getCurrentUserIdLocked();
            targetUserInfo = mUserController.getUserInfo(targetUserId);
            if (targetUserId == currentUserId) {
                Slog.i(TAG, "user #" + targetUserId + " is already the current user");
                return true;
            }
            if (targetUserInfo == null) {
                Slog.w(TAG, "No user info for user #" + targetUserId);
                return false;
            }
可以看到,当使用切换的目标用户的用户ID无法找到targetUserInfo的话,会返回错误的。
if (targetUserInfo == null) {
                Slog.w(TAG, "No user info for user #" + targetUserId);
                return false;
            }
7.在用户切换的步骤中,在发出USERBACKGROUND通知前,有一步是应用用户访问权限,该步骤的具体内容是什么?
该步骤是在WMS和IMS分别冻结了屏幕和输入后,由UserManagerService执行applyUserRestrictionsLR函数来将/data/system/users/${userid}.xml中保存的用户限制应用到当前生效的用户限制缓存汇中(mCachedEffectiveUserRestrictions)。
// Package private for the inner class.
    void applyUserRestrictionsLR(int userId) {
        updateUserRestrictionsInternalLR(null, userId);
    }

    private void updateUserRestrictionsInternalLR(
            @Nullable Bundle newBaseRestrictions, int userId) {
        final Bundle prevAppliedRestrictions = UserRestrictionsUtils.nonNull(
                mAppliedUserRestrictions.get(userId));

        // Update base restrictions.
        if (newBaseRestrictions != null) {
            ......
        }

        final Bundle effective = computeEffectiveUserRestrictionsLR(userId);

        mCachedEffectiveUserRestrictions.put(userId, effective);
        ......
    }

    @GuardedBy("mRestrictionsLock")
    private Bundle computeEffectiveUserRestrictionsLR(int userId) {
        final Bundle baseRestrictions =
                UserRestrictionsUtils.nonNull(mBaseUserRestrictions.get(userId));
        final Bundle global = UserRestrictionsUtils.mergeAll(mDevicePolicyGlobalUserRestrictions);
        final Bundle local = mDevicePolicyLocalUserRestrictions.get(userId);

        if (UserRestrictionsUtils.isEmpty(global) && UserRestrictionsUtils.isEmpty(local)) {
            // Common case first.
            return baseRestrictions;
        }
        final Bundle effective = UserRestrictionsUtils.clone(baseRestrictions);
        UserRestrictionsUtils.merge(effective, global);
        UserRestrictionsUtils.merge(effective, local);

        return effective;
    }

     //下面是mBaseUserRestrictions和mDevicePolicyGlobalUserRestrictions的来源

	 UserData readUserLP(int id, InputStream is) throws IOException,
            XmlPullParserException {
        Bundle baseRestrictions = null;
        Bundle localRestrictions = null;
        Bundle globalRestrictions = null;

        XmlPullParser parser = Xml.newPullParser();
        parser.setInput(is, StandardCharsets.UTF_8.name());
        ........
        while ((type = parser.next()) != XmlPullParser.END_DOCUMENT && ....) {
            if (TAG_RESTRICTIONS.equals(tag)) {
                    baseRestrictions = UserRestrictionsUtils.readRestrictions(parser);
                } else if (TAG_DEVICE_POLICY_RESTRICTIONS.equals(tag)) {
                    localRestrictions = UserRestrictionsUtils.readRestrictions(parser);
                } else if (TAG_DEVICE_POLICY_GLOBAL_RESTRICTIONS.equals(tag)) {
                    globalRestrictions = UserRestrictionsUtils.readRestrictions(parser);
                }
                ......
            }
        ......
        synchronized (mRestrictionsLock) {
            if (baseRestrictions != null) {
                mBaseUserRestrictions.put(id, baseRestrictions);
            }
            if (localRestrictions != null) {
                mDevicePolicyLocalUserRestrictions.put(id, localRestrictions);
            }
            if (globalRestrictions != null) {
                mDevicePolicyGlobalUserRestrictions.put(id, globalRestrictions);
            }
    }

    private UserData readUserLP(int id) {
        FileInputStream fis = null;
        try {
            AtomicFile userFile =
                    new AtomicFile(new File(mUsersDir, Integer.toString(id) + XML_SUFFIX));
            fis = userFile.openRead();
            return readUserLP(id, fis);
            .....
    }

    private void readUserListLP() {
        ......
        AtomicFile userListFile = new AtomicFile(mUserListFile);
        ......
        try {
            fis = userListFile.openRead();
 			  XmlPullParser parser = Xml.newPullParser();
            parser.setInput(fis, StandardCharsets.UTF_8.name());
            while ((type = parser.next()) != XmlPullParser.END_DOCUMENT) {
            	......
            	String id = parser.getAttributeValue(null, ATTR_ID);
              UserData userData = readUserLP(Integer.parseInt(id));
              ......
        }
        catch (IOException | XmlPullParserException e) {
        }
        finally {
            IoUtils.closeQuietly(fis);
        }
    }
可以看到,readUserListLP加载了每个用户对应用户id的xml文件,即/data/system/${userid}.xml,然后读取其中配置的限制,限制分为三类(basic, local,global),会在用户切换时应用到用户生效限制缓存中去。
8.用户切换的耗时
XXX:/ $ am switch-user 10
XXX:/ $ 01-01 08:00:39.546  5535  5535 I USER_EVENT_CATCH: android.intent.action.USER_STARTED
01-01 08:00:39.546  5535  5535 I USER_EVENT_CATCH: userId:10
01-01 08:00:39.548  5535  5535 I USER_EVENT_CATCH: serid:10,serialNumber:10
01-01 08:00:39.548  5535  5535 I USER_EVENT_CATCH: android.intent.action.USER_BACKGROUND
01-01 08:00:39.548  5535  5535 I USER_EVENT_CATCH: userId:0
01-01 08:00:39.549  5535  5535 I USER_EVENT_CATCH: userid:0,serialNumber:0
01-01 08:00:39.553  5535  5535 I USER_EVENT_CATCH: android.intent.action.USER_FOREGROUND
01-01 08:00:39.553  5535  5535 I USER_EVENT_CATCH: userId:10
01-01 08:00:39.553  5535  5535 I USER_EVENT_CATCH: userid:10,serialNumber:10
01-01 08:00:39.554  5535  5535 I USER_EVENT_CATCH: android.intent.action.USER_SWITCHED
01-01 08:00:39.554  5535  5535 I USER_EVENT_CATCH: userId:10
01-01 08:00:39.565  5535  5535 I USER_EVENT_CATCH: userid:10,serialNumber:10
01-01 08:00:39.946  5535  5535 I USER_EVENT_CATCH: android.intent.action.USER_UNLOCKED
01-01 08:00:39.946  5535  5535 I USER_EVENT_CATCH: userId:10
01-01 08:00:39.947  5535  5535 I USER_EVENT_CATCH: userid:10,serialNumber:10
01-01 08:00:40.147  5535  5535 I USER_EVENT_CATCH: android.intent.action.USER_STARTING
01-01 08:00:40.147  5535  5535 I USER_EVENT_CATCH: userId:10
01-01 08:00:40.148  5535  5535 I USER_EVENT_CATCH: userid:10,serialNumber:10
01-01 08:00:40.204  5535  5535 I USER_EVENT_CATCH: android.intent.action.LOCKED_BOOT_COMPLETED
01-01 08:00:40.204  5535  5535 I USER_EVENT_CATCH: userId:10
01-01 08:00:40.205  5535  5535 I USER_EVENT_CATCH: userid:10,serialNumber:10
01-01 08:00:41.580  5535  5535 I USER_EVENT_CATCH: android.intent.action.BOOT_COMPLETED
01-01 08:00:41.580  5535  5535 I USER_EVENT_CATCH: userId:10
01-01 08:00:41.581  5535  5535 I USER_EVENT_CATCH: userid:10,serialNumber:10
从日志上看,耗时在2秒左右,有时候会3秒。
9.切换用户过程中intent的发送流程
10.在启动过程中,如果目标用户状态是BOOTING的情况下,会让“WMS重新设置字体以及屏幕分辨率” ,这个动作需要确认
1.设置分辨率应该更正为设置DPI,这个动作是指在WindowManagerService的setCurrentUser函数中调用setForcedDisplayDensityLocked函数。
public void setCurrentUser(final int newUserId, final int[] currentProfileIds{
    synchronized (mWindowMap) {
        ......
    	 // If the display is already prepared, update the density.
        // Otherwise, we'll update it when it's prepared.
        if (mDisplayReady) {
        	  //根据用户id获取DPI设置
            final int forcedDensity = getForcedDisplayDensityForUserLocked(newUserId);
            //如果没有设置用户对应的DPI则使用默认的DPI设置
            final int targetDensity = forcedDensity != 0 ? forcedDensity
                        : displayContent.mInitialDisplayDensity;
            setForcedDisplayDensityLocked(displayContent, targetDensity);
        }
    }
}
mDisplayReady的设置是在systemserver的run中就设置了的
private void startOtherServices() {
    ......
    traceBeginAndSlog("MakeDisplayReady");
    try {
        wm.displayReady();
    } catch (Throwable e) {
        reportWtf("making display ready", e);
    }
    traceEnd();
    ......
}

private void run() {
    ......
    // Start services.
    try {
        traceBeginAndSlog("StartServices");
        ......
        startOtherServices();
        ......
    } catch (Throwable ex) {
        Slog.e("System", "******************************************");
        Slog.e("System", "************ Failure starting system services", ex);
        throw ex;
    } finally {
        traceEnd();
    }
    ......
}
所以,设置屏幕DPI的动作在切换用户中是不执行的,基本设计中需要修改。
2.设置语言和字体
设置语言和字体的入口在UserCtroller::startUser中调用mInjector.updateUserConfigurationLocked();这个会进入ActivityManagerService的updateUserConfigurationLocked。
void updateUserConfigurationLocked() {
    final Configuration configuration = new Configuration(getGlobalConfiguration());
    final int currentUserId = mUserController.getCurrentUserIdLocked();
    //从
    Settings.System.adjustConfigurationForUser(mContext.getContentResolver(), configuration,
            currentUserId, Settings.System.canWrite(mContext));
    updateConfigurationLocked(configuration, null /* starting */, false /* initLocale */,
            false /* persistent */, currentUserId, false /* deferResume */);
}
其中Settings是android.provider.Settings,System是其内部类,adjustConfigurationForUser函数定义如下
public static void adjustConfigurationForUser(ContentResolver cr, Configuration outConfig,
                int userHandle, boolean updateSettingsIfEmpty) {
     //获取字体的大小
     outConfig.fontScale = Settings.System.getFloatForUser(
                    cr, FONT_SCALE, DEFAULT_FONT_SCALE, userHandle);
     if (outConfig.fontScale < 0) {
         outConfig.fontScale = DEFAULT_FONT_SCALE;
     }
     //获取语言设置
     final String localeValue =
                    Settings.System.getStringForUser(cr, SYSTEM_LOCALES, userHandle);
     .......
}
11.创建用户的过程中,如果突然断电,会不会造成新用户的文件创建失败,文件损坏或者目录损坏。
如果突然断电,那么新用户的某些文件或者目录创建失败是非常有可能的。
创建用户的过程中,文件和目录的创建都是在UserManagerService中执行的
private UserInfo createUserInternalUnchecked(String name, int flags, int parentId,
            String[] disallowedPackages) {
    ......
    userId = getNextAvailableId();
    Environment.getUserSystemDirectory(userId).mkdirs();
    userInfo = new UserInfo(userId, name, null, flags);
    userInfo.serialNumber = mNextSerialNumber++;
    long now = System.currentTimeMillis();
    userInfo.creationTime = (now > EPOCH_PLUS_30_YEARS) ? now : 0;
    userInfo.partial = true;  //这个字段标志用户创建完整度 true:未创建完成 false:创建完成15.
    userData = new UserData();
    userData.info = userInfo;
    mUsers.put(userId, userData);
    writeUserLP(userData);   //新用户信息写入/data/system/users/${userid}.xml
    writeUserListLP();  //用户id写入/data/system/users/userlist.xml
    //创建用户key
    storage.createUserKey(userId, userInfo.serialNumber, userInfo.isEphemeral());
    //
    mUserDataPreparer.prepareUserData(userId, userInfo.serialNumber,
                    StorageManager.FLAG_STORAGE_DE | StorageManager.FLAG_STORAGE_CE);
    mPm.createNewUser(userId, disallowedPackages);
    userInfo.partial = false;
    synchronized (mPackagesLock) {
        writeUserLP(userData);
    }
    ......
}
12.system UI 为什么一定要对应多用户?起第二个是为了什么?
从源代码上看,其第二个SystemUI进程的目的是在于新建某几个多用户下必须隔离的SystemUI对象(Dependency, NotificationChannel, Recents),Recents是最近任务管理界面,对于每一个用户,该对象需要保持独立,因此,在第二个用户下,对于需要对用户独立运行的SystemUI对象,就在新用户下单独启动进程运行SystemUI,创建这些SystemUI的对象。
下面是SystemApplicationUI.java中创建目标用户下SystemUI的代码:
private final Class<?>[] SERVICES_PER_USER = new Class[] {
    Dependency.class,
    NotificationChannels.class,
    Recents.class
};
void startSecondaryUserServicesIfNeeded() {
    startServicesIfNeeded(SERVICES_PER_USER);
}
13. CE和DE 定义是什么?有什么不同?
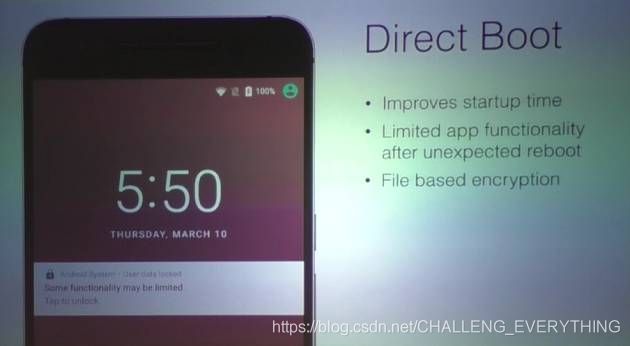
DirectBoot:直接启动,7.0版本开始支持,当首次开机时,如果用户还未来得及解锁,此时,设备会启动到直接启动模式,在这个模式下操作系统可以全功能运行,但是无法访问私有应用数据,只能运行支持直接启动功能的应用。

像短信,相机还有闹钟这类应用就属于需要支持直接启动功能的应用。
如果希望自己的应用支持直接启动的功能,那么需要在应用的组件属性中增加android:directBootAware=”true”
而为了支持直接启动的应用可以访问自己的应用数据,android为所有的应用提供了两个存储位置:
- 凭证加密存储空间(CE):默认存储位置,用户解锁后可以使用
- 设备加密存储空间(DE):直接启动以及用户解锁后都可以使用
同时,创建用户时,系统也为用户创建了用户加密解密这两个存储空间所使用的user-key。
支持直接启动的应用组件必须使用设备加密存储空间来存储直接启动模式期间应用需要存取的任何数据,而在用户解锁了设备后,该应用和组件仍然可以访问凭证加密存储空间。
换句话说,如果所出的平台和应用不存在用户解锁的情况,那么就不需要去考虑DE存储空间,也不需要考虑将应用做成支持直接启动的应用。
