Android 自定义PopupWindow 实现 ListView与PopupWindow结合下拉框
转载请标明出处:http://blog.csdn.net/u010886975/article/details/52711611
1.说明
1.1 项目中要求用下拉框弹出一个带有listView的选择框,开始想到spinner来实现,但是那个效果着实不好看,后来用PopupWindow,加listView的布局文件来实现,但是使用的地方多了,就想着把他们弄到一个控件里面,免得麻烦。最后效果如下,用法和PopupWindow一样。Android菜鸟一枚,请大神们指教。
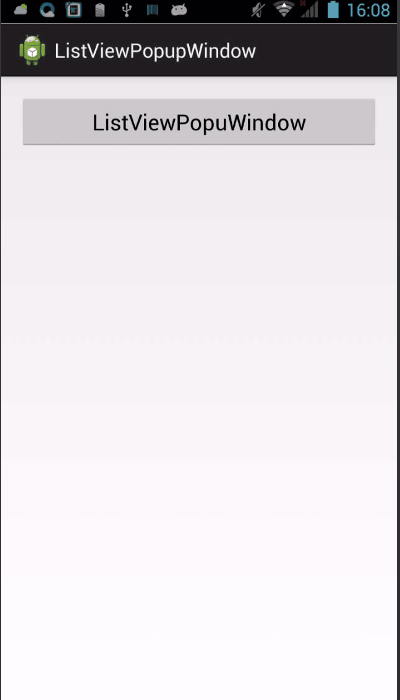
2.效果图
3.自定义
3.1 定义效果:显示由上向下,消失由下向上。在anim中定义两个动画。
popupwindow_show:
<set xmlns:android="http://schemas.android.com/apk/res/android">
    <scale  android:interpolator="@android:anim/accelerate_decelerate_interpolator"
        android:fromXScale="1.0"
        android:toXScale="1.0"
        android:fromYScale="0.0"
        android:toYScale="1.0"
        android:pivotX="0%"
        android:pivotY="0%"
        android:fillAfter="false"
        android:duration="500" >
    scale>
set>
popupwindow_gone:
<set xmlns:android="http://schemas.android.com/apk/res/android">
    <scale  android:interpolator="@android:anim/accelerate_decelerate_interpolator"
        android:fromXScale="1.0"
        android:toXScale="1.0"
        android:fromYScale="1.0"
        android:toYScale="0.0"
        android:pivotX="0%"
        android:pivotY="0%"
        android:fillAfter="false"
        android:duration="500" >
    scale>
set>
在style.xml中引用定义的动画:
3.2 定义控件:
第一步:定义ListViewPopuWindow继承自PopupWindow;
接着定义一个ListView
 listView = new ListView(mContext);
 listView.setSelector(R.drawable.listview_item_selector);
 listView.setCacheColorHint(Color.TRANSPARENT);
 listView.setVerticalScrollBarEnabled(false);
 listView.setDivider(new ColorDrawable(Color.parseColor("#caced1")));
 listView.setDividerHeight(2);
有listView,那么adapter肯定不能少的。这里adapter没什么好说的。要说的adapter中的getView方法,这个返回view,没有用布局文件,当然你也可以用布局文件。我们直接用代码生成:
private LinearLayout createSingleView(String name) {
            LinearLayout ll = new LinearLayout(mContext);
            ll.setBackgroundColor(Color.TRANSPARENT);
            ll.setGravity(Gravity.CENTER);
            LinearLayout.LayoutParams rlp = new LinearLayout.LayoutParams(
                    ViewGroup.LayoutParams.WRAP_CONTENT, ViewGroup.LayoutParams.WRAP_CONTENT);

            ll.setOrientation(LinearLayout.HORIZONTAL);
            TextView tv = new TextView(mContext);
            tv.setText(name);
            tv.setFocusable(false);
            tv.setTextSize(textSize);
            tv.setPadding(0, 20, 0, 20);
            tv.setTextColor(Color.parseColor(textColor));
            ll.addView(tv, rlp);
            return ll;
        }
接下来在构造方法中设置PopupWindow的一些必要属性和动画:
    // 设置SelectPicPopupWindow弹出窗体的宽
        this.setWidth(w);
        // 设置SelectPicPopupWindow弹出窗体的高
        this.setHeight(h);

        initView();

        this.setBackgroundDrawable(mContext.getResources().getDrawable(R.drawable.bg_listview_popuwindow_white));
        this.setFocusable(true);
        this.setOutsideTouchable(true);
        this.setContentView(parentLinear);
        this.update();
        this.setAnimationStyle(R.style.popwin_anim_style);
这里需要注意的是:需要有一个viewGroup来装我们的listView,然后把viewGroup设置到PopupWindow中。这里的viewGroup就是parentLinear,也可以,把listView直接设置到PopupWindow中,我这样做是方便设置背景图片。例如弹框的外形什么的。
其实代码真的没什么难度,很简单的,只是把listview,和adapter放到空间里边去了。现在要做的就是,要实现一个接口。以便于我们在点击item的时候。返回我们想要的信息:
    public interface MyClickListener {
        void ItemClick(int index, String str);
    }

    public void setOnMyItemClickListener(MyClickListener listener) {
        mYitemClickListener = listener;
    }
然后在listView的item点击事件中把信息传出去:
 listView.setOnItemClickListener(new OnItemClickListener() {

            @Override
            public void onItemClick(AdapterView arg0, View arg1, int index,
                    long arg3) {
                mYitemClickListener.ItemClick(index,mStrings[index]);
            }
        });
这里的mStrings是数据源。
3.使用
int[] location = new int[2];
        button.getLocationOnScreen(location);

        final ListViewPopuWindow popupWindow = new ListViewPopuWindow(
                this, tv_state_value, ViewGroup.LayoutParams.MATCH_PARENT,
                ViewGroup.LayoutParams.WRAP_CONTENT,0);
        popupWindow.setOnMyItemClickListener(new ListViewPopuWindow.MyClickListener() {
            @Override
            public void ItemClick(int index, String str) {
                button.setText(str);
                popupWindow.dismiss();
            }
        });
        popupWindow.setOnDismissListener(new PopupWindow.OnDismissListener() {

                @Override
                public void onDismiss() {
                //处理popupWindow消失时处理的事情
                }
            });
    popupWindow.showAtLocation(button, Gravity.NO_GRAVITY,
            location[0], location[1] + button.getHeight());
使用的是我们只需要传一个,context,数据源,宽,高,背景图片id。这里宽高可以是ViewGroup.LayoutParams.WRAP_CONTENT。button.getLocationOnScreen(location)是为了拿到显示位置。
到这里就写完了。希望能对人有帮助。不明白的地方可以私信我。
demo下载地址:http://download.csdn.net/detail/u010886975/9648787