spring boot+mybatis+ajax实现注册功能和问题总结
文章目录
- 前言
- 正文
-
- 业务场景和环境
-
- 环境
- 业务场景
- 详细代码
-
- pom.xml配置
- application.yml配置
- DruidConfig.java
- MyMvcConfig.java
- generatorConfig.xml
- 实体类User
- UserMapper接口(dao层接口)
- UserMapper.xml映射
- UserService.java
- UserServiceImpl.java
- RegisterController.java
- RespEntity.java
- RespCode.java
- AJAX和html
- 总结
前言
该文章用来归纳一下,并且给需要的人做参考,希望可以帮助到大家,如果有什么写的不对的,可以指出来共同讨论共同进步。
不用aja直接跳转页面可以看一下 利用IDEA搭建SpringBoot项目,整合mybatis,实现简单的登录功能。这篇文章写的还行,只不过可能版本有点老,有些配置不太一样)
正文
业务场景和环境
环境
idea 2019.2+mysql5.7+spring boot2.2.2
数据库user表:

业务场景
如图所示,在该注册页面,输入相关信息,然后通过后端的逻辑判断一下注册是否合法,注册成功则跳出提示窗口显示“注册成功”并重定向到登录页面,注册失败则弹出注册失败,然后显示出失败的原因。
注册页面:

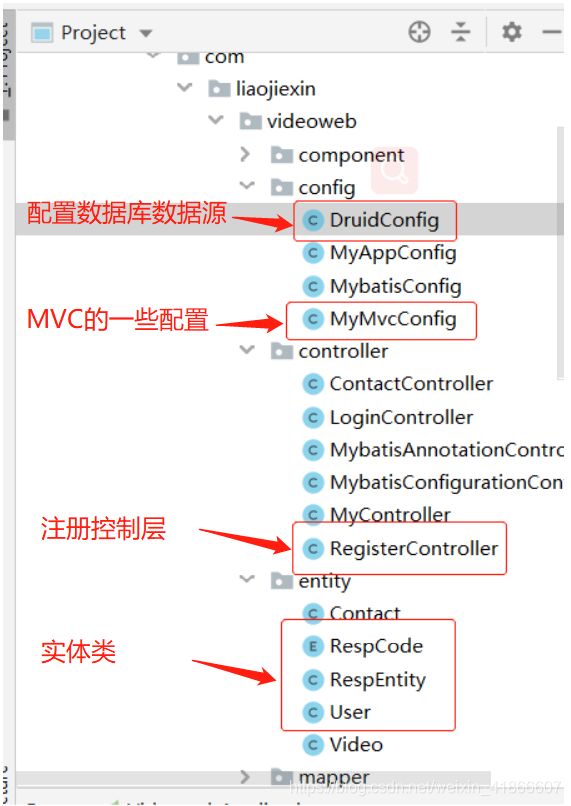
下面是我的项目包(红色框是要用到的,其他是项目别的功能)


详细代码
代码顺序我从底层到前端的顺序写,代码里面有注释可以看一下:
pom.xml配置
里面有注释按自己情况进行配置
<project xmlns="http://maven.apache.org/POM/4.0.0" xmlns:xsi="http://www.w3.org/2001/XMLSchema-instance"
         xsi:schemaLocation="http://maven.apache.org/POM/4.0.0 https://maven.apache.org/xsd/maven-4.0.0.xsd">
    <modelVersion>4.0.0modelVersion>


    <parent>
        <groupId>org.springframework.bootgroupId>
        <artifactId>spring-boot-starter-parentartifactId>
        <version>2.2.2.RELEASEversion>
        <relativePath/>
    parent>

    <groupId>com.liaojiexingroupId>
    <artifactId>videowebartifactId>
    <version>1.0.0-SNAPSHOTversion>
    <name>videowebname>
    <description>Demo project for Spring Bootdescription>

    <properties>
        <project.build.sourceEnconding>UTF-8project.build.sourceEnconding>
        <project.reporting.outputEnconding>UTF-8project.reporting.outputEnconding>
        <java.version>1.8java.version>
    properties>

    <dependencies>

        <dependency>
            <groupId>org.springframework.bootgroupId>
            <artifactId>spring-boot-starter-jdbcartifactId>
        dependency>

        <dependency>
            <groupId>org.springframework.bootgroupId>
            <artifactId>spring-boot-starter-webartifactId>
        dependency>

        <dependency>
            <groupId>org.mybatis.spring.bootgroupId>
            <artifactId>mybatis-spring-boot-starterartifactId>
            <version>2.1.1version>
        dependency>

        <dependency>
            <groupId>mysqlgroupId>
            <artifactId>mysql-connector-javaartifactId>
            <scope>runtimescope>
        dependency>


        <dependency>
            <groupId>com.alibabagroupId>
            <artifactId>druidartifactId>
            <version>1.1.8version>
        dependency>


        <dependency>
            <groupId>org.springframework.bootgroupId>
            <artifactId>spring-boot-configuration-processorartifactId>
            <optional>trueoptional>
        dependency>


        <dependency>
            <groupId>org.springframework.bootgroupId>
            <artifactId>spring-boot-starter-thymeleafartifactId>
        dependency>

        <dependency>
            <groupId>nz.net.ultraq.thymeleafgroupId>
            <artifactId>thymeleaf-layout-dialectartifactId>
        dependency>

        <dependency>
            <groupId>log4jgroupId>
            <artifactId>log4jartifactId>
            <version>1.2.17version>
        dependency>

        <dependency>
            <groupId>org.springframework.bootgroupId>
            <artifactId>spring-boot-starter-testartifactId>
            <scope>testscope>
            <exclusions>
                <exclusion>
                    <groupId>org.junit.vintagegroupId>
                    <artifactId>junit-vintage-engineartifactId>
                exclusion>
            exclusions>
        dependency>

        <dependency>
            <groupId>junitgroupId>
            <artifactId>junitartifactId>
            <scope>testscope>
        dependency>
    dependencies>


    <build>
        <plugins>
            <plugin>
                <groupId>org.springframework.bootgroupId>
                <artifactId>spring-boot-maven-pluginartifactId>
            plugin>

            <plugin>
                <groupId>org.mybatis.generatorgroupId>
                <artifactId>mybatis-generator-maven-pluginartifactId>
                <version>1.3.1version>
                <configuration>
                    <configurationFile>${basedir}/src/main/resources/generator/generatorConfig.xmlconfigurationFile>
                    <overwrite>trueoverwrite>
                    <verbose>trueverbose>
                configuration>
            plugin>
        plugins>
    build>

project>
application.yml配置
作用和application.properties是一样的,这里主要配置数据库连接和mybatis的连接。
spring:
  datasource:
    #   数据源基本配置
    username: root  #用户名
    password: 201314  #密码
    driver-class-name: com.mysql.cj.jdbc.Driver   #驱动名
    url: jdbc:mysql://192.168.0.113:3306/videoweb   #路径,这里用虚拟机的mysql
    type: com.alibaba.druid.pool.DruidDataSource    #数据源
    #   数据源其他配置
    initialSize: 5
    minIdle: 5
    maxActive: 20
    maxWait: 60000
    timeBetweenEvictionRunsMillis: 60000
    minEvictableIdleTimeMillis: 300000
    validationQuery: SELECT 1 FROM DUAL
    testWhileIdle: true
    testOnBorrow: false
    testOnReturn: false
    poolPreparedStatements: true
    #   配置监控统计拦截的filters,去掉后监控界面sql无法统计,'wall'用于防火墙
    filters: stat,wall,log4j
    maxPoolPreparedStatementPerConnectionSize: 20
    useGlobalDataSourceStat: true
    connectionProperties: druid.stat.mergeSql=true;druid.stat.slowSqlMillis=500

mybatis:
  config-location: classpath:mybatis/mybatis-config.xml
  mapper-locations: classpath:mybatis/mapper/*.xml    #或写MyMapper.xml等
DruidConfig.java
因为application.yml使用了阿里的Druid作为数据源,所以我们要写一个DruidConfig配配置一下,你也可以用springboot自带的,具体查看别人的教程
package com.liaojiexin.videoweb.config;

import com.alibaba.druid.pool.DruidDataSource;
import com.alibaba.druid.support.http.StatViewServlet;
import com.alibaba.druid.support.http.WebStatFilter;
import org.springframework.boot.context.properties.ConfigurationProperties;
import org.springframework.boot.web.servlet.FilterRegistrationBean;
import org.springframework.boot.web.servlet.ServletRegistrationBean;
import org.springframework.context.annotation.Bean;
import org.springframework.context.annotation.Configuration;

import javax.sql.DataSource;
import java.util.Arrays;
import java.util.HashMap;
import java.util.Map;

@Configuration
public class DruidConfig {


    @ConfigurationProperties(prefix = "spring.datasource")  //绑定spring.datasource属性,(application.yml)
    @Bean
    public DataSource druid(){
           //注册自己的数据源
        return new DruidDataSource();
    }

    //配置Druid的监控
    //1、配置一个管理后台的Servlet
    @Bean
    public ServletRegistrationBean statViewServlet(){

        ServletRegistrationBean bean = new ServletRegistrationBean(new StatViewServlet(), "/druid/*");
        Map<String,String> initParams = new HashMap<>();

        initParams.put("loginUsername","admin");
        initParams.put("loginPassword","123456");
        initParams.put("allow","");//默认就是允许所有访问

        bean.setInitParameters(initParams);
        return bean;
    }


    //2、配置一个web监控的filter
    @Bean
    public FilterRegistrationBean webStatFilter(){

        FilterRegistrationBean bean = new FilterRegistrationBean();
        bean.setFilter(new WebStatFilter());

        Map<String,String> initParams = new HashMap<>();
        initParams.put("exclusions","*.js,*.css,/druid/*");

        bean.setInitParameters(initParams);

        bean.setUrlPatterns(Arrays.asList("/*"));

        return  bean;
    }
}
MyMvcConfig.java
配置一下MVC,这里主要是做请求的映射,到时候前端页面js做跳转页面重定向时候可以用到(我的项目里面也有很多地方要用到,作用很大)
package com.liaojiexin.videoweb.config;

import org.springframework.context.annotation.Bean;
import org.springframework.context.annotation.Configuration;
import org.springframework.web.servlet.LocaleResolver;
import org.springframework.web.servlet.config.annotation.InterceptorRegistry;
import org.springframework.web.servlet.config.annotation.ViewControllerRegistry;
import org.springframework.web.servlet.config.annotation.WebMvcConfigurer;

@Configuration  //指明当前类是一个配置类;就是来替代之前的Spring配置文件
public class MyMvcConfig implements WebMvcConfigurer {

    //所有的WebMvcConfigurerAdapter组件都会一起起作用
    @Bean //将组件注册在容器
    public WebMvcConfigurer webMvcConfigurerAdapter() {

        WebMvcConfigurer adapter = new WebMvcConfigurer() {

            @Override
            public void addViewControllers(ViewControllerRegistry registry) {

                //addViewController为请求,setViewName为路径(spring boot设定为templates包下的路径,
                // 如registry.addViewController("/").setViewName("index");为发送“/”请求时,会跳到templates/index.html路径的页面 )
                registry.addViewController("/").setViewName("index");               //主页
                registry.addViewController("/index.html").setViewName("index");     //主页
                registry.addViewController("/login").setViewName("login");          //登录
                registry.addViewController("/register").setViewName("register");    //注册
            }
        };
        return adapter;
    }
}
generatorConfig.xml
配置generator,可以自动帮我创建实体类,mapper,xml映射。记得在pom.xml里面要配置generator,另外配置中classPathEntry的location可以直接用spring boot的数据库驱动包(如果有导入mysql的话应该就有),参考:mybatis逆向生成器配置文件中寻找mysql驱动位置classPathEntry中的location项-springboot
另外如果你的表名为user时可能会发生生成mysql的系统user表的错误,详情可见:自动生成 User 类的同时会生成 UserKey 及 UserWithBlob 类的问题的解决,不过我下面代码已经解决该问题了。
<generatorConfiguration>

    <classPathEntry  location="E:\graduation\maven\apache-maven-3.6.1\repo\mysql\mysql-connector-java\8.0.18\mysql-connector-java-8.0.18.jar"/>
    <context id="DB2Tables"  targetRuntime="MyBatis3">
        <commentGenerator>
            <property name="suppressDate" value="true"/>

            <property name="suppressAllComments" value="true"/>
        commentGenerator>

        <jdbcConnection driverClass="com.mysql.cj.jdbc.Driver" connectionURL="jdbc:mysql://192.168.0.113:3306/videoweb" userId="root" password="201314">

            <property name="nullCatalogMeansCurrent" value="true" />
        jdbcConnection>
        <javaTypeResolver>
            <property name="forceBigDecimals" value="false"/>
        javaTypeResolver>

        <javaModelGenerator targetPackage="com.liaojiexin.videoweb.entity" targetProject="src/main/java">
            <property name="enableSubPackages" value="true"/>
            <property name="trimStrings" value="true"/>
        javaModelGenerator>

        <sqlMapGenerator targetPackage="mybatis.mapper" targetProject="src/main/resources">
            <property name="enableSubPackages" value="true"/>
        sqlMapGenerator>

        <javaClientGenerator type="XMLMAPPER" targetPackage="com.liaojiexin.videoweb.mapper" targetProject="src/main/java">
            <property name="enableSubPackages" value="true"/>
        javaClientGenerator>

        <table tableName="user" domainObjectName="User" enableCountByExample="false" enableUpdateByExample="false" enableDeleteByExample="false" enableSelectByExample="false" selectByExampleQueryId="false">table>
    context>
generatorConfiguration>
配置完后可以启动,前提是你的mysql里面表要建好,用一下方式启动,或者上面generatorConfig.xml代码块后面有两行注释的链接里面的方式也可以启动。

启动完后会自动生成实体类,mapper.xml映射文件和dao层接口,下面贴出我的这三个文件。
(ps:这个文件生成后你可以按照自己的改,删掉一些不必要的,我的没删,那些有注释的基本上是我加上去的,其他是自动生成的)
实体类User
package com.liaojiexin.videoweb.entity;

import java.util.Date;

public class User {
              //用户
    private Integer uid;                //用户id
    private String username;            //用户名
    private String password;        //用户密码
    private String email;           //用户邮箱
    private Date birthday;     //用户出生日期

   省略get和set方法...
}
UserMapper接口(dao层接口)
package com.liaojiexin.videoweb.mapper;

import com.liaojiexin.videoweb.entity.User;
import org.apache.ibatis.annotations.Mapper;
import org.apache.ibatis.annotations.Param;
import org.springframework.stereotype.Repository;

@Repository
@Mapper
public interface UserMapper {

    int deleteByPrimaryKey(Integer uid);

    int insert(User record);

    int insertSelective(User record);

    User selectByPrimaryKey(Integer uid);

    int updateByPrimaryKeySelective(User record);

    int updateByPrimaryKey(User record);
    //用户登录
    User userlogin(@Param("username") String username, @Param("password") String password);
    //用户注册
    int userInsert(User user);
    //注册时查询是否有重复的用户名
    String usernameInsert(@Param("username") String username);
    //注册时查询是否有重复的邮箱
    String emailInsert(@Param("email") String email);
}
UserMapper.xml映射
<?xml version="1.0" encoding="UTF-8" ?>
<!DOCTYPE mapper PUBLIC "-//mybatis.org//DTD Mapper 3.0//EN" "http://mybatis.org/dtd/mybatis-3-mapper.dtd" >
<mapper namespace="com.liaojiexin.videoweb.mapper.UserMapper" >
  <resultMap id="BaseResultMap" type="com.liaojiexin.videoweb.entity.User" >
    <id column="uid" property="uid" jdbcType="INTEGER" />
    <result column="username" property="username" jdbcType="VARCHAR" />
    <result column="password" property="password" jdbcType="VARCHAR" />
    <result column="email" property="email" jdbcType="VARCHAR" />
    <result column="birthday" property="birthday" jdbcType="DATE" />
  </resultMap>
  <sql id="Base_Column_List" >
    uid, username, password, email, birthday
  </sql>

<!-- resultMap要先配置,设置入参字段映射 如上的<resultMap>标签 ,如果使用parameterType则不用配置-->
  <select id="selectByPrimaryKey" resultMap="BaseResultMap" parameterType="java.lang.Integer" >
    select
    <include refid="Base_Column_List" />
    from user
    where uid = #{
     uid,jdbcType=INTEGER}
  </select>
  <delete id="deleteByPrimaryKey" parameterType="java.lang.Integer" >
    delete from user
    where uid = #{
     uid,jdbcType=INTEGER}
  </delete>
  <insert id="insert" parameterType="com.liaojiexin.videoweb.entity.User" useGeneratedKeys="true" keyProperty="uid">
    insert into user (username, password,
      email, birthday)
    values (#{
     username,jdbcType=VARCHAR}, #{
     password,jdbcType=VARCHAR},
      #{
     email,jdbcType=VARCHAR}, #{
     birthday,jdbcType=DATE})
  </insert>
  <insert id="insertSelective" parameterType="com.liaojiexin.videoweb.entity.User" >
    insert into user
    <trim prefix="(" suffix=")" suffixOverrides="," >
      <if test="uid != null" >
        uid,
      </if>
      <if test="username != null" >
        username,
      </if>
      <if test="password != null" >
        password,
      </if>
      <if test="email != null" >
        email,
      </if>
      <if test="birthday != null" >
        birthday,
      </if>
    </trim>
    <trim prefix="values (" suffix=")" suffixOverrides="," >
      <if test="uid != null" >
        #{
     uid,jdbcType=INTEGER},
      </if>
      <if test="username != null" >
        #{
     username,jdbcType=VARCHAR},
      </if>
      <if test="password != null" >
        #{
     password,jdbcType=VARCHAR},
      </if>
      <if test="email != null" >
        #{
     email,jdbcType=VARCHAR},
      </if>
      <if test="birthday != null" >
        #{
     birthday,jdbcType=DATE},
      </if>
    </trim>
  </insert>
  <update id="updateByPrimaryKeySelective" parameterType="com.liaojiexin.videoweb.entity.User" >
    update user
    <set >
      <if test="username != null" >
        username = #{
     username,jdbcType=VARCHAR},
      </if>
      <if test="password != null" >
        password = #{
     password,jdbcType=VARCHAR},
      </if>
      <if test="email != null" >
        email = #{
     email,jdbcType=VARCHAR},
      </if>
      <if test="birthday != null" >
        birthday = #{
     birthday,jdbcType=DATE},
      </if>
    </set>
    where uid = #{
     uid,jdbcType=INTEGER}
  </update>
  <update id="updateByPrimaryKey" parameterType="com.liaojiexin.videoweb.entity.User" >
    update user
    set username = #{
     username,jdbcType=VARCHAR},
      password = #{
     password,jdbcType=VARCHAR},
      email = #{
     email,jdbcType=VARCHAR},
      birthday = #{
     birthday,jdbcType=DATE}
    where uid = #{
     uid,jdbcType=INTEGER}
  </update>

  <!-- 用户登录 -->
  <select id="userlogin" parameterType="com.liaojiexin.videoweb.entity.User" resultType="com.liaojiexin.videoweb.entity.User">
    select <include refid="Base_Column_List" /> from user where username= #{
     username} And password= #{
     password}
  </select>

  <!-- 用户注册 -->
  <insert id="userInsert" parameterType="com.liaojiexin.videoweb.entity.User" useGeneratedKeys="true" keyProperty="uid">
    insert into user (username, password,
      email, birthday)
    values (#{
     username,jdbcType=VARCHAR}, #{
     password,jdbcType=VARCHAR},
      #{
     email,jdbcType=VARCHAR}, #{
     birthday,jdbcType=DATE})
  </insert>

  <!-- 注册时查询是否有重复的用户名 -->
  <select id="usernameInsert" parameterType="java.lang.String" resultType="java.lang.String">
    select username from user where username=#{
     username} limit 1
  </select>

  <!-- 注册时查询是否有重复的邮箱 -->
  <select id="emailInsert" parameterType="java.lang.String" resultType="java.lang.String">
    select email from user where email=#{
     email} limit 1
  </select>
</mapper>
上面的基本配置基本完成,下面开始进业务逻辑编写
因为上面已经把数据层基本完成,所以我直接从服务层开始写(逻辑处理尽量写在服务层,开发规范)
UserService.java
DAO层接口
package com.liaojiexin.videoweb.service;

import com.liaojiexin.videoweb.entity.User;

import java.util.Date;
import java.util.Map;

public interface UserService{

    boolean isUserRegister(String username,String password,String repassword,String email,Date birthday, Map<String ,Object> map);     //注册
}
UserServiceImpl.java
服务层实现类
package com.liaojiexin.videoweb.service.impl;

import com.liaojiexin.videoweb.entity.User;
import com.liaojiexin.videoweb.mapper.UserMapper;
import com.liaojiexin.videoweb.service.UserService;
import org.springframework.beans.factory.annotation.Autowired;
import org.springframework.stereotype.Service;

import java.util.Date;
import java.util.Map;

@Service
public class UserServiceImpl implements UserService {
           //处理用户相关的服务

    @Autowired  //注入DAO
    private UserMapper userMapper;

    @Override
    public boolean isUserRegister(String username,String password,String repassword,String email,Date birthday, Map<String ,Object> map) {
             //判断用户注册合法性
        if (username.length()<8||username.length()>16)       //用户名长度8-16
        {

            map.put("msgregister","用户名长度不规范");
            return false;
        }
        else if (password.length()<8||password.length()>16)     //密码长度8-16
        {

            map.put("msgregister","密码长度不规范");
            return false;
        }
        else if(email.isEmpty())            //邮箱为空
        {

            map.put("msgregister","邮箱不能为空");
            return false;
        }
        else if (!repassword.equals(password))          //两次密码不同
        {

            map.put("msgregister","两次密码不一致");
            return false;
        }
        else if (username.equals(userMapper.usernameInsert(username)))        //用户名已经存在
        {

            map.put("msgregister","用户名已存在");
            return false;
        }
        else if(email.equals(userMapper.emailInsert(email)))           //邮箱已存在
        {

            map.put("msgregister","邮箱已存在");
            return false;
        }
        else
        {

            User user=new User();
            user.setUsername(username);
            user.setPassword(password);
            user.setEmail(email);
            user.setBirthday(new Date());
            userMapper.userInsert(user);
            return true;
        }
    }
}
服务层写完,接下来写控制层,控制层调用服务层。
RegisterController.java
package com.liaojiexin.videoweb.controller;

import com.liaojiexin.videoweb.entity.RespCode;
import com.liaojiexin.videoweb.entity.RespEntity;
import com.liaojiexin.videoweb.service.UserService;
import org.springframework.beans.factory.annotation.Autowired;
import org.springframework.web.bind.annotation.*;

import java.util.Date;
import java.util.Map;

@RestController     //返回json值
public class RegisterController {
            //注册
    @Autowired
    private UserService userService;

//    在参数里面@RequestBoby只能有一个,请求参数永远都是一个,因为一个request中只包含一个request body.
//    理解了这个,就会明白Spring MVC不支持多个@RequestBody。
//    @RequestParam则可以多个,两者的差别:https://blog.csdn.net/weixin_38004638/article/details/99655322
    @PostMapping(value = "/user/register")  //和前端form表单的action相对应或者ajax对应,consumes指定处理请求的提交内容类型(Content-Type)
    public RespEntity register(@RequestParam("username") String username, @RequestParam("password") String password,
                               @RequestParam("repassword") String repassword,@RequestParam("email") String email,
                               Date birthday, Map<String ,Object> map)
    {

        boolean is=userService.isUserRegister(username,password,repassword,email,birthday,map);
        String msgregister=(String)map.get("msgregister");
        if(is==true){

            return new RespEntity(RespCode.SUCCESS);
        }
        else{

            return new RespEntity(RespCode.ERROR,msgregister);
        }
    }
}


/*spring boot+ajax前后端分离参考:
*https://blog.csdn.net/bat_xu/article/details/82597149
*https://www.cnblogs.com/yelao/p/9835707.html
*https://blog.csdn.net/ththcc/article/details/81870702
* */
这里的控制层的返回值为RespEntity 类,这里是进行报文的规范,具体参考:SpringBoot学习之Json数据交互,你们也可以直接返回String值到前端页面
RespEntity.java
package com.liaojiexin.videoweb.entity;


/*接口响应至少需要告诉使用方三项信息:状态码、描述、数据。其中,
数据不是每个接口必须的,如果只是一个简单修改的动作可能就没有必须返回数据了。
下面我们定义一个 RespEntity类来封装我们的响应报文model:
 */
public class RespEntity {

    private int code;       //状态
    private String msg;     //信息
    private Object data;    //数据

    public RespEntity(RespCode respCode) {

        this.code = respCode.getCode();
        this.msg = respCode.getMsg();
    }

    public RespEntity(RespCode respCode, Object data) {

        this(respCode);
        this.data = data;
    }

    public int getCode() {

        return code;
    }

    public void setCode(int code) {

        this.code = code;
    }

    public String getMsg() {

        return msg;
    }

    public void setMsg(String msg) {

        this.msg = msg;
    }

    public Object getData() {

        return data;
    }

    public void setData(Object data) {

        this.data = data;
    }
}
RespCode.java
package com.liaojiexin.videoweb.entity;

public enum RespCode {


    SUCCESS(0, "请求成功"),
    ERROR(-1, "请求失败");

    private int code;
    private String msg;

    RespCode(int code, String msg) {

        this.code=code;
        this.msg = msg;
    }

    public int getCode() {

        return code;
    }
    public String getMsg() {

        return msg;
    }
}
后端页面基本完成
AJAX和html
html页面用了bootstrap等都不用理,其他的css样式也删掉,主要看html代码
<html lang="en" xmlns:th="http://www.thymeleaf.org">
	<head>
		<meta charset="utf-8" />
	    <meta http-equiv="X-UA-Compatible" content="IE=edge" />
	    <meta name="viewport" content="width=device-width, initial-scale=1" />
	    <meta name="description" content="">
	    <meta name="author" content="">
		<title>注册title>


    <link rel="stylesheet" href="/css/bootstrap.min.css"  type="text/css">


	<script src="/js/jquery-2.1.1.js">script>


    <script src="/js/bootstrap.min.js">script>

    <script src="/js/register.js">script>


	head>
	<body>
            <div class="container register">
                <div class="form row">
                    <div class="form-horizontal col-md-offset-3" id="login_form">
                        <h3 class="form-title">注册h3>

                        <p style="color: red;font-size: 70%;margin: 0" id="msgregister">p>
                        <div class="col-md-9">
                            <div class="form-group">
                                <i class="fa fa-user fa-lg">i>

                                <input class="form-control required"
                                       type="text" placeholder="用户名(长度8-16,数字/字母/下划线)" id="username" onkeyup="this.value=this.value.replace(/[^\w_]/g,'');"
                                       name="username" autofocus="autofocus" maxlength="20" required/>
                            div>
                            <div class="form-group">
                                    <i class="fa fa-lock fa-lg">i>
                                    <input class="form-control required"
                                           type="password" placeholder="密码(长度8-16,数字/字母/下划线)" id="password" onkeyup="this.value=this.value.replace(/[^\w_]/g,'');"
                                           name="password" maxlength="20" required/>
                            div>
                            <div class="form-group">
                                    <i class="fa fa-lock fa-lg">i>
                                    <input class="form-control required"
                                           type="password" placeholder="确认密码(和上面相同的密码)" onkeyup="this.value=this.value.replace(/[^\w_]/g,'');"
                                           id="repassword" name="repassword" maxlength="20" required/>
                            div>
                            <div class="form-group">
                                    <i class="fa fa-envelope">i>
                                    <input class="form-control required" type="email" placeholder="设置邮箱" id="email" name="email" maxlength="50" required/>
                            div>
                            <div class="form-group col-md-offset-9">
                                <button type="submit" class="btn btn-success pull-right" name="submit">注册button>
                            div>
                        div>
                    div>
                div>
        div>
	body>
html>
$(document).ready(function () {

    $('button[name="submit"]').click(
        function () {

            $.ajax({

                url:"/user/register",       //请求路径,和Controller类中的@PostMapping对应
                contentType: 'application/x-www-form-urlencoded',       //客户端实际返回的内容的内容类型,form默认application/x-www-form-urlencoded
                type: "POST",                       //请求方式
                dataType: "JSON",               //预期服务器返回的数据类型。
                data:{

                    username:$('input[name="username"]').val(),
                    password:$('input[name="password"]').val(),
                    repassword:$('input[name="repassword"]').val(),
                    email:$('input[name="email"]').val(),
                },
                success: function (data) {
           //function的参数为controller返回的json值
                    // var jsonData=JSON.stringify(data);    //stringify()用于从一个json对象解析出json字符串,alert可以完整的输出内容,
                    // alert(jsonData);                      //但是js操作的是对象,所以此处不能转化成字符串
                    if(data.code==0){

                        alert("注册成功");
                        //重定向到登录页面,在MyMvcConfig中配置好映射 registry.addViewController("/login").setViewName("login");
                        window.location.href="/login";
                    }
                    else if(data.code==-1){

                        $("#msgregister").text(data.data);      //显示错误信息
                        alert("注册失败");
                    }
                },
                error:function () {

                    alert("请求失败");
                }
            });
        }
    )
})
总结
这个过程遇到很多的坑,主要还是ajax的比较麻烦,其他的都比较顺利的解决了,所以下面说关于ajax的坑,其他的我在上面的代码注释和解释都或多或少说了:
- ajax和form结合使用时候要十分注意(建议不要结合使用),因为我一开始不是用ajax,用form表单提交请求,所以后面改用ajax时候,ajax代码中前面提交写成$(‘form’).submit结果就发生405错误,一直提示不支持post,这个问题也是我花最多时间解决的,具体原因参照:用ajax模拟post请求报错 “405 Method not allowed”,解决方法可以用这篇文章的,也可以像我一样直接删除form表单。
- 用form标签时,ajax的contentType是不支持application/json数据的,要用application/x-www-form-urlencoded,这里可能是我的button标签是type=submit类型,所以不可以,因为我看到很多教程都用application/json,所以具体情况具体分析。关于post的提交数据方式参考:四种常见的 POST 提交数据方式
- 后端返回值是json对象类型,如果ajax中要处理json对象,这不用做转换,否则需要转换成字符串形式,参考:json.stringify()的妙用,json.stringify()与json.parse()的区别

- 另外controller获取ajax传的值时用的注解:@RequestBody和@RequestParam区别
- 还有controller层拿到json值的原理@ResponseBody ResponseEntity