通过qemu monitor 来测试 qemu live migration (3)
3. 迁移测试
在源服务器上的qemu monitor中输入迁移的目的地址和端口,然后打印迁移状态
(qemu)migrate -d tcp:192.168.0.11:4444
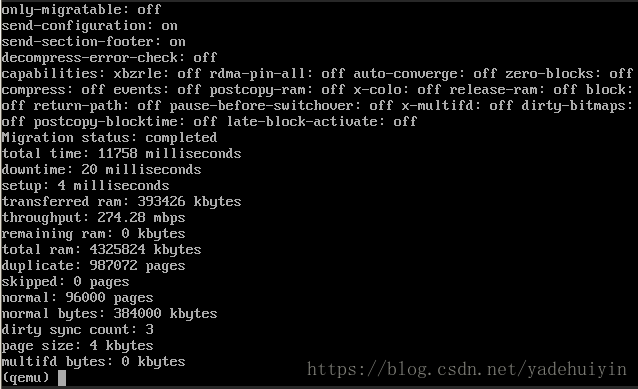
(qemu)info migrate
可以看到迁移状态中包含了很多参数的配置情况以及迁移耗费的时间,迁移内存大小等等。以此为基础可以做很多的测试和优化。比较值得注意的数值如下:
total time //总迁移时间
downtime   //虚拟机down机的时间,这影响到了用户体验
setup      //做配置的时间
transferred ram  //总共传输的ram大小
throughput  //传输速度
page size   //内存页的大小
当迁移成功后,我们在通过vncviewer访问目的机上的虚拟机,就可以看到虚拟机已经在正常运行状态,而源服务器上的虚拟机进入了paused(postmigrate)状态。
4. 热迁移流程简析(https://www.linux-kvm.org/page/Migration)
1. Setup
    Start guest on destination, connect, enable dirty page logging and more
2. Transfer Memory
    Guest continues to run
    Bandwidth limitation (controlled by the user)
    First transfer the whole memory
    Iteratively transfer all dirty pages (pages that were written to by the guest).
3. Stop the guest
    And sync VM image(s) (guest's hard drives).
4. Transfer State
    As fast as possible (no bandwidth limitation)
    All VM devices' state and dirty pages yet to be transferred
5. Continue the guest
    On destination upon success
    Broadcast "I'm over here" Ethernet packet to announce new location of NIC(s).
    On source upon failure (with one exception).
上面的流程介绍的已经很简单清晰了,可以看到热迁移大部分的工作都是在进行ram传输,尤其是dirty page的传输,所以之后可以看到,很多对于热迁移的优化也是针对ram传输的。
注:dirty page指的是在迁移过程中产生变化的memory page,内存迁移是先把没有变化的的内存传输过去,然后逐渐减小dirty page的大小,最后有短暂的down机,把剩下的dirty page一并传输过去。
